My 1914 Primus 100
Making a NRV Removal Tool
The first thing I did after reading through other peoples restorations was to make a NRV removal tool. A what?
Fig. 7 Model 96 Cutaway |
Fig. 8 Pump Cutaway |
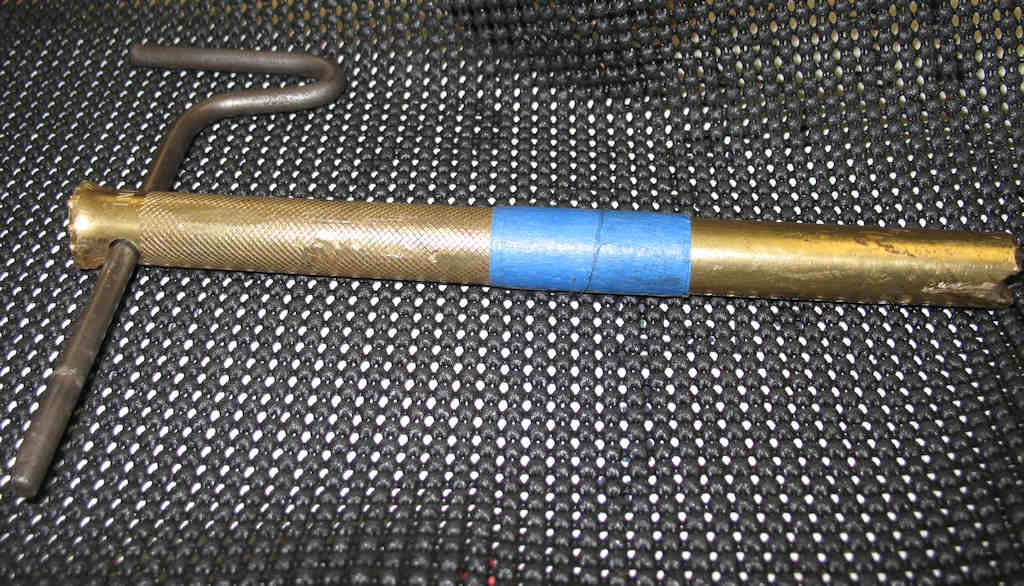
Fig. 9 NRV Tool |
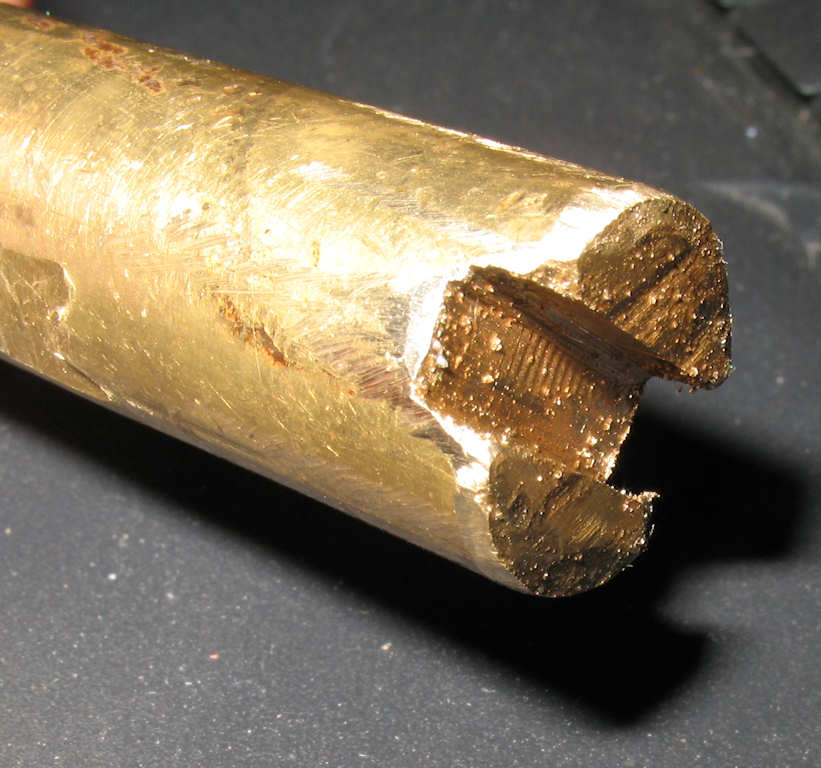
Fig. 10 Close up of end |
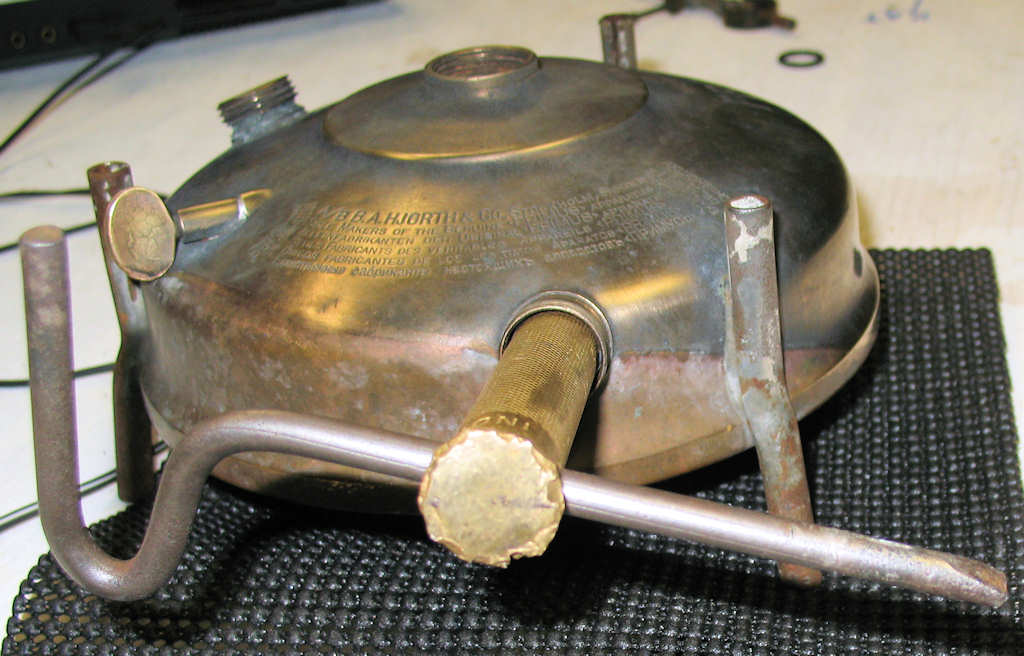
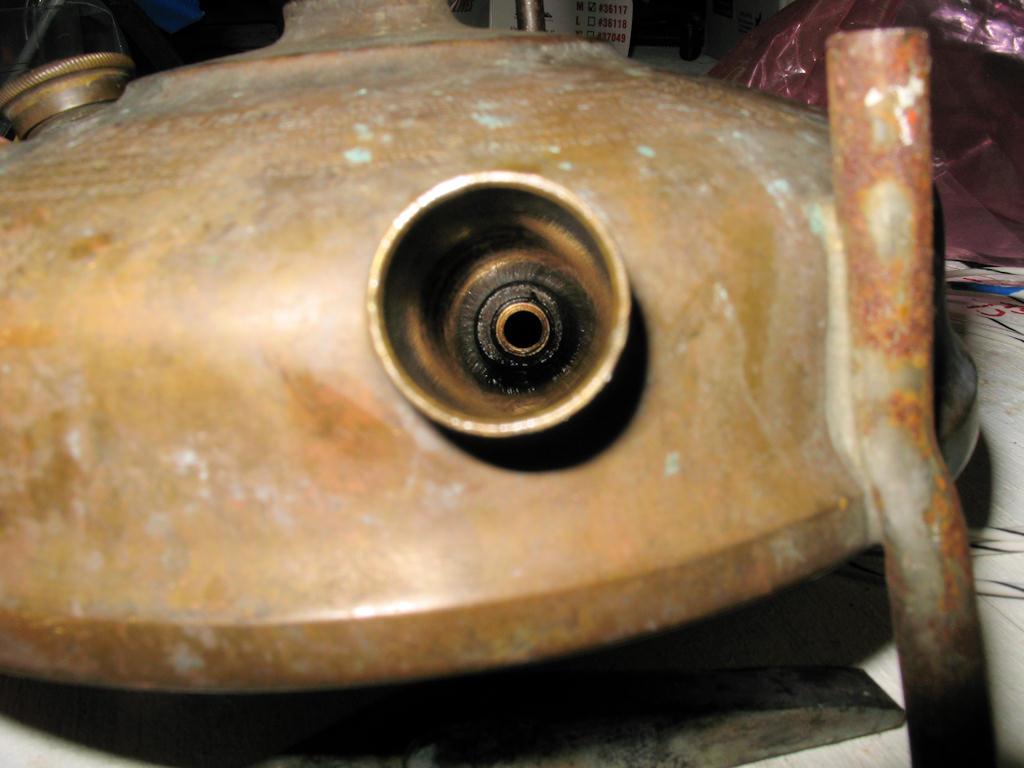
Fig.11 Tool In Place |
Fig.11A Valve Removed |

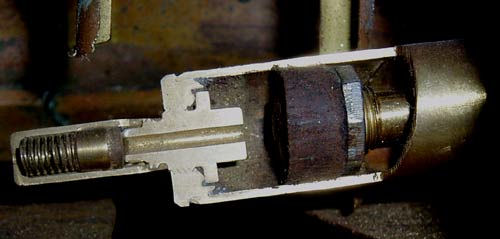
Yeah that's what I said, NRV (Non Reversing Valve) it's what we here in the USA call a check valve. Look at Fig. 7 to see a cool cut away view of the inner workings of a Model 96 stove. Fig. 8 shows a close up of the pump cylinder and the check valve at the end. The valves function is to prevent air from escaping the fount after pumping it in, or in this case, paraffin. Since this check valve is essentially under the level of the paraffin in the tank, if it fails, paraffin will be forced out the valve into the pump cylinder. Coleman designed their check valve with an additional manual shut off so that this cannot occur. Since I had to assume the valve had been inside my Model 100 for 97 years I also had to assume it was going to be stuck. I poured some Ed's Red (a solvent to help loosen the threaded valve) into the pump cylinder and put a silicone stopper in to prevent any spills or the acetone from evaporating from the mixture. While it was working I proceeded to make the tool to remove it.
The tool I made is shown in Fig. 9. It's a brass rod about 15mm in diameter. I bought it at Harbor Freight as a Brass drift. I cut the tapered end off and squared it up with a bastard file then used the edge of the file to cut a centered groove across the end. I continued filing the groove width until the tool just barely slipped over the NRV. (The proper measurements of the groove are 5.1mm wide and 5mm deep) I then wrapped enough painters tape around the shaft to make it a slide in fit. This helps keep the tool centered in the pump cylinder. Finally I drilled a hole in one end large enough to accept a stove leg to aid in turning it.
Fig. 11 shows how I used it to remove the NRV. Since the fount is fairly fragile I did not attempt to clamp it in a vice. I just clamped it between my legs and used the stove leg as a lever. After 97 years the valve easily popped loose! I was expecting it to be MUCH harder to remove this valve! The Ed's Red stuff must have worked really well or someone in the past had removed the valve.
Fig. 11A shows inside the pump cylinder after the valve is removed. There is supposed to be a lead washer in the bottom but I can't see it. Guess I'll be digging that out to make a new one...
Fig. 12 NRV |
Fig. 13 NRV Apart |
Fig. 14 Sealing Surface |
Fig. 15 |
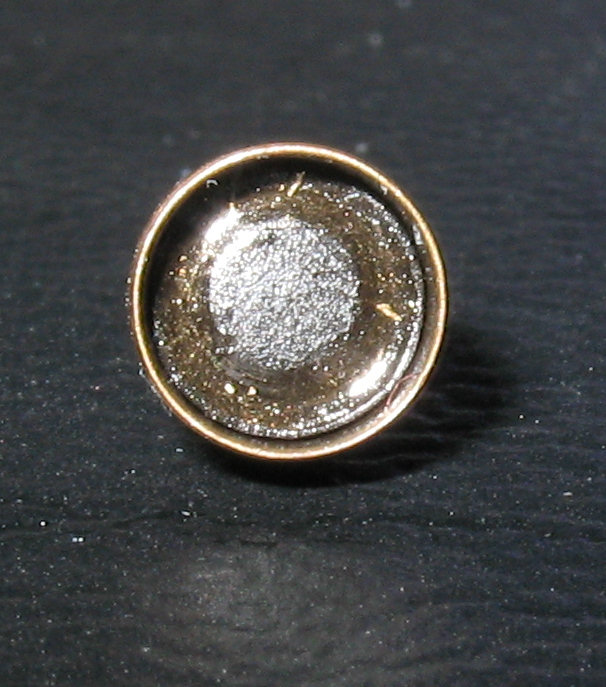
Fig. 12 shows the valve after removal. It was not that dirty! A quick puff of air from my air compressor proved it still functioned. Fig. 13 shows it after a bit of cleaning in vinegar and unscrewed to expose the spring and sealing cup. Fig. 14 shows a close up of the cup. You can see where the rubber insert has taken a set though it still seals well. I am having a hard time believing that this valve assembly is 97 years old.