Installing the 79-87 Self Regulating Alternator in
an early FJ40
Note: This is not a "how to mount"
the alternator, this is a how to WIRE the alternator article!
Remove the old Alternator
from the drivers side mounting bracket. Mount the 79-87 alternator in
it's place.
Cut the three pin connector that plugged
into the old alternator off right next to the connector.
Slip a piece of the included heat shrink
tubing over the White/Red wire on the NEW connector. Strip the 1/4" of
insulation off the White/Red wire and tin the end with solder.
Strip 1/4" of insulation off the White/Green
wire that was in the old plug and tin the end.
Solder the White/Red wire to the White/Green
wire. Let it cool then center the heat shrink tubing over the joint and shrink
it down with a lighter or heat gun.
Plug the new connector into the alternator.
It will only go in one way so you can't screw it up. :-)
Strip 3/16" of insulation from the White/Black
wire from the old connector.
Slip a piece of heat shrink tubing over the
White/Black wire. Solder or crimp on the included ring terminal.
Slip the heat shrink tubing up so that it
covers the end of the ring terminal and shrink it down.
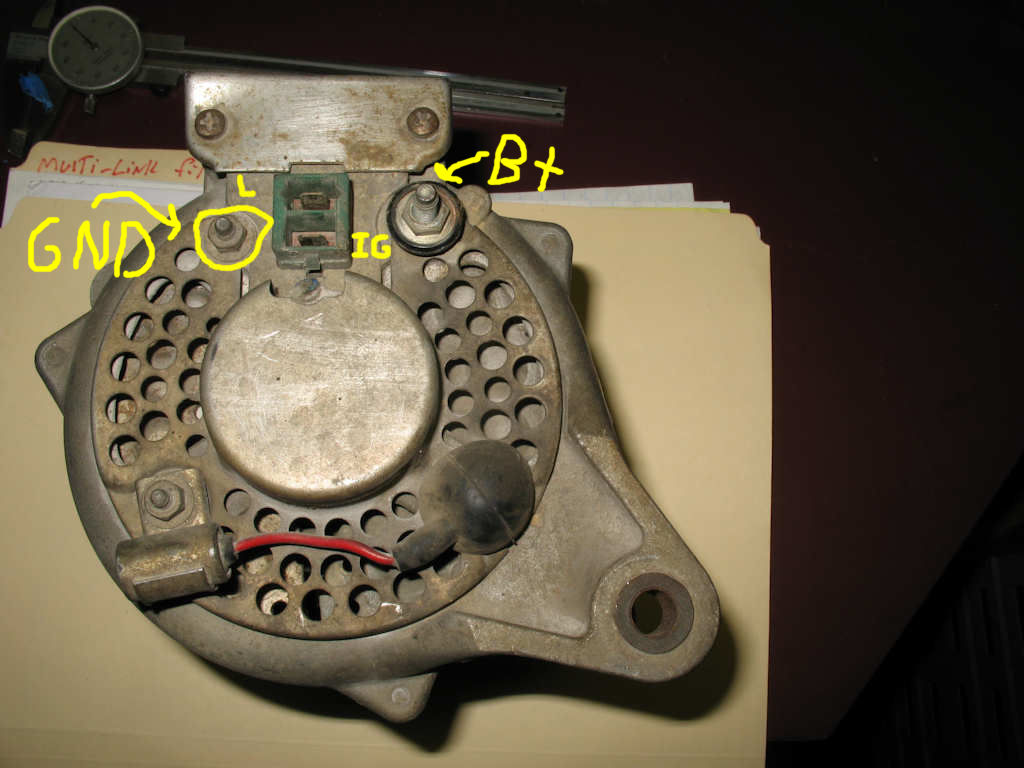
Refer to the pic below. Remove the circled
nut labeled GND and put the ring terminal under it then tighten it back down.
This grounds the alternator to the main chassis ground system.
Now insert the large White/Blue wire with
the ring terminal into the small end of the red Alternator B+ stud cover boot.
Attach this wire to the Alternator B+ terminal. Slip the boot up over the
stud to prevent shorts.
Now go to the firewall mounted regulator.
The regulator will have three wires attached to it: two wires coming from
the main harness, a white/red (key switched B+) and a white/black (chassis
ground). It will also have the white/green from the alternator (field wire
from regulator). The new alternator does not use a field wire so we will reuse
it as the excite wire for the 79-87 alternator.
Remove the White/Green wire from the regulator
F terminal and attach it to the IG terminal that has the White /Red wire.
The White/Red wire is a fused key switched hot wire so now when the key is
on the White/Green wire will have +12V. This is now connected to the IG terminal
on the new alternator to provide the excitation it needs.
Double check all your connections, then start
the truck. Using a volt meter check that you have 13.8 to 14.4 volts at the
battery when the truck is above idle.