Home

Identifying your FJ40/60 Distributor

Note: MOST of the information on this page came from Jim Chenoweth (FJ40Jim on IH8MUD) and Chris (Numby on MUD)


Year


Type of Advance

Notes

E-1968

Vacuum Advance

E-'68: Extra small distributor, vacuum advance (correctly called "non-smog", also sold as "non-USA"). ROW markets continued to use the small dissy well into the 1980s.
Toyota still sells the non-USA distributor under the p/n 19100-61080.

Mechanical:
900 rpm advance begins
1800 rpm 18*
3200 rpm 30* All in

Vacuum Advance: Part #60072
4" adv begins
12" 16* all in

The E-1968 USA distributors, and all non-EGR distributors sold for the rest of the world (i.e. Canada) have a decent curve from the factory. SOR and others have sold a fair number of them into the US market.

Cap held on by clips.

1969-74

Vacuum Retard

69-74: Extra Small distributor, but w/ vac retard.

69-74 dizzy cap is 3-1/8" diameter

The early (69-74) points distributors are a Toyota improved copy of a Delco distributor, and as such, are crap.

Subject to leaky retards, sticking breaker plates, eroded weights, worn shafts & bushings....

75-Early 76

Vacuum Retard

75 & early 76: small distributor, completely redesigned, very good quality points distributor. Since they use an igniter, the points last forever. Vacuum retard. Use with a ballast resistor.

61020 is the vacuum RETARD canister used on the larger redesigned USA 75-mid76 points dissy.

Note: The 1975 dizzy registers the drive gear on top of the oil pump, and the dissy sits a little above the block. It may appear to not be seated. VERIFY oil pressure after replacement!!!

75-77 dizzy cap is 3-1/2" diameter

Cap held on by clips.

The 75 (and maybe 76) Kali carbs are the only 2F carbs without ported vac.

75 to 80

Non-USA 75-80 2F w/ vac advance Points/Ignitor dizzy

This dizzy is a good match for the early 2F engines, because it has enough mechanical advance.
The 81-later dissy work better with the later 2F and has less advance because of the higher CR and fast burn chamber of those engines.

later 76-77

Vacuum Advance

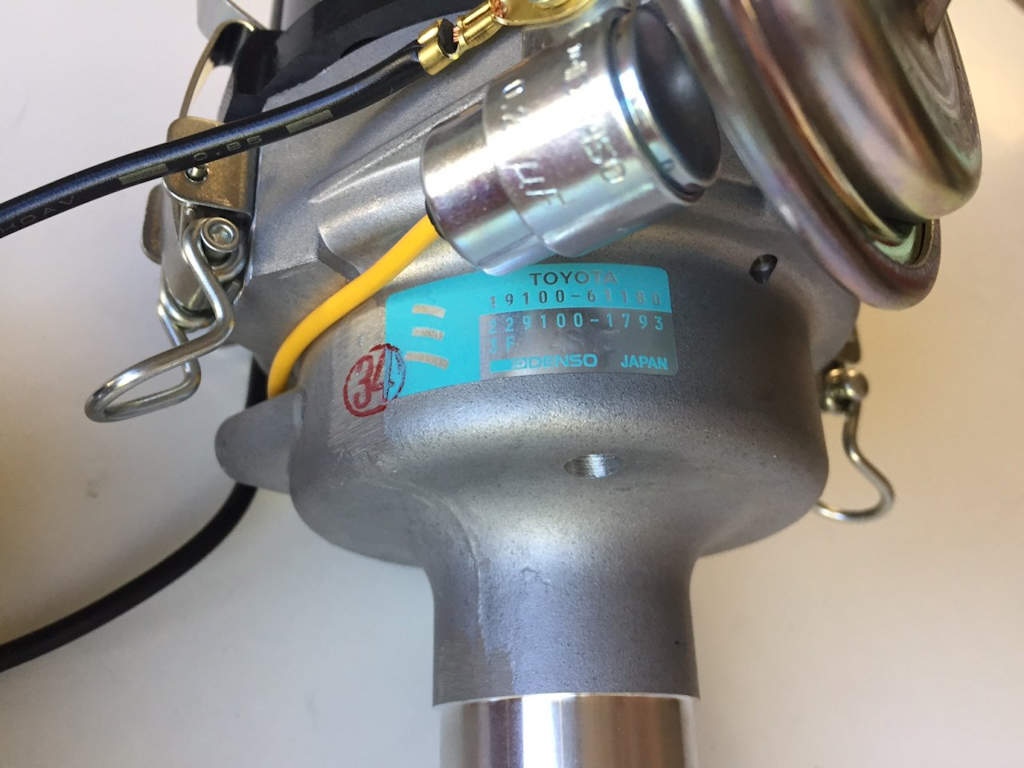
8/77 California Spec Advance/Retard

Toyota Part # 19100-61180 (soon to be available from City Racer )
Late '76 &77: Same as above, but w/ vac advance.

Cap held on by clips. (9/77 on held down with three screws)

The 77 is a good setup, it has adjustable vacuum advance, a better ignitor than 74-76, and an emergency backup ignition system in the form of ignition points and a condenser.

61021 is the vacuum advance canister that was OEM on 76-77 USA points dissy.

From Jim C. : The 19100-61180 can be converted to pertronix electronic, but it takes a weird kit. Mark A knows which one to use for 75-77 dissy.
I think it is possible to drop in the Toyota electronic ignition by changing out the breaker plate and swapping the point cam for a trigger wheel. Haven't done it yet, but that's essentially what Denso did in 1978.

California spec dizzy has both vacuum advance and retard. The retard is the nipple coming out of the top of the vacuum advance can, the advance is coming out horizontally.

1978

Vacuum Advance AND Retard!

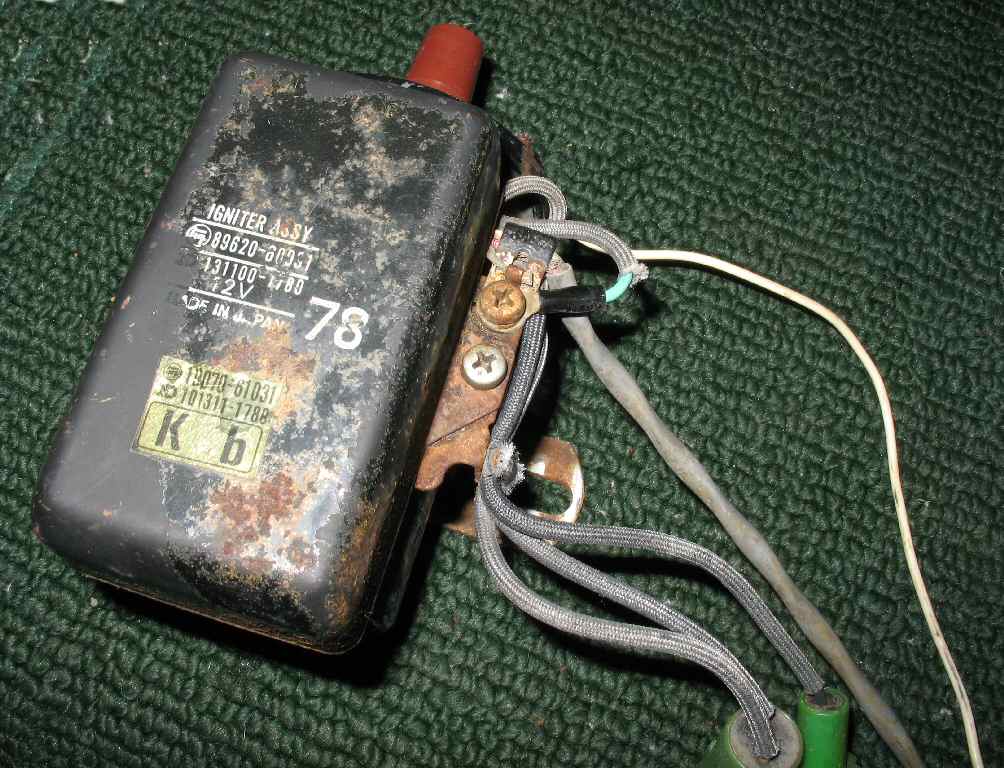
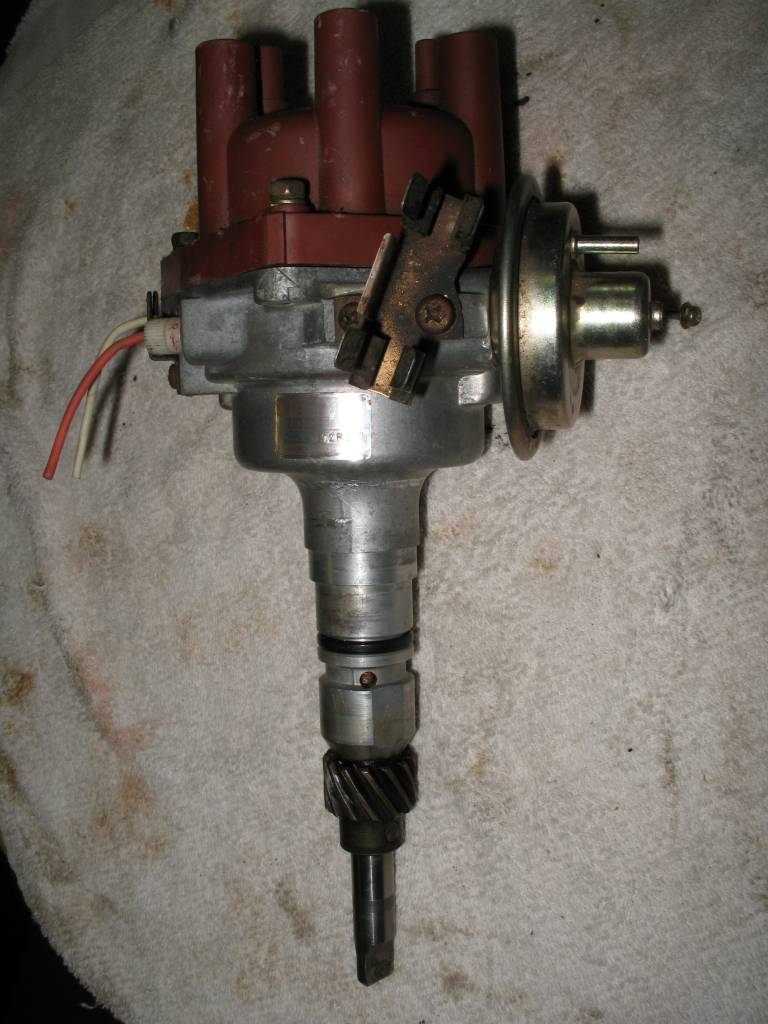
'78: redesigned with medium. size screw down, waterproof cap, all electronic ignition. Vacuum advance & retard. The vac canister has 2 vac fittings. Outer fitting is advance, inner fitting is retard.

78-80 small cap distributors have nylon(?) plastic bushings for the advance weights, the same pickup as the later ones (only difference in the two part numbers is about 1" longer wire leads for the 81-87 ones) and doesnt require the side cover swap.
They do have two bushings for shaft support instead of the sealed bearing and bushing combo of the 81-87 distributors.

The air gap for the reluctor is .008-.016".
Anywhere in that range is fine. The signal generator is a go/ no-go type of thing. It either generates a timing pulse or not. It cannot cause a weak spark, but it could cause an intermittent spark.
The igniter will not consistently fire one cylinder, but not another. It will either shut down for good, or misfire erratically. The igniter doesn't know if it is hitting #1 or #4 or whatever. It just makes a spark after it gets the trigger from the dizzy.

The dwell is built into the igniter, and it is variable w/ RPM.

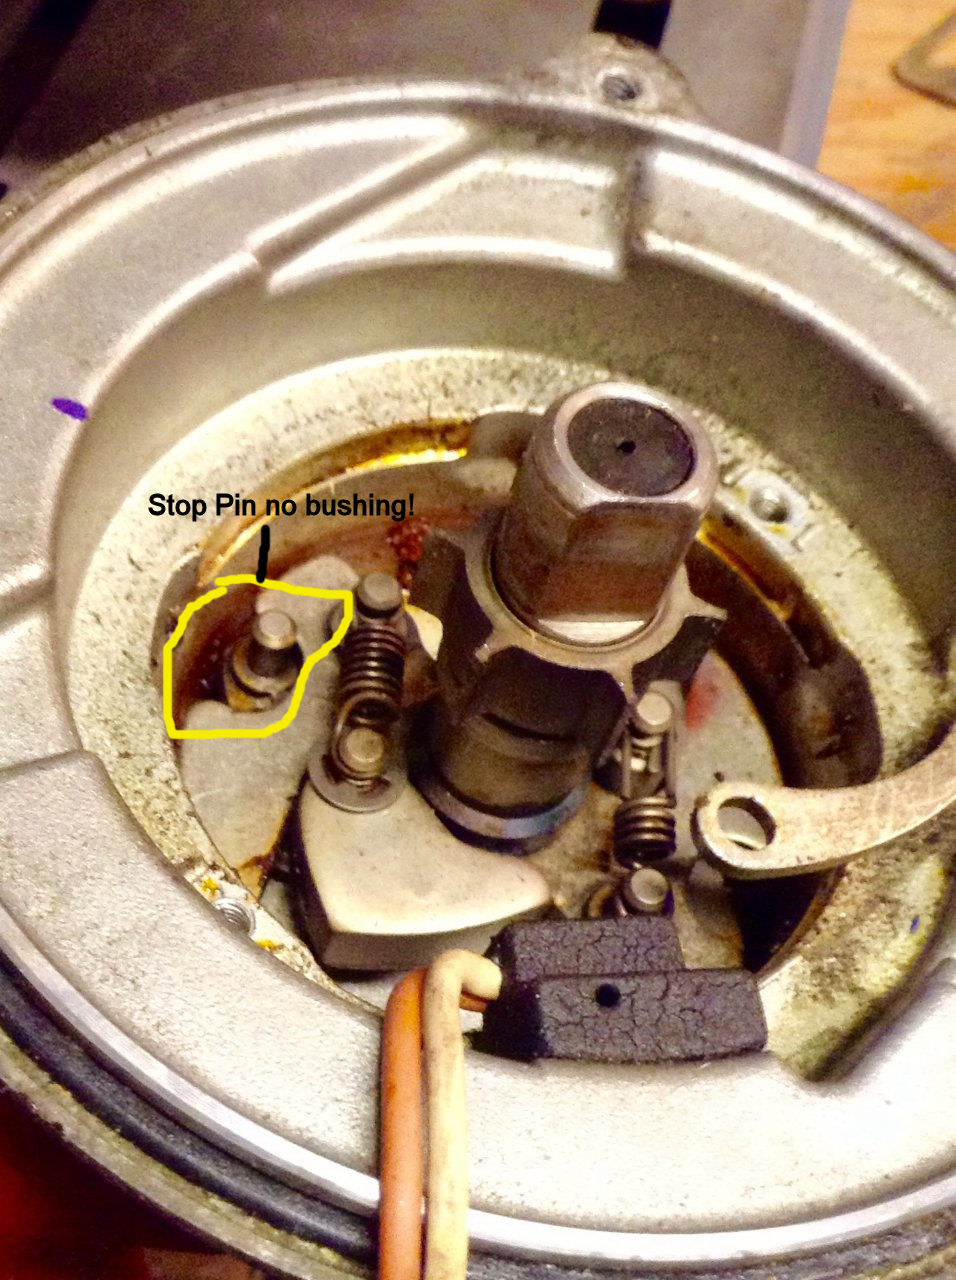
The 75-87 dizzy all have the same advance guts so can be recurved easily. The springs can be changed and the stop pin can be modified.

The resistance value for the igniter is roughly the same for all 78-87.

The 78 Fed spec dissy will be fully electronic (no points). The vac canister has 2 vac fittings. Outer fitting is advance, inner fitting is retard.

1978 Cal. Spec Vac. Adv. canisters have only a single retard port.

1978 High Alt. Spec. Vac. Adv. canisters have only a single advance port.

Cal Spec and High Alt carburetors do not technically have a true advance port on the carburetor base. They only have an EGR port and a manifold vacuum (or Throttle Positioner) port. Toyota used said EGR port to supply the vacuum signal to the Cal/High Alt distributors whereas the Fed Spec carburetor base had a dedicated "Advance" port and an EGR port and TP port. Whether or not there were significant differences in the location of the EGR ports in the throat of the Cal/High Alt carbs vs the location of the advance port on Fed Spec carbs (which, again, had both) is something I have never bothered to investigate. My general understanding of these carbs is that the EGR port is higher up and therefore comes in slightly later in the power band.

The 1978 OEM Emission manual simply indicates that the advance or retard function in these distributors is largely aimed at providing some advance in timing - or in the case of the Cal Spec carb - discontinuing the retard in timing in 4th gear only. That makes me think they were aiming at maximizing highway mileage while addressing pollution in stop-and-go driving.

A replacement dizzy pickup is expensive! The pickup from a Toyota 1981 cressida is exactly the same with the exception of the rubber grommet, and only cost $32 at Kragen. Kragen part # for Niehoff pickup is: WA936C.

You will need to trim the grommet(to fit the round hole), and pull off the plastic connector housing to get it installed but that is easy. Even the plug is the same. Fitment on the breaker plate is identical.

79-80


Dual Advance

'79-80: dual diaphragm advance. One big advance stage for normal operation, small second stage for extra advance at hi-altitude
Cap held down with three screws.
81-87

Dual Advance

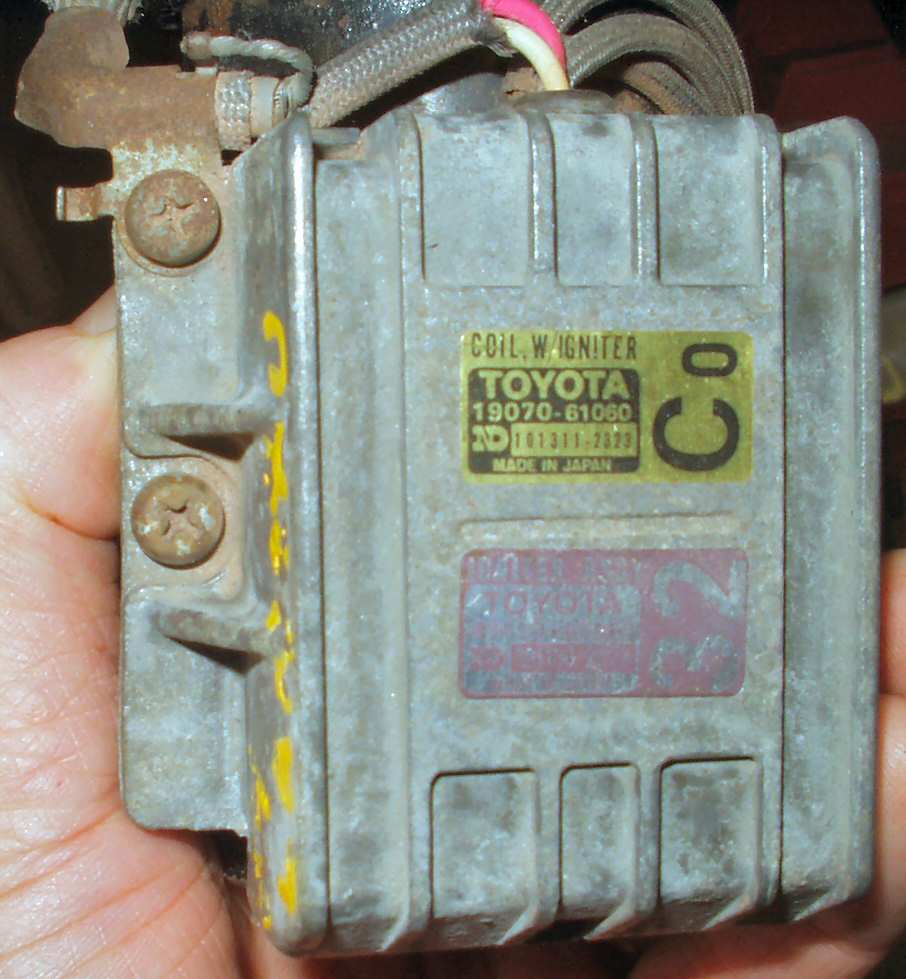
81-87 distributor body was redesigned to use a larger cap. The larger cap is less prone to cross arcing inside.
It's also less prone to arcing down the outside in wet conditions. Same dual diaphragm advance introduced in '79.

The 81-87 distributor is a work of art. The shaft spins on sealed ball bearings, the breaker plate advances on a proprietary large ball bearing ring, the weights pivot on teflon inserts, the distributor is sealed against dirt & water contamination via O-Rings, 
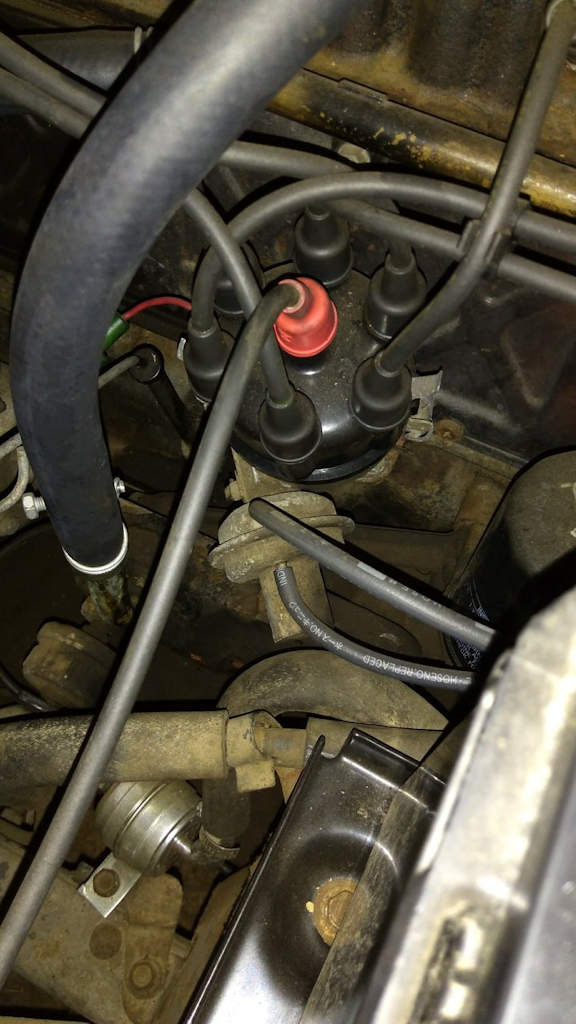
The cap provides for a source of fresh, clean air when connected correctly. The smaller port should go to a distributor filter assembly that will be mounted on the inside of the firewall, and poke through into the engine bay. The larger port goes to a VCV that is usually attached to the bottom side of the air filter housing on the passenger side.

These late model distributors don't fail. The FJ60 distributors will run a long time. The only problems they develop is a leaky vac advancer and the stop pin bushing ** can wear.

On the 81-87 the OUTER vacuum advance diaphram nipple is capped off when used on a non smog engine. It was/is the high altitude compensator.

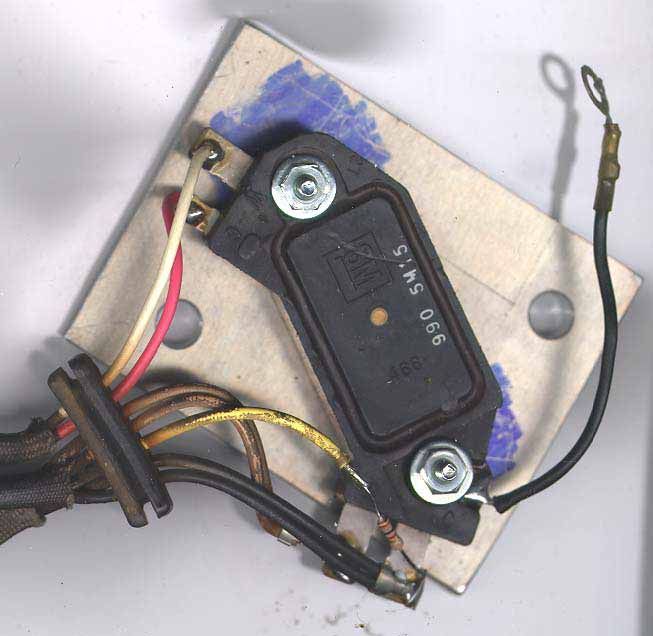
The 81-87 ignitor does have variable dwell (like the newest Pertronix) and has self protect to keep from frying itself if the key is left on (like the newest Pertronix).

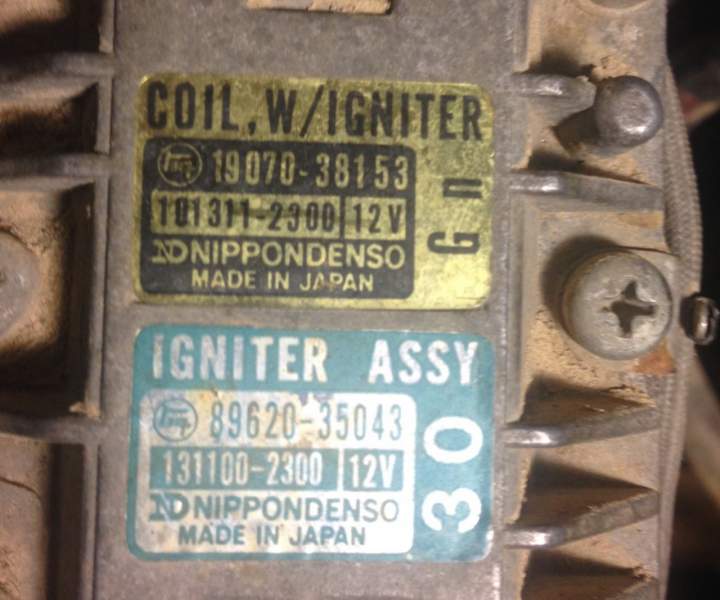
The 81-87 ignition is uber reliable because the electronics are not all packed into the hot, vibrating dizzy. The finned aluminum heat sink seems to be of benefit also. Toyota moved the Ignitor to the inner fender from the head to help keep heat and vibration down.

The air gap for the reluctor is .008-.016".
Anywhere in that range is fine. The signal generator is a go/ no-go type of thing. It either generates a timing pulse or not. It cannot cause a weak spark, but it could cause an intermittent spark.
The igniter will not consistently fire one cylinder, but not another. It will either shut down for good, or misfire erratically. The igniter doesn't know if it is hitting #1 or #4 or whatever. It just makes a spark after it gets the trigger from the dizzy.

23 degrees of centrifical advance

6 degrees of HAC advance

18 degrees VAC advance

Cap held down with three screws.

The distributor cap dust proof packing (large O-ring) and distributor shaft O-ring are available from Toyota - 19127-61240 and 90099-14090 respectively.

When the finned aluminum ignitor came out in the 81 model year, the ballast resistor/wire was finally done away with.

88-92

NO Advance

88-92 distributor redesigned w/ out advance. Distributor pickup is a crank angle sensor, advance curve is controlled by computer.


Additional Notes

** Read this thread!!! If you want to mess with the stop bushing this thread gives part numbers for a replacement pin: Both aluminum and plastic 1/4" OD x 1/4" length and #8 screw size are available.


Fig. 1 Missing Stop Pin

Fig. 2 Plastic Stop Pin Installed

Click pics for larger images.

The stop pin is down inside the distributor, under the breaker plate. It is supposed to have a plastic bushing around it. See Fig 1. The governor (advance mechanism) slot rests against the stop pin at idle. As the revs increase, the governor moves off the pin until the other side of the slot contacts the pin, about 10.5 degrees later. The plastic bushing tends to crumble, exposing the much smaller steel core of the stop pin. Now the rest angle is much retarded, and the max governor angle is more advanced. This means the distributor which already had a greater than ideal advance curve has about 6 more degrees than stock.

You can see the stop pin without disassembling the dist. by looking through the inspection window in the breaker plate. Chances are it will be missing the plastic bushing, because 90% of them are after 10 years in service.

In summary, you'll know if the stop pin is a problem by either:
1. Visual inspection
2. Live testing w/ advance timing light
3. testing on the distributor machine.

You'll know if the vac advancer is a problem by:
1. Live testing w/ vac pump on engine
2. Static testing w/ vac pump & visual inspection

You'll know if the advance curve is mismatched to the engine's requirements:
1. by setting to the best performance at peak torque (1800-2200rpm) and then finding idle timing too advanced or retarded.


Misc Notes gathered from many sources

All Land Cruiser distributors for F and 2F applications interchange mechanically. The later (FJ60) ones use large caps that require the matching engine side cover plate which will also interchange. It has an indent to accommodate the larger cap diameter.

Be aware there are 2 different heights of distributor hold down clamps. If the tall (early model) distributor clamp is used on a distributor machined for a short clamp, then the distributor will not seat on the block. This is will result in NO OIL to the engine as the pump is not being turned!!! Make sure the correct clamp is used w/ the distributor!

All E-87 distributors have mechanical advance. Curves vary from year to year.

The dizzys are all the same for 81-87 FJ40 & FJ60, USA-spec. Earlier dizzys have different curves because of the different cylinder head design.

It's really only those few distributors installed in Cruisers sold in a tiny backwards market called USA that could use recurved. and that is if the dizzy is smog-compliant and the engine is not. Like installing a FJ60 dizzy into a F engine.

The ballast resistor is matched to the coil, not the distributor. Early Cruisers have no ballast resistor and use a coil w/ higher impedance. Later Cruisers added a ballast resistor to go w/ a lower impedance coil.


Igniter Information

Year

Description

Notes

Wiring Notes
75-77

use w/ points dizzy

The 75-77 points igniters are completely different, designed to be triggered by points. Black/Yellow from ignition switch -- To ballast resistor [end opposite coil positive(+)] and igniter

Black from igniter -- To coil neg (-)

Red from igniter -- To distributor

White/Black from igniter -- To ground

Also a Black/Yellow from coil positive -- To starter bypass contact (for full voltage to coil during starting).

78-80

1978 Igniter

black box, use w/ electronic dizzy

All the 78-87 igniters are interchangeable. The coils are slightly different.


78-80 coils work with an inline ballast resistor wire in the vehicle harness. It's possible to run the 78-80 igniter& coils on full 12V with no ill effects.

Ballast bypass moves into the emissions computer on 79-80 models. The ECM bypass is shown on the 79-80 wiring diagram, but some diagrams still show the starter bypass terminal, though it actually disappears from 79-newer trucks.

On a 1978 igniter, there is a dual pole connector that receives 12V power for the coil on one terminal and 12V power for the igniter on the other terminal. Ground is through the mounting feet.

81-87

Aluminum finned box, use w/ electronic dizzy

All the 78-87 igniters are interchangeable. The coils are slightly different.


The wire that goes to the + terminal on coil, is the wire that gets +12V power.

The other wire goes directly to igniter, that is tach output.

Ground is through the mounting feet, so make sure those are clean, and apply some grease when mounting, to prevent future corrosion.

When the finned aluminum ignitor came out in the 81 model year w/ variable dwell, the ballast resistor/wire was finally done away with.

Alternative Ignitors

Option #1: It seems that some folks have successfully installed mini truck ignitors in the FJ40/45. Nippondenso Part # 19070-35100 or Toyota PArt #/ 89620-35043. This from a carbed mini truck with a 22r engine years 1979 to 1986 or the Celica 1980-1981 GT, LT, ST, Supra 4 Cyl 2.2L, 4 Cyl 2.4L, 4 Cyl 2.7L, 6 Cyl 2.8L 20R, 22R, 4ME, 5ME; MA46, MA47, RA42, RA43 or the Corona 1980-1982 DLX, LE 4 Cyl 2.4L 22R; RT135

Replaced by:
89620-14H94

Option #2 :For those of you with >78 full electronic ignition with the magnetic pickup coil, the cheapest spare/replacement would be NAPA igniter is a TP50, fits dodge/plymouth/chrysler 72-92. It's like 20-30 bucks, and you can get the connector that fits it for a few dollars more. Hookup is as such (clockwise looking in, pointy bit at pin 1 in 3 o'clock
position):

3 - no connection (not even there on some units)
2 - ignition coil -
1 - ignition + from key (black/yellow originally)
4 - pickup coil (polarity is arbitrary)
5 - pickup coil

They seem to last about ten years so don't rely on it (carry a spare).

Option #4: Again if you have the 78 and later dizzy with the pickup coil you can use the GM HEI ignition module for a igniter replacement.

Parts Required:
Ignition Module from a 1979 GM truck with a 350 CI engine Autozone P/N DR100
Coil from a 1972 Chevrolet k10 4wd truck with a 350 CI engine Autozone P/N C819
Optionally you can get or build a heat sink to mount the ignition module to. It is not needed but it wouldn't hurt.

Special Tools Required:
Soldering Iron and resin core solder
Misc. wire connectors
Wire Crimping Pliers
Test Light

Installation:
First off, start by removing the toyota ignition and coil.

Then find a place to mount your ignition module. Either inside the cab or in the engine bay. Drill your holes and mount your ignition module down. You will notice the holes are lined with steel for the mounting, this is the ground for your module. I attached a wire from one of the mounting bolts, to a clean body ground to insure proper grounding of the module.

Secondly, find a place to mount your new round coil. This will need to be somewhat close to the distributor as it has to have a spark plug wire attaching it to the coil.

After both have been mounted the job is darn near done, here comes the easy part, wiring everything up.

You will find 4 connections on the ignition module. Being marked B, C, G, W.

B = Connect to switched +12v Power
C = Connect to Coil - terminal
W = Signal wire from distributor
G = Signal wire from distributor

Keyed power runs to the B terminal on the ignition module. Use the LARGE BY wire that was originally attached to your old coil. This is a key switched hot wire. I used a connector to attach it to the HEI ignition terminal. Off of this terminal you will need to run a second wire, which will be a hot +12v power wire that runs to the + side of the coil.

C terminal is the HEI module, ground switched wire for your coil, so run a wire from C terminal to the - side of your coil.

Now you have G and W left to wire on the ignition module. Take a look at your distributor, you have 2 wires running off of it. You need to attach one to the G terminal and one to the W terminal. I have found it to be indifferent as to which goes where on my system.

Quick System rundown for troubleshooting:

When you hit the key, you apply 12v power to the ignition module at terminal B, and to the coil, which then goes back to the ignition module on terminal C. The coil begins to energize waiting for a ground to make it discharge. When you crank the engine, the magnetic pickup will signal the ignition module through the wires attached to terminals W & G to create a ground on post C, which then grounds the coil and makes it discharge through the spark plug wire and back into the distributor cap.

I said that much because it is quite possible that the magnetic pick up in the distributor is not set properly. This is referred to as air gap, and must be set with a feeler gauge. It is very easy to set, but if it is off you will never get spark. Other troubleshooting procedures can be found in the factory service manual with specs on resistance and such for the Distributor.

Home