Under Construction!!!
Please Read: Click on the small pics to see full size versions of them then use your back button in your browser to return here...
Painting the Burner Assembly
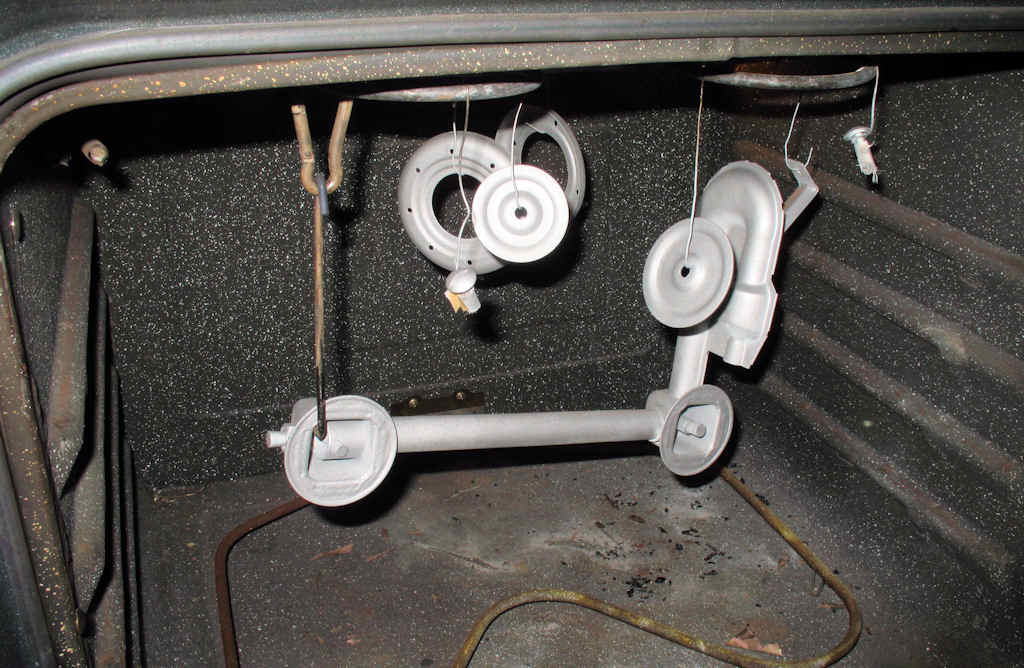
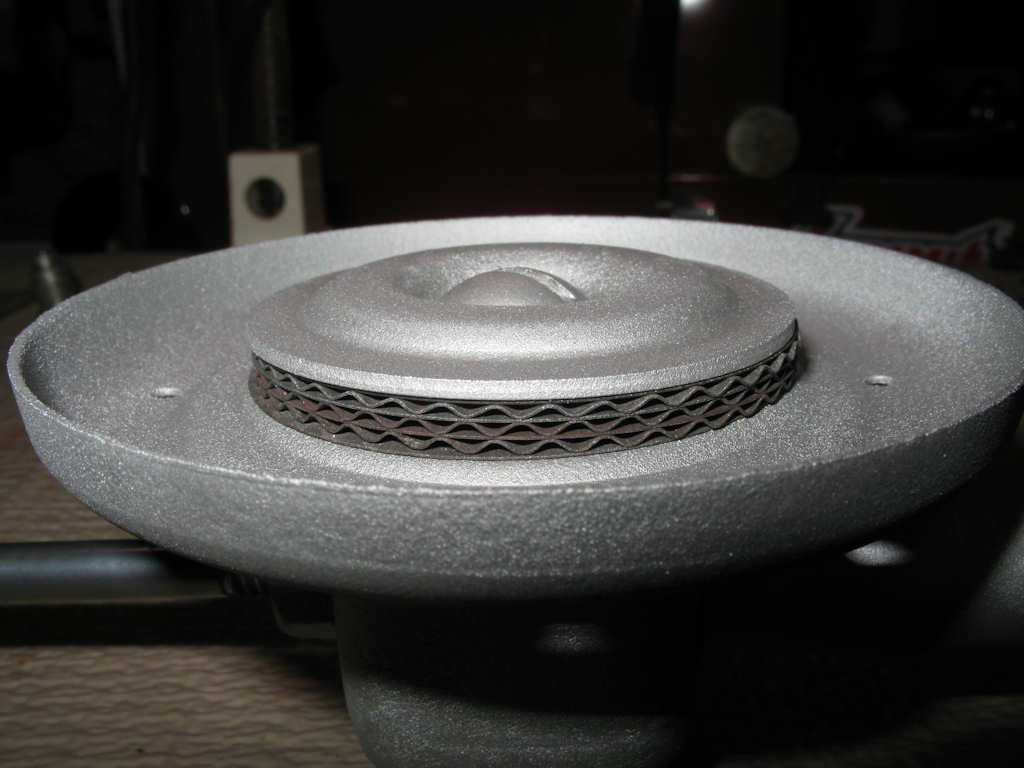
Now it was time to apply the VHT 1200 degree Ceramic header paint to the burner assembly. I first applied a light coat of white VHT Primer to all pieces, let that dry for 10 minutes then followed that with three coats of silver allowing each piece to dry 10 minutes between coats. The parts were then allowed to dry for 24 hours at room temperature.
Fig. 24 Cured! Ready to install... |
Fig. 25 Big difference from Fig. 18! |
Fig. 26 Ready for Flames! |
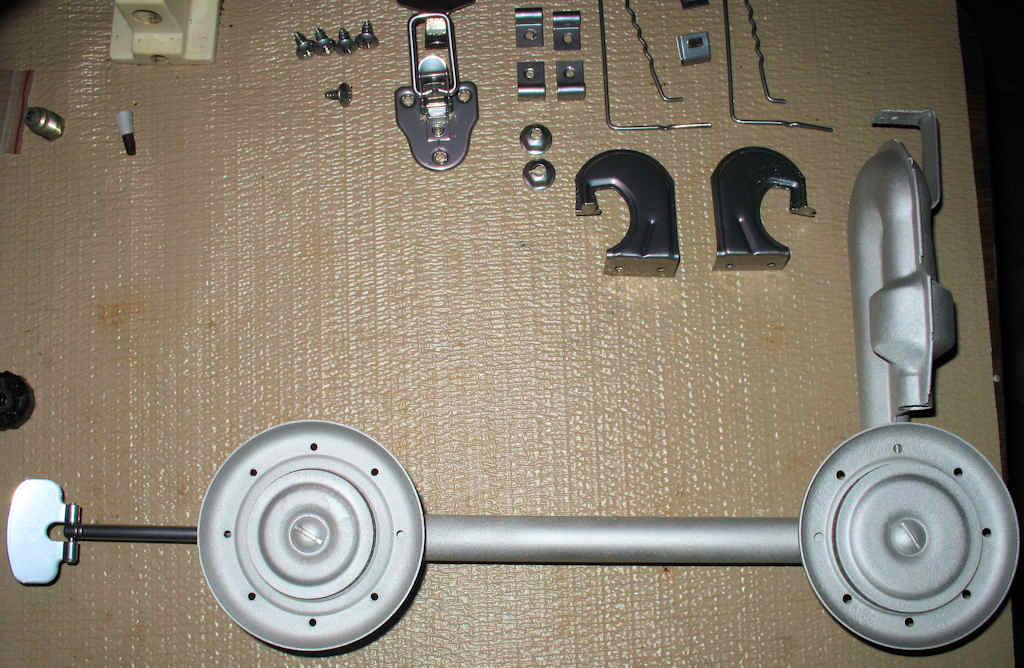
Fig. 27 Lots of parts |
The VHT ceramic paint has to be oven cured before it will stand up to the 1200 degree heat they claim. First you heat your oven to 250 degrees and let the parts bake for 30 minutes. Remove them and let them cool for 30 minutes. Now heat the oven to 400 degrees and let the parts bake for 30 minutes. Remove and let cool for 30 minutes. Heat the oven to 600 degrees and let the parts bake for 30 minutes let cool and they are done! No boring pics of parts being painted but one of them cooling in the oven after final cure. See Fig. 24.
Powder Coating the stove Hardware
Fig. 28 Powder coated Hardware |

I have no pics of me drilling out all the rivets holding the wind screen hinges, the lid hinges, the case latch, and catch. Even though I have no idea where to get replacement rivets at this time, I wanted a super clean look when I powder coated everything. Once I had everything apart I determined the parts were all stamped steel, and could be placed in the de-rust tank. After removal from the tank, they were lightly sand blasted, then powder coated with Xtreme silver which is close to chrome plating in appearance. They came out great! See Fig. 28.
Stripping/Powder Coating the Fuel Tank
Fig. 29 In the De-Rust Tank |
Fig. 30 Paint Gone |
Fig. 31 Sand Blasted |
Fig. 32 Powder on but not baked |
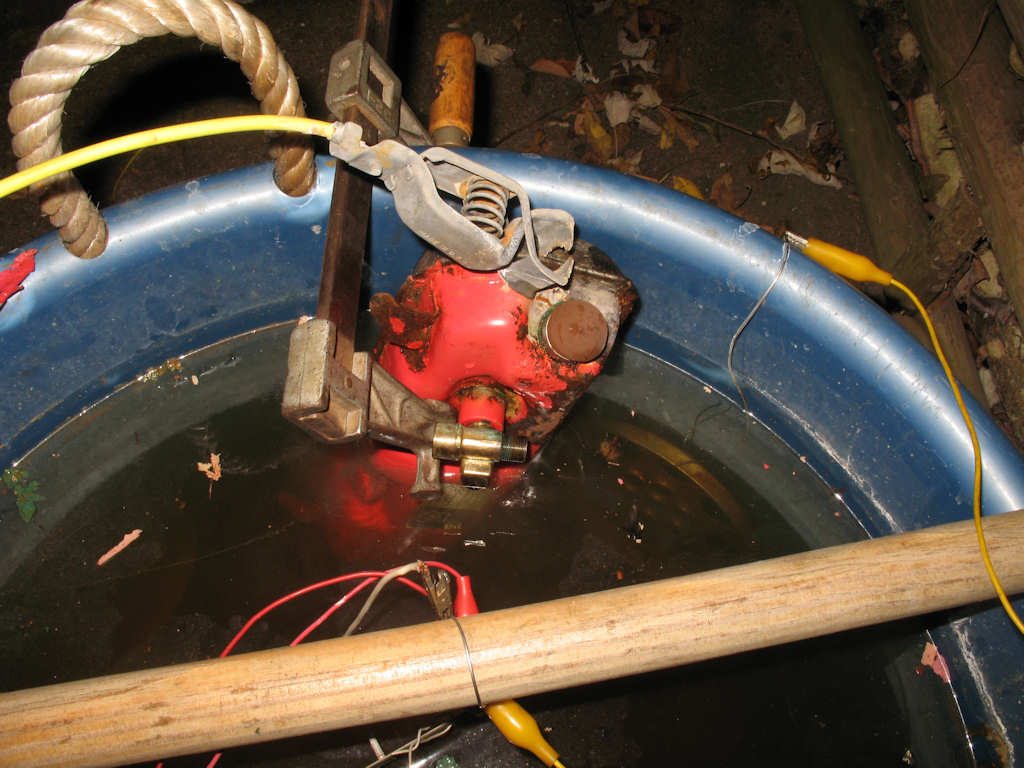
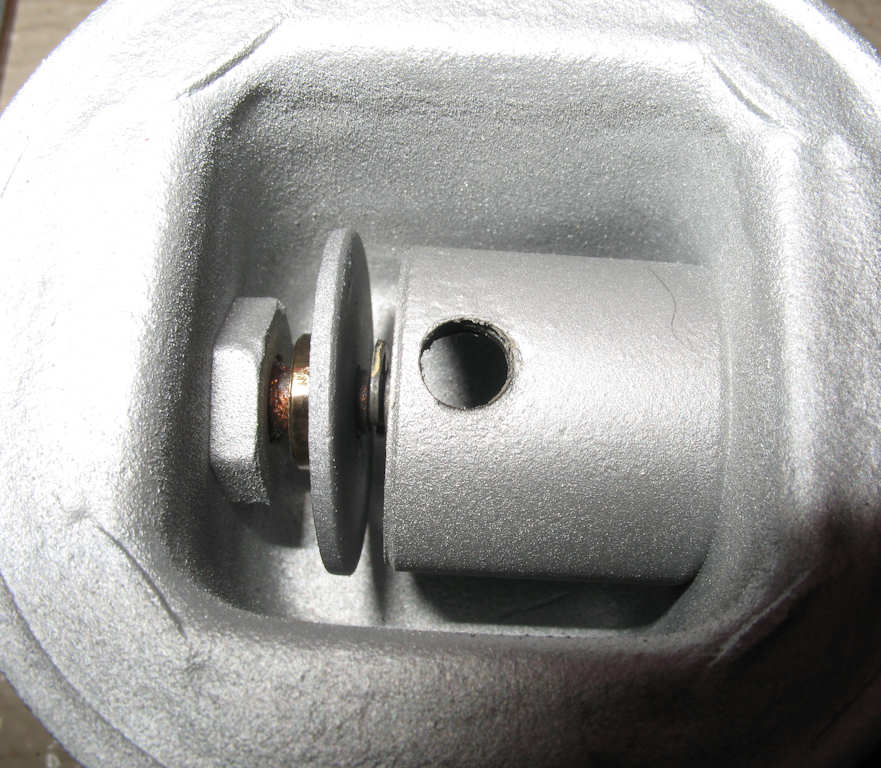
OK, the tank was the next project. After gutting the tank of everything except the check valve, (Note the check valve SHOULD be removed! My check valve was working fine BEFORE powder coating, but was stuck after. I had to remove and clean the valve afterwards.)
I put some silicone plugs into all the tank openings to keep the water out, then clamped it to the side of the de-rust tank. See Fig. 29. After several hours and a couple of flips and rotations the tank look like Fig. 30. All the paint was gone and the heavy rust from the mouse pee has been removed. A quick trip to the sand blaster to rough up the surface and remove the final contaminants and we have the tank as seen in Fig. 31. I used high temp fiberglass tape to keep the powder off the cap threads and the pump tube where the pump cap fits. I also left the Silicone plugs in as they can stand the baking process. Next I sprayed a thick coat of the Machine Red powder (From The EastWood Company) on the tank. See Fig. 32. Five minutes in a 450 degree oven to melt the powder then reduce to 400 degrees for 20 minutes.
Fig. 33 Yes, the valve is backwards... |
Fig. 34
|
Fig.35 Correct Valve Position |
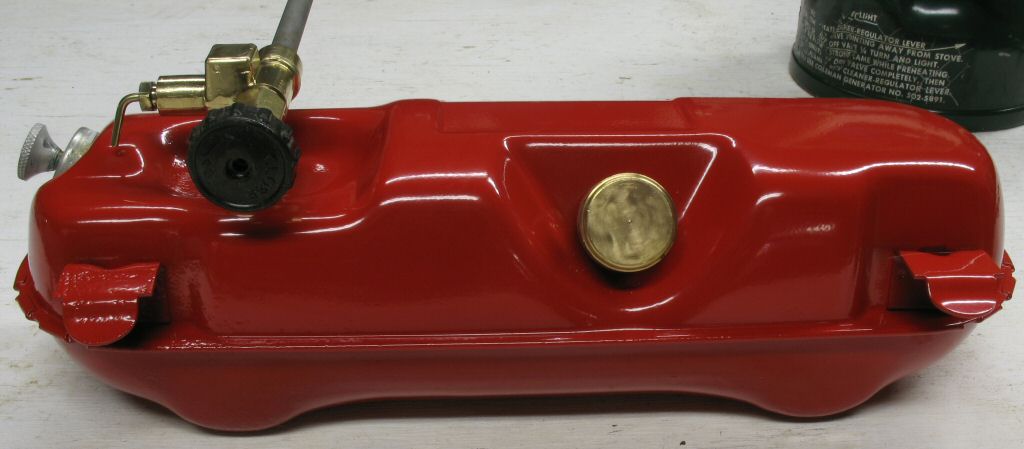
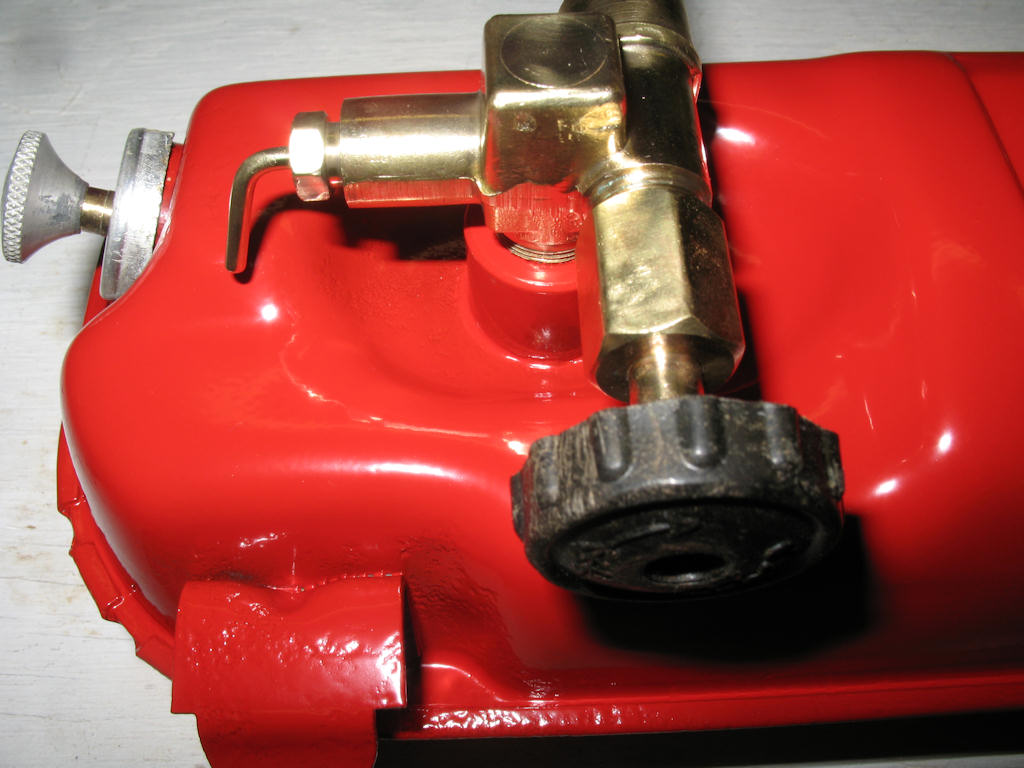
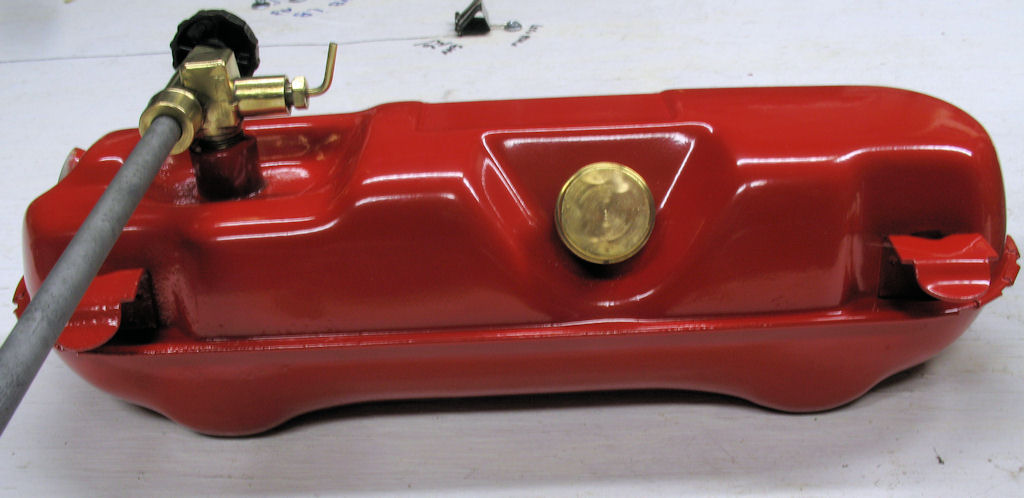
Fig. 33 shows the completed tank. The sharp eyed will notice the valve assembly is on backwards. I did this to show off the polished valve assembly and pump cap in one pic. (I'm an old 35mm film photographer used to trying to save film) The pic also shows the "orange peel" look on the left hook tab from the rust pits. Fig. 35 is a close up of that area. For the final archives, Fig.36 shows the valve in the correct position...
Tank Valve Disassembly and Cleaning
Fig. 36 All the brass parts |
Fig 36A Purdy ain't it? |
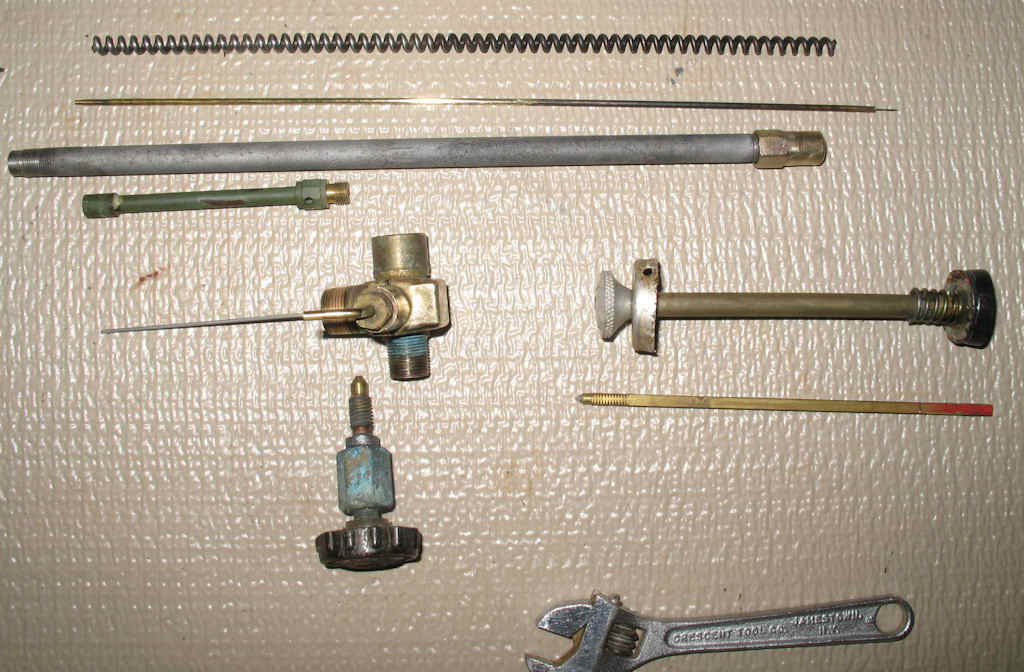
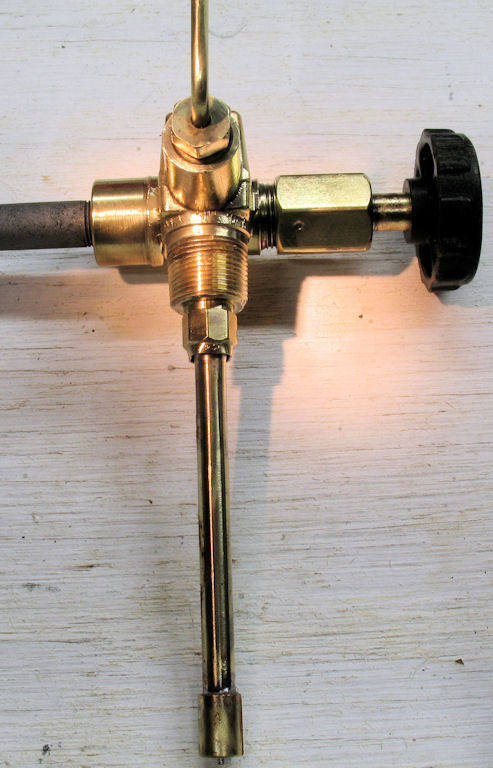
While the tank was baking, I disassembled the valve assembly and generator. See Fig. 36. I put the brass valve assembly, fill cap and the generator brass parts into a vinegar solution for about 5 minutes, rinsed, then used a Dremel tool with a fine steel wire brush to polish the parts. See Fig. 36A. The generator steel housing and coil spring were de-rusted, then lightly sand blasted.
Stove Shell: Blasting and Powder Coating
Fig. 37 Sand Blasted case |
Fig. 38 Sand Blasted Lid |
Fig. 39 Sand Blasted Screen |
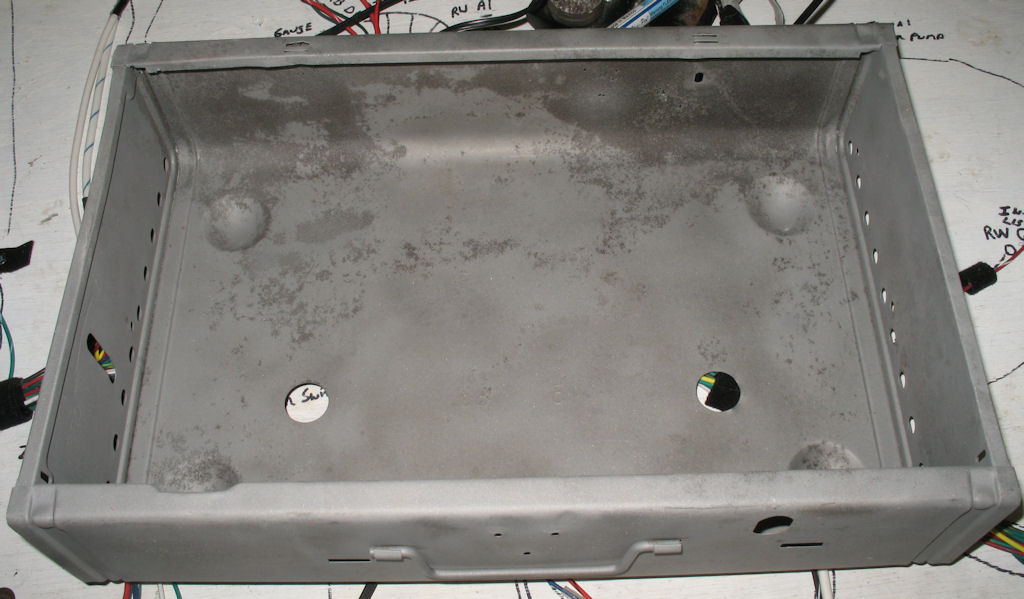
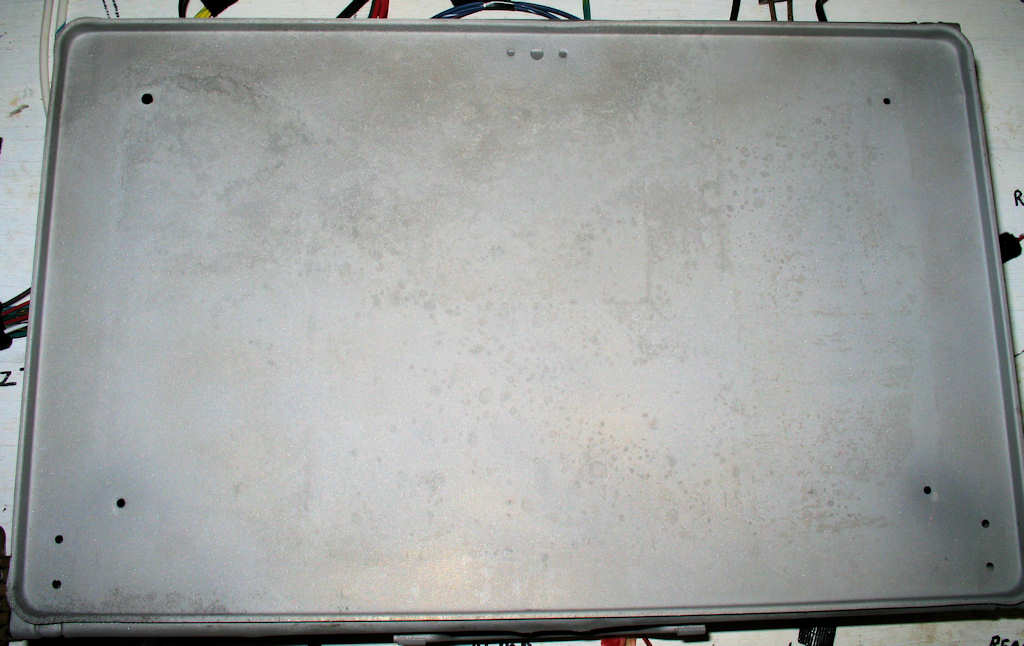
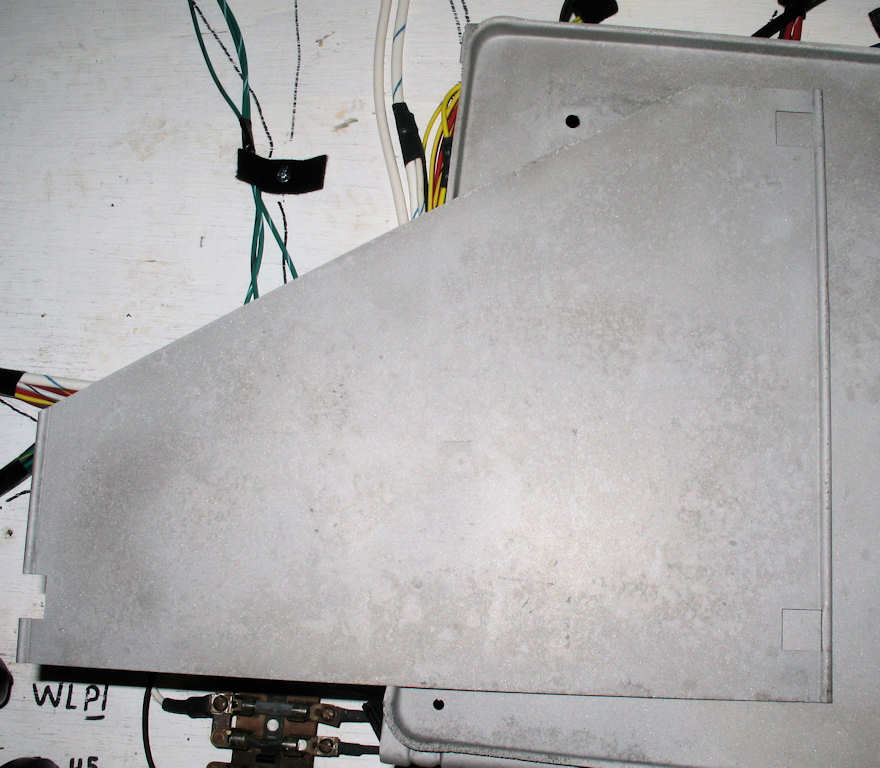
Fig. 37 shows the case after it was sand blasted to remove all traces of paint in the seams. It came out pretty good as did the wind screens and top as seen in Fig. 38-39. I'm waiting on the green powder to get here for the last step. In the mean time I have to deal with the stuck check valve. I should have pulled it out before powder coating it. Duh! I also have stickers on order for this and my 1963 Model 502 stove.
OK, the powder came in! I took two pieces of scrap metal and coated then with the red and green so you could see what they look like.
Fig. 40 Color Samples |

The green is VERY close but in my own opinion has a bit too much yellow in it. I am going to order a slightly darker powder and try that on my next stove.
The first shell parts I coated were the wind screens. Never having used this type powder before I did not know how thick to apply it on a large flat surface. I had to play with several adjustments on my powder setup to get the powder to adhere to the parts. It was really hard to tell how much powder was actually on the part. (This issue resulted in parts I'm not happy with but they will work for this stove.)
Fig. 41
|
Fig. 42
|
Fig. 43
|
Fig. 44
|
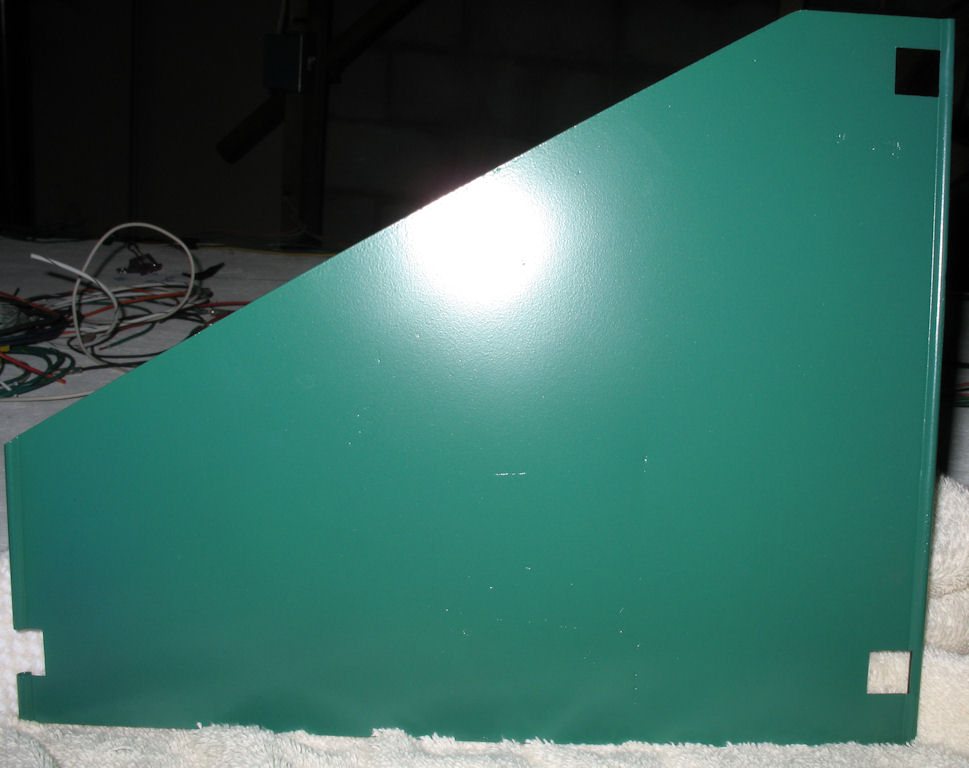

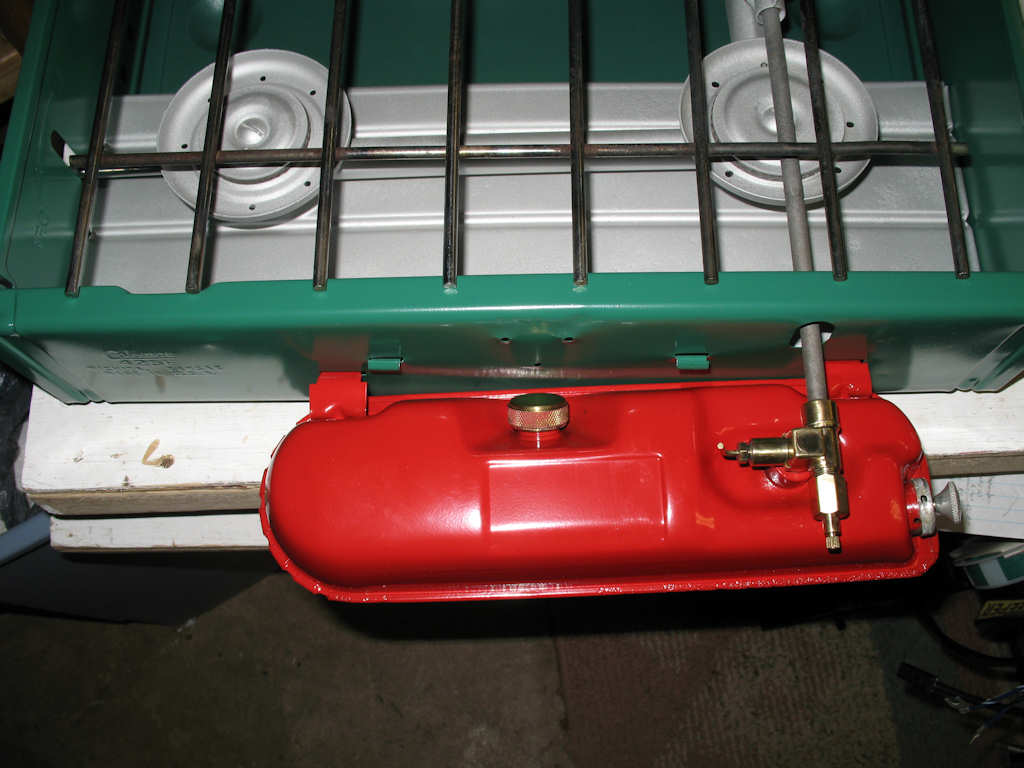
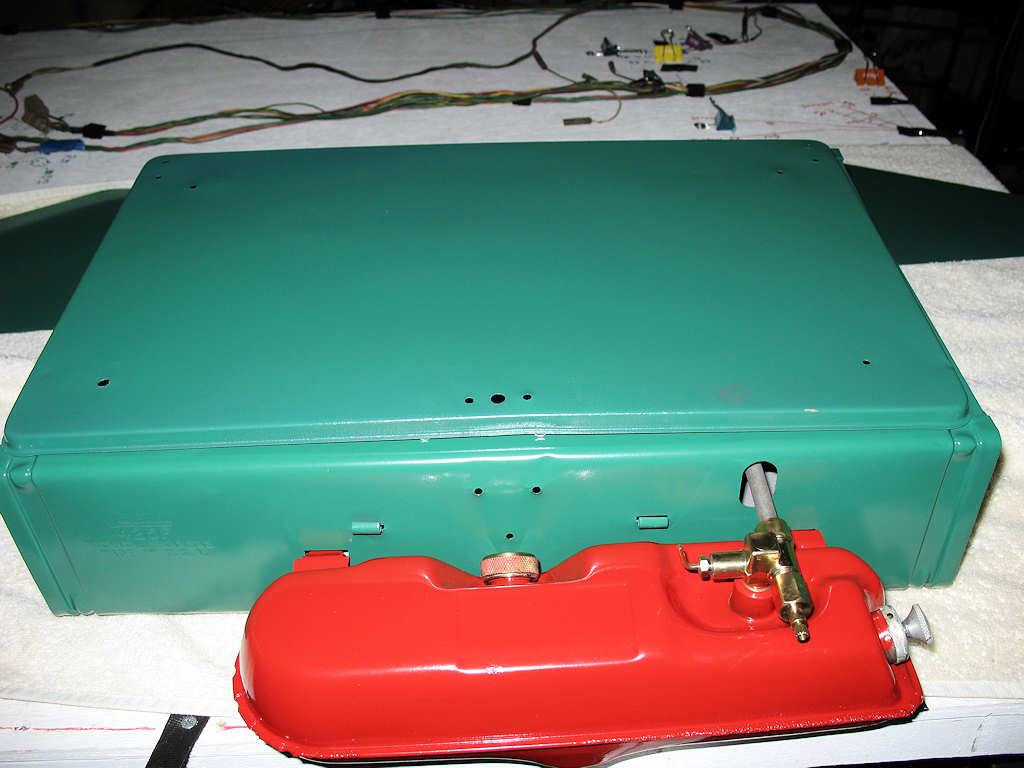
Fig. 41 shows the wind screen. Remember this stove was severely rusted and pitted so the powder, though it has a self leveling property, won't cover deep pitting. I also found that if you get this powder too close to the oven elements it will darken. Basically it gets too hot. The worst issue I had though was the powder WOULD NOT get into the corners well! This is probably a grounding issue with my gun but this powder is the worst I have seen for this. This is my learning stove. The next one I do will turn out better.
Fig. 45 |
Fig. 46 |
Fig. 47 |
Fig. 48 |
Fig. 49 |

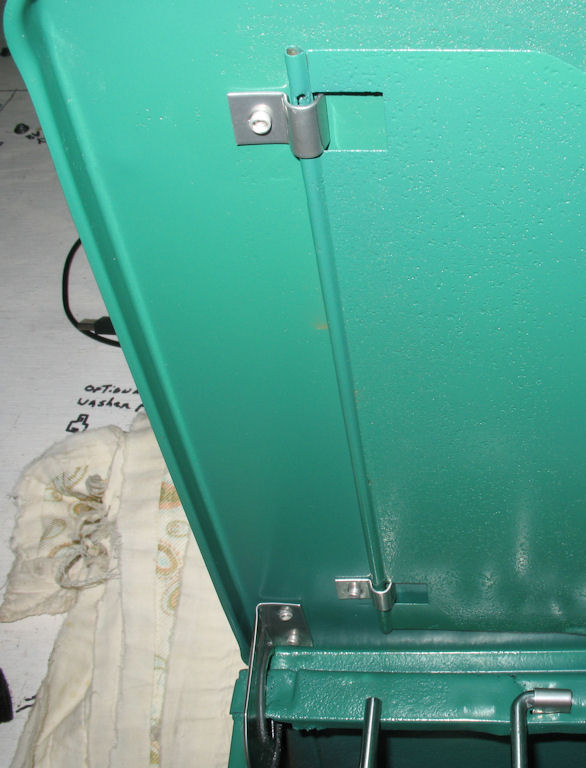
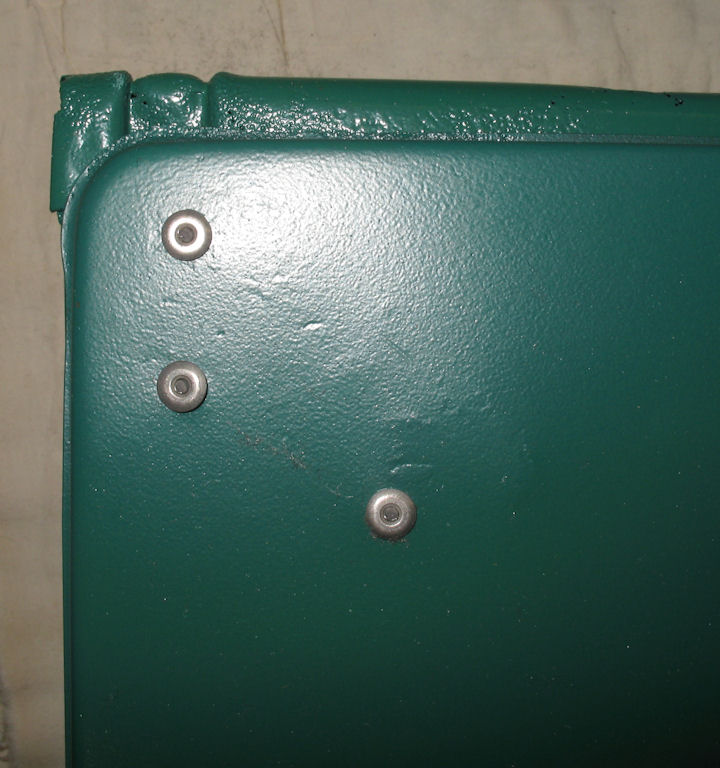
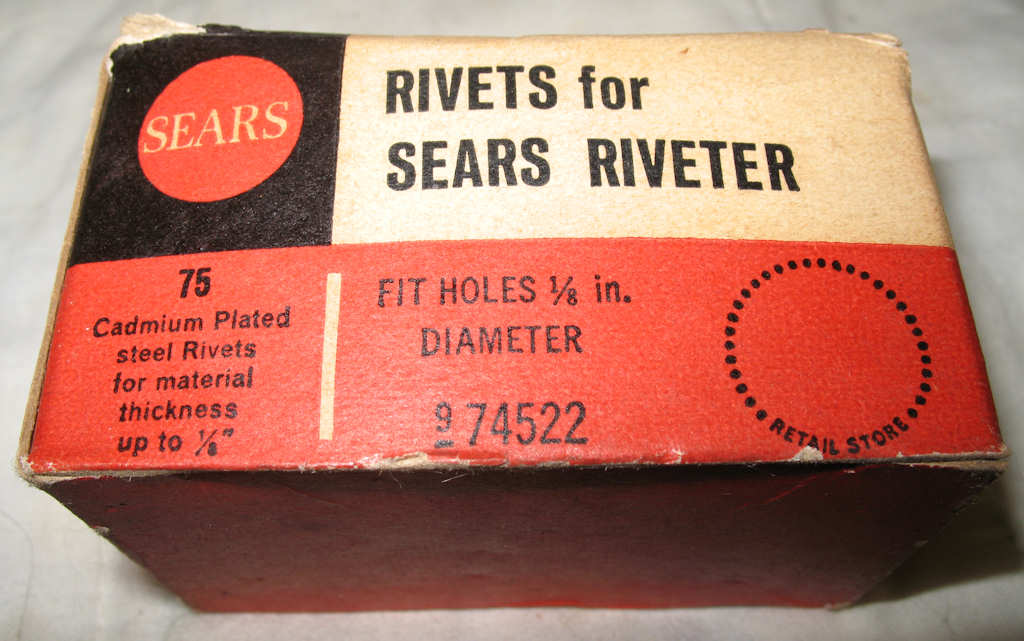
Now I had to figure out the rivet issue. After much research, and thinking about how mad the better half would get if I spent $119.00 on a set of rivet setters I might only use once or twice, I decided to just use plain old aluminum pop rivets to reassemble the stove. No, it's not correct, but I bet most folks will not notice it. ( I did use antique Sears (1972) 1/8" diameter by 3/16 rivets that I got from my grandfathers garage when he died! )
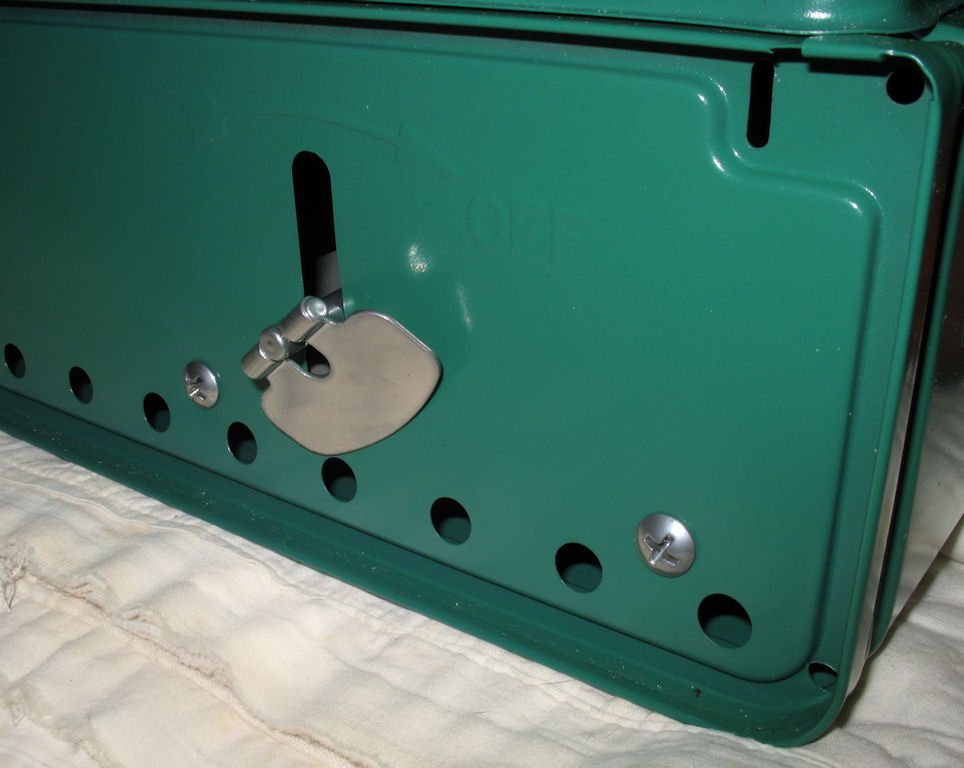
Anyway the last pics show the completed stove.
Well that wraps up the restovication of this stove. I have a 1966 425D that I will do next....