Odd how just sitting will make a water pump fail.
During all the testing getting this thing to run I had never had the slightest
sign of a leak. (Well, we won't count the time I forgot to re-install a hose
clamp I 'borrowed' from the heater valve hose. Amazing how much coolant can
come out of a 5/8" hose in the time it takes you to return from a beverage
run! ) So I was a bit disappointed to see drops of coolant under the truck one
morning. I figured it was a hose or something but no, it was coming from the
weep hole on the pump. I called Advanced Auto Parts and they had a lifetime
warranty pump for $54.00. Worked for me! Ok lets get started. I would also recommend
you get new hoses, belts, and thermostat while your into the front like this.
You won't get another chance to have such good working conditions!
Here is a list of what you will need to do this
job. YMMV
Tools
Description/Job
Liquid Wrench
or what ever your favorite penetrating oil is. Soak all
the fender/bib bolts thoroughly a couple of days before.
Socket set
If you have to ask..
Wire wheel on a drill
To remove old gasket material and to prep the block for
the new pump.
Bucket
At least 5 gallons to catch all the coolant. Then mix the
new coolant in it.
Empty gallon jugs
To put old coolant in after catching in 5 gallon bucket.
Channel Locks
To remove the drain valve from the bottom of the radiator.
Screwdriver
To remove the hose clamps and to help pry them off.
Table 1 Tools Needed
Part
Description
2 Gallons anti-freeze
Mix with 2 gallons of water for a 50-50 mix
Paint
To paint the water pump if you desire.
Silicone sealant
To make gasket easier to remove next time you do this job.
While it may be possible to remove the water pump
without lowering the front bib and removing the radiator it will be a LOT easier
if you do. This will also give you the opportunity to fix that rust spot on
the bottom of the bib.
Bib and radiator removal
Fig. 1
Fig. 2
Fig. 3
Gather ALL the parts and tools BEFORE you start! I highly
recommend that you degrease and pressure wash the entire front of the truck
and engine to remove all the mud and crud before you start this job. DO NOT
aim the pressure washer at the radiator!!! You will flatten the fins faster
than you would believe! Drive the truck to dry it off, then let it cool completely
so you don't burn the crap out of yourself. Paint the water pump while your
letting the truck cool down.
Now park on flat ground, chock the wheels, pop the hood and
disconnect the negative battery cable . You don't want someone to hit the
starter while you have your hands wrapped around the fan :-)
Unplug the headlight harness wires.
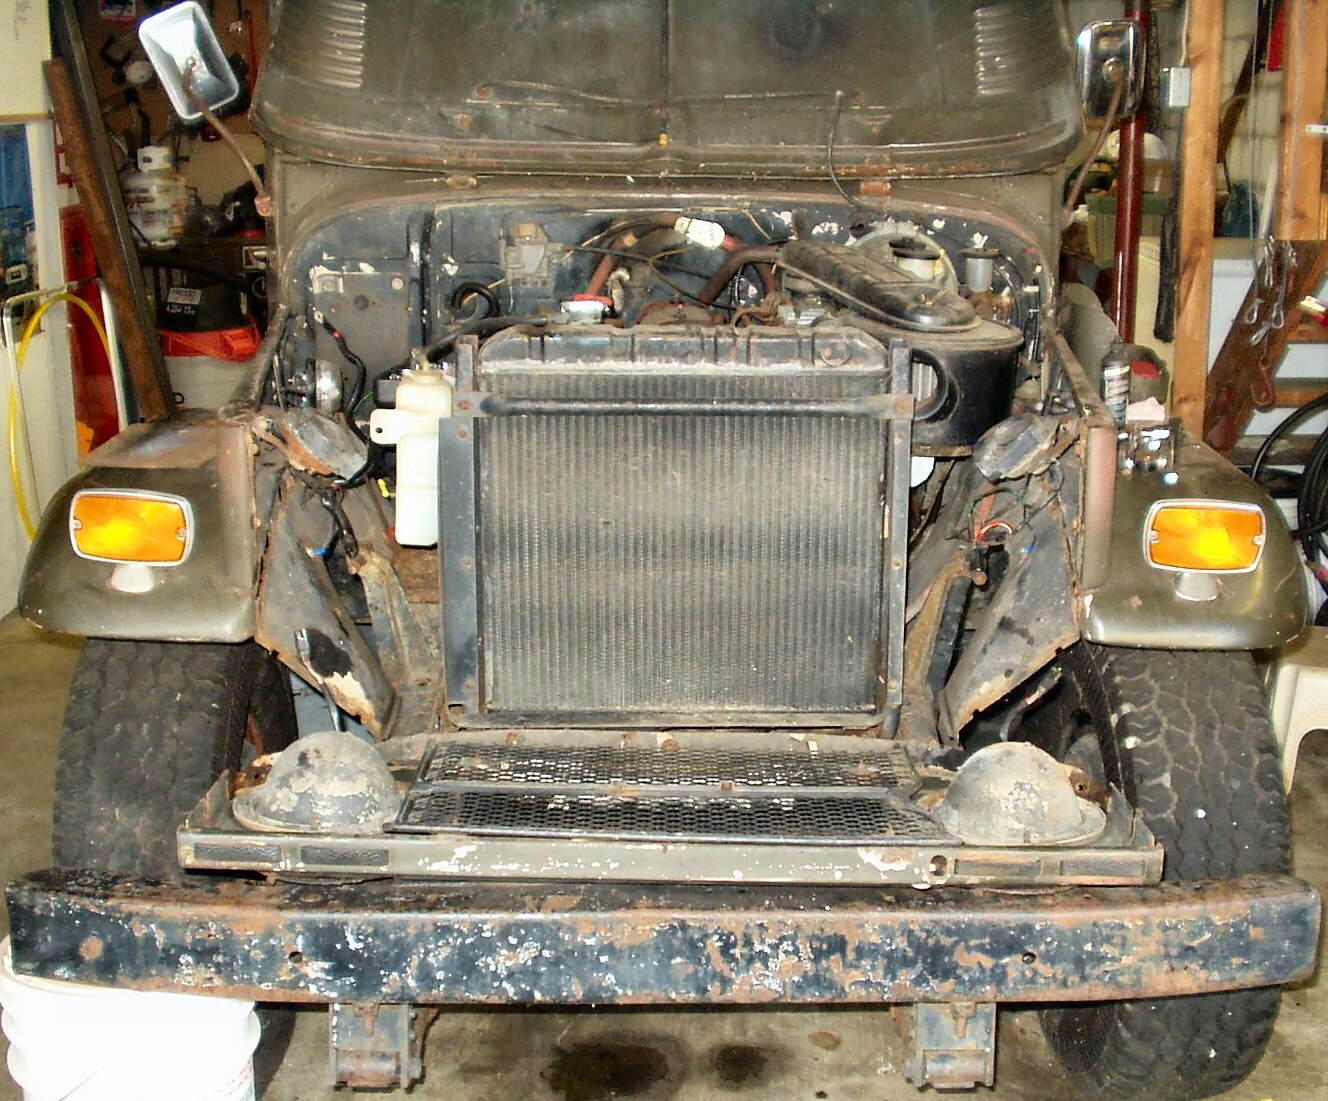
Refer to Fig. 1. The fender
and bib are slotted so just loosen the 10 6mm bolts that hold the front bib
to the inner fenders. As with most of the bolts on the Cruiser these 6mm bolts
just sheared off even though I did soak them for 2 days!. Take your time with
the bolts that go into captured nuts! It's very difficult to remove one that
breaks!
Lower the bib as shown in Fig. 2.
You may elect to remove it entirely as it will give you about 6 more inches
of room to work in the front.
Remove the radiator cap and the over flow tank if you have
one.
Make sure the heater valve(s) is open all the way.
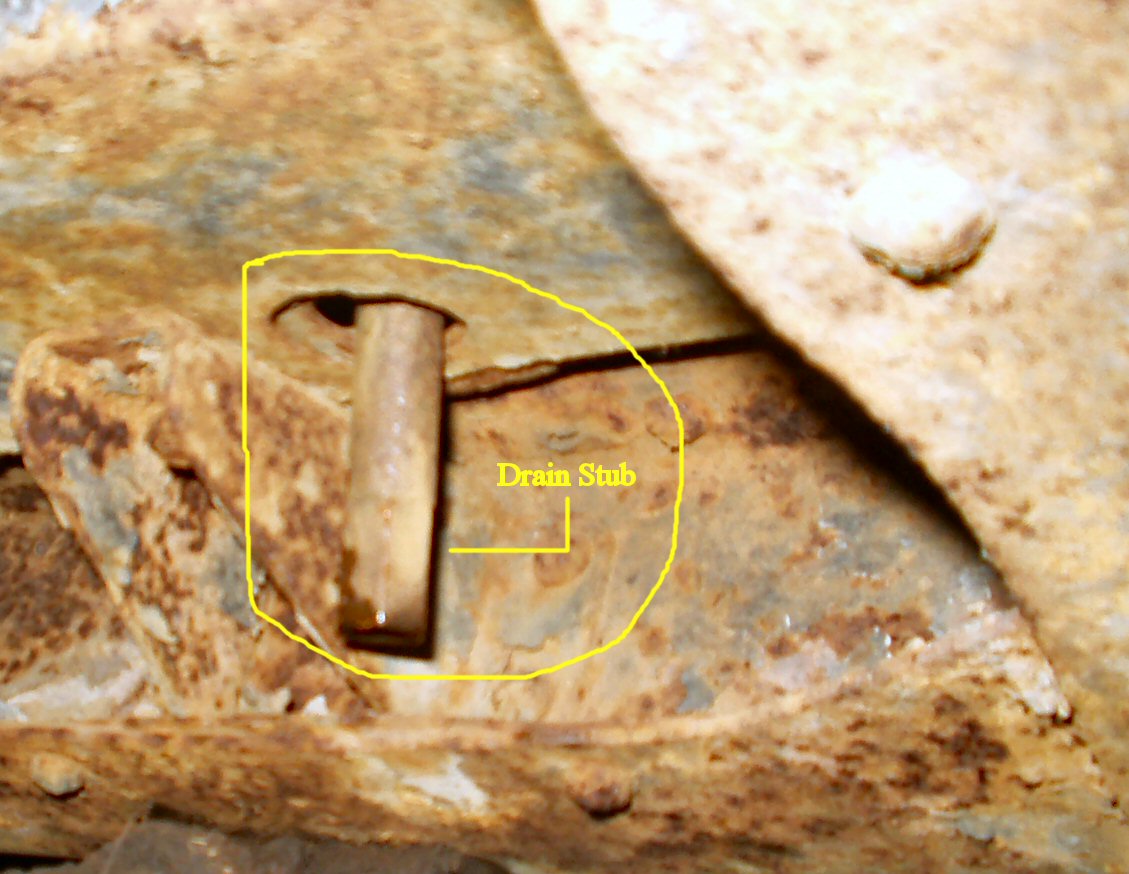
Place your drain bucket under the radiator petcock drain
valve. (On a Cruiser it does not stick out 90 degrees to the radiator like
most vehicles! It is on the passenger side and sticks down through the radiator
support. See Fig. 3) If you can get the valve
to open great! If not you will have to remove the entire stub with valve.
Drain the radiator. Remember to immediately clean up any spilled anti-freeze
if you have pets or your neighbors have pets! Toxic to them but tastes sweet.
Remove the entire drain valve from the radiator if you haven't
already. You cannot remove the radiator if you don't! The valve hits the radiator
support.
If you are doing a total flush and replacement of anti-freeze
then place your bucket under the engine on the left and remove the drain plug
on the left side of the block to drain it.
Remove the 6 bolts holding the radiator fan shroud on. Remove
the shroud. (This is not as easy as it sounds. Just keep wiggling it around
until it comes out.)
Disconnect the top and bottom radiator hoses only where they
attach to the radiator.
Remove the 6 bolts holding the radiator to the radiator support.
Don't lose the rubber washers!
Try to lift the radiator out of the support. It if won't
come out, remove the front radiator brace (See Fig.
1). This will allow it to spread open a bit. Remove radiator.
Using a hose flush out the radiator as many times as necessary
until the water runs clear. Now give the radiator a good scrubbing on the
outside.
Straighten any fins that are bent then paint the radiator
if you wish. Set the radiator aside.
Flushing the heater cores, block and head passages
easily
You may elect at this time to flush out the front and rear
heater cores and lines and of course the block and head.
First re-install the block drain plug.
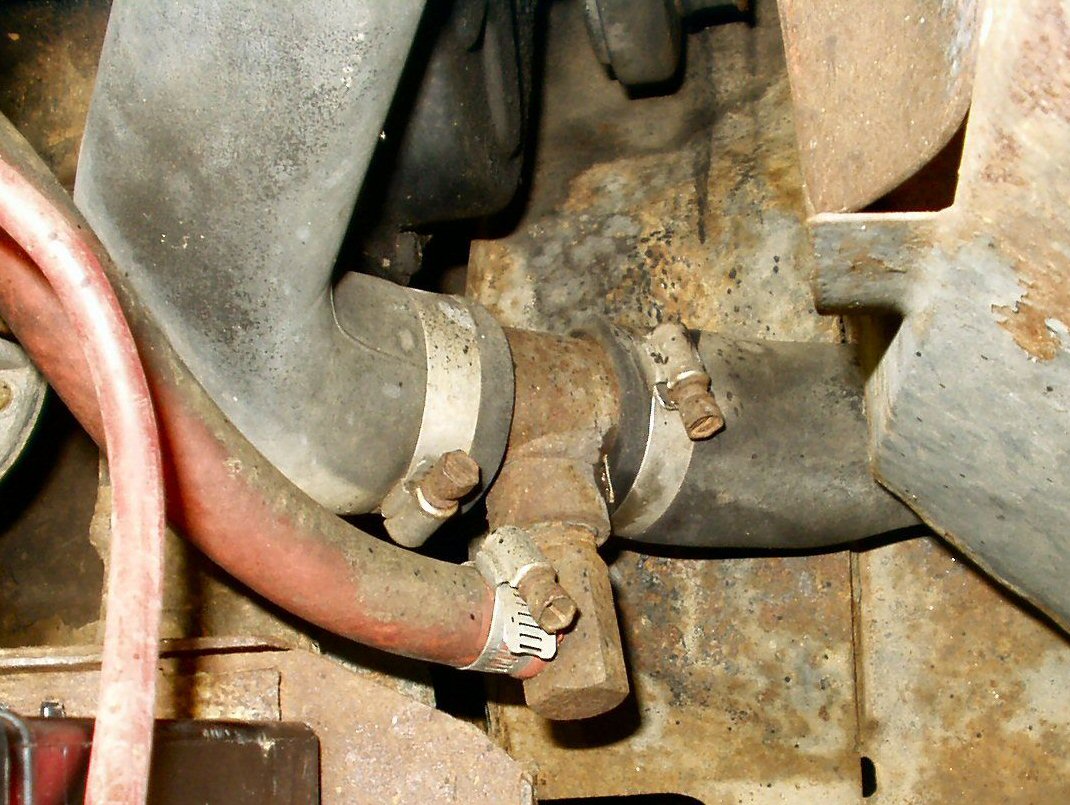
Disconnect the bottom heater return hose at the Tee fitting
in the lower radiator hose. (See Fig. 4.) Hook
your water hose to it. You may have to make an adapter. Place your bucket
under the lower radiator hose. Slowly open the water hose valve and flush
water through until it's clear. This will force water to flow through the
heater cores and lines, through the heater valve(s) to the back of the head,
down through the head into the block, through the block to the water pump,
then through the small bypass hose on the pump and back out the lower radiator
hose. Remember! City water may be at 45-60 PSI! More than enough to blow a
heater core if they are clogged. NEVER use full pressure until you know the
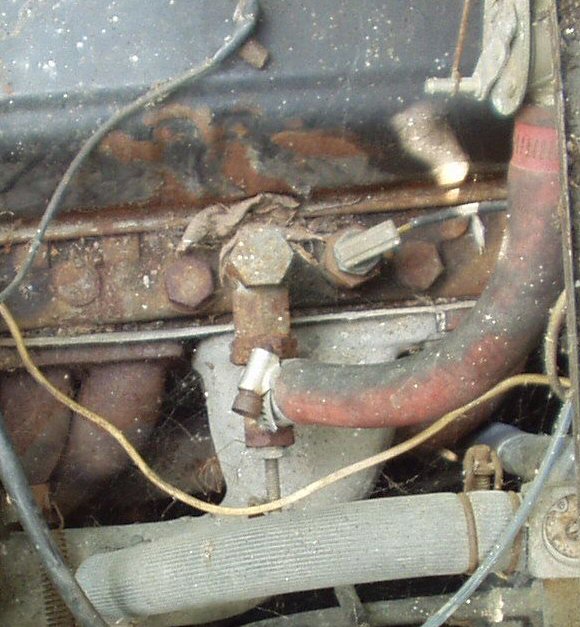
flow is good! See Fig. 5 for where the heater
feed line goes into the head.
Now take your air compressor, set the regulator to about
10 PSI and connect it to the heater hose. Slowly blow all the water out of
the lines, cores, head and block.
Remove the block drain plug again and drain the block.
Put the drain plug back in with teflon tape on the threads.
The point of all that was to get the raw water out of the
block so that you don't mess up the anti-freeze and water mixture. Water left
in the block will dilute the mixture.
Fig. 4
Fig. 5
Fig. 6
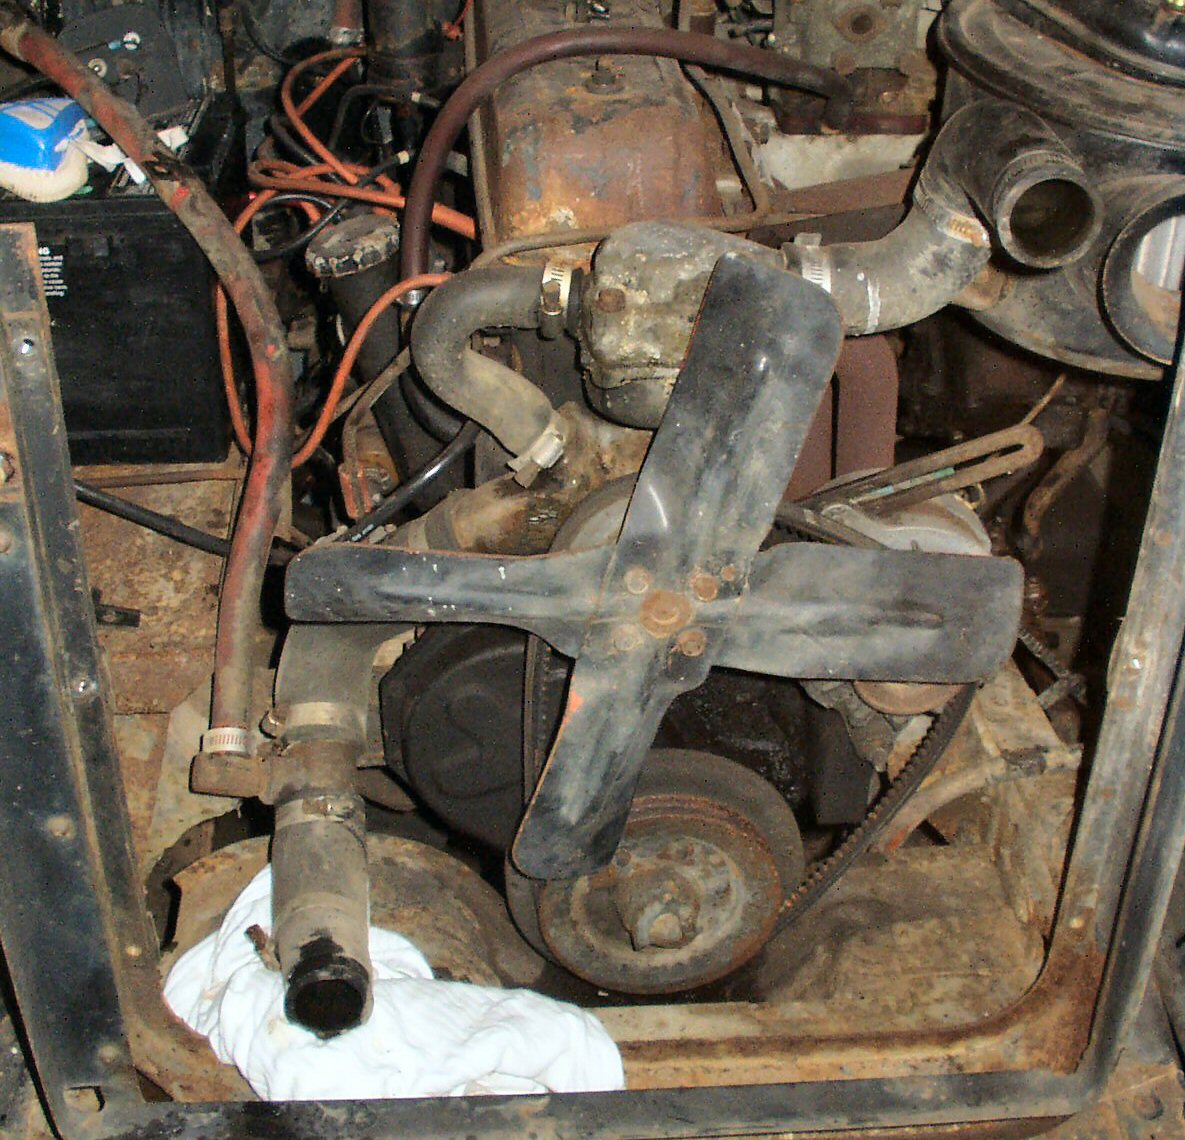
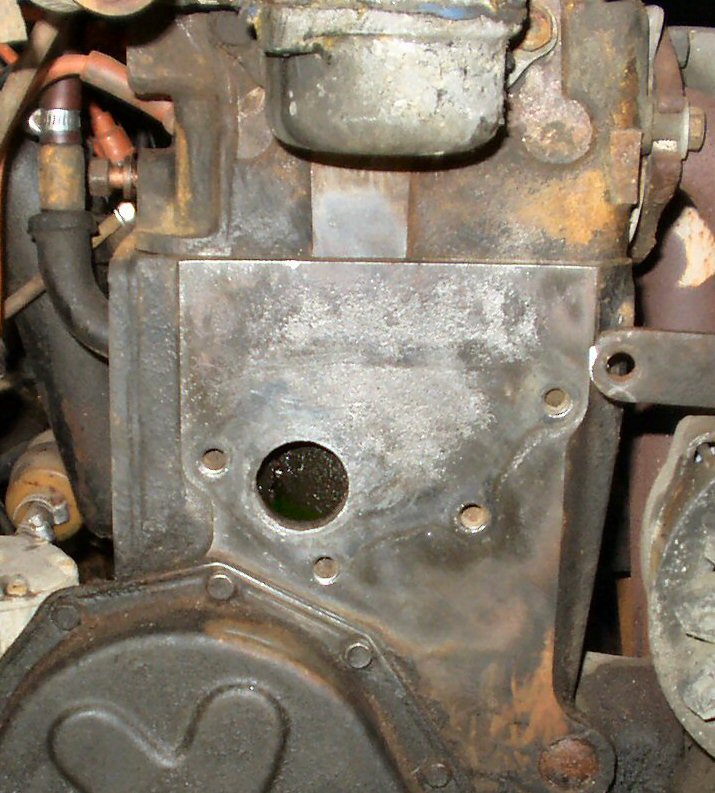
Ok now that we have all that flushing done we have
what you see in Fig. 6. Total access to the front
of the engine! Let's continue the disassembly.
Fan and pump removal
Loosen the alternator belt adjusting bolts and push the alternator
towards the block to take the tension off the belt.
Remove the 4 bolts holding the fan on and remove the fan.
pulley and belt.
Take a break, wipe the sweat off, grab a beer. ONE beer.
Hey you! Will you get back here? We have work to do!
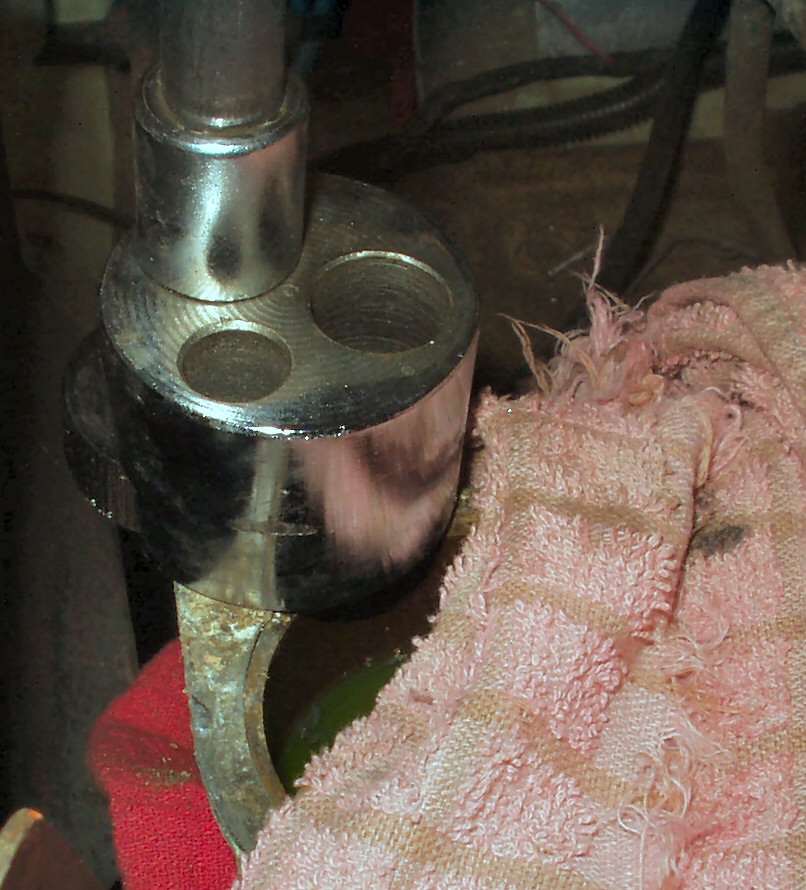
Fig. 7
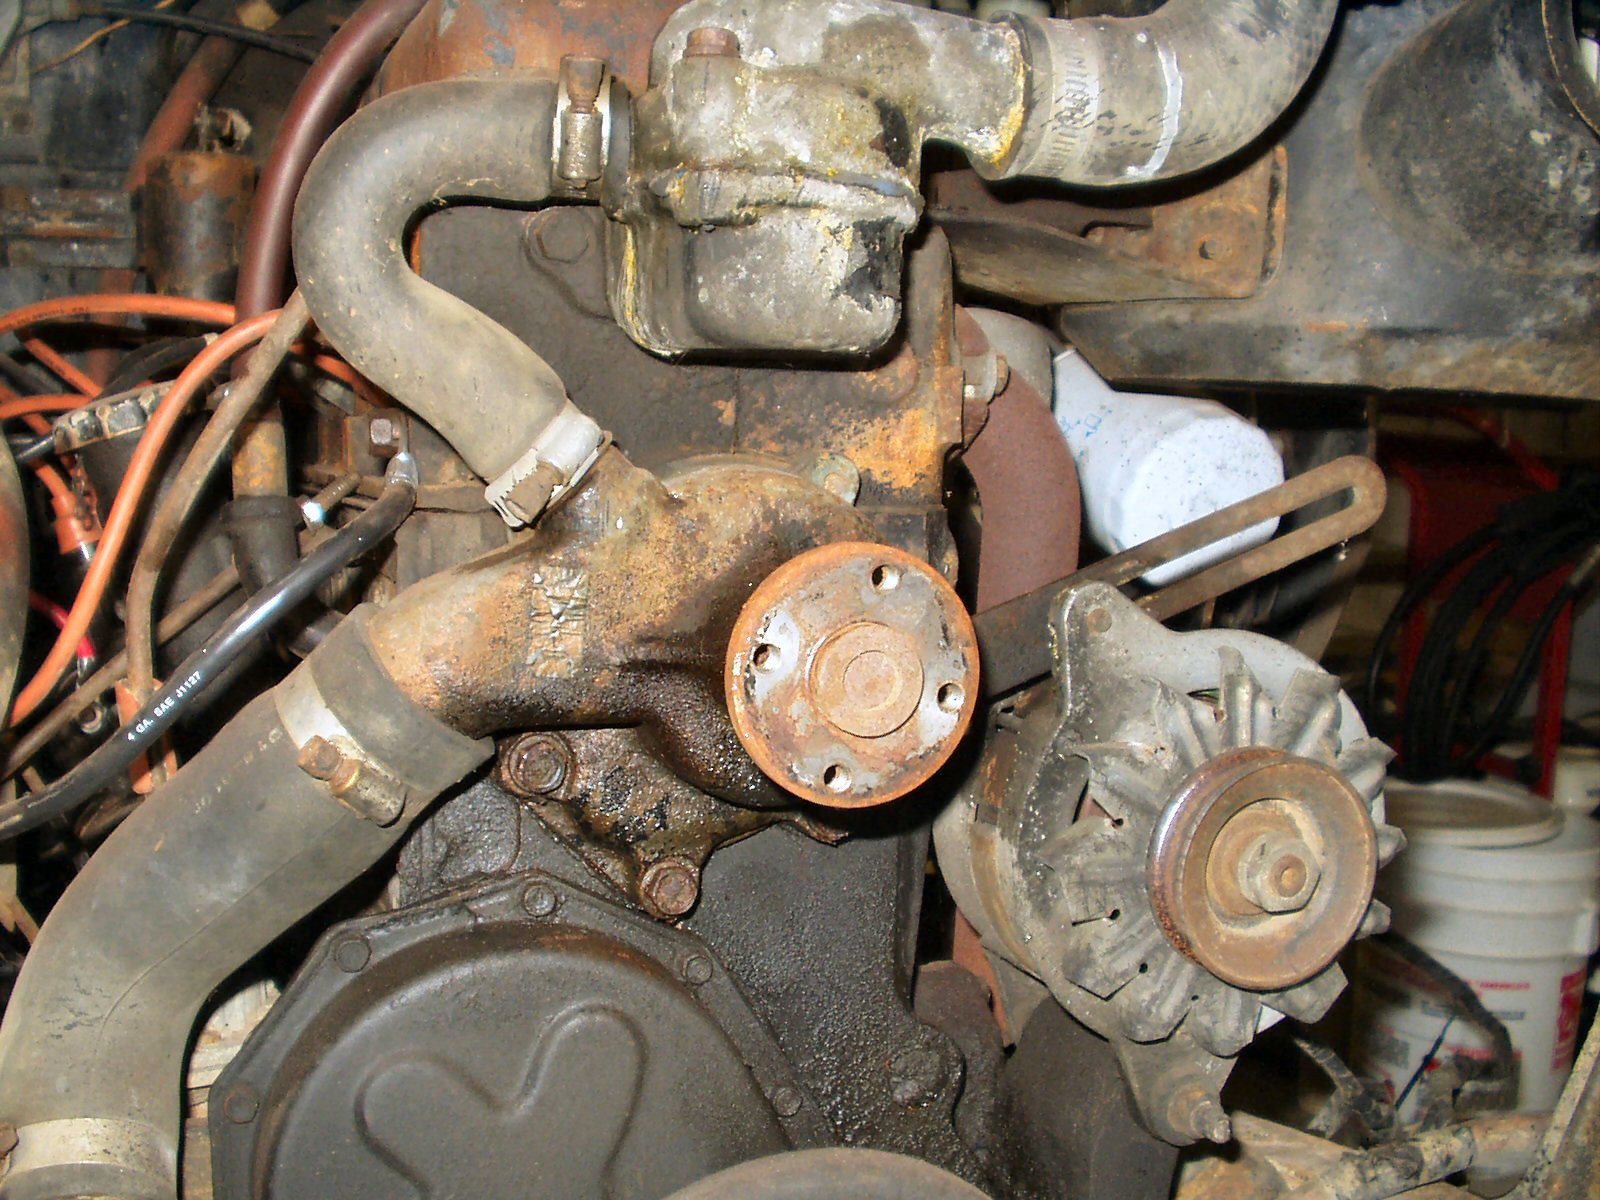
See Fig. 7. Yeah I know got
a bit of an oil leak there, concentrate on the water pump. Take the two hoses
off the water pump and remove the 4 bolts holding the pump to the block. Keep
track of what holes they came from.
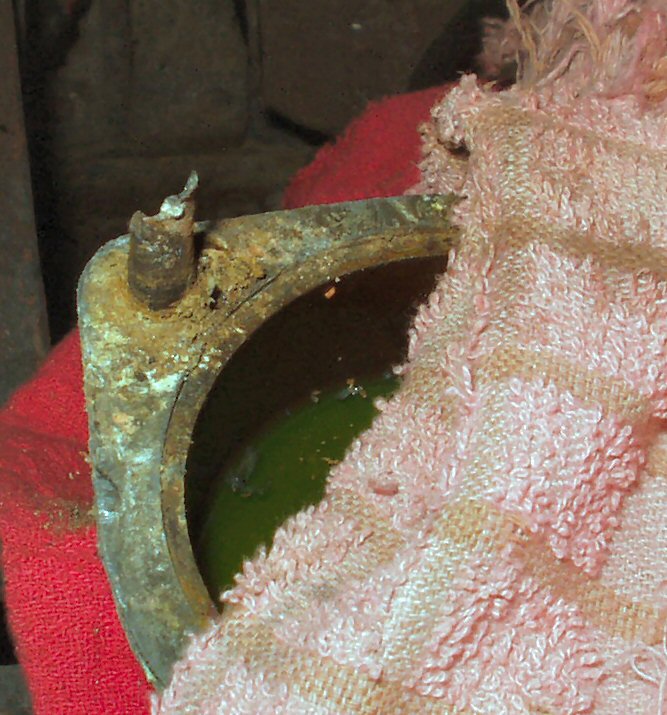
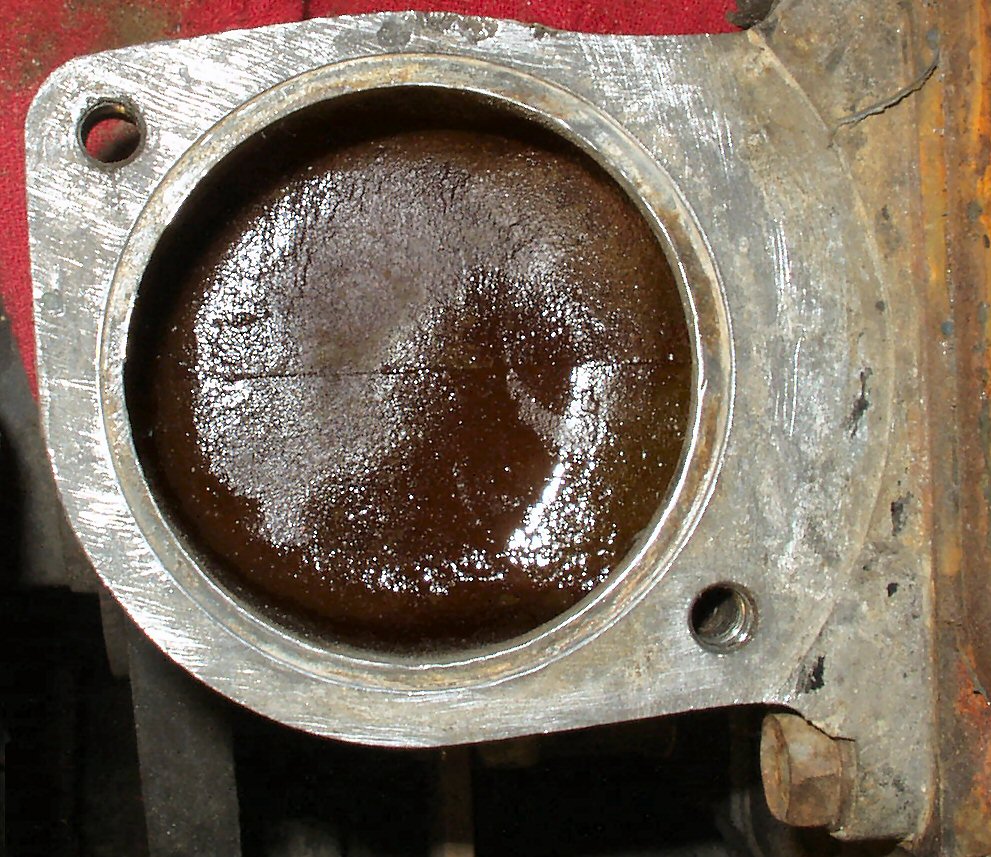
Fig. 8
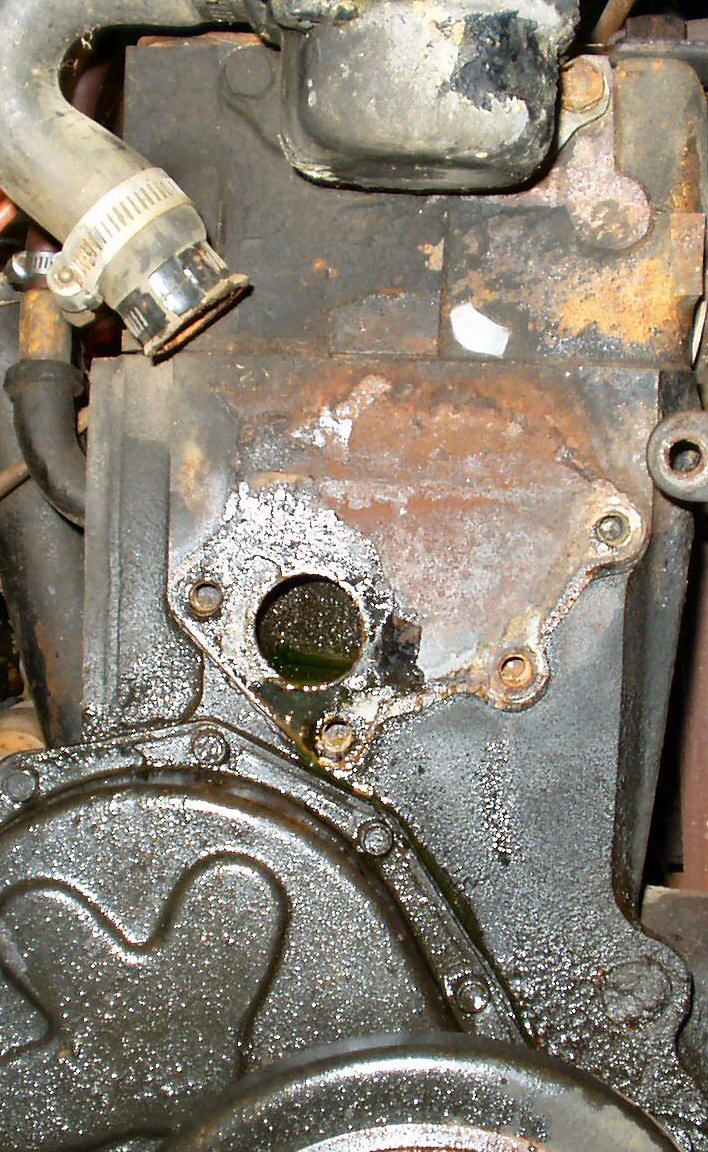
See Fig. 8. After the pump is
removed use a rag to sop up the coolant around the water pump inlet hole.
You don't want it seeping out constantly. Stuff the rag back in the hole to
keep crap out of it while you clean the block.
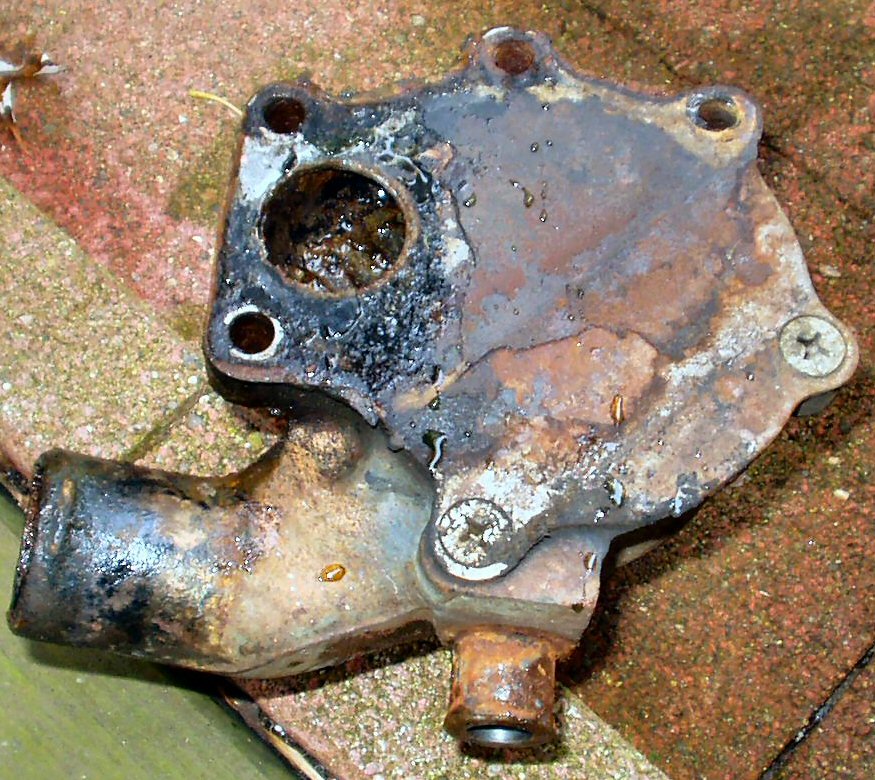
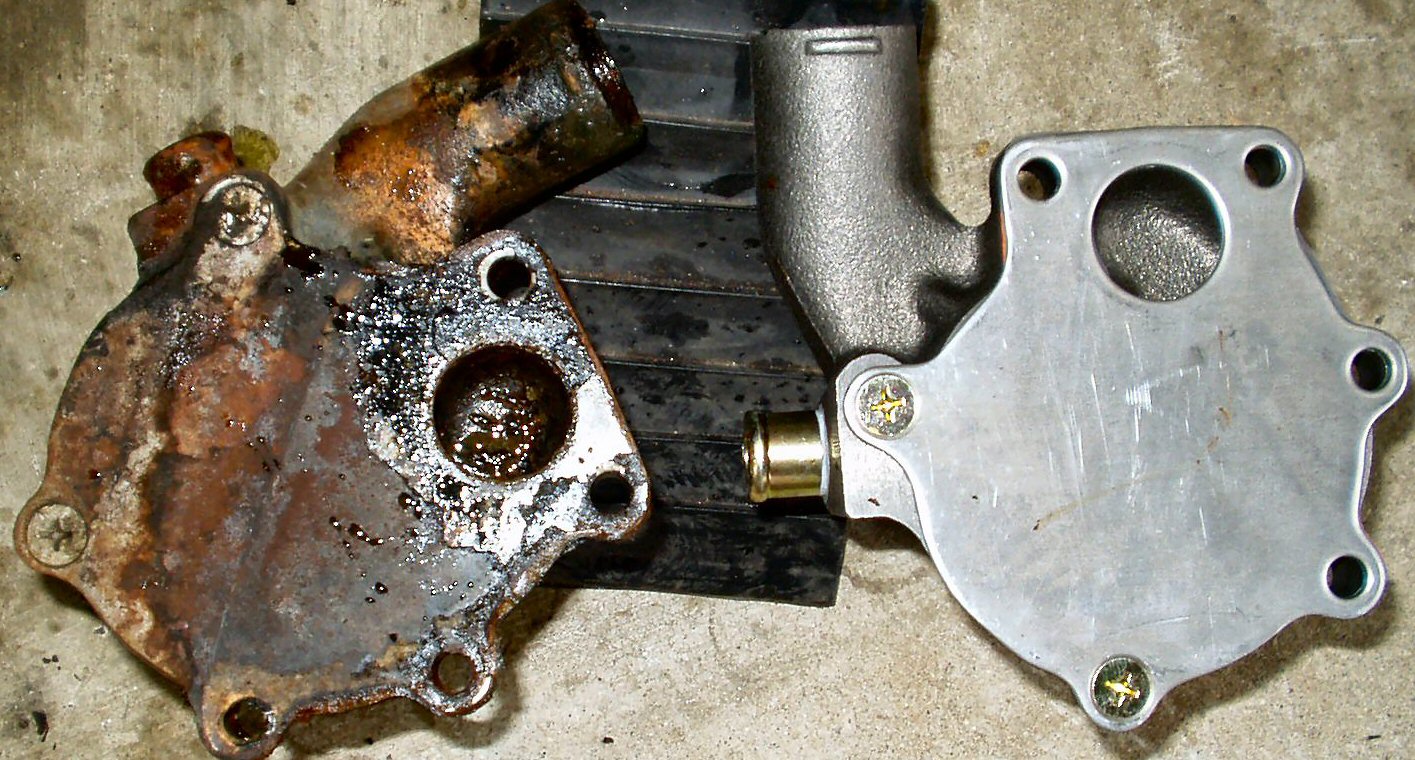
Fig. 9
Fig. 10
See Fig. 9-10 for
the old and new pump pics. Quite a contrast!
Thermostat Replacement
Fig. 11
Broken Bolt
Fig. 12
Removing Stub with stud remover
Fig. 13
Cleaned Housings
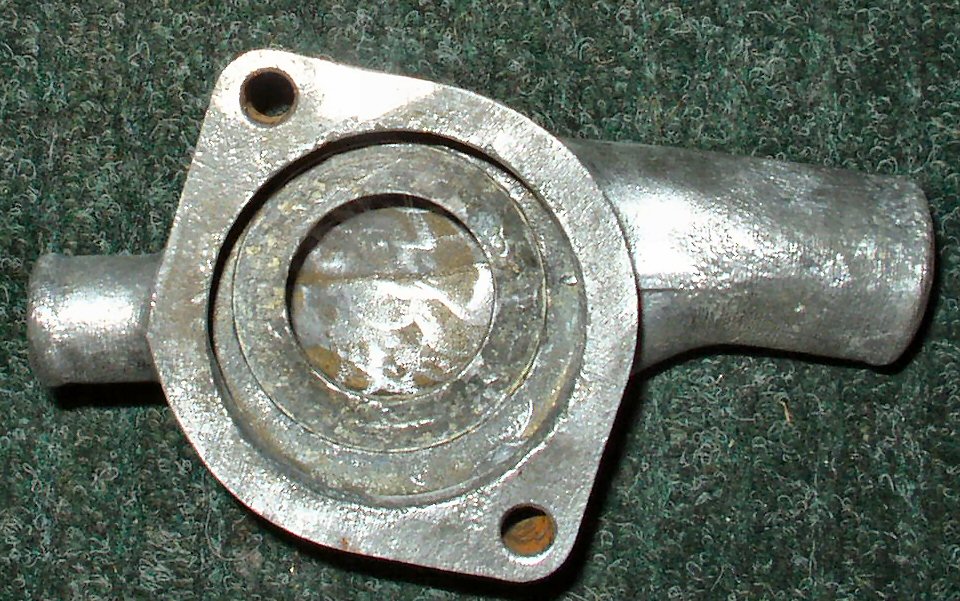
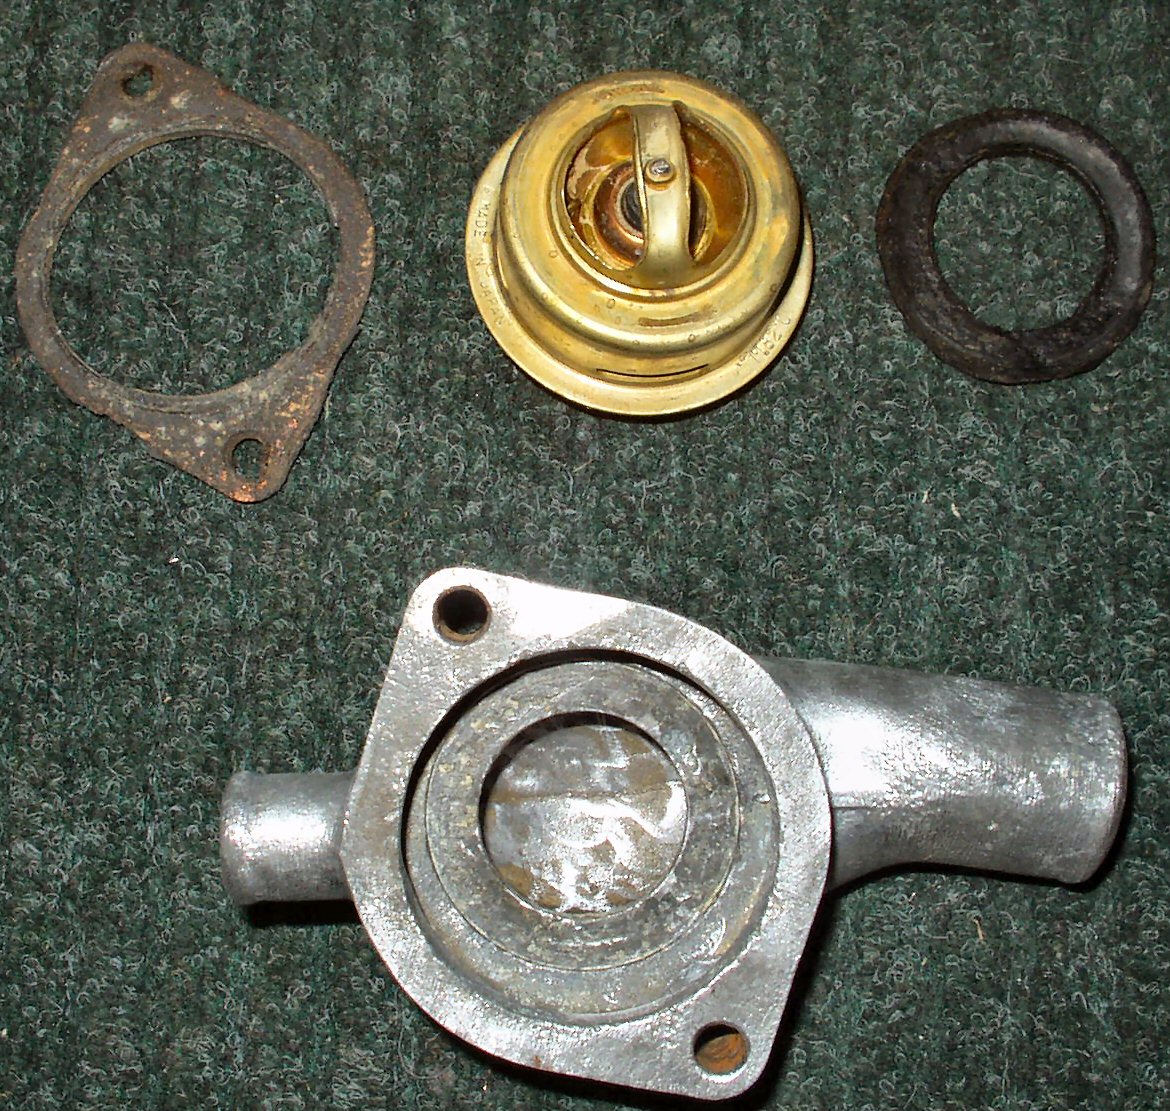
Fig. 14
Thermo and Gaskets
If you are replacing the thermostat then remove
the hoses from the thermostat housing and remove the two bolts holding the
thermostat housing top cover.
Yeah, sounded easy to me too. See Fig
11-12 for what actually happened. Damn head broke off the bolt! I had
to drill it out to the point it released the top housing. Then I used a stud
extractor to pull the remaining stub out.
Pry the thermostat out of the top housing and then remove
the top gasket if it stuck in place inside the housing..
Use a wire wheel on a drill and clean the entire top cover.
A Dremel tool with a small wire wheels will allow you to clean the top o-ring
gasket mounting surface. I noticed on the three housing covers I have that
there was sever corrosion on all of them under the gasket! It yours are really
bad use some JB Weld to smooth them out.
Clean the mating surface on the other half including the
thermostat seat. See Fig. 13.
Use a 8mm x 1.25 tap to clean out the threads in the bottom
cover. Use lube and be careful! This is pot metal not steel!
Lay the top housing on its back and place the round top gasket
into it's recessed area. See Fig. 14. Apply a
VERY THIN film of silicone sealant to both sides
of the oval paper housing gasket and place it over the thermostat. then place
the thermostat on top of the round gasket. Note: If
you don't put the round gasket on top of the thermostat, coolant will be allowed
to bypass the thermostat and the engine will not heat up properly. This will
also result in your heater not working very well.
Coat the entire length of the two cover bolts with anti-seize.
This will help prevent the cover from oxidizing to the bolts. Bolt the top
cover back on. Don't over tighten! Pot metal remember?
Prepping the block and installing pump
Fig. 15
Fig. 16
Fig. 17
Use a wire wheel on a drill and remove all the crud from
the block where the pump bolts up. Get it down to shiny iron! See Fig.
15.
Next use a 10mm x 1.5 tap and lube to clean out the pump
holes in the block. If your bolts were rusty then clamp them by their heads
in a vise and wire wheel then clean. Run a 10mm x 1.5 die down them to clean
them up. If you do this you will be able to finger tighten them. Coat the
threads with a good anti-seize so the next guy will have an easy time getting
them out. Set aside.
Remove the rag you stuffed in the hole awhile back. You'll
be sorry if you forget this ...
Apply a thin film of silicone sealant to both sides of the
pump housing gasket. Let it 'dry' for about 5 minutes then stick the gasket
to the back of the pump. See Fig. 16. Use a bolt
to help you align the pump to the block. Finger tighten all bolts. Now tighten
in a criss cross pattern to 12-16 ft lbs.
Loosely re-attach the hoses to the thermostat housing and
water pump.
Slip the belt over the water pump snout and route it around
the other pulleys.
Attach the fan and pulley to the pump. Use anti-seize on
the bolts. Slip the belt over the fan pulley.
Adjust the belt tension by prying against
the alternator to get a .28 to .39 " deflection of the belt measured
between the fan pulley and alternator pulley. Tighten the alternator bolts.
(It helps to have two folks here.)
If you flushed the block then put the heater hose back on
the T fitting.
Put the radiator back in place. Re-attach one end of the
support brace if you took it loose. You may have to have a buddy squeeze it
together while you put the other bolt in.
Attach the upper and lower radiator hoses leaving the hose
clamps loose then tighten down the radiator mounting bolts. Now tighten the
all the hose clamps.
Replace the fan shroud.
Pre-mix 2 gallons of anti-freeze to 2 gallons of clean water
in the 5 gallon bucket. This will give you a 50-50 mix. Depending on your
climate you can go down to 35% anti-freeze.
Take the heater feed line off the back of the head. See Fig.
5 above. This will allow air to escape the block and head. You DON'T
want air trapped in the head!
Make sure the block drain plug and the radiator drain stub
and plug are reinstalled. Check again that the hose clamps are tight.
Start pouring the pre-mixed coolant into the radiator. As
it starts filling the block there will be lots of burping of air out of the
heater feed port on the head, remember we blew ALL the water out so there
is lots of air! Take your time. When it stops burping and coolant starts coming
out then put the hose back on.
Continue filling until the coolant just covers the top of
the core in the radiator. If you fill it too full now when it burps it will
force coolant all over the place!
Start the engine and check for any leaks.
As the truck warms up and the thermostat opens air will work
it's way out of the heater cores, lines, block and head. Add coolant as the
level drops due to air pockets. The level will drop rapidly when the thermostat
first opens!
If you run out of coolant pre-mix (You made 4 gallons of
mix the coolant system actually holds 4.3 gallons) and live where the temps
NEVER get below zero then just add water to finish topping off. Toyota says
make a 35% mix of coolant to water for -4 degrees protection, since we used
50% then a bit of water to top off won't throw the mix off too much. If you
live in the north then you may want to mix up another gallon of 50-50.
Once the truck is fully warmed up verify that you are getting
heat from the heaters and you are not overheating. If everything is good then
fill the radiator to the bottom of the filler neck and install the new radiator
cap. Continue to let the truck run to build up system pressure. Monitor for
leaks.
Take the truck for a test drive and closely monitor the engine
temp. Horns blowing behind you are NOT a good sign! :-)
Don't forget to take your old anti-freeze to the recycling
center.