Home
Click on the pic to see a full size version of the pic then use your back button in your browser to return here...
My 3/83 425E Restovication
Disassembly/De-Rusting
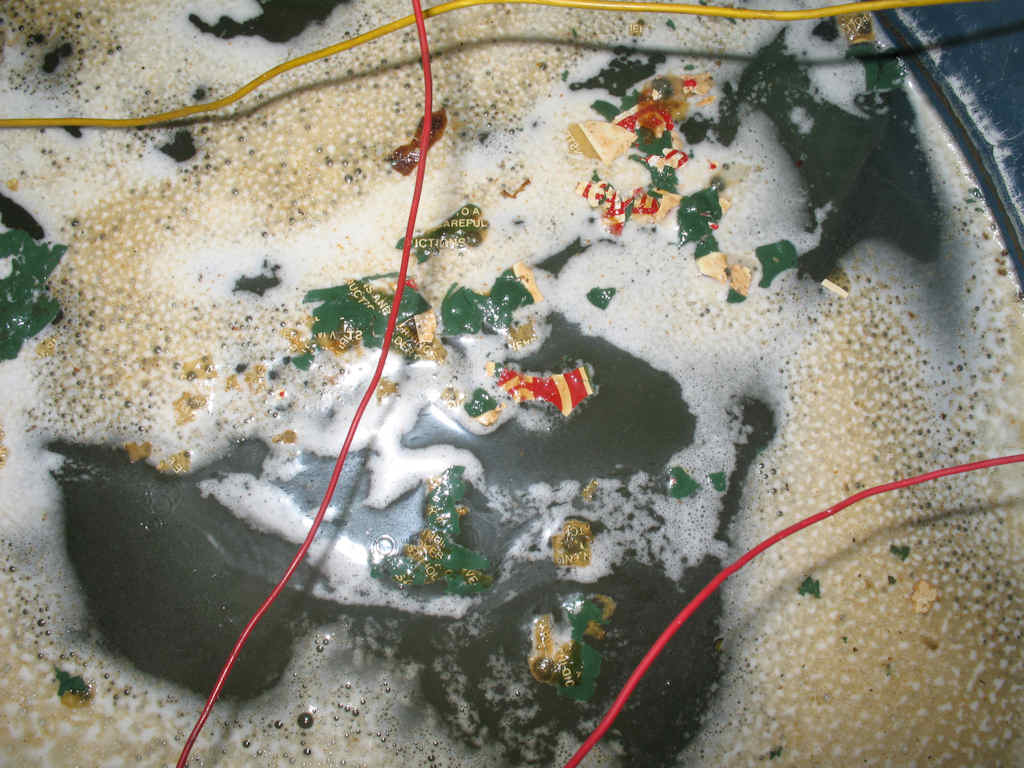
I acquired this 3/83 425E from my father-n-law maybe 15 years ago when he finally had to stop camping due to a back injury. The wife and I used it every year for camping and the occasional power outage until we bought a popup camper a few years ago. At that point, like thousands of these stoves across the country, it was placed in our storage shed and forgotten about. I got bit by the Coleman collection bug earlier this year, and decided that my first restore would be the old stove in the shed. I went to retrieve it and when I picked it up about three mice ran out of the side of it! Damn things had built a nest in it...
Fig. 1 What a mess... |
Fig. 2 Disgusting! |
Fig. 3 Can you smell it? |
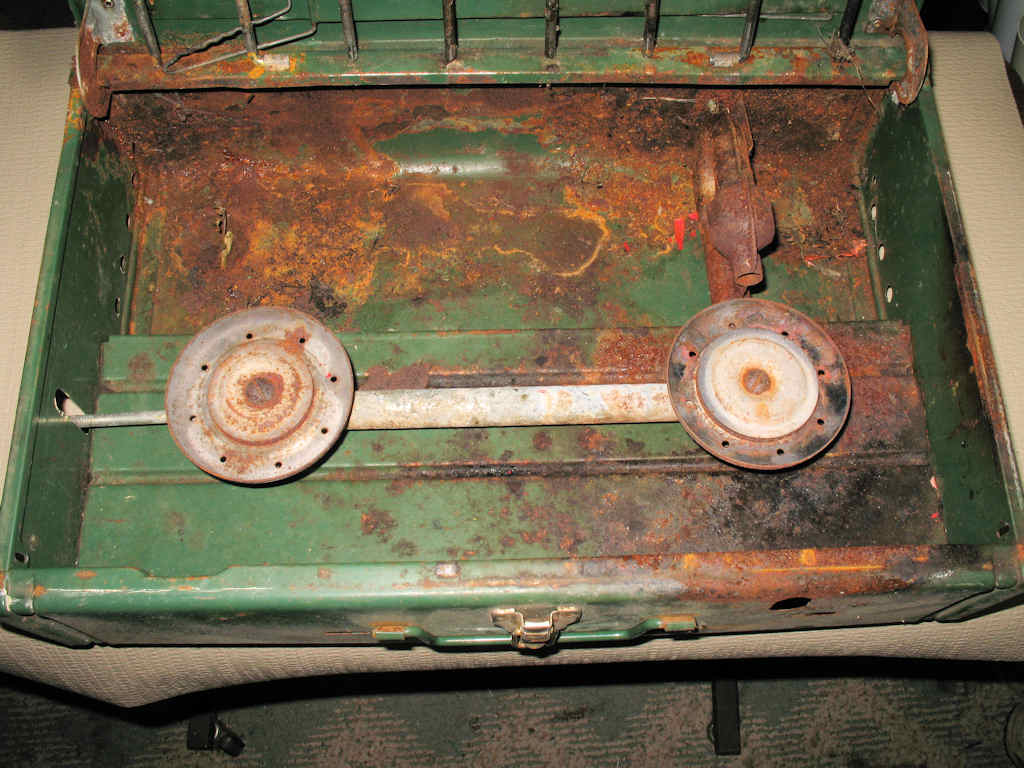
OK... There is nothing worse than mice pee/feces that has been sitting for months... We all know how acidic this mixture is. The stove was sitting upright and all the stuff had accumulated in the bottom. There were places where it rusted completely through. Well... I donned the gloves and respirator, took the stove to the outside water faucet, and proceeded to scrub it out best I could.
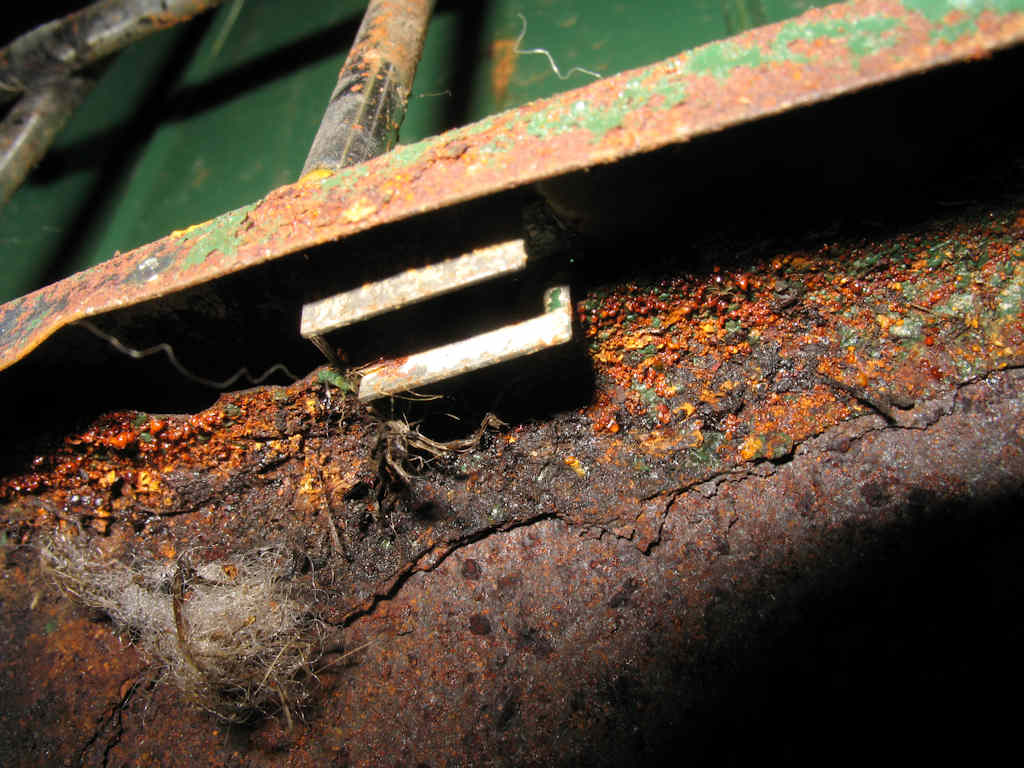
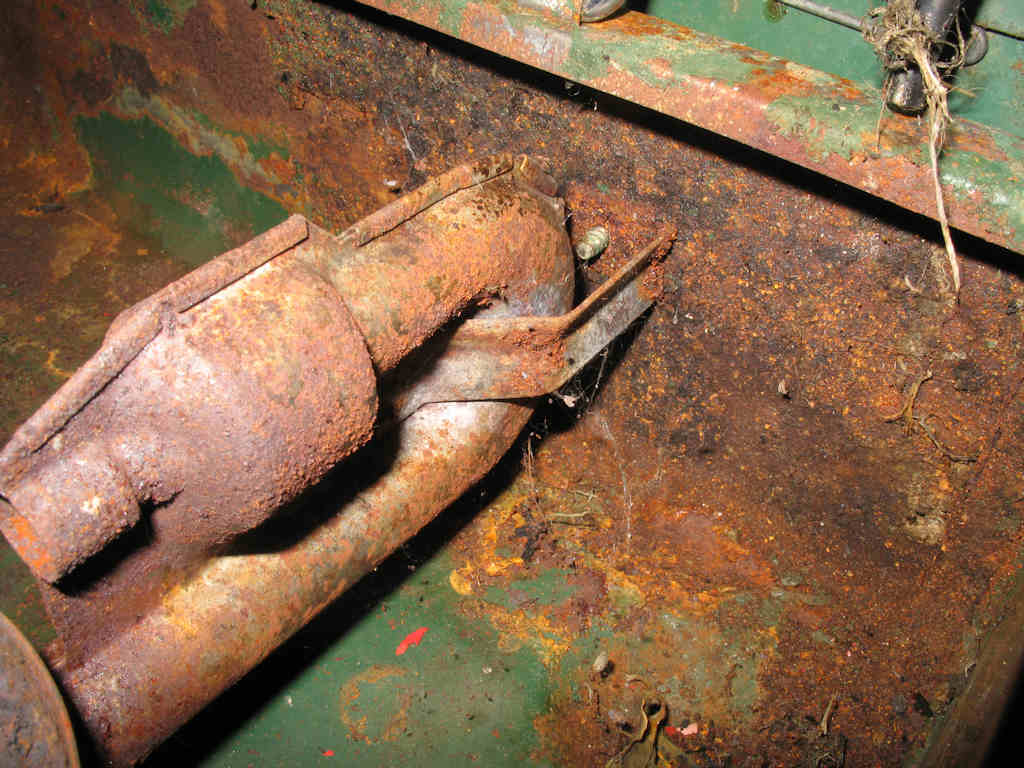
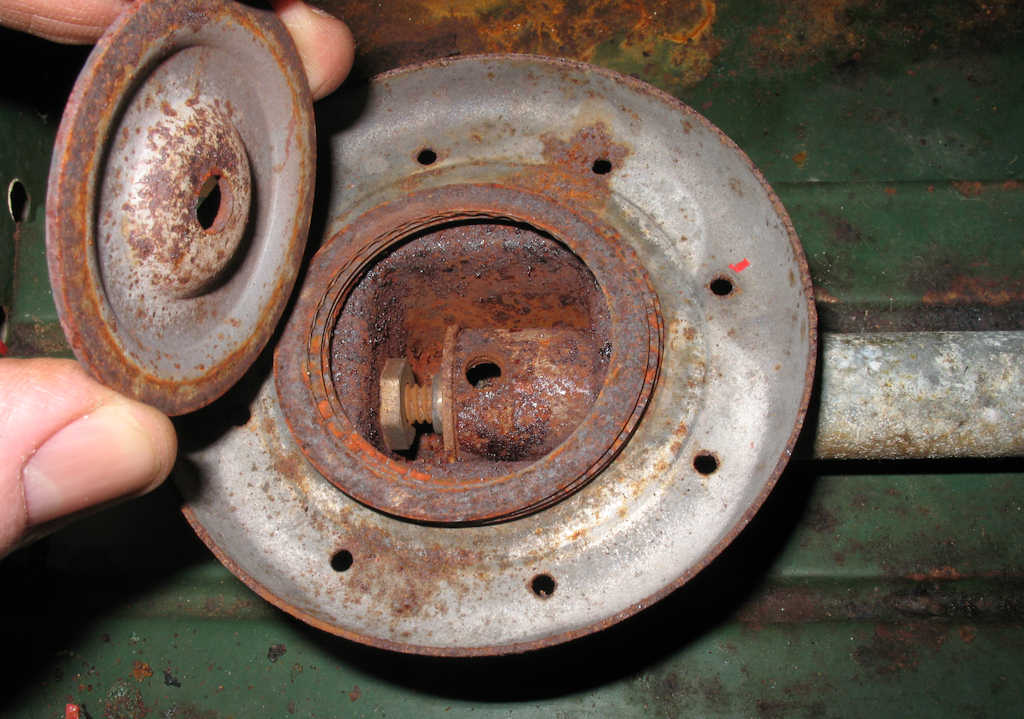
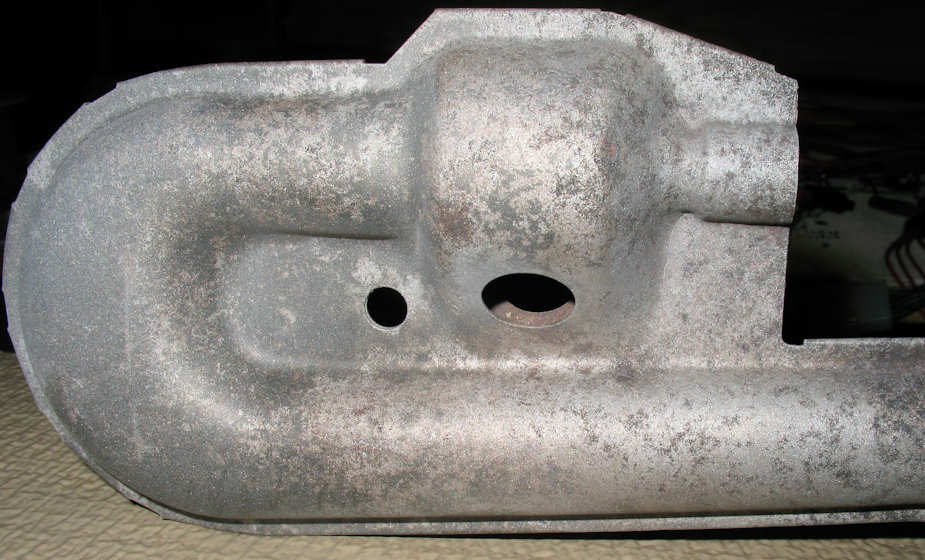
Now it was time to take it apart. I started by removing the 5 screws shown in Fig. 5-7. I thought the whole burner assembly and splash plate would just lift out but no, not that simple. (I know you experienced folks are laughing about right now, but this was my first disassembly of a 425.) I struggled with this for a few minutes then just bent the mixing chamber bracket shown in Fig.3 a bit and was then able to easily remove the entire assembly. Yeah then I saw the burner mounting nuts and the holes in the case to easily access them... Doh!
Fig. 4 Remove these nuts first!
|
Fig. 5 Remove these... |
Fig. 6 ...and these |
Fig. 7 ...and this one |
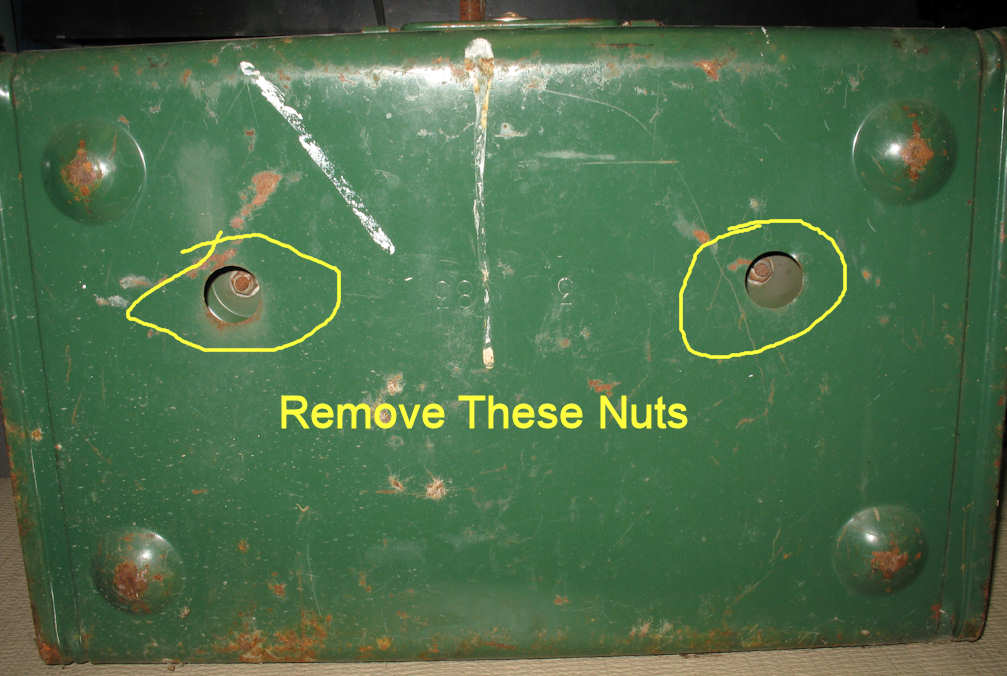
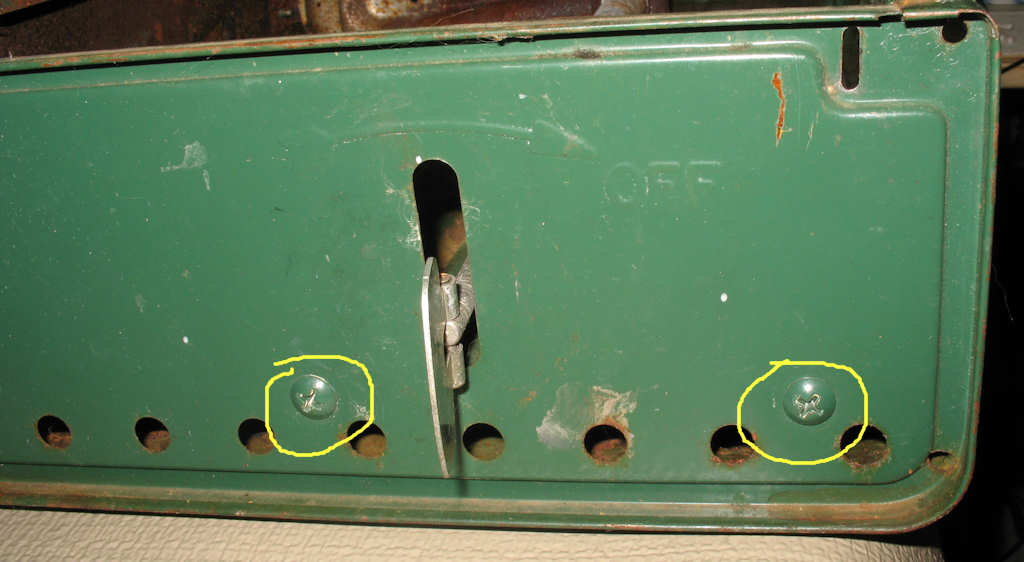
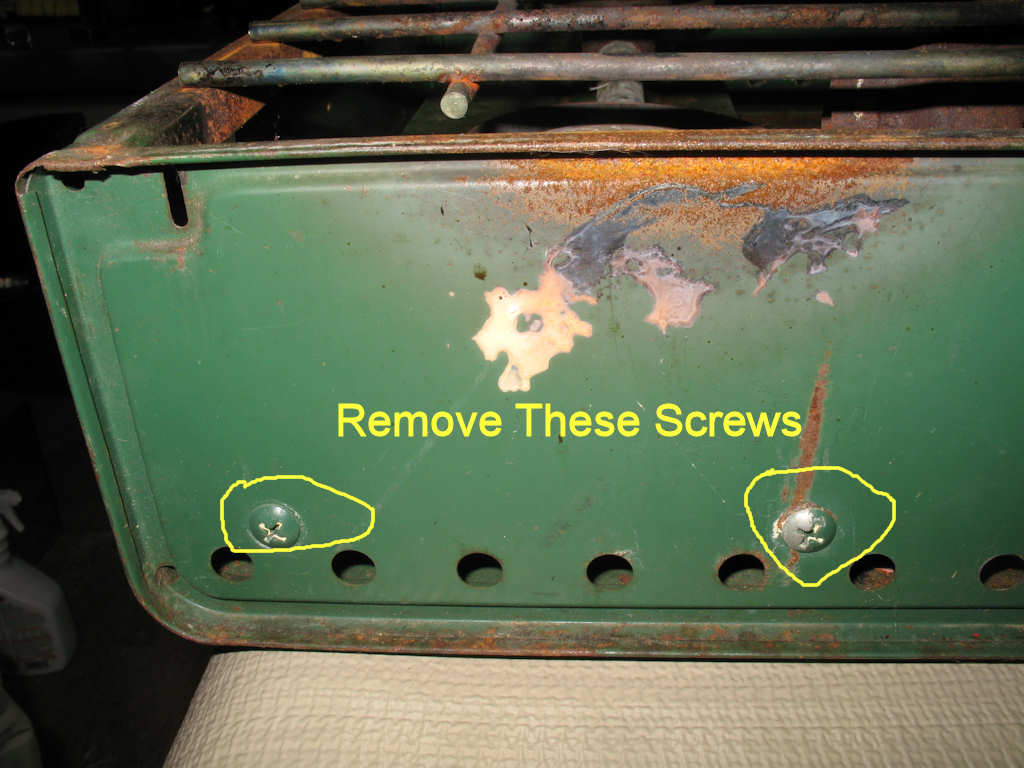
Anyway Figs. 4-7 show the proper sequence to remove the burner assembly and splash plate. Once the five screws and two nuts are out, just lift the burner assembly out, then the splash plate. Now we can get to the hard part: Removing the grate... I admit it! I just bent one of the grate legs to remove it from the clips holding it in place. Once the grate was out of the way I figured out how to remove the clips so now I can pass that on to you.
Fig. 8 Grate Holding Clips |
Fig. 9 Bottom of Grate Holding Clip |
Fig. 10 Clip Removed |
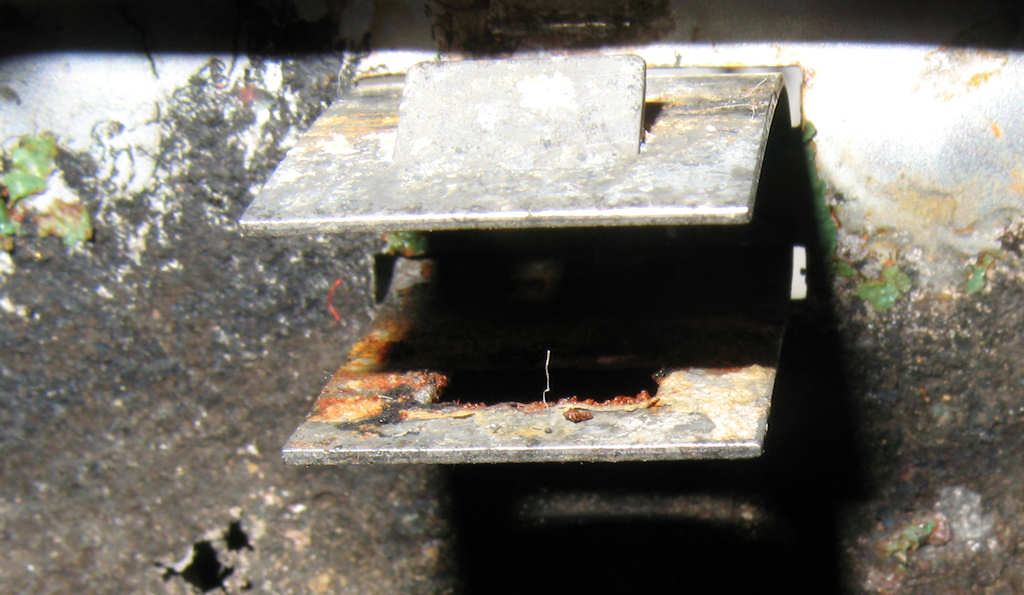
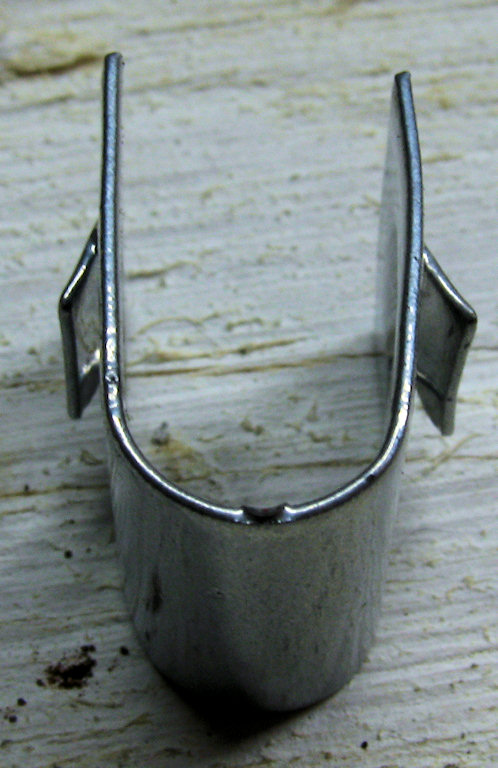
Fig. 8 shows the clips that hold the grate. Fig. 9 shows the bottom of the clip. It's a very simple concept, but a bit difficult to remove. I used a pair of needle nose pliers to first bend in the little "retaining flaps" on both legs of the clip, then used them to work the legs one at a time up through the case slots while compressing the flap. Once they are removed you can see the simplicity of the design. See Fig. 10.
Now you can remove the case lid. Again I had no idea how to remove this piece so just bent one of the legs sideways a bit and off the lid came!
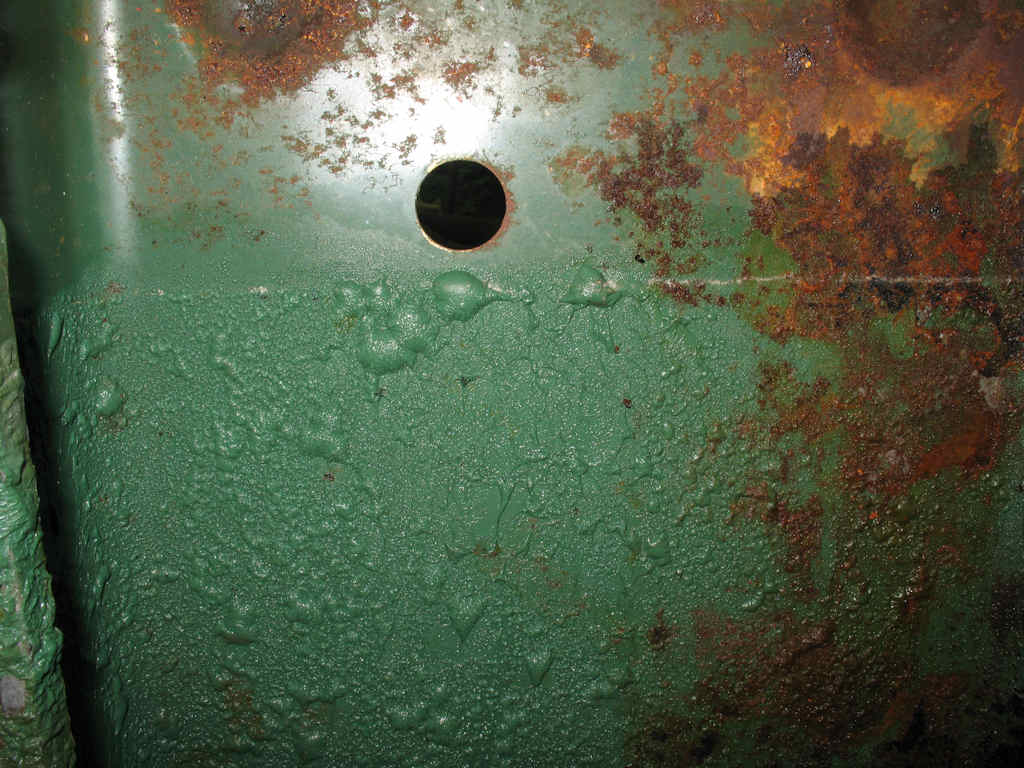
Now that the stove is all apart it was time to put it in my de-rust tank. What's a de-rust tank? Well it uses water, washing soda (Sodium Carbonate) and +12 volts DC to convert the rust on a steel or iron object into something that just wipes off. (Very over simplified explanation)
I have been using this method to clean parts for years on my old Toyota FJ40 Land Cruiser and made a web page detailing what all it can do: Electrolysis: Removing Rust with Electricity go there and read all about this process. Lots of pictures of parts before and after.
Fig. 11 See the Decals floating? |
Fig. 12 Paint Lifting |
Fig. 13 More lifting... |
Fig. 14 Pain/Rust Gone! |
So here are some pics of the process. Fig. 11 shows the case fully submerged and after about 4 hours you can see the decals floating on the top. Fig. 12-13 dramatically show how the process lifts the paint. You can see where the water line was in both pics. The paint just wipes off the case. Fig. 14 shows the completed case, but before I sand blasted it to remove the final bits of paint and scale. The top was also done with the same results. Sorry no pics of that...
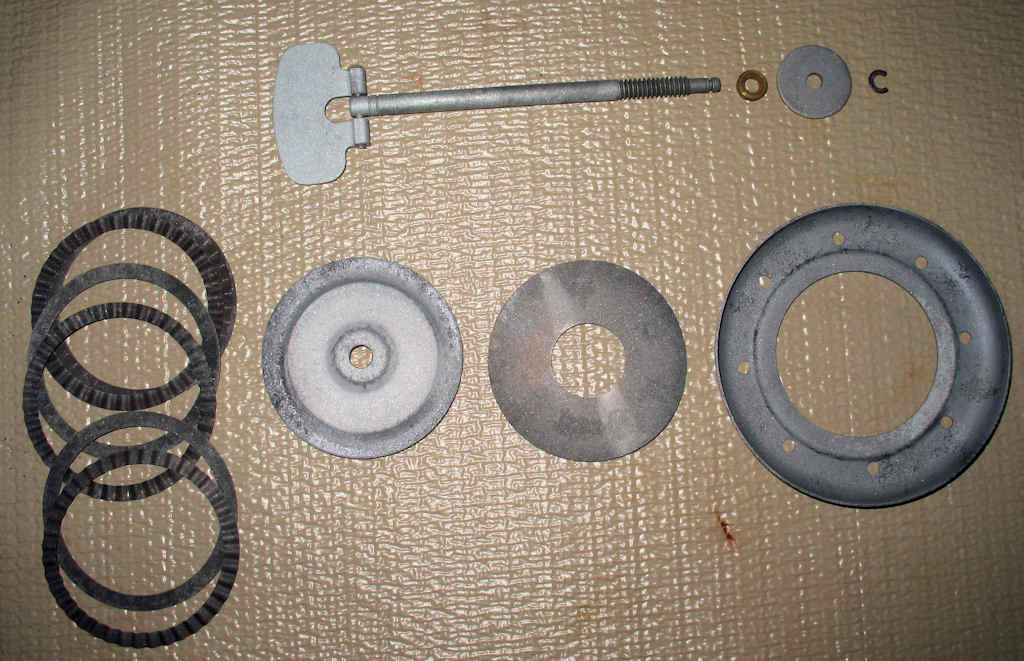
Fig. 15 Burner Ring Pack |
Fig. 16 Burner Disassembled |
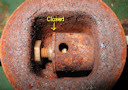
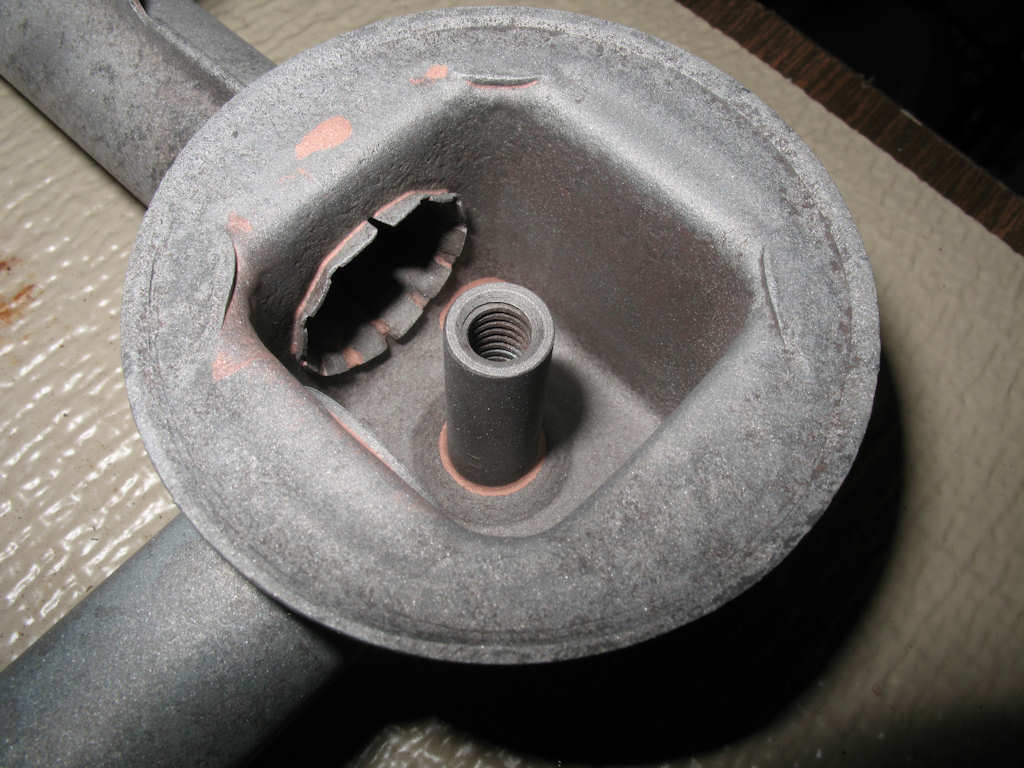
Fig. 17 Secondary Valve Closed |
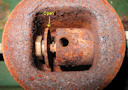
Fig. 18 Secondary Valve Open |
Fig.19 Secondary Burner Valve Assembly |
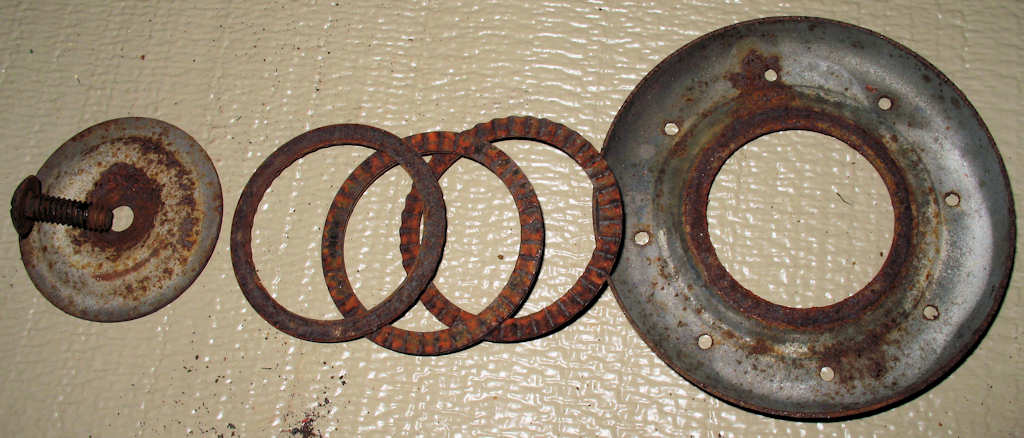

While the case was de-rusting I disassembled the burner assembly. First remove the screw from the top of the burner rings. See Fig. 15. Mine came right out. Now you can remove the burner ring pack. See Fig. 16. The pack consists of alternating smooth, then crinkled rings.
Fig. 17-18 show how the secondary valve works. The secondary valve is nothing more than a washer that is pressed against the end of the connecting pipe! Simple but effective. To remove the valve assembly it is necessary to remove a small C clip at the end of the valve stem. Once removed the valve can be unscrewed all the way allowing the sealing washer and a brass spacer to fall out. See Fig. 19.
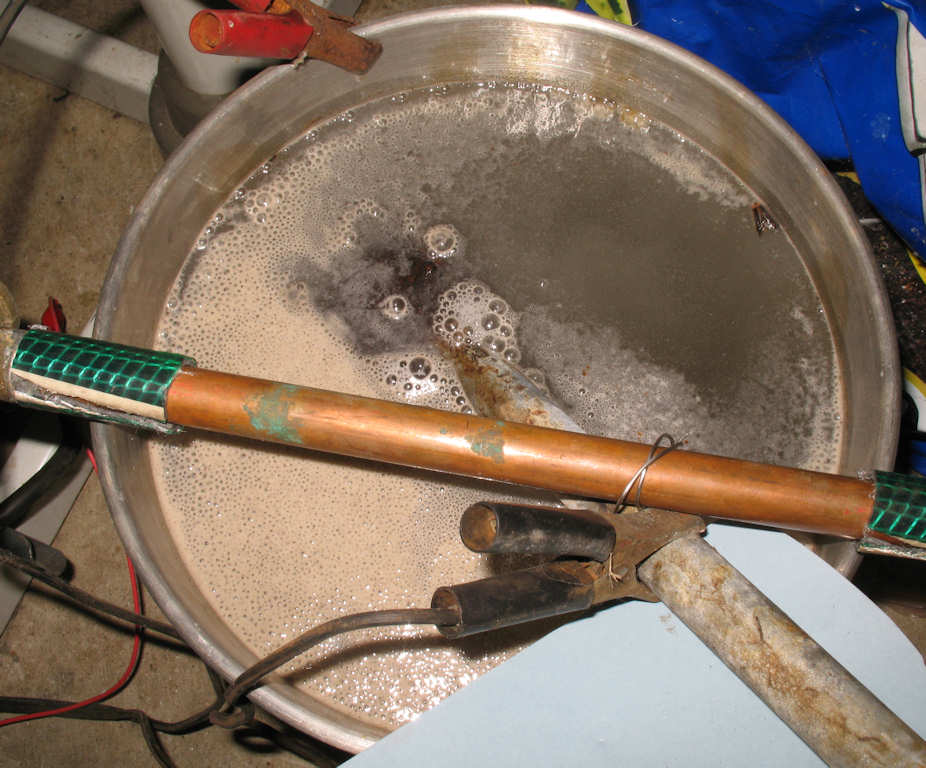
Now I could put the disassembled burner assembly into another smaller de-rust tank. See Fig. 20
Fig. 20 Burner assembly De-Rusting
|
After the burner assembly parts had de-rusted for a few hours I pulled them out, scrubbed them off let them dry them popped them into the sand blaster to remove any remaining crud. See Fig. 21-23. BIG difference in appearance!
Fig. 21
|
Fig. 22
|
Fig. 23
|
Freshly De-Rusted and Blasted Parts