DISCLAIMER
#1: Recently it came to my attention that some folks
feel there is a slight danger to using the following process to de-rust certain
components. Steering components, brake components or anything with bolts or
studs under tension. There is a little understood phenomenon called Hydrogen
Embrittlement that occurs during chrome plating and other types of electrolysis.
It basically can weaken a metal by introducing hydrogen atoms into the metal
matrix. I am not a metallurgist so I am NOT qualified to even give an opinion
on this matter one way or the other. However, after reading the information
I came to the conclusion that this is not much of a factor in what I am doing.
It appears to be more of an issue when Chrome Plating a part than de-rusting
a part. Regardless my advice is this: Follow the links provided below, read,
and make your own decision. Do any of the following at YOUR OWN RISK! I take
no responsibility for anything that may result from this procedure.
DISCLAIMER #2:
If you use stainless steel as your cathode when setting up a tank you are
creating another hazard that you may not be aware of: Hexavalent Chromium
... What is this? Read about it here
For your safety and others use
normal steel for your cathode. This allows you to just dump the water on the
ground or down the drain assuming there are no other contaminants in the water
like paint or solvents off the parts.
Funny but potentially
dangerous story : About a month ago I was in the basement getting
ready to pull a batch of small parts from the de-rust tank. The tank is a
large uncovered plastic tub about 28" across. I had 10 small metal parts
suspended in the solution by clip leads from a 2" piece of strap metal
that goes across the top of the tank. The total current draw with this many
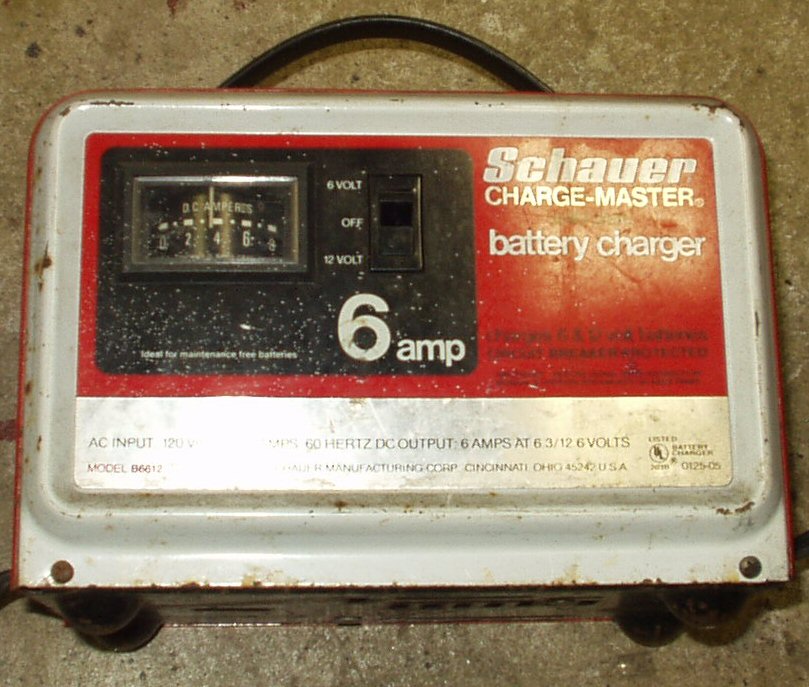
pieces is about 2 amps. If you have seen my web site you know I have two ways
of powering the tank. One is a small battery charger good for up to 8 amps
and the other is an adjustable power supply good for 4 amps. They sit side
by side on the floor so I can reach over and quickly turn them off when I
need to pull a part out to check it's progress. When the de-rust tank is in
use with a lot of parts a thick layer of nasty rust colored, slimy 'foam'
develops on top of the solution. I also know that when the process is working
that Hydrogen and Oxygen are produced. Several times I have taken an open
flame and put in the tank just to see if the hydrogen would burn. Not once
had I even got a sputter.
Well this batch of parts were
done so I reached over and turned off the adjustable power supply, grabbed
the strap metal and started raising it out of the solution with the parts
suspended from it. Next thing I know I hear a sharp report almost like a gun
shot sound and I'm suddenly and completely covered in the rusty slimy foam
from the tank! The damn thing had exploded! It did not burn me at all it just
threw that nasty foamy stuff EVERYWHERE! About a 10' diameter circle and straight
up to the underside of the floor were covered... After cleaning my drawers
and getting it out of my face and hair I went back to the tank to determine
what had happened. Took about 3 seconds to realize that I TURNED OFF THE WRONG
POWER SOURCE! I had left the adjustable supply on by mistake. When I pulled
the parts out one of the swung over and shorted against the cathode. The resulting
spark ignited that harmless 'foam'! Later experimentation showed that the
foam is mostly hydrogen gas! I guess the dirt,grease and oil from the parts
(yes I do clean them but in a kerosene tank)make a film that allows the foam
to form using the hydrogen and oxygen bubbles. The perfect combo for an explosion...
Oh you may be wondering why it did not explode the times I had an open flame
in there? I had only done this early in the cycle BEFORE the foam developed.
Well there is my story. I changed
my hookup to include a terminal strip with an on/off switch. I now turn that
off which turns off BOTH power supplies.
Be careful with this stuff!
Rust Removal Via Electrolysis
While researching rust removal techniques I came
across a reference to using electrolysis. This sounded promising and easy
so I continued to inquire into it. I located several sites that told how simple
it was and came home one evening and built a small tank.
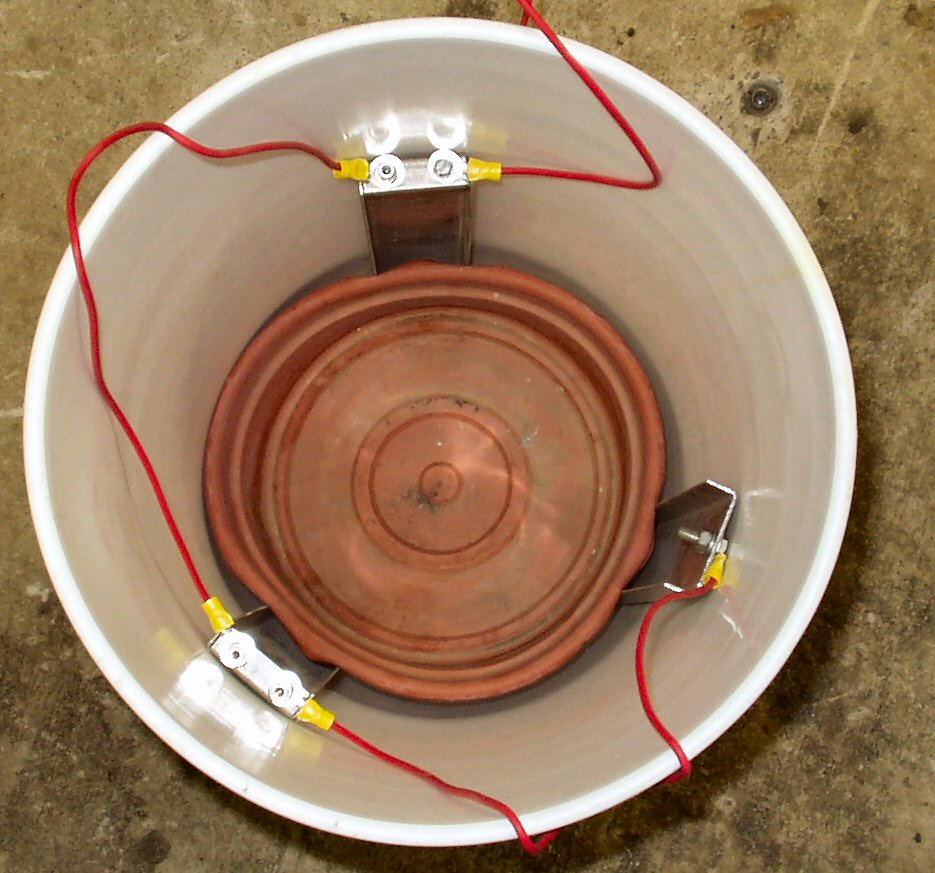
Fig. 1
My 1st Tank
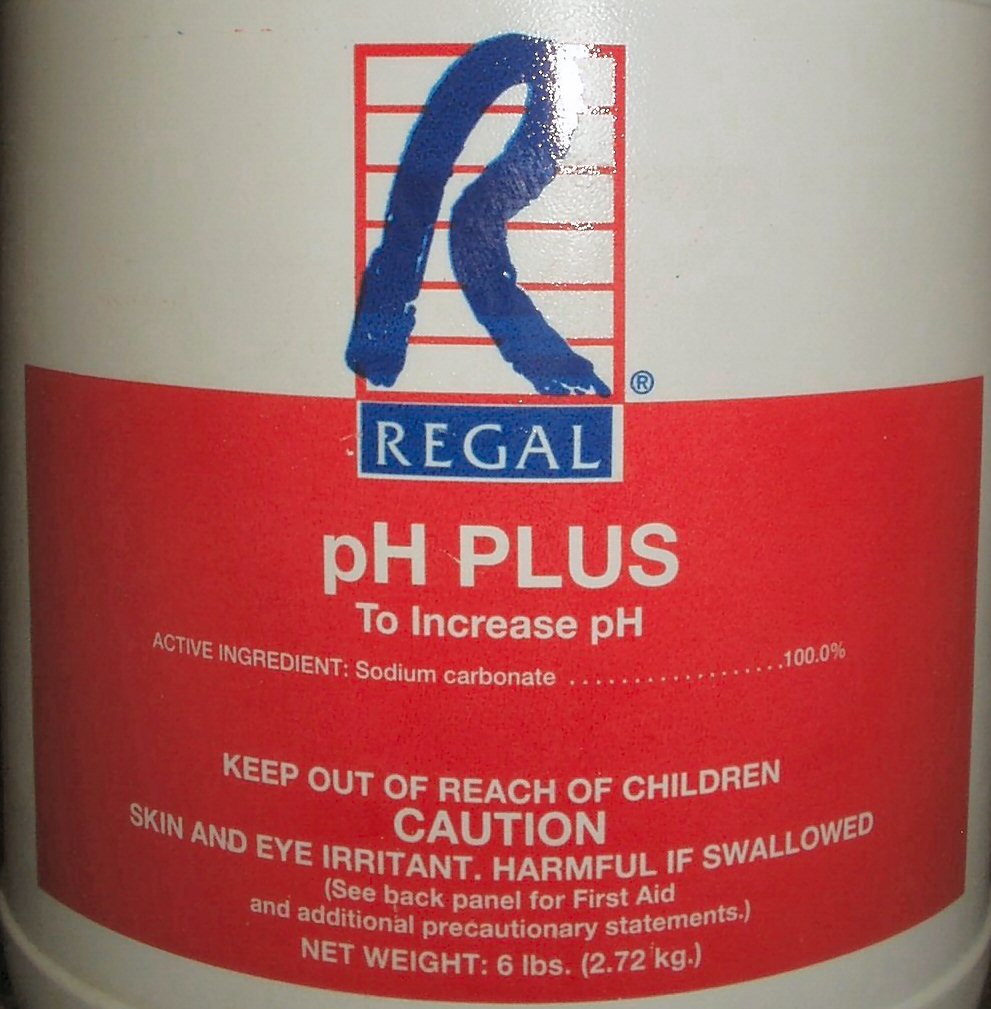
Fig. 2
ph Plus (Sodium Carbonate)
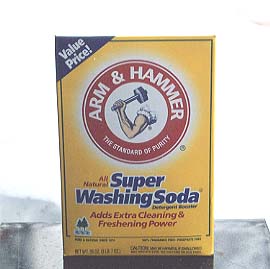
Fig. 3
Arm & Hammer Washing Soda
I used a 5 gallon bird seed pail, three 12"
x 2.5" pieces of stainless steel channel I had laying around, some 12
gauge wire, a bottom of a flower pot to hold the stainless in place and an
eight amp battery charger with a current meter. I also bought a 2 lb box of
Arm & Hammer baking soda. See Fig. 1 above
for the tank.
Fig. 4
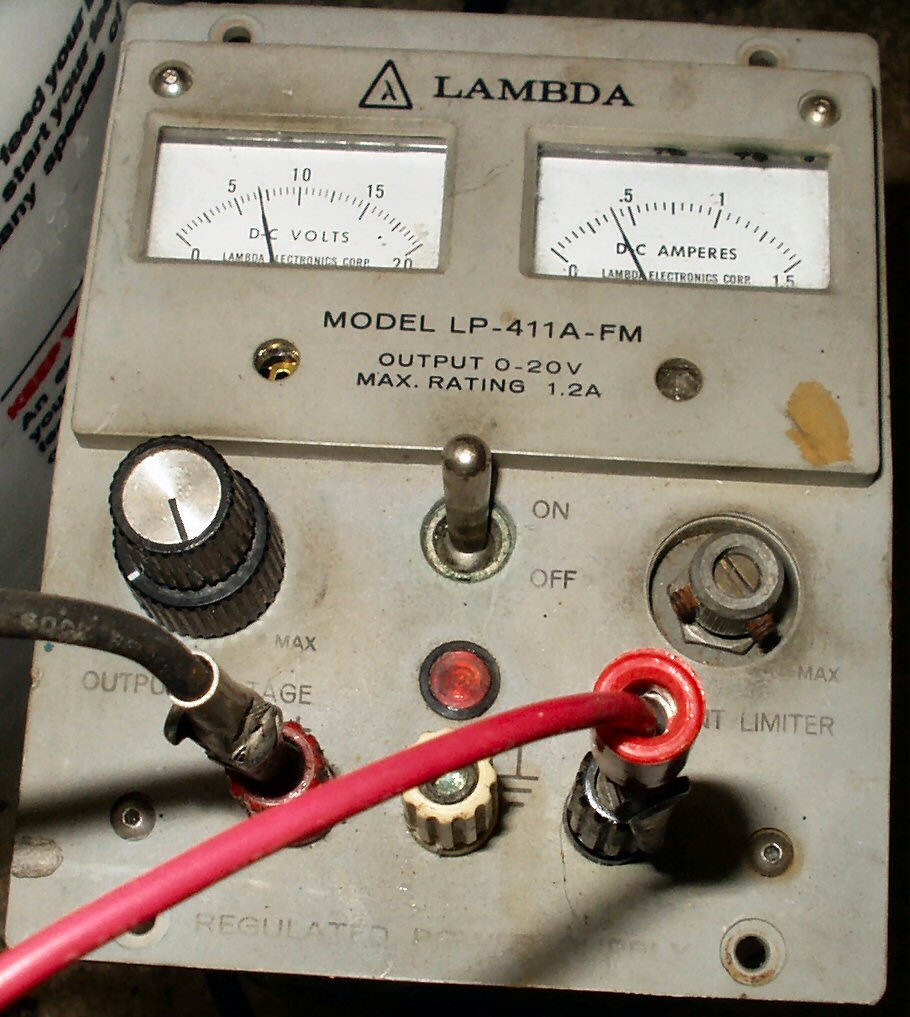
First try: 8 amp Battery Charger then the regulated power
supply
Fig. 5
First use!
I used 4 gallons of hot water with a table spoon
of straight baking soda per gallon as I could not find the Soda Wash that you
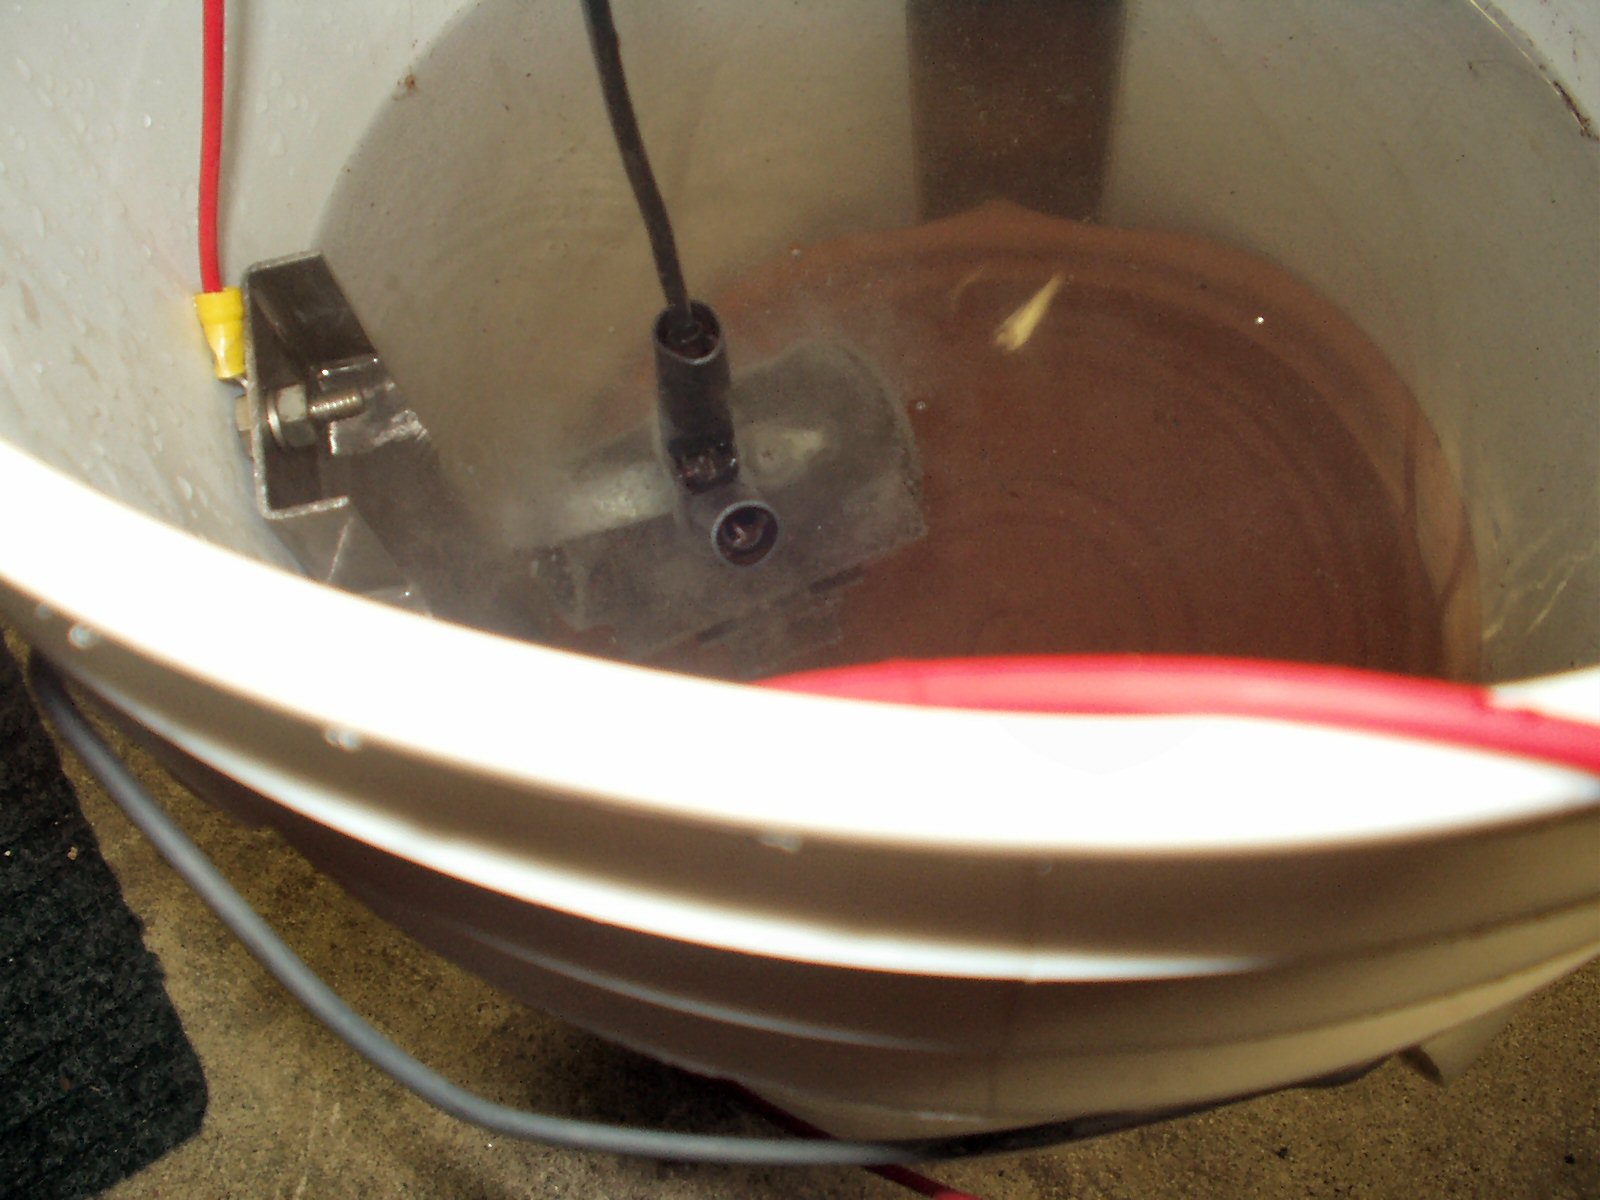
are supposed to use. I hooked up a wheel cylinder from the FJ40 and as you can
see in Fig. 3 it fizzed nicely! After about 30
minutes I pulled it out and it was definitely working. I then played around
with moving the electrodes closer to the cylinder. The closer you moved it the
more current was drawn from the charger and the greater the fizzing.
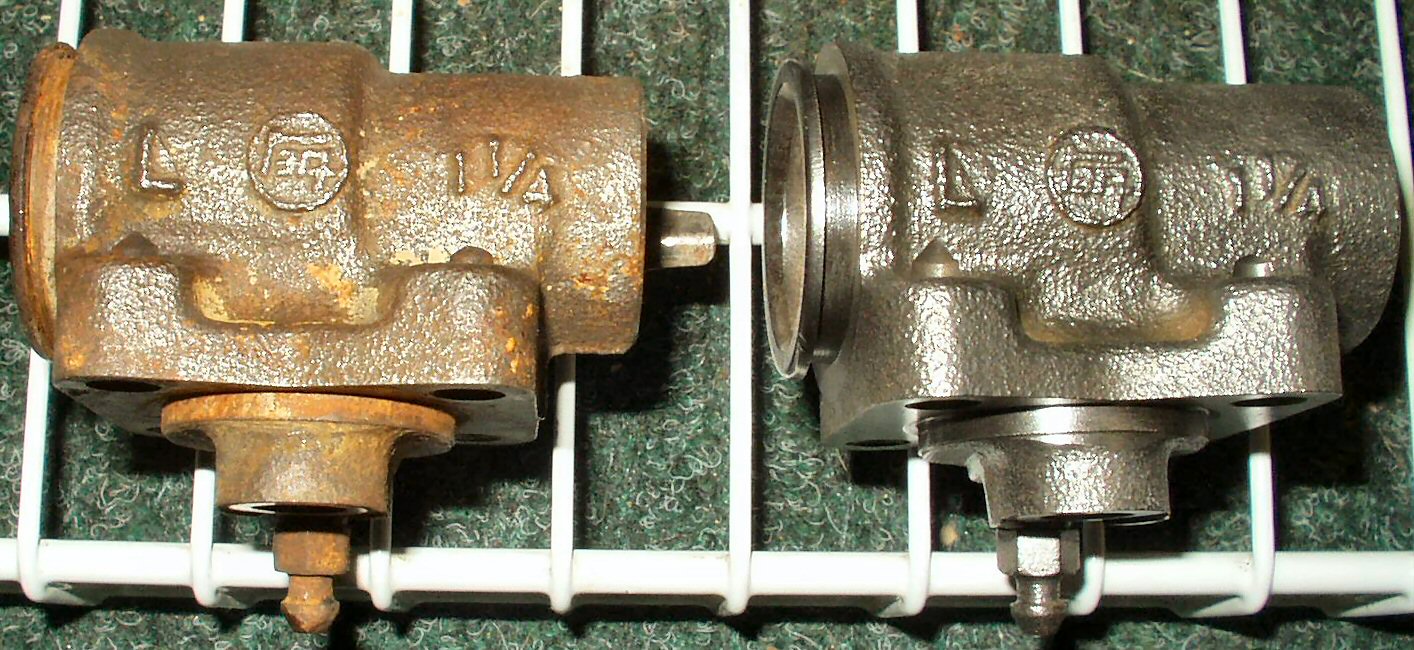
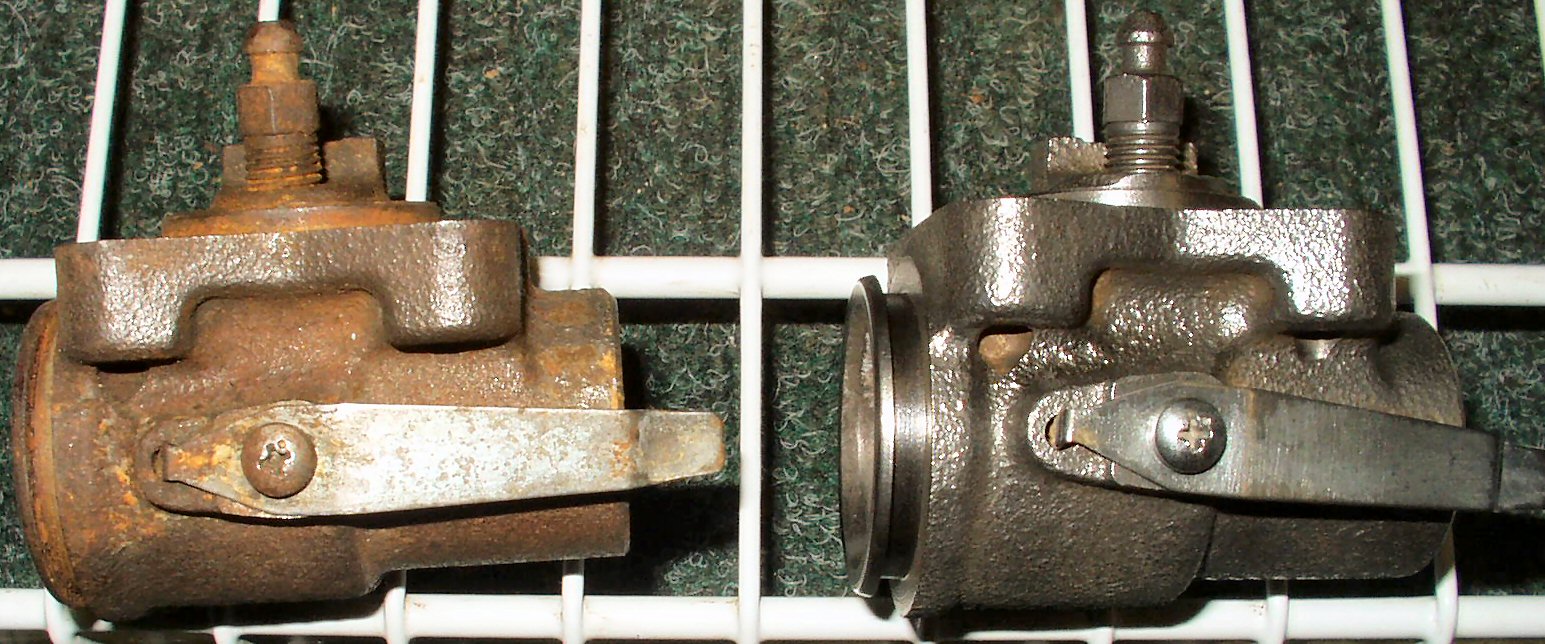
I left it in overnight then pulled it out and scrubbed it
off with a tooth brush and soap then spent just a minute with a wire wheel
to remove the white stuff ... See Fig. 6 for
the results.
Fig. 6
The Morning After
What is Actually Happening in the Tank?
Magic? No it's actually a little more complicated
than that. As stated above, I'm not a chemist so you will just have to read
all about it here.
**Update 5-19-2005 ** Washing Soda
Vs. Baking soda
I finally found a local source for pure Sodium
Carbonate and ran a quick test to see if it is in any way superior to the baking
soda (Sodium Bicarbonate).
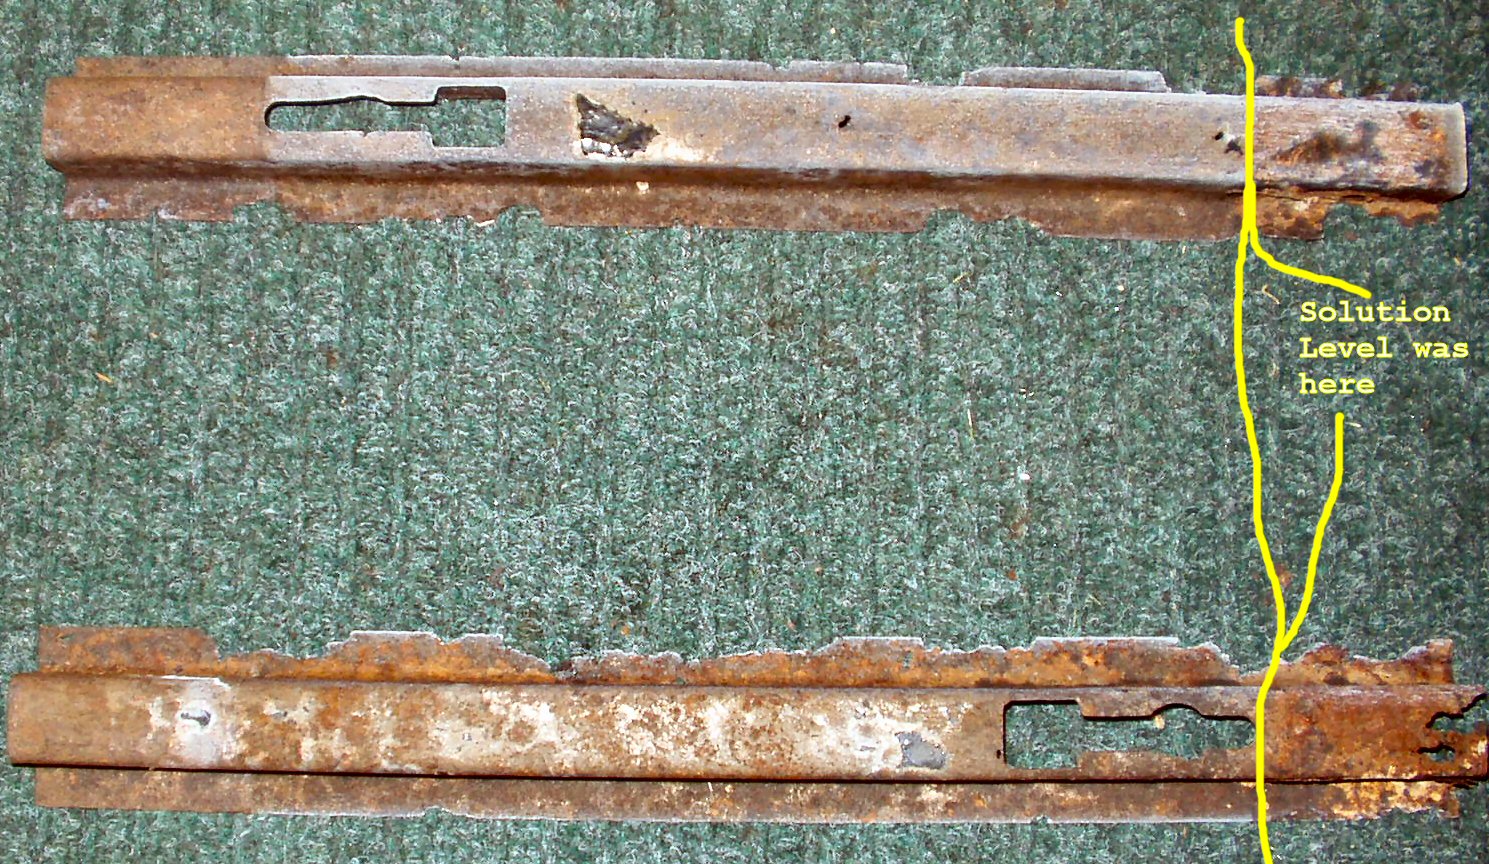
Fig. 7
Rusty Running Board Supports
Baking Soda Test
Fig. 8
Pure Sodium Carbonate Test
Fig. 9
There is a difference!
Fig. 10
Test #1
I used two identical pieces of badly rusted metal
(running board support brackets from my FJ40 See Fig.
7). I put the first piece in my existing baking soda bucket (See Fig.
8) for 12 hours then removed it. I used just a tooth brush and water
and scrubbed the part. About 70% of the rust had been converted and just brushed
right off. In the corners of the folds there was still rust that had not been
converted. I set the part aside to dry.
I then emptied the bucket, cleaned it thoroughly, added 5
gallons of fresh water then 5 tablespoons of pure Sodium Carbonate. I mixed
it up and then put the anode and the other support in it. See Fig.
9. This part was also left for 12 hours. Again I used a tooth brush
to clean the part. About 90% of the rust was converted and the residue came
off just a bit easier. Fig. 10 compares the two
brackets.
Conclusion: There is a big difference between these two! Faster
rust removal/conversion and easier final clean-up.
Test #2
This is an engine side cover that had been degreased in my
kerosene based parts cleaner. It was rusted a bit, had paint on it in most
places and the inside had that layer of brown oil sludge that you can never
get off. It also still had most of the cork gasket stuck to it. See below
for the result in the Sodium Carbonate tank after just 24 hours! Compare Fig.
11 to Fig. 12 and Fig.
13 to Fig. 14. Made a believer out of
me! All I did to this part was use a scrub brush and some soap, no wire brushing!
Note also that the cork gasket just came right off with my fingers! There
was still a bit of cement left but I know a wire brush will take that right
off.
Front Before
Fig. 11
Front After
Fig. 12
Back Before
Fig. 13
Back After
Fig. 14
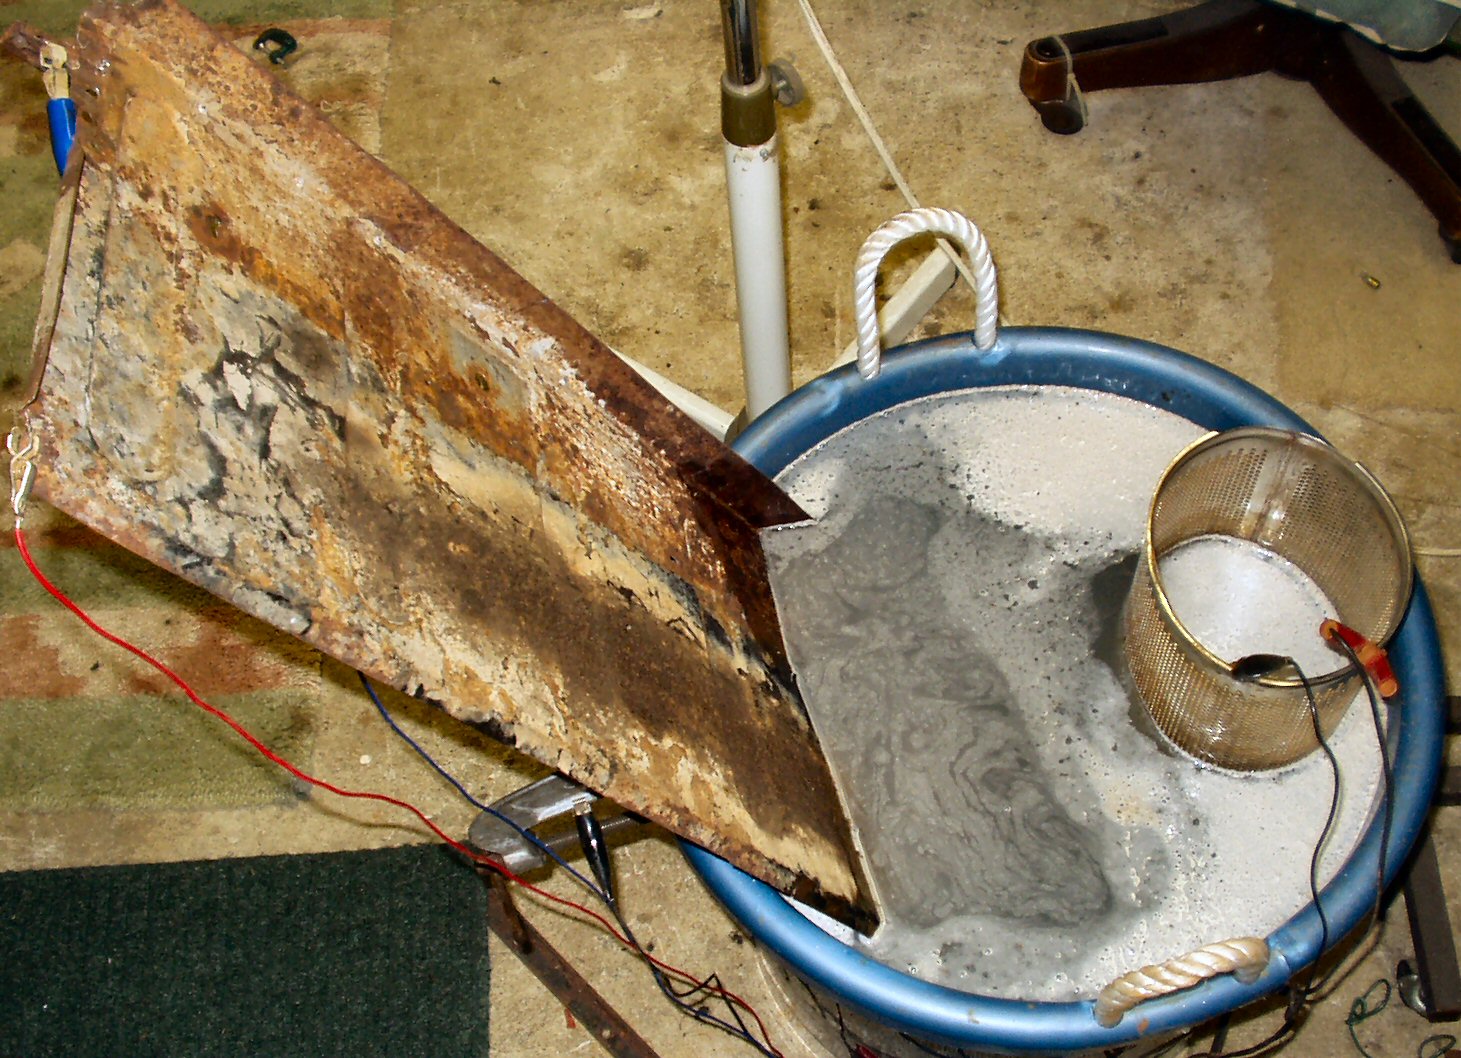
Fig. 15
Wheel Well Side
Fig. 15 shows the paint
lifting that occurs while in the tank. This is a wheel well side panel that
was half in and half out. You can clearly see where the paint has started
bubbling off. Note: Paint that is adhered firmly will NOT lift off! You will
still have to grind off any paint that remains.
Tips for anyone wanting to build
their own De-Rusting System
DO NOT use this method of
de-rusting on aluminum parts or parts that contain aluminum or magnesium!!!
They will be eaten away VERY quickly! Chrome plated parts will likely
have the chrome peel off. Copper parts will also be eaten, though not
as fast.
Use as much steel as possible
for the anodes. Ideally you would have a steel cylinder or pipe as big
as your container. Or if your container is square then you would line
the sides and bottom with interconnecting plates of steel. Connect
the steel pieces with stainless wire NOT copper if the leads will be
in the solution!
Fill your container with water until
you are about 2" from the top of your steel. DO NOT submerge
your copper leads if that is what you used! They will quickly corrode
and
will actually deposit copper onto your steel or iron piece. This will
result in two dissimilar metals in contact with each other and
guess
what? The steel will rust even faster once removed! Keep the leads
out of the water..
Add a tablespoon of baking soda (Sodium
Bicarbonate) or much preferred, Soda Wash (Sodium Carbonate) for each
gallon of water. Arm and Hammer Soda Wash should be available at your
local store or you can get a PH enhancer from your local pool or spa
supply company that is 100% pure Sodium Carbonate. I finally found
a product called ph Plus made by Regal in a 6 lb container for $8.95.
See Fig. 2.
Connect the + lead of the charger or
power supply to the stainless or iron in the bucket. This is the
+ Anode.
Connect the - lead of the charger
or power supply to the part being de-rusted. Use a file or wire
brush to get down to shiny metal to ensure good contact. DO NOT
get these leads reversed or you will DESTROY your part!!! Your part
is the Cathode or - side.
Suspend your part into the solution
with a steel wire (preferably stainless) so that it is equidistant
from all anodes. This ensures equal current flow to all areas
of your part. Note: Russ Kepler on the TLCA board suggested
the following 'I'd suggest using a 316L wire, very low corrosion,
strong, and makes a decent fill wire when you're welding. This
wire can be gotten fromMcMaster-Carr
or MSC. Also use
steel alligator clips not copper or copper plated ones.
The larger the part, and the
thicker the rust layer, the longer you need to leave it in the
solution. I just make a habit of leaving all parts in the tank
for 24 hours then checking them. I turn the part every 8 hours
so that all areas are exposed to the anodes. Note that if you
have all the sides of your tank covered with anodes then you
will not need to turn the parts.
After each run pull your anodes
out and scrub them with a stiff wire brush to remove the 'rust'
coating. Stainless steel can go two or three batches before
cleaning. Iron or mild steel plate will develop an ugly rusty
black coating that must be removed between each batch or the
efficiency will be GREATLY reduced. Make sure to scrub them
well, this coating will reduce the flow of electrons!
If your parts are extremely rusty
then the rust will fall to the bottom of the tank and accumulate.
You will need to empty it every now and then to keep the rust
from shorting out your part to the anode.
Wear gloves anytime you are handling
the parts or the solution! If the Hexavalent stuff is true then
it's
some nasty stuff. It's just a good idea regardless when messing with
chemicals. Not to mention that the black magnetite produced as the
rust is converted does not want to come off your hands easily.
Once you pull your part out of the solution,
scrub it down with a stiff brass wire brush and soapy water to remove
the loose magnetite,
dry it with a hair dryer or heat gun, go over it with a brass wire
brush on a drill if it needs it then immediately prime it, powder
coat
it or
spray oil on it. If you fail to do this the part will flash rust in
front of your eyes! Note: Russ Kepler also mentioned a couple
of products to help stop the flash rust: Boeshield and LPS-3. Just
don't forget to clean this coatings off before final finish!
Some examples of what this
process can do
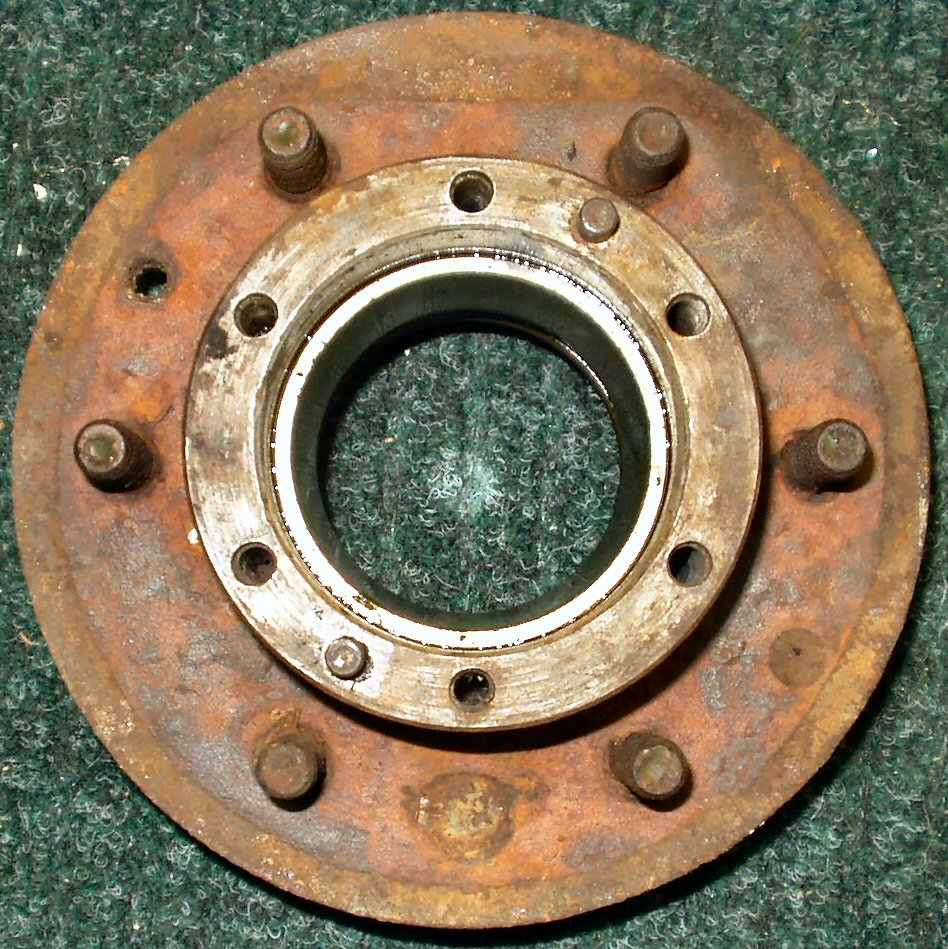
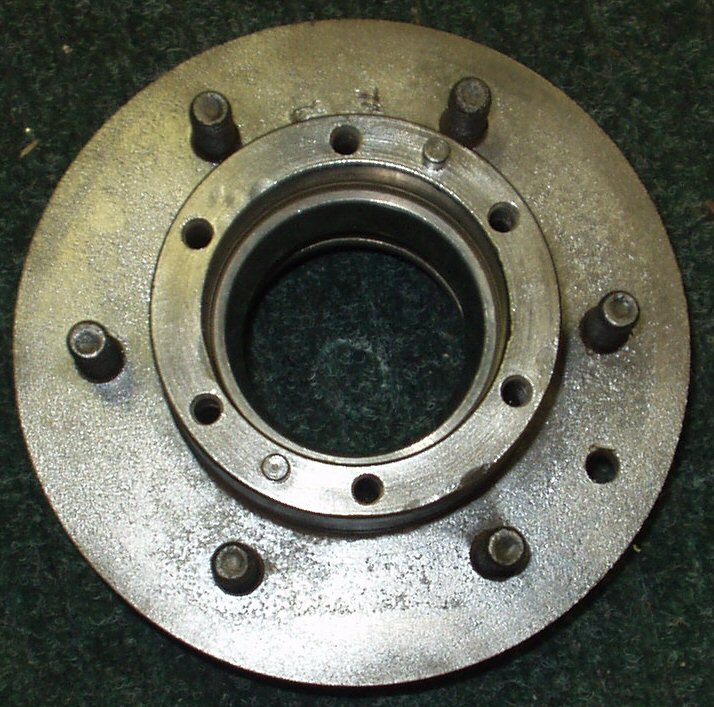
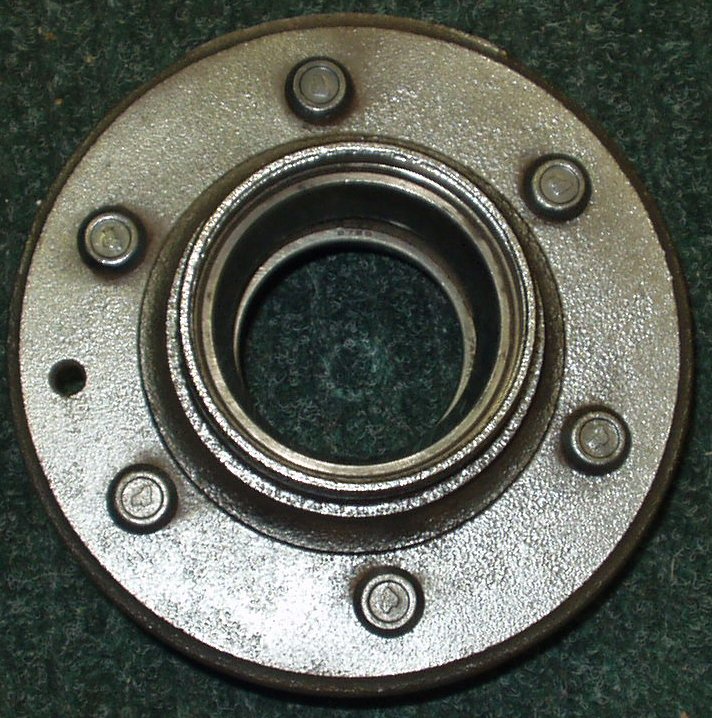
FJ40 Hub
Fig. 16
Before and after
Total time in the solution was 24 hours.
Scrub with soap and water then one light pass with a wire wheel. These
results are just too cool!
The Drag Link Box
Fig. 17
Box for Drag Links
I built this box to do the short drag
links/tie rods. It's just a long cardboard box, lined with a garbage
bag, lined with sheet metal from an old computer tower case.
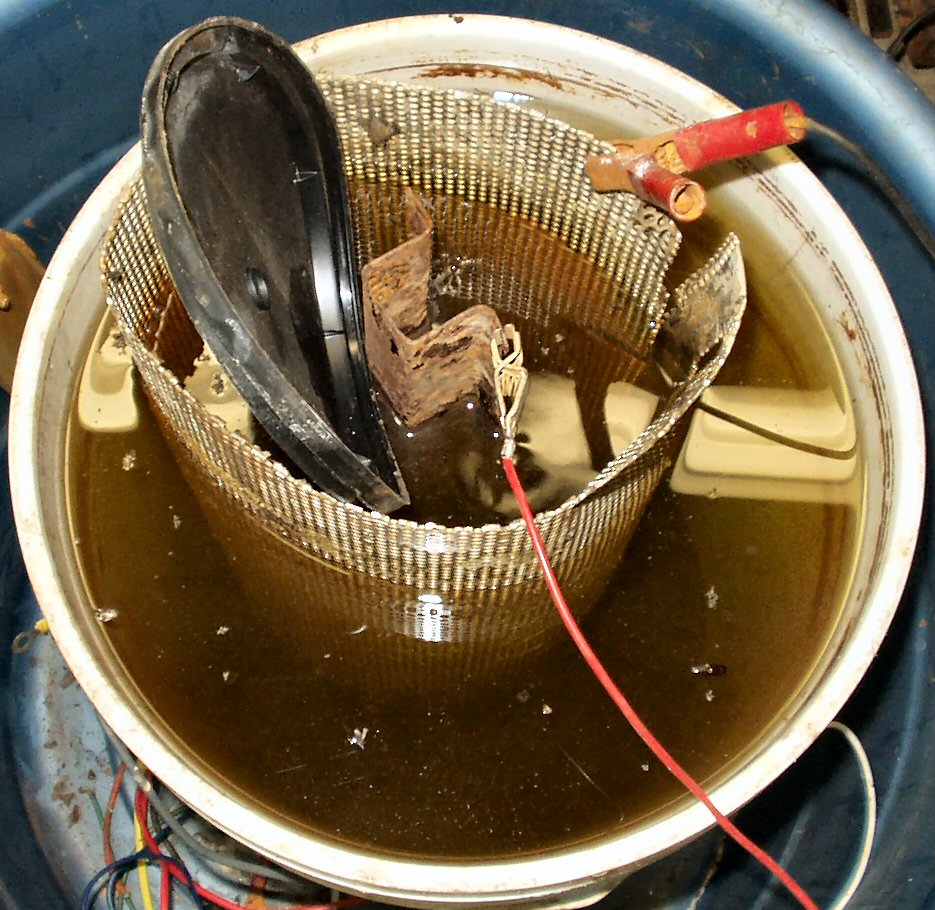
Fig. 18
Drag Link in the box fizzing away!
Since I was using my current regulated
supply for the bucket I hooked up the Battery Charger again to power
this box. Due to the boxes smaller size (parts are much closer to
cathodes and larger surface area of the cathodes) the current was
over 8 amps! This was way too high and resulted in very vigorous fizzing.
I set it to 6 volts which dropped the current to about 4 amps, still
to high. So I hooked a 12 Volt lamp in series which dropped it down
to about amp. Perfect ... The orange caps on the ends of the drag
link insulate it from the cathodes.
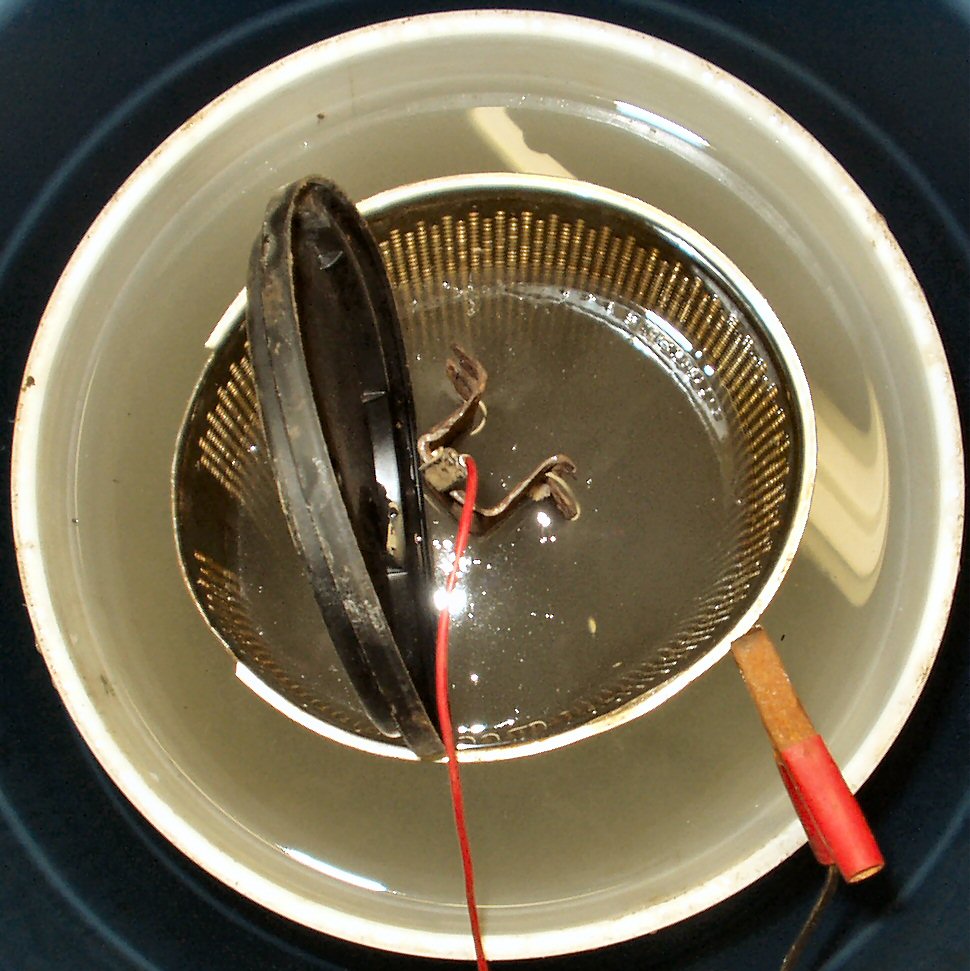
Fig. 19
Blue light Current limiter
Here you can see the limiter in action.
This was taken 1 hour into the session. Note the solution has already
taken on a rust colored tint.
Fig. 20 Fig.
21
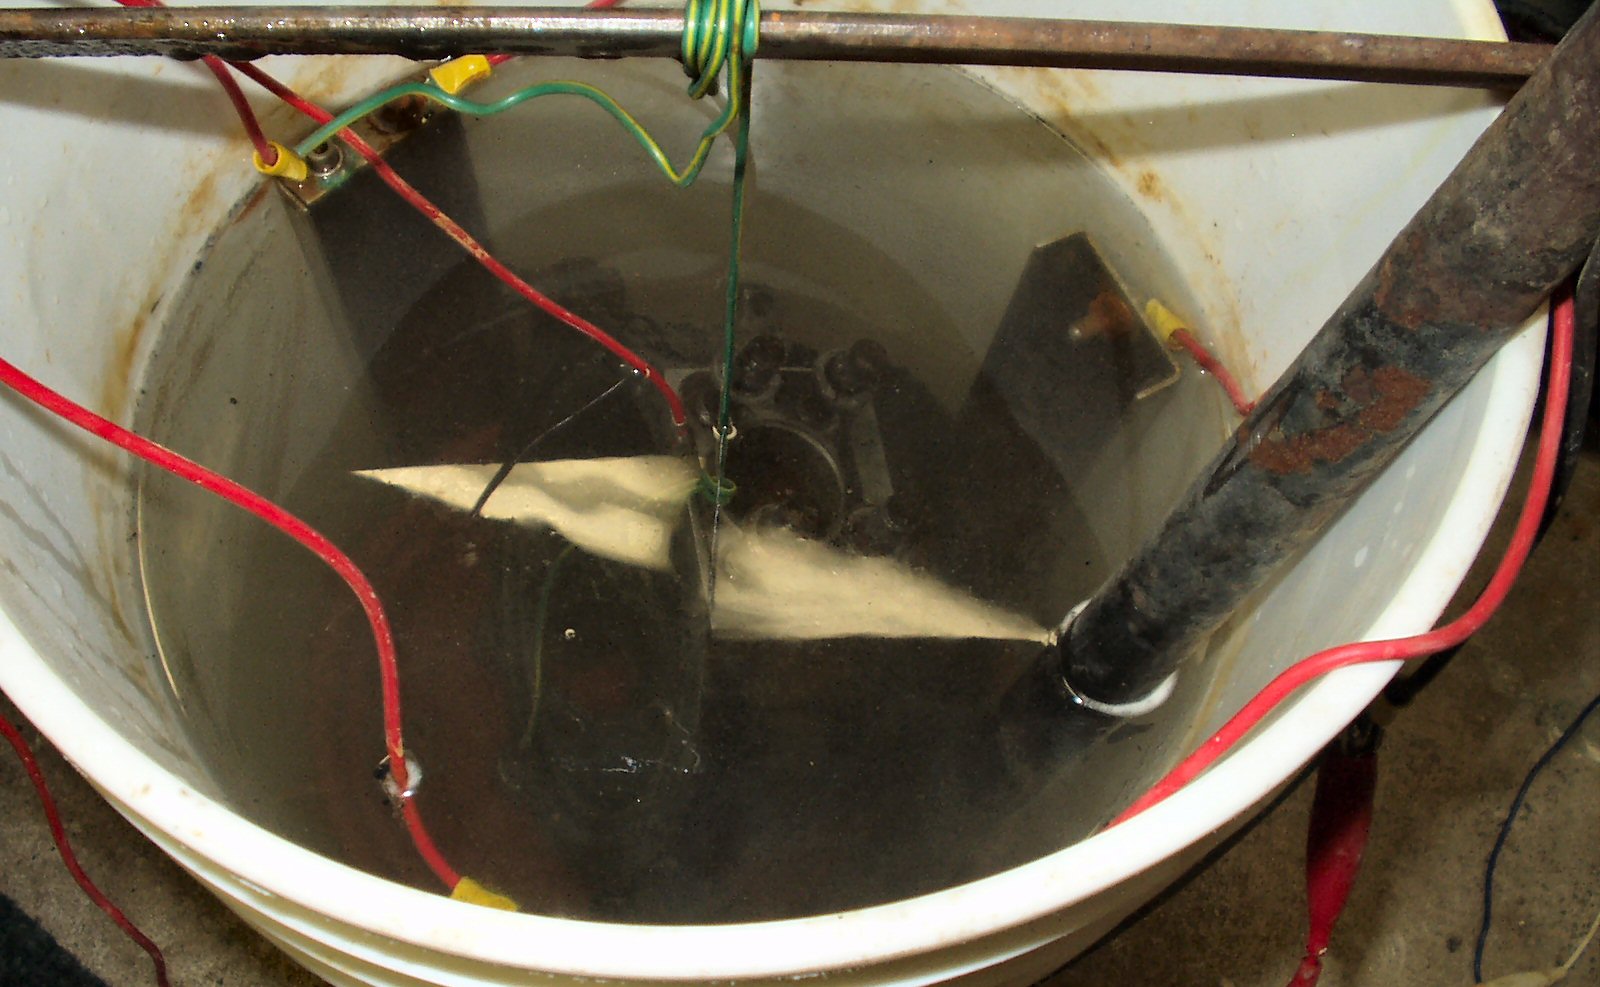
Knuckle and Relay Rod
In Fig. 20
I have the long relay rod and various other small parts in the tank.
I left the rod in for 24 hours then turned it over for another 24 hours.
It still did not get the inside rust out. I then took some stainless
rod I had laying around. I fabbed up some plastic insulators for the
rods ends, ran the rod through and connected the + lead to the rod.
That worked great! After 24 hours I was able to tap the rod with a hammer
and get gobs of scale to fall out. See Fig. 24
below for the results. I'm going to soak a rag in Rust Bullet and run
through it when I'm ready to paint it.
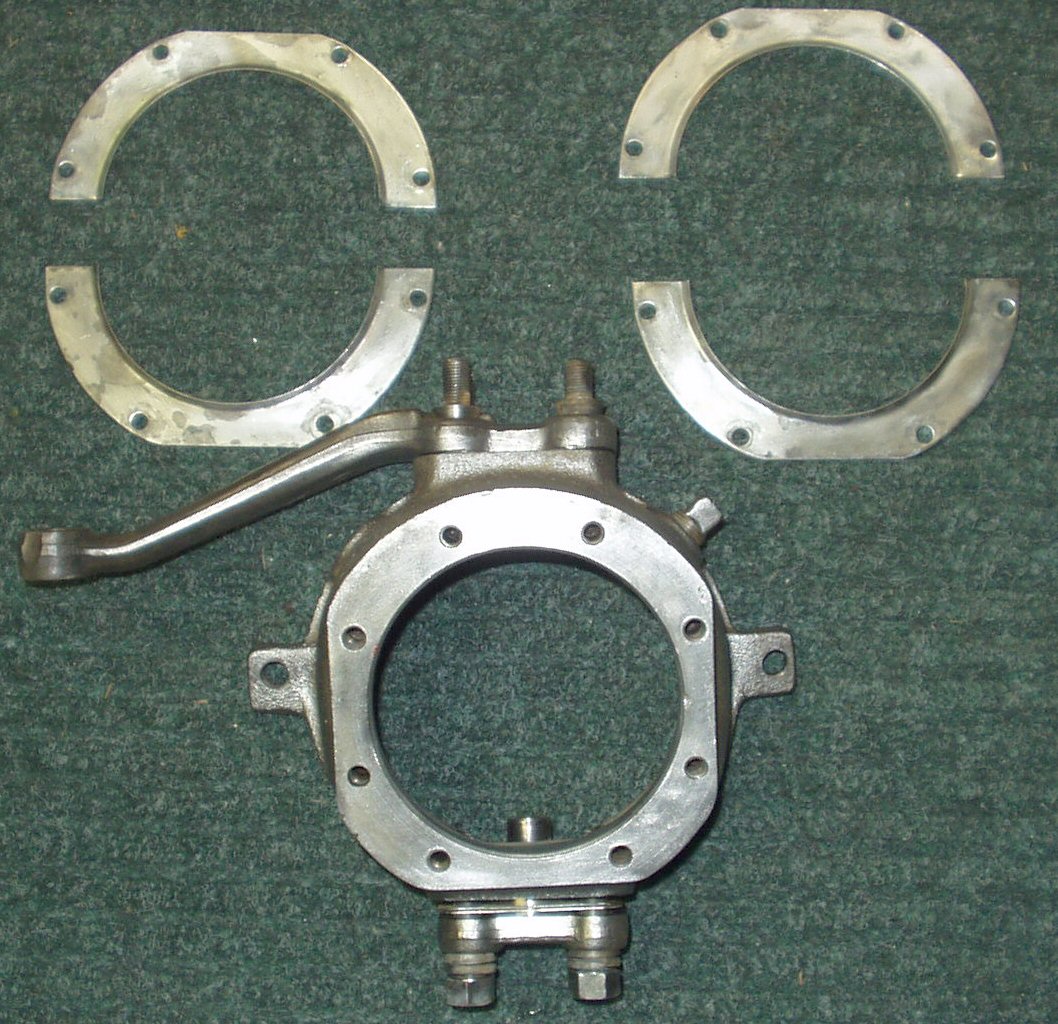
I also put an entire knuckle assembly into the tank.
I ran it for 24 hours then turned it upside down and ran it another
8. See Fig. 22,23
for the results.
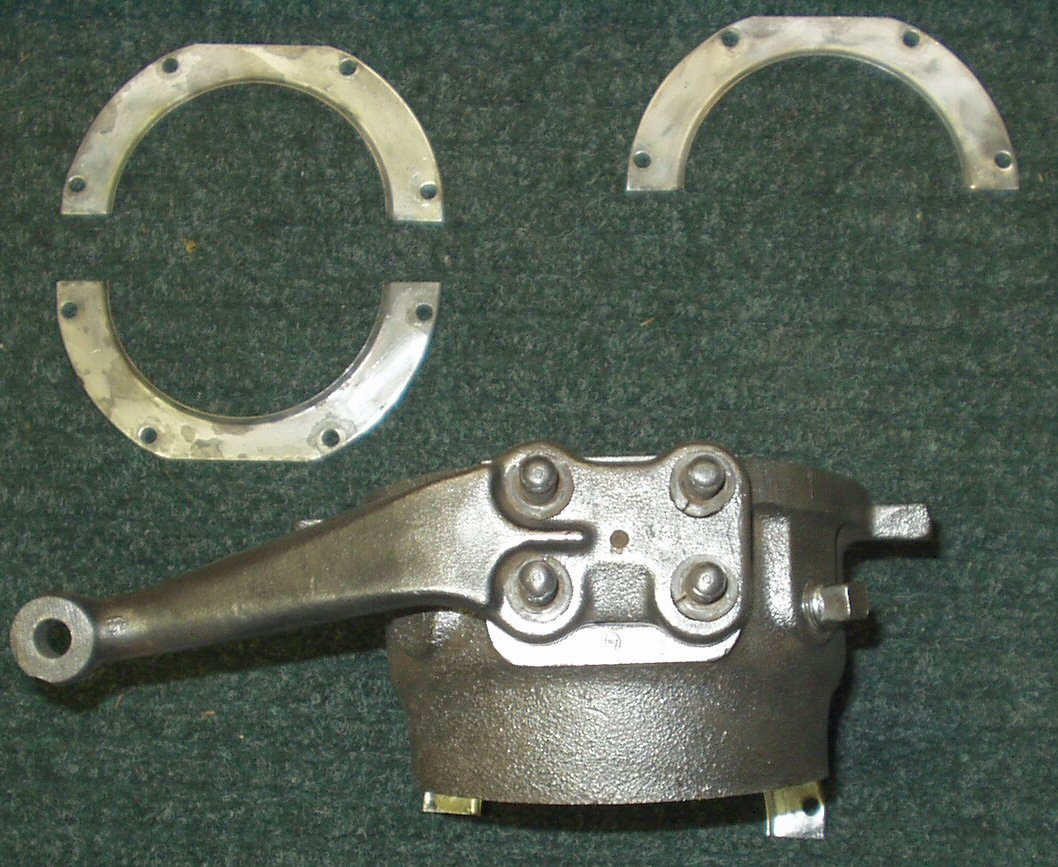
Fig. 22
Knuckle and Seal Retainer
Plates
Fig, 23
They look like they just came out of the casting
mold! :-)
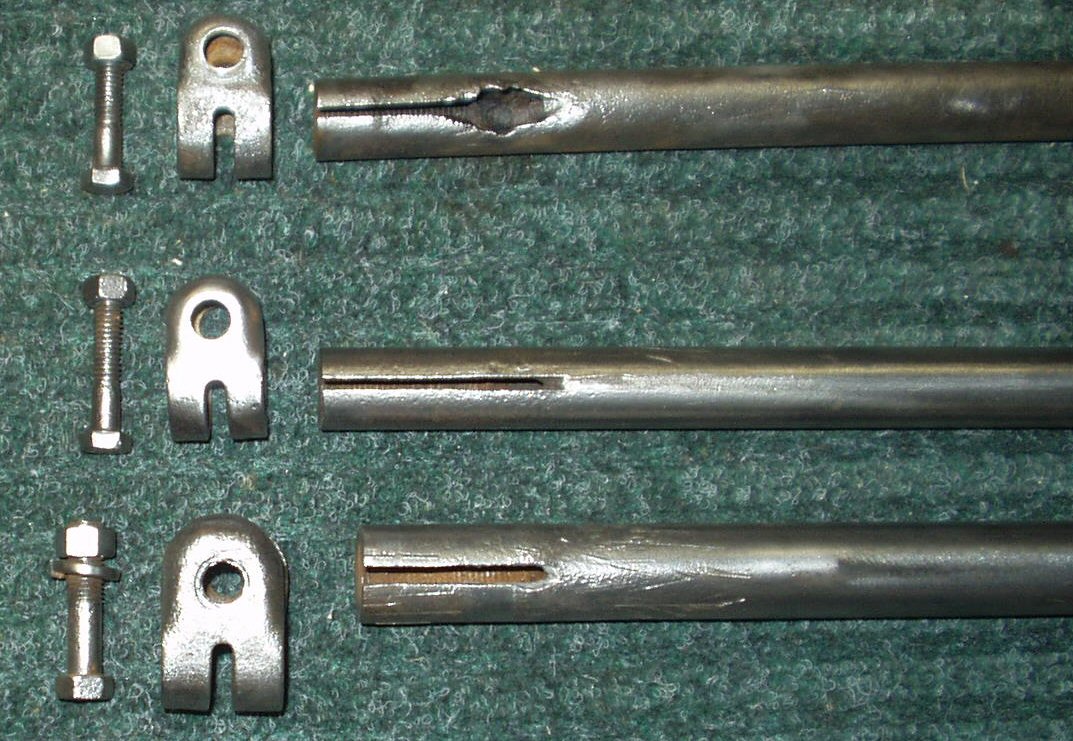
Fig. 24
Relay Rods and Drag Link
All cleaned up and nowhere
to go ...
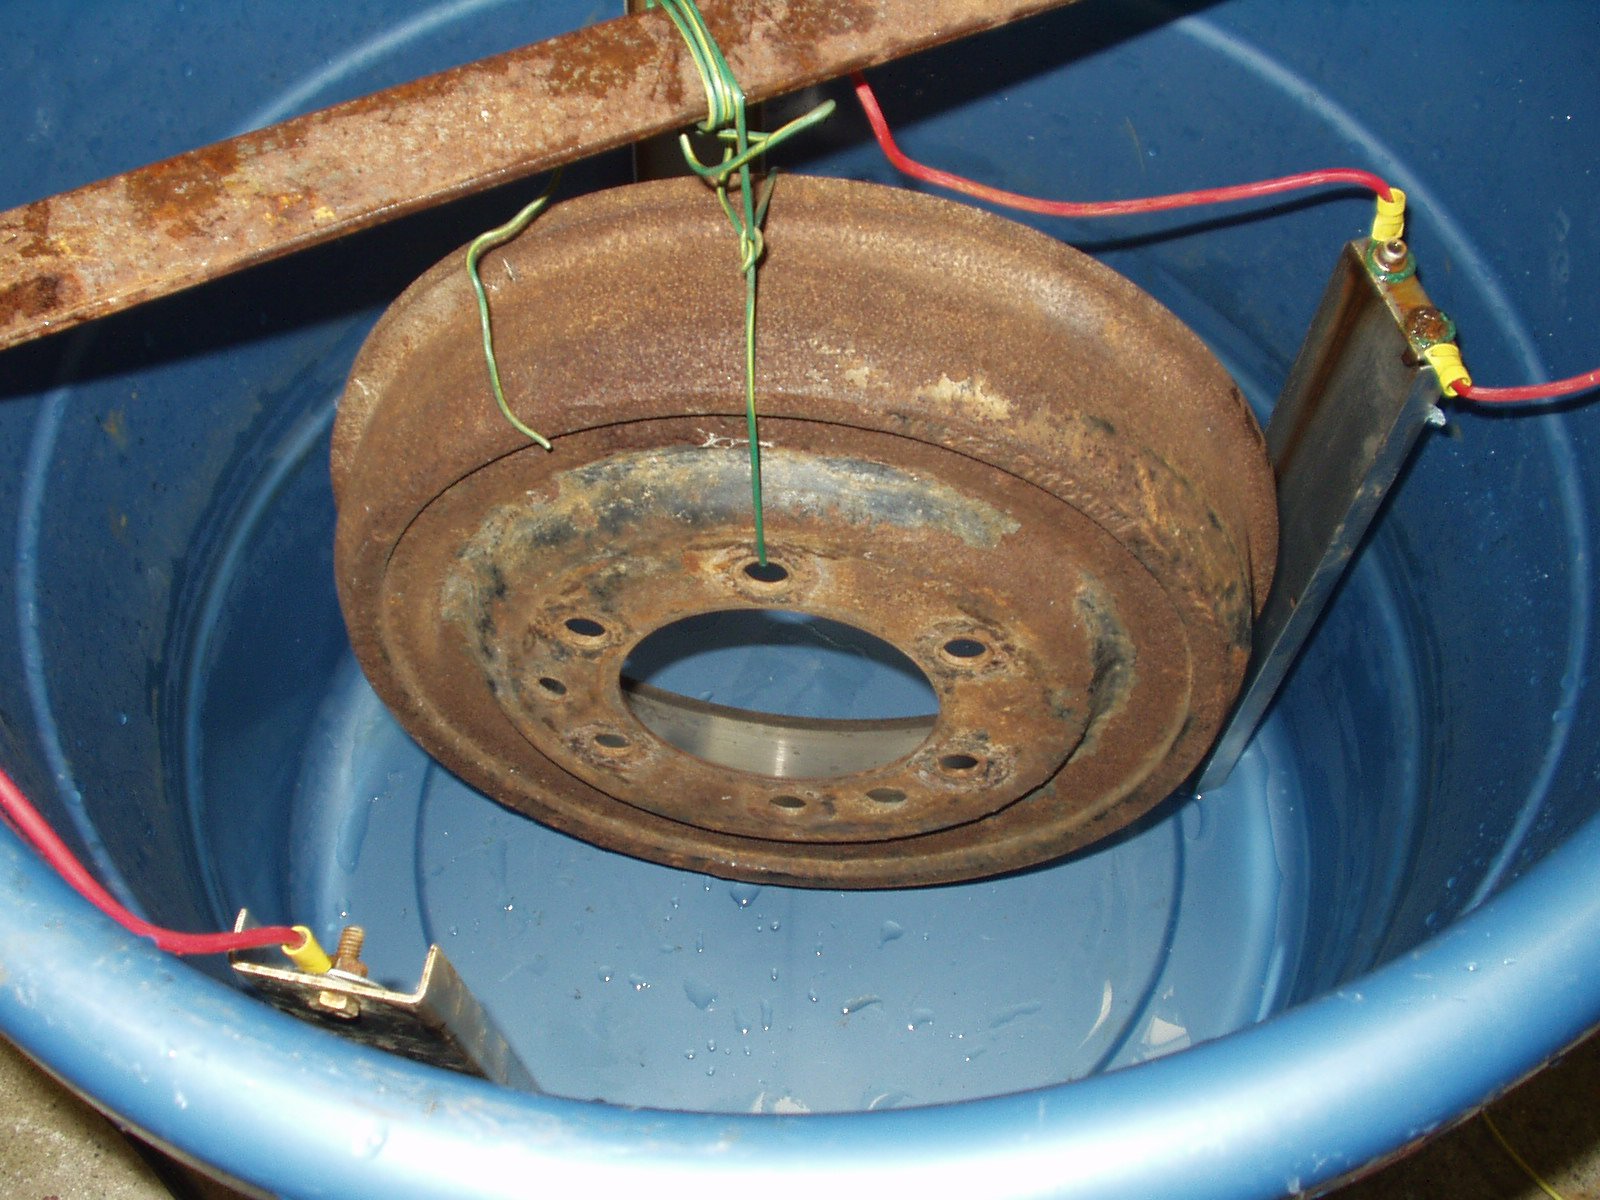
Fig. 25
New Tank with brake backing
plate in it
Fig. 26
Brake Drum before.
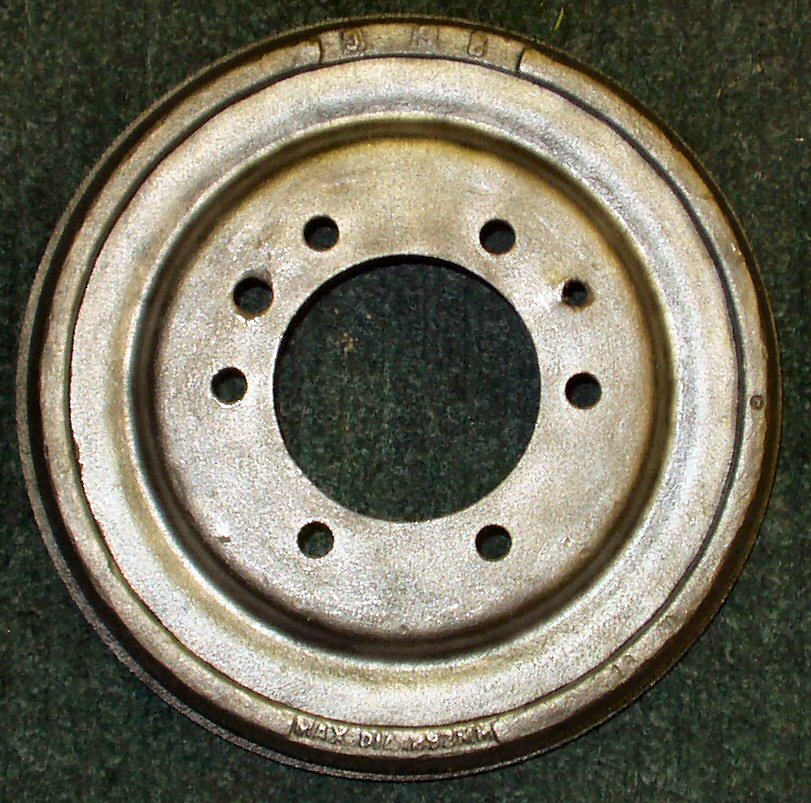
Fig. 27
Brake Drum after...
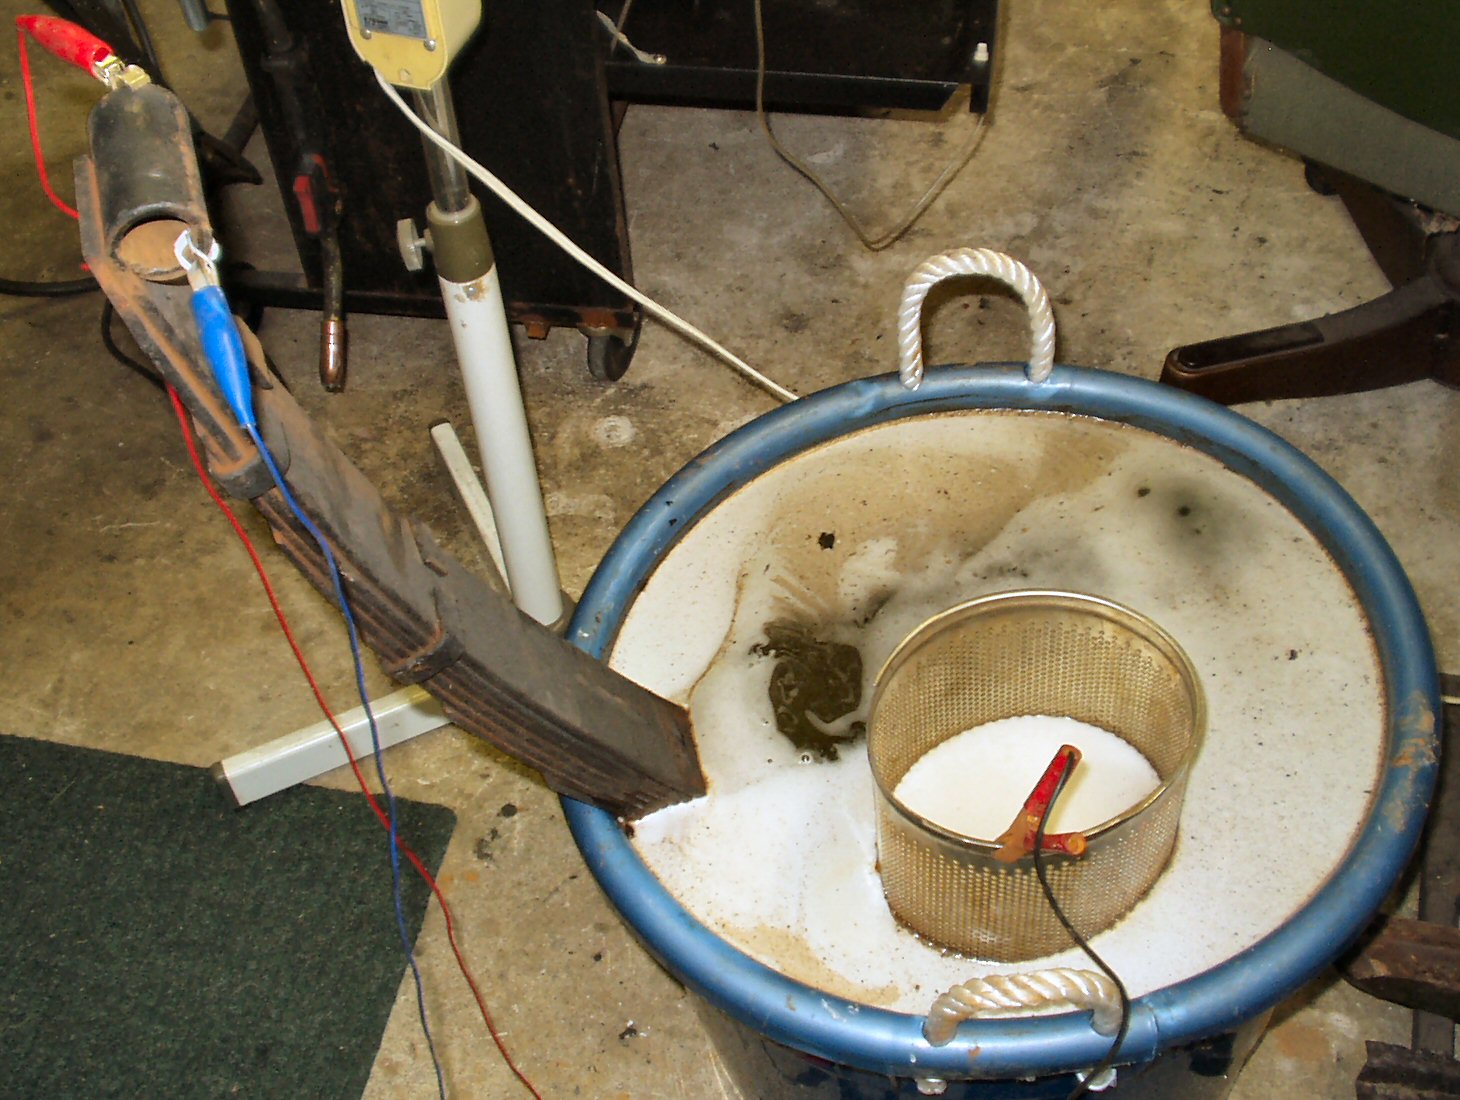
Fig. 28
Mid bed sheet metal
Fig. 29
Front Leaf Spring
Final Conclusions:
This works! It's fairly clean, simple
to setup and maintain and gets rid of ALL the rust! The part I like
best is the garage stays so much cleaner due to much less rust dust
generated from de-rusting parts with a wire wheel on a drill.