Fig. A
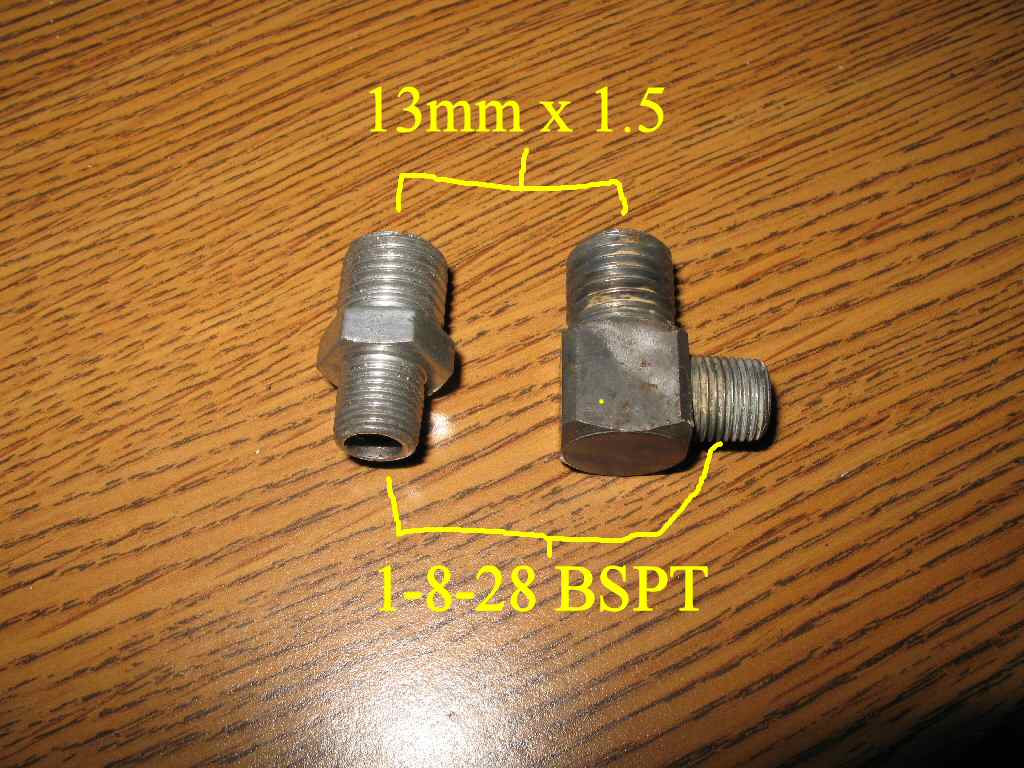
OEM Unions
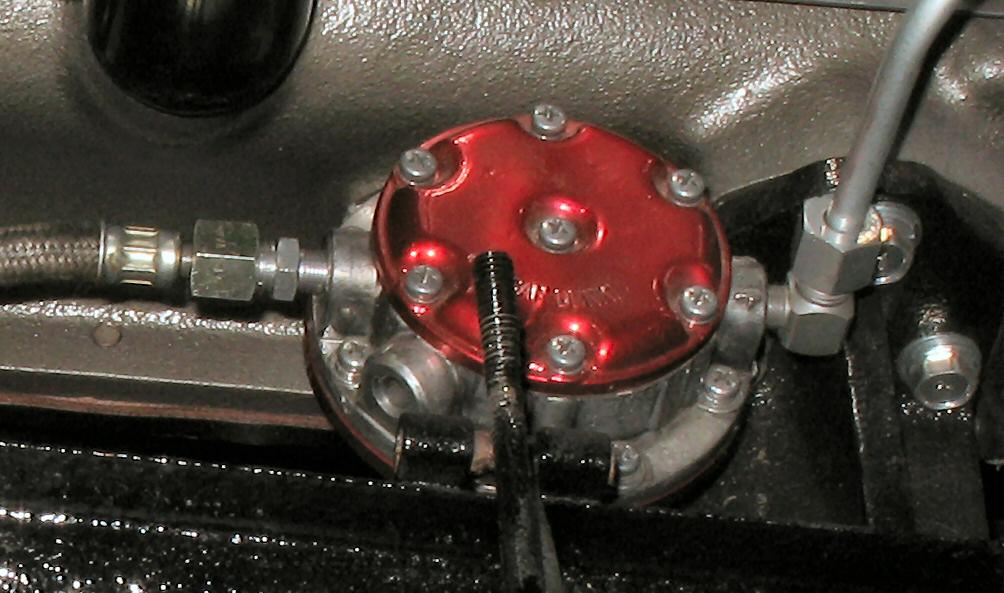
Fig. B
OEM Unions On Pump
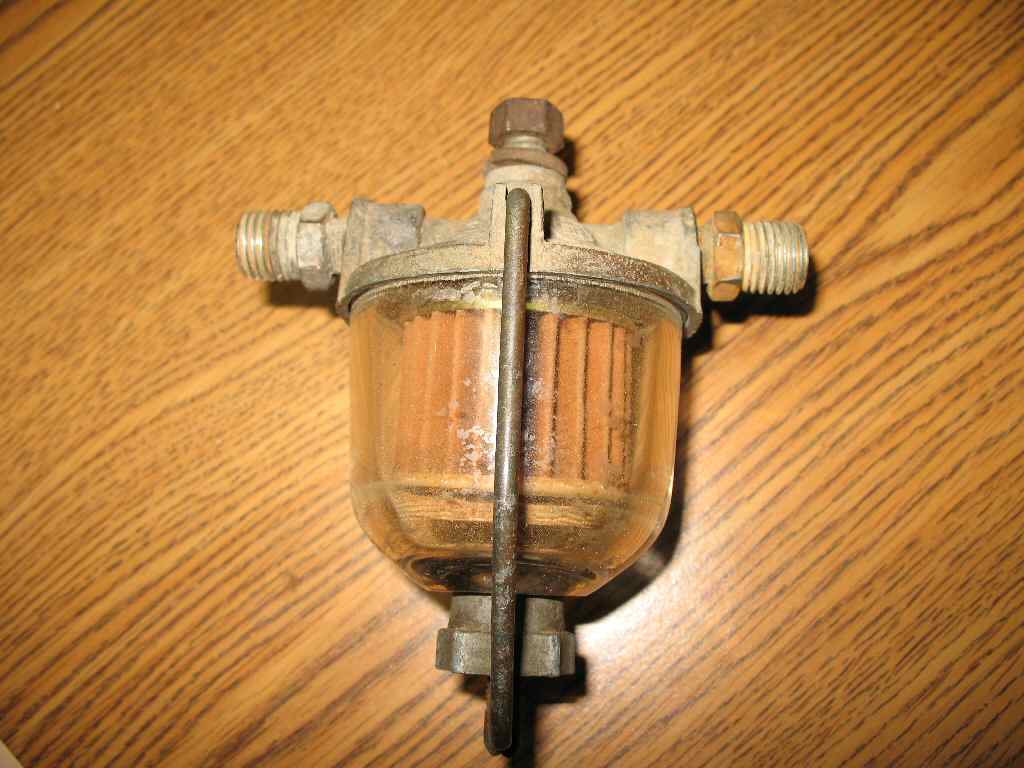
Fig. C
Early Filter Unions On Glass Filter
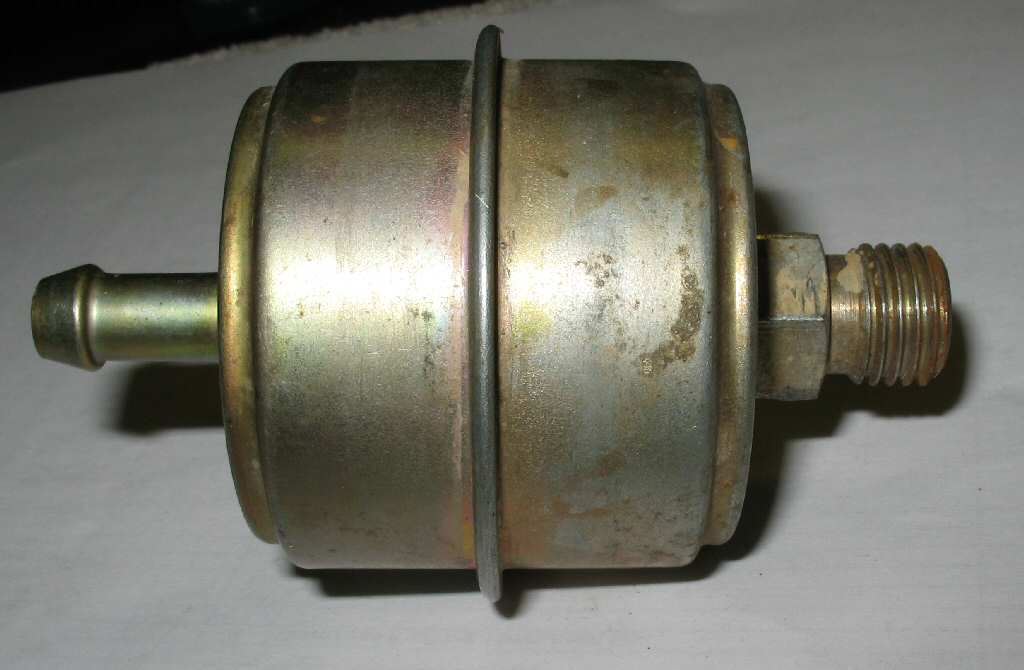
Fig. D
Later 70's Filter
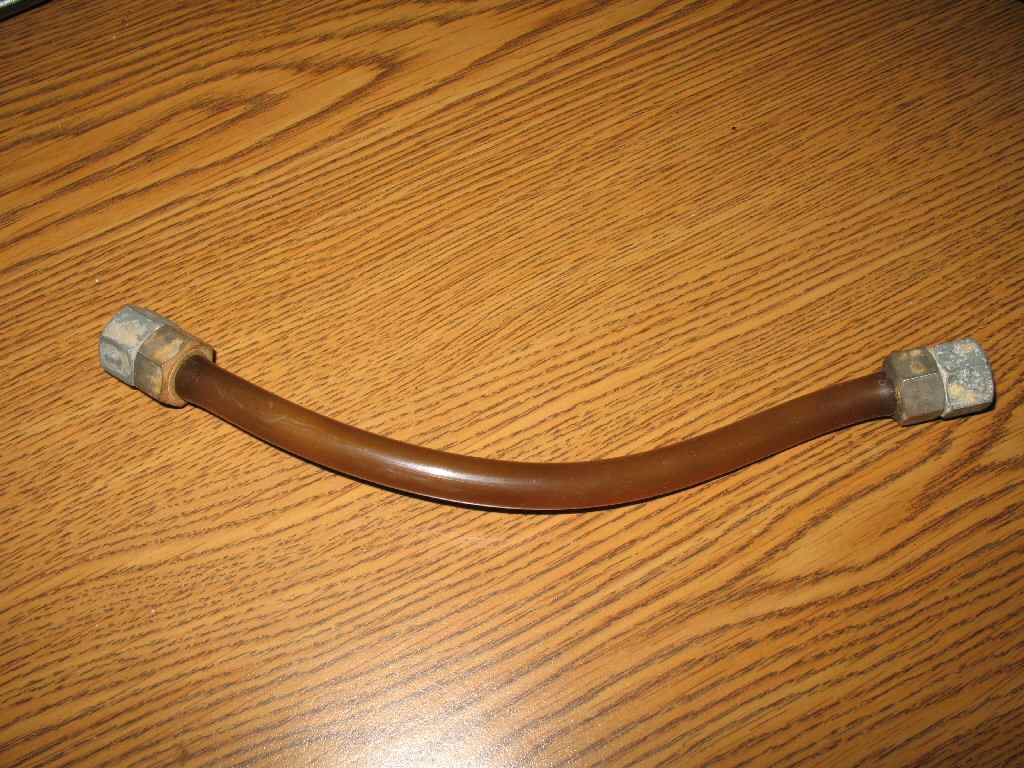
Fig. E
Early Short Plastic Line
![]()
Fig. F
Later Rubber Short Line
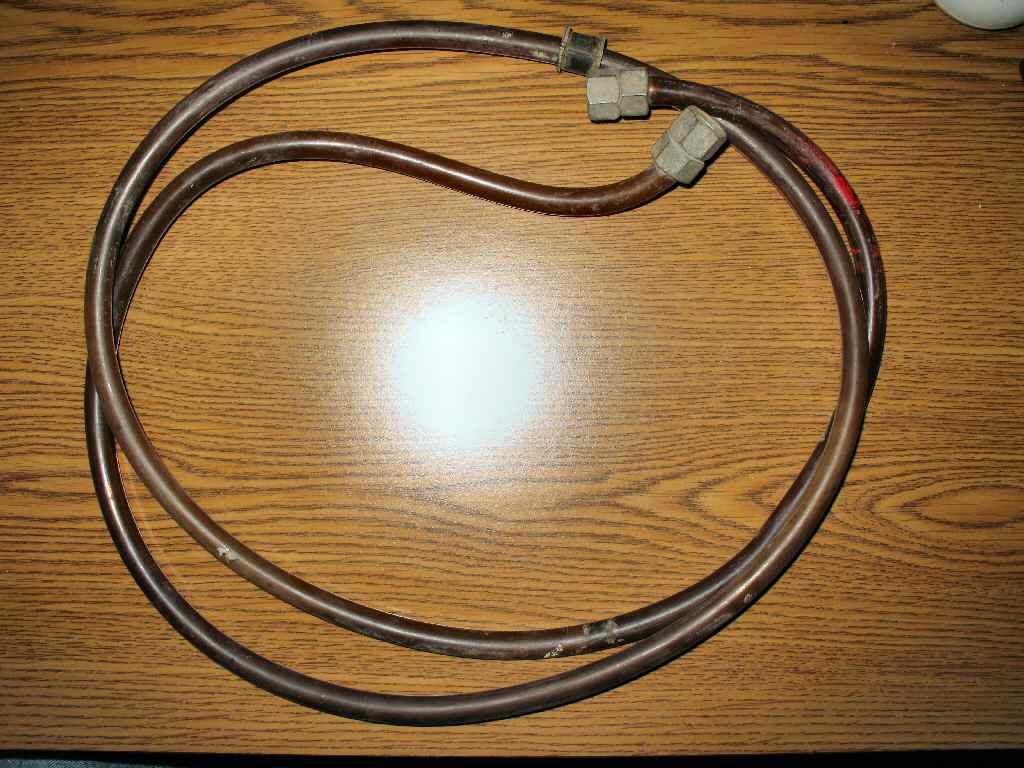
Fig. G
Early Long Plastic Line
Fig. H
There are two types of lines used on the Land Cruiser: hard lines, and soft lines. Both are used in my current fuel delivery setup.
Two Hard lines: In between tank outlet and filter inlet (each end with a soft line) and pump outlet and carb inlet which is a solid hard line.
Three Soft Lines: Tank outlet to hard line, tank outlet hard line to fuel filter inlet, and fuel filter outlet to fuel pump inlet.
Here are some facts you need to know to work with the OEM fuel lines.
|
Fig. A OEM Unions
|
Fig. B OEM Unions On Pump
|
Fig. C Early Filter Unions On Glass Filter |
Fig. D Later 70's Filter |
Fig. E Early Short Plastic Line |
Fig. F Later Rubber Short Line |
Fig. G Early Long Plastic Line |
Fig. H
|
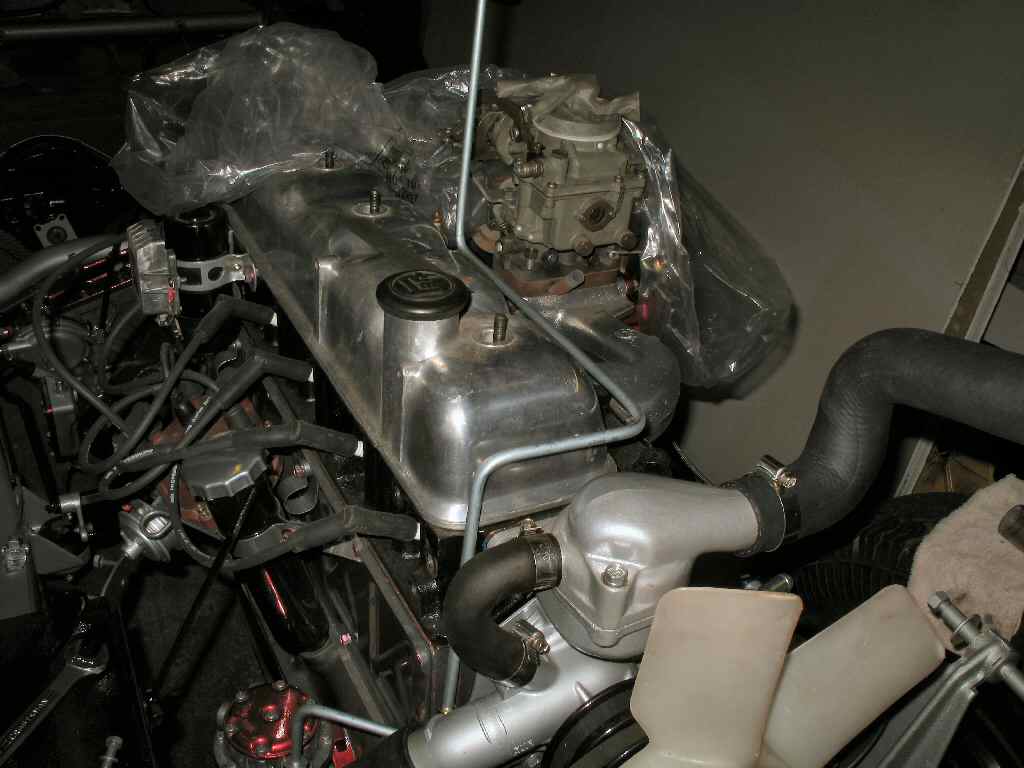
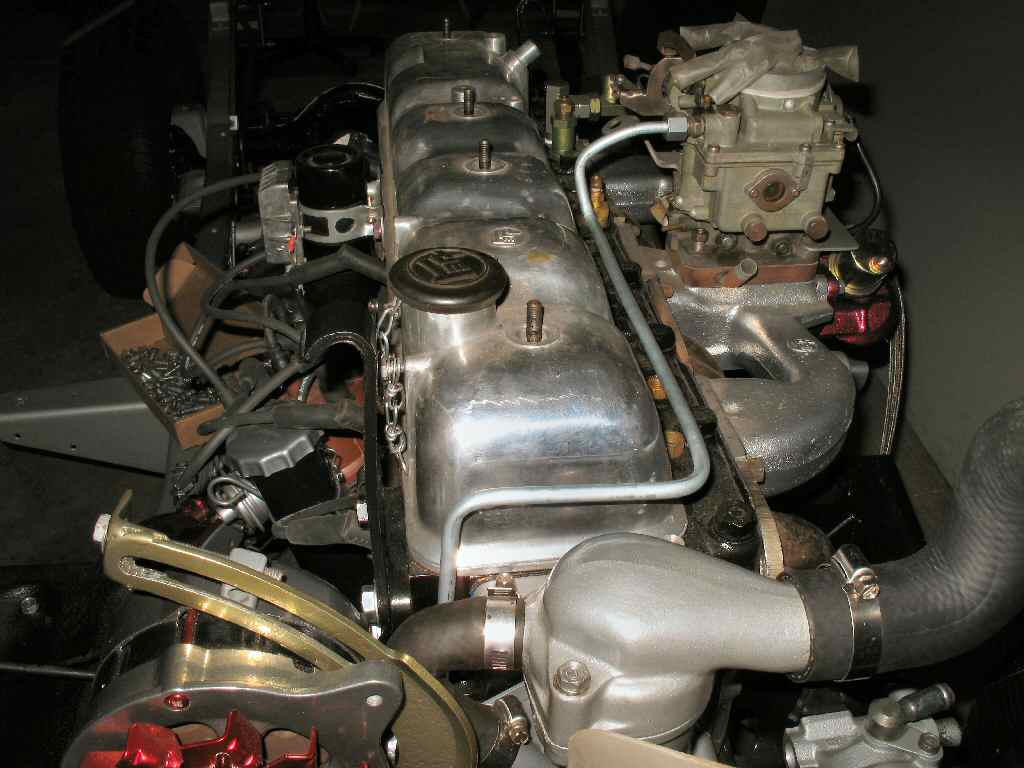
The pics above show the fuel lines and fittings that were used on late 60's to early 70's Land Cruisers.
As was common for other parts on my Cruiser, the steel fuel lines from the tank to the filter and the pump to the carb were rusted badly. Though the fuel line from the pump to the carb is still available from the Toyota dealer, I decided to replace both with home made lines.
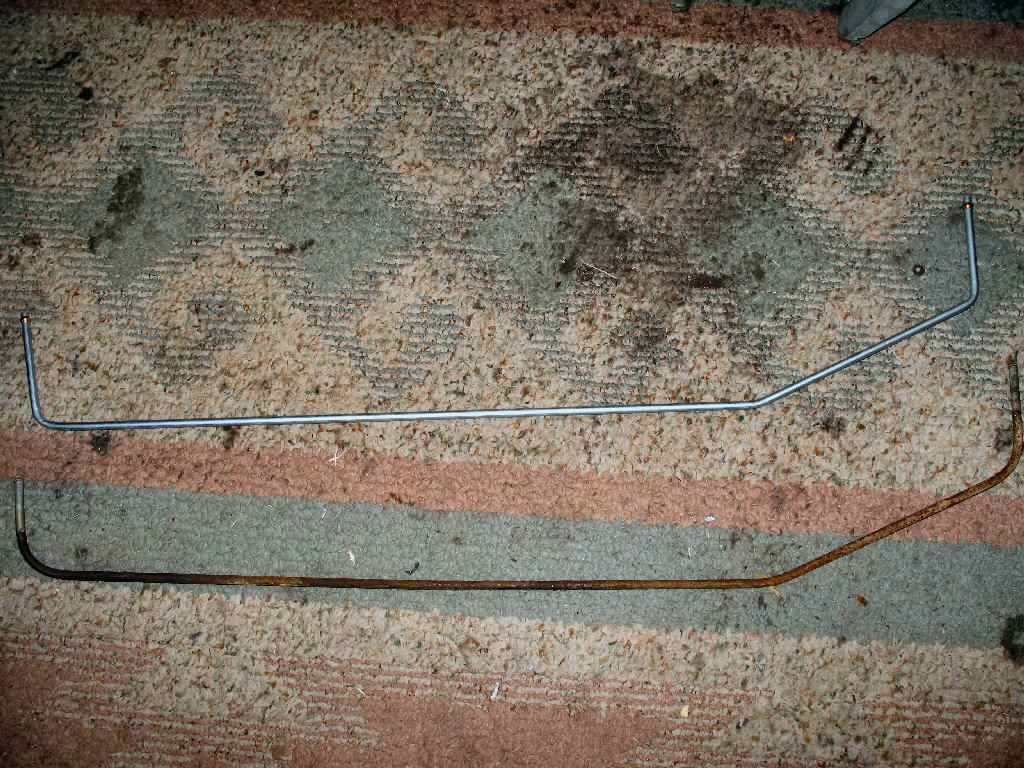
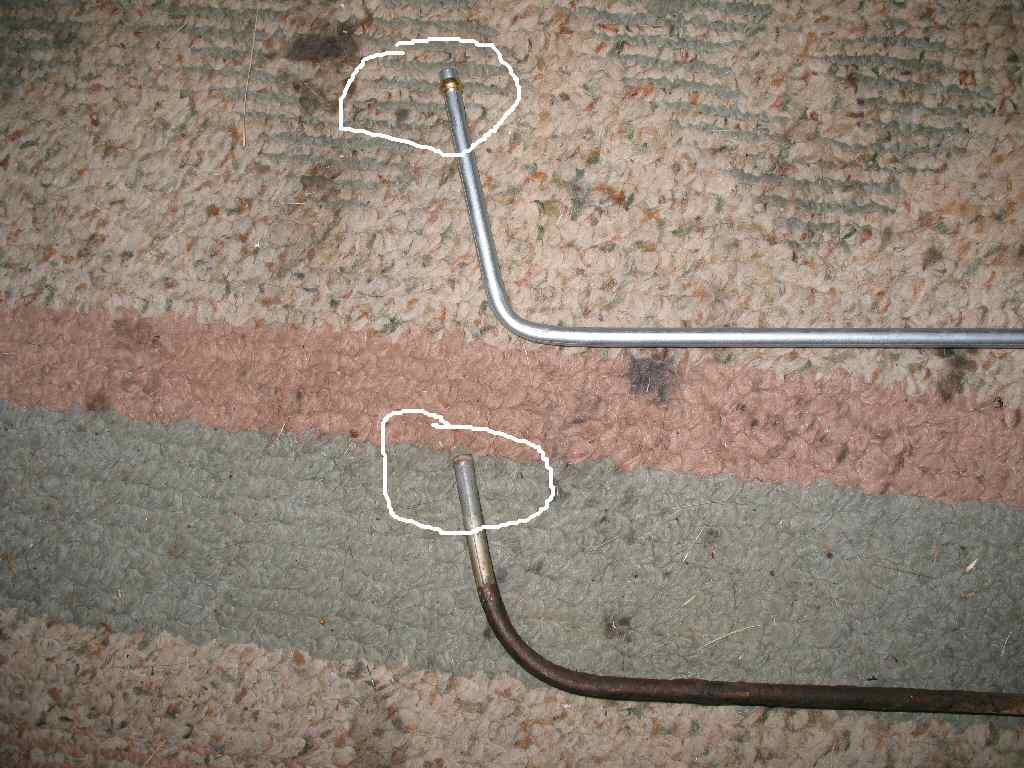
Fig.1 New/Old Lines |
Fig. 2 New Line |
Fig. 3 Compressing Ferrule |
Fig. 4 Comparing Ferrules |
What you need:
Tubing bender and various lengths of 5/16" line available at any auto parts store. I picked up two 5' sections and a package of 5/16" brass ferrules (Also known as "Olives"). The OEM tank to filter hard line we will duplicate first, is shown in Fig. 1.
Making the fuel tank to fuel filter line:
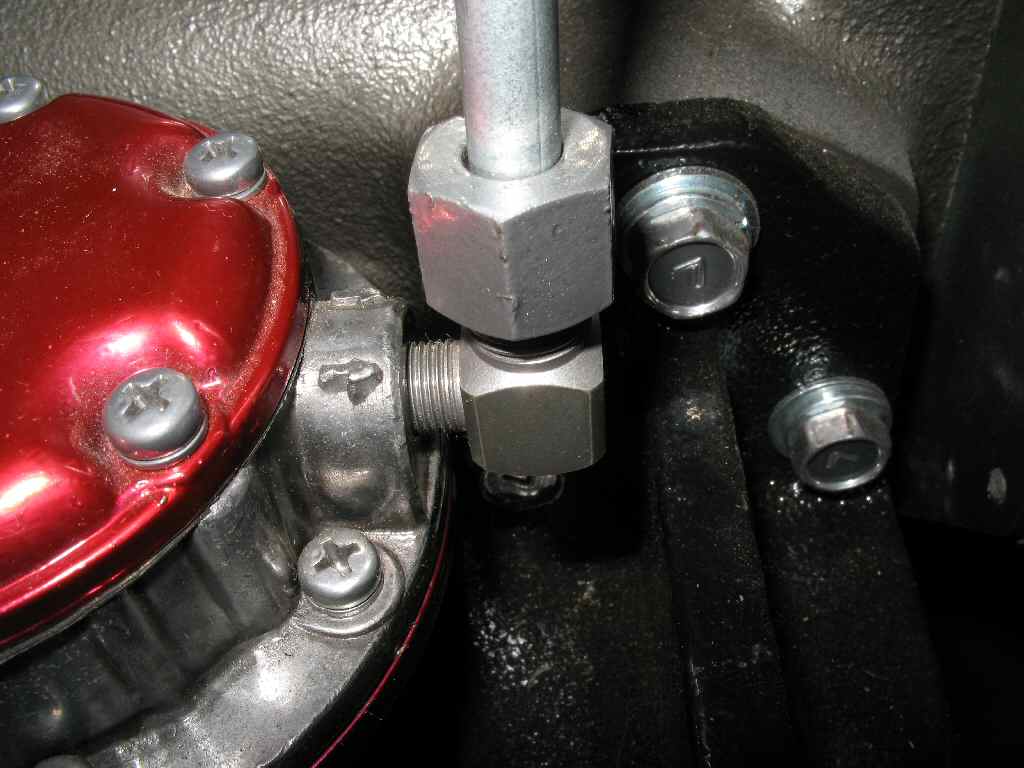
This line was very easy to bend, took all of 3 minutes! See Fig. 2. After bending I decided to try to make the rolled end that the factory line had. To do this I slipped an old compression nut from an old fuel line, slipped it on the end of the line, slipped a brass ferrule on, stuck this down into the fitting on the fuel pump outlet, (See Fig. 3 ) then cranked it down to compress the ferrule around the line. Worked like a charm! I then just slide the nut off the other end...
You probably thinking, "OK smart ass, how are you going to compress the other ferrule without leaving the compression nut on the line or cutting it off?" Well... this is what I came up with. First I found a washer whose inner diameter was slightly bigger than 5/16" and slipped it on the line. Next I slipped the ferrule on the line. I clamped one of the flare nuts, from the new fuel lines I had bought, in a vise, inserted the line into it, then used a hammer to tap on the washer driving the ferrule into the flare nut thereby compressing it! I cut the washer off the line easily with a Dremel tool equipped with a cut-off wheel. See Fig. 4 for the completed line.
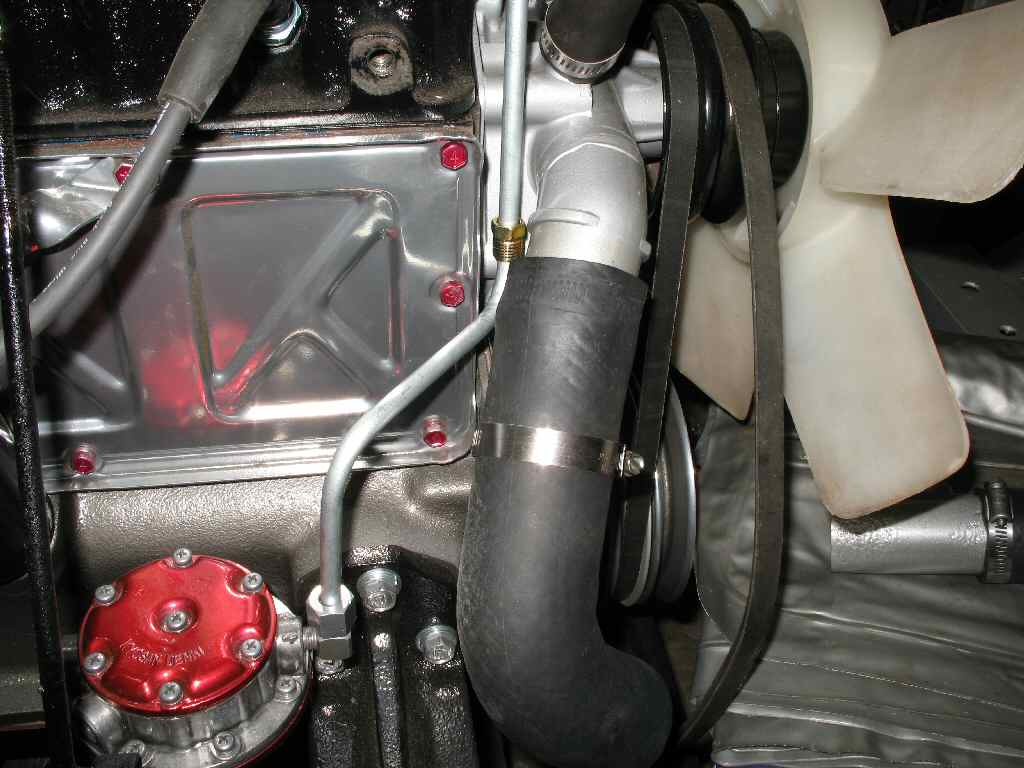
Fig. 5 Old Line Routing |
Fig. 6 First Bends |
Fig. 7 Next Bends |
Fig. 8 Almost There |
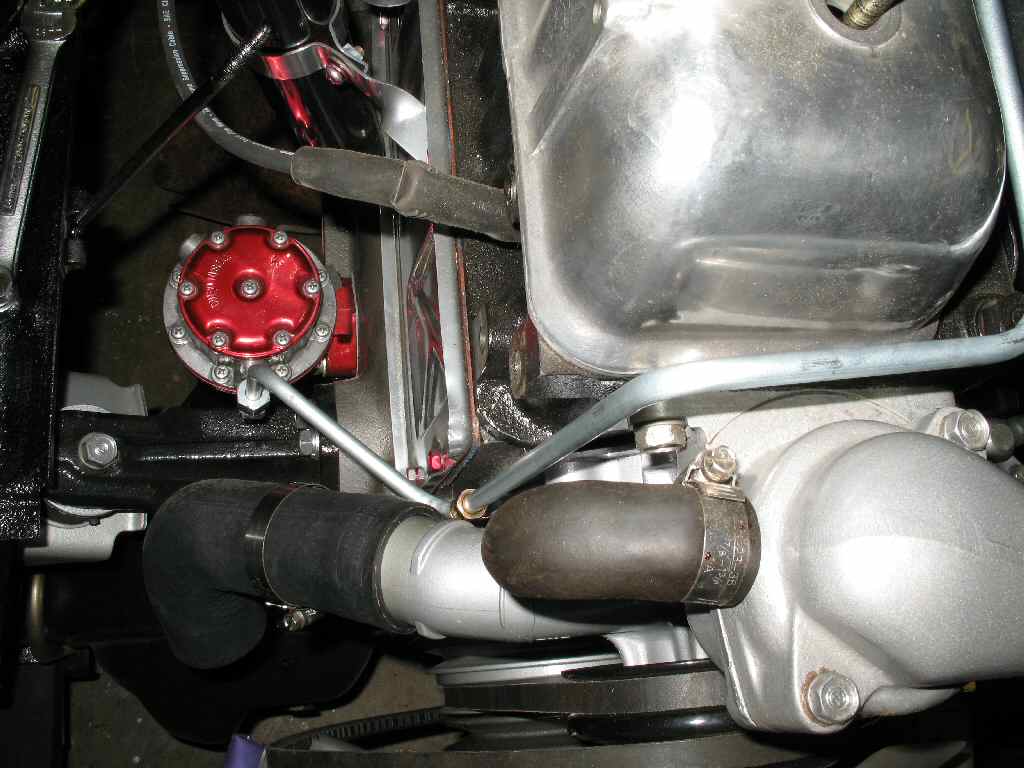
Fig. 9 Done! |
Making the fuel pump to carb line:
Ok that was the easy line, time for the fuel pump to carb line... (The pump to carb hard line is still available from Toyota if you don't want to make your own line.)Someone, at some pont in my Cruisers life, had replaced this fuel line with one that was routed incorrectly. ( at least it was wrong for my 2F alternator installation) I will correct this routing. See Fig. 5.
After removing the alternator and bracket, I grabbed the other 5' fuel line, and repeated the compression nut trick on one end. This time I left the compression nut on the line. I inserted this end into the fuel pump outlet fitting and tightened it down. See Fig. 3 above. Now I could start measuring. The line must go between the edge of the side cover, the water pump inlet, and under the alternator bracket. There is not much room, so this had to be measured carefully. Once I had measured three times, I made the two bends as shown in Fig. 6. So far so good. Next I measured the width of the valve cover, added an inch, and made those two bends. See Fig. 7. Now I measured the run to the carb, and bent the line straight up in line with the inlet. See Fig. 8. Then I ran into a problem. The damn bender was to big to allow the tight bend I needed to get the line in perfectly! Grrrrrrr..... So I had to bend that section using my hands. It did not come out as accurate compared to the other bends, but it sure looks better than the old line! See Fig. 9.
Now that I had new hard lines, it was time to address the soft lines.
Fig. 10 Used Long Soft line |
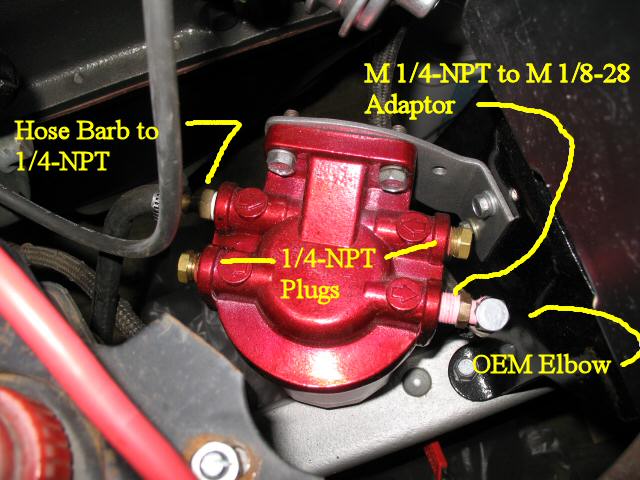
Fig. 11 Soft Line Adapters for Filter Housing |
Fig. 12
|
As I mentioned earlier, the soft lines with the crimped on 13mm x 1.5mm connectors are no longer available from anyone. There are two versions of the soft lines, a plastic line with 13mm x 1.5 female fittings crimped on (See Fig. E above), and the cloth covered rubber lines with 13mm x 1.5 female fittings crimped on (See Fig. F above). The plastic lines get brittle after a while, and break. Tthe rubber ones eventually just rot. So what to do? What it boils down to is this: If you want to keep it all OEM, you are going to have to salvage vintage lines, use your existing lines, or adapt all these fittings to NPT. I elected to go all OEM.
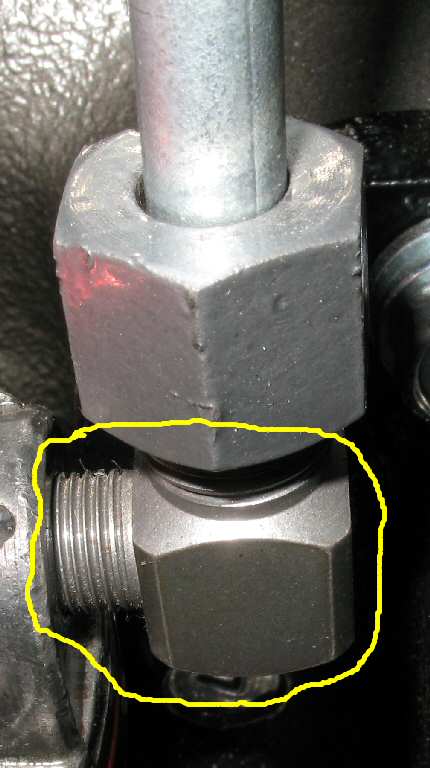
I bought some used OEM, cloth covered, rubber fuel hoses from a MUD member. One of the used hoses turned out to be a long tank to hard line hose! Cool, I cleaned up the hose and connector, which was slightly rusted, and clamped it to the hard line. See Fig. 10. I also had two short NOS OEM lines that came in a box of parts from E-Bay. I also had a handful of the OEM adapter unions. With all this I was able to fab up a mostly OEM system.
To connect the new, non OEM, Marine Fuel Filter to the fuel pump, I used a male 1/4" NPT to female 1/8-28 BSPT adapter screwed into the outlet port of the filter housing. Into this I screwed a OEM 90 degree male 1/8-BSPT to 13mm male adapter . I used one of the short OEM lines to connect the filter to the pump inlet. To connect the new hard line from the tank to the filter housing, I used a hose I bought with the 13mm x 1.5 connectors, cut one end off, used a hose clamp to attach it to the hard lind, then used a male 1/4" NPT to female 1/8-28 BSPT adapter screwed into the inlet port of the filter housing, and finally a OEM straight male 1/8-BSPT to 13mm male adapter threaded into that so I could thread the hose on. Two male 1/4-NPT plugs filled the two holes in the filter housing. See Fig. 11. Yes, it was a pain in the ass to find all that and make it work...
Hosted by Global Software, Inc.
©1998 - 2023 Mark C. Baker Web Designer
Please: No part of this web site may be used without express permission... email mbaker@globalsoftware-inc.com for permission.
