The first owner of this truck converted the t-case to a manual,
floor mounted shifter. I decided to convert back to the original vacuum shifter
just for the retro coolness of it! I had all the levers, vacuum switch, hard
lines and cables but was missing the actuator. I scored a unit from a fellow
IH8MUD member for cheap. Let's start tearing it down.
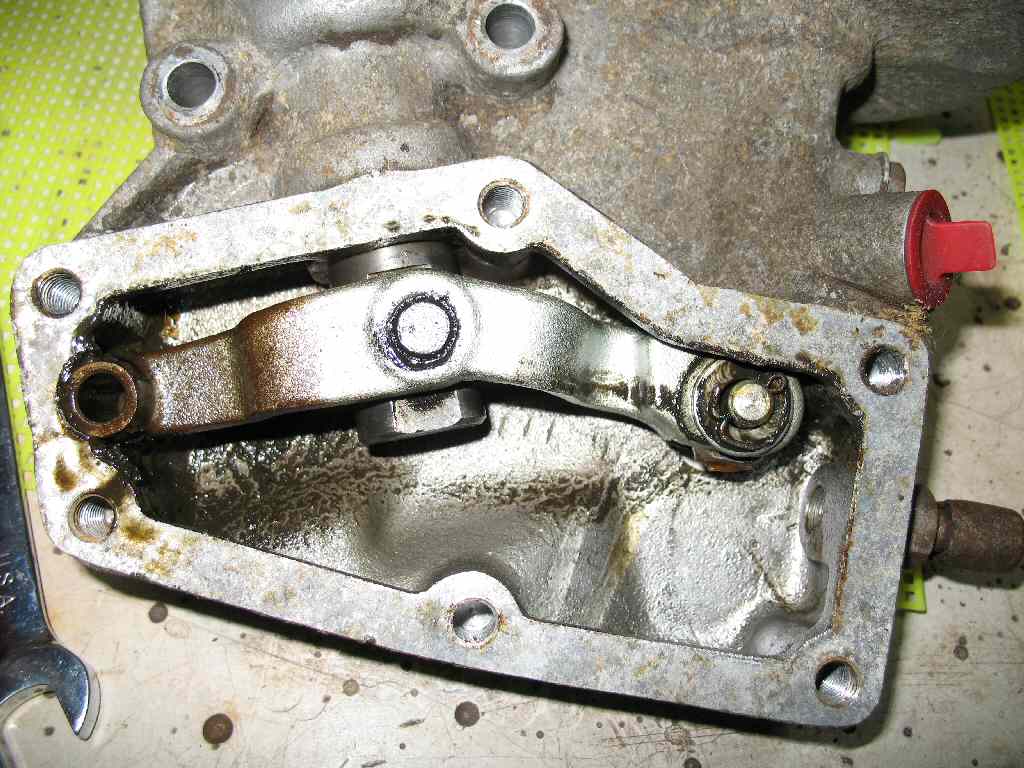
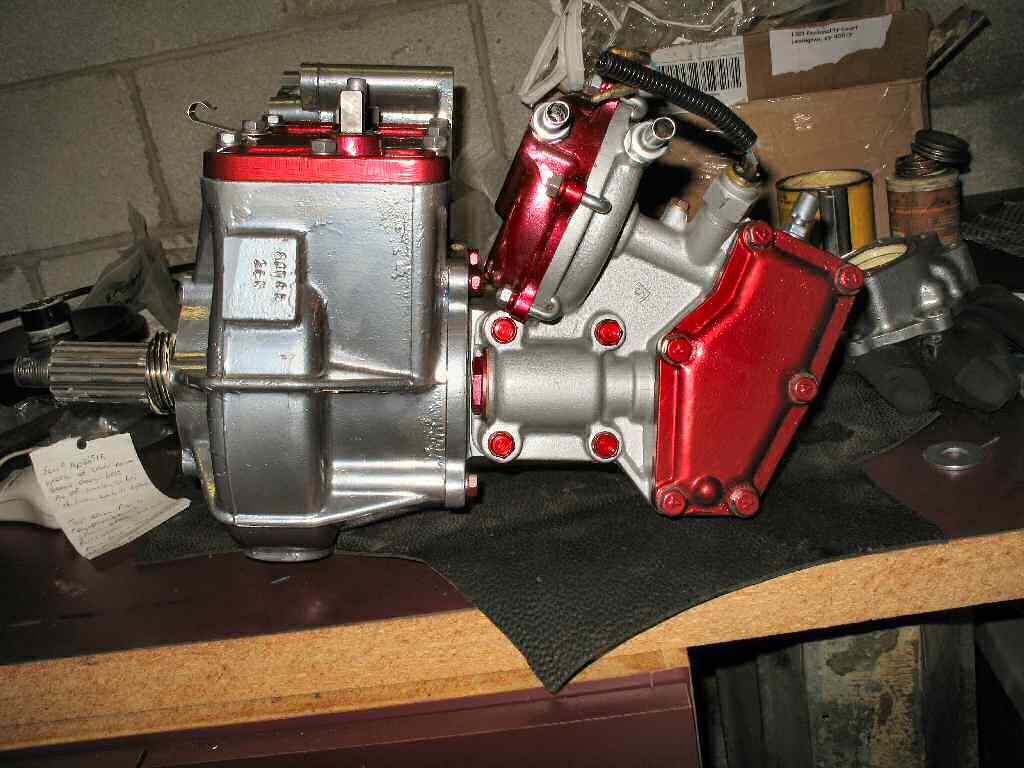
Fig. 1
Left Side
Fig. 2
Top
Fig. 3
Right Side
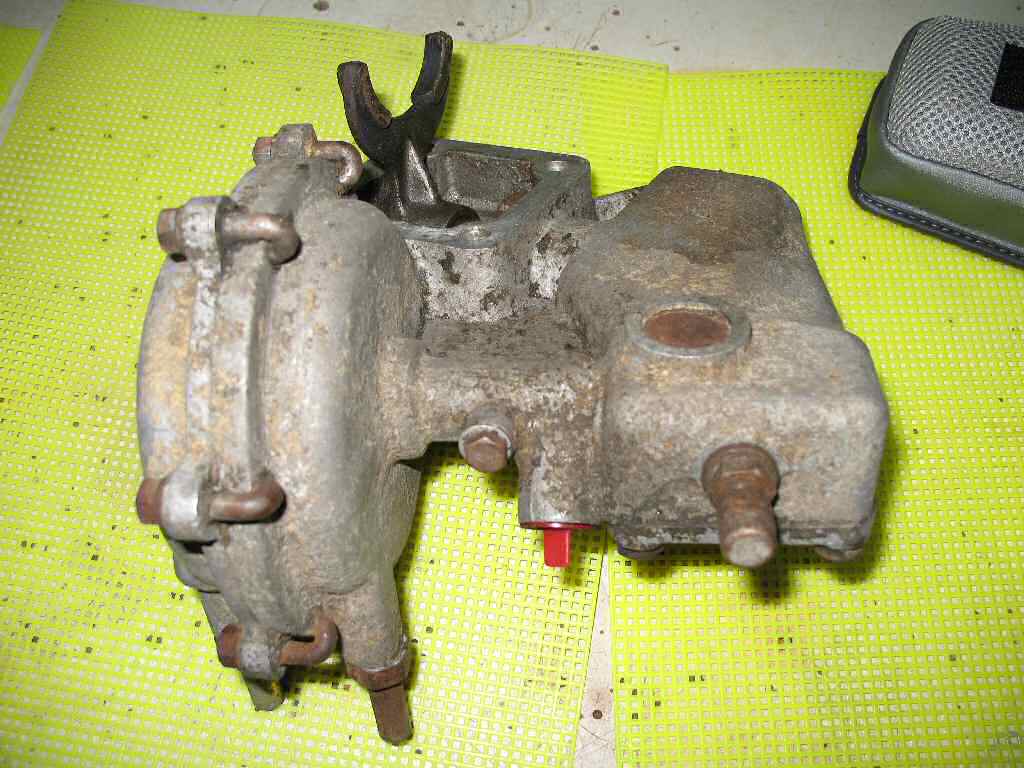
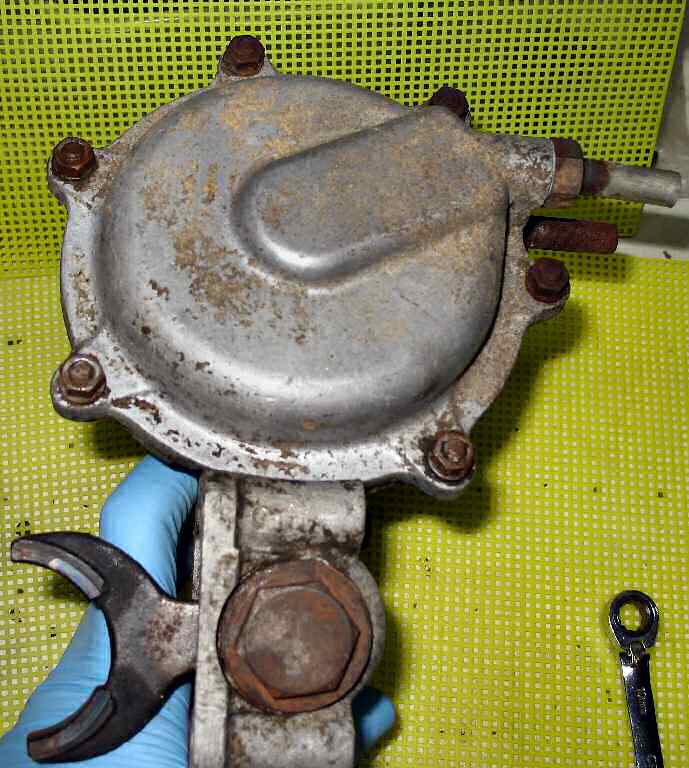
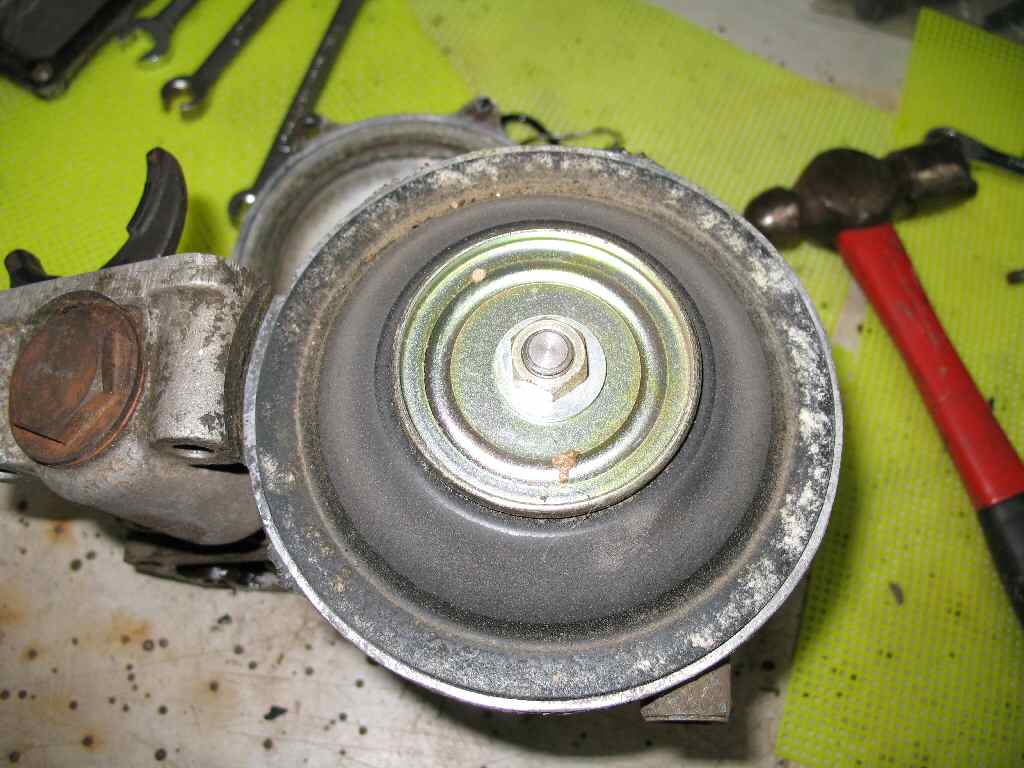
Fig. 1-2 show the unit as received. It was a bit dirty but
upon testing by applying vacuum to each port it worked smoothly.
Fig. 4
FSM Drawing
Fig. 5
Side Cover Removal
Fig. 6
Shift Lever
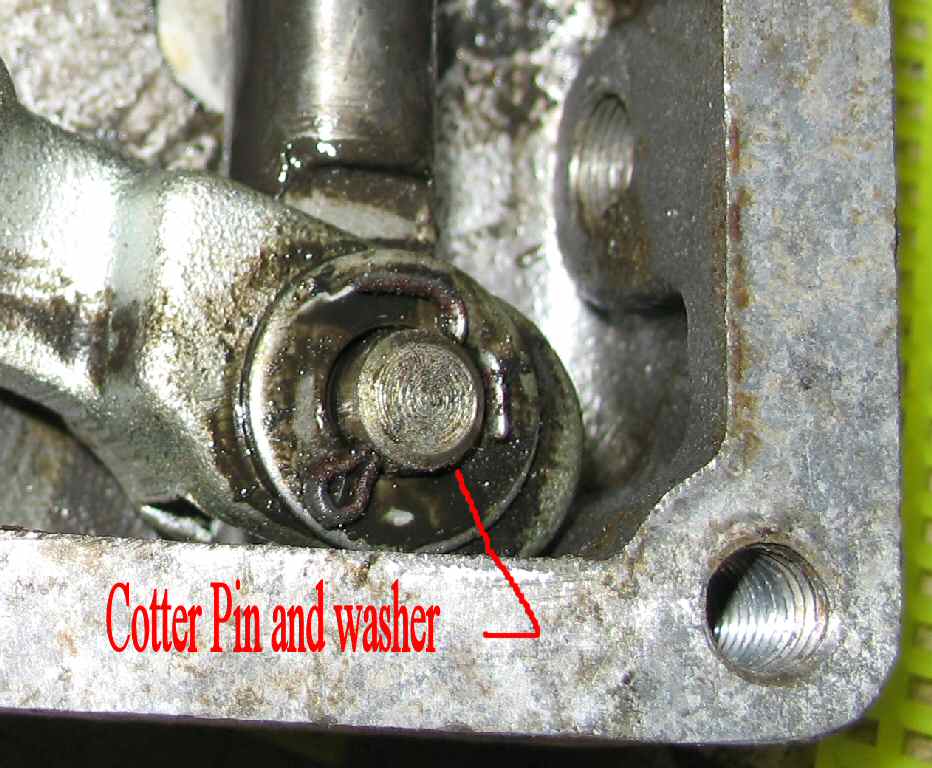
Fig. 7
Disconnecting Lever
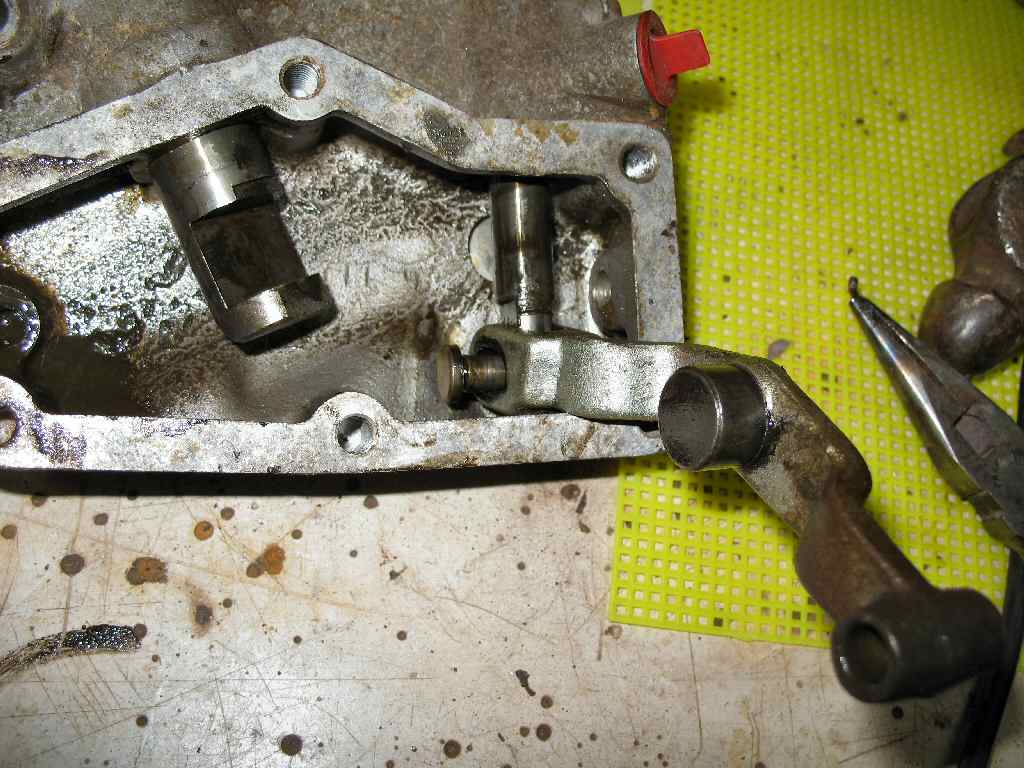
Fig. 8
Pulling Pin
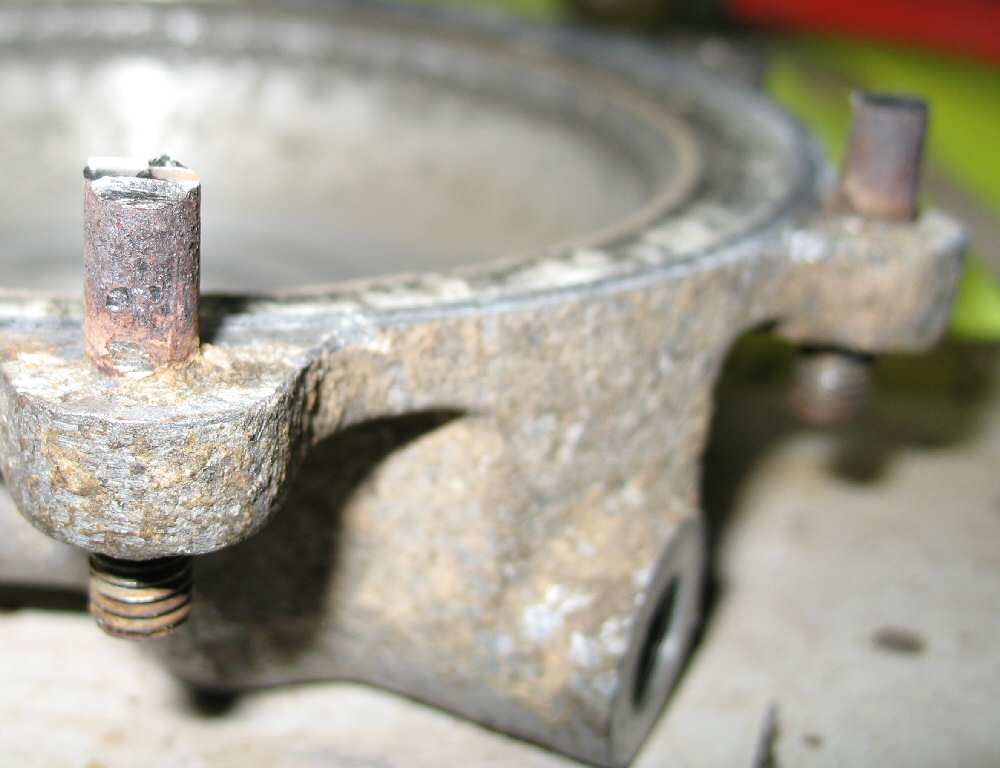
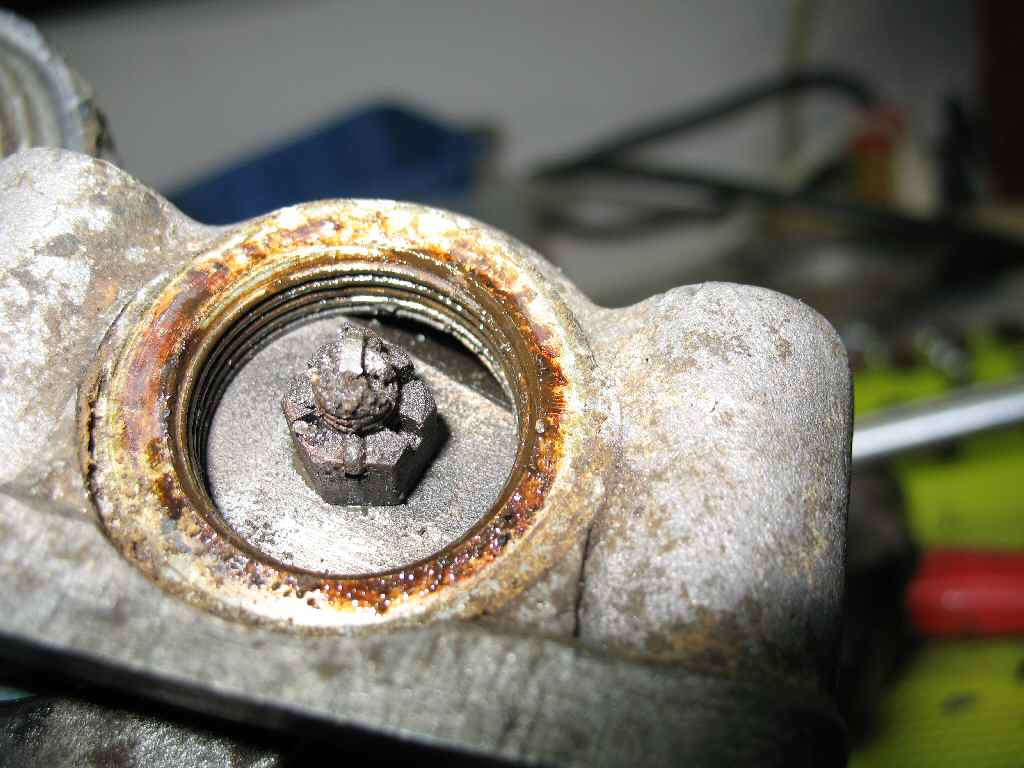
Fig. 9
Broken J-Bolts
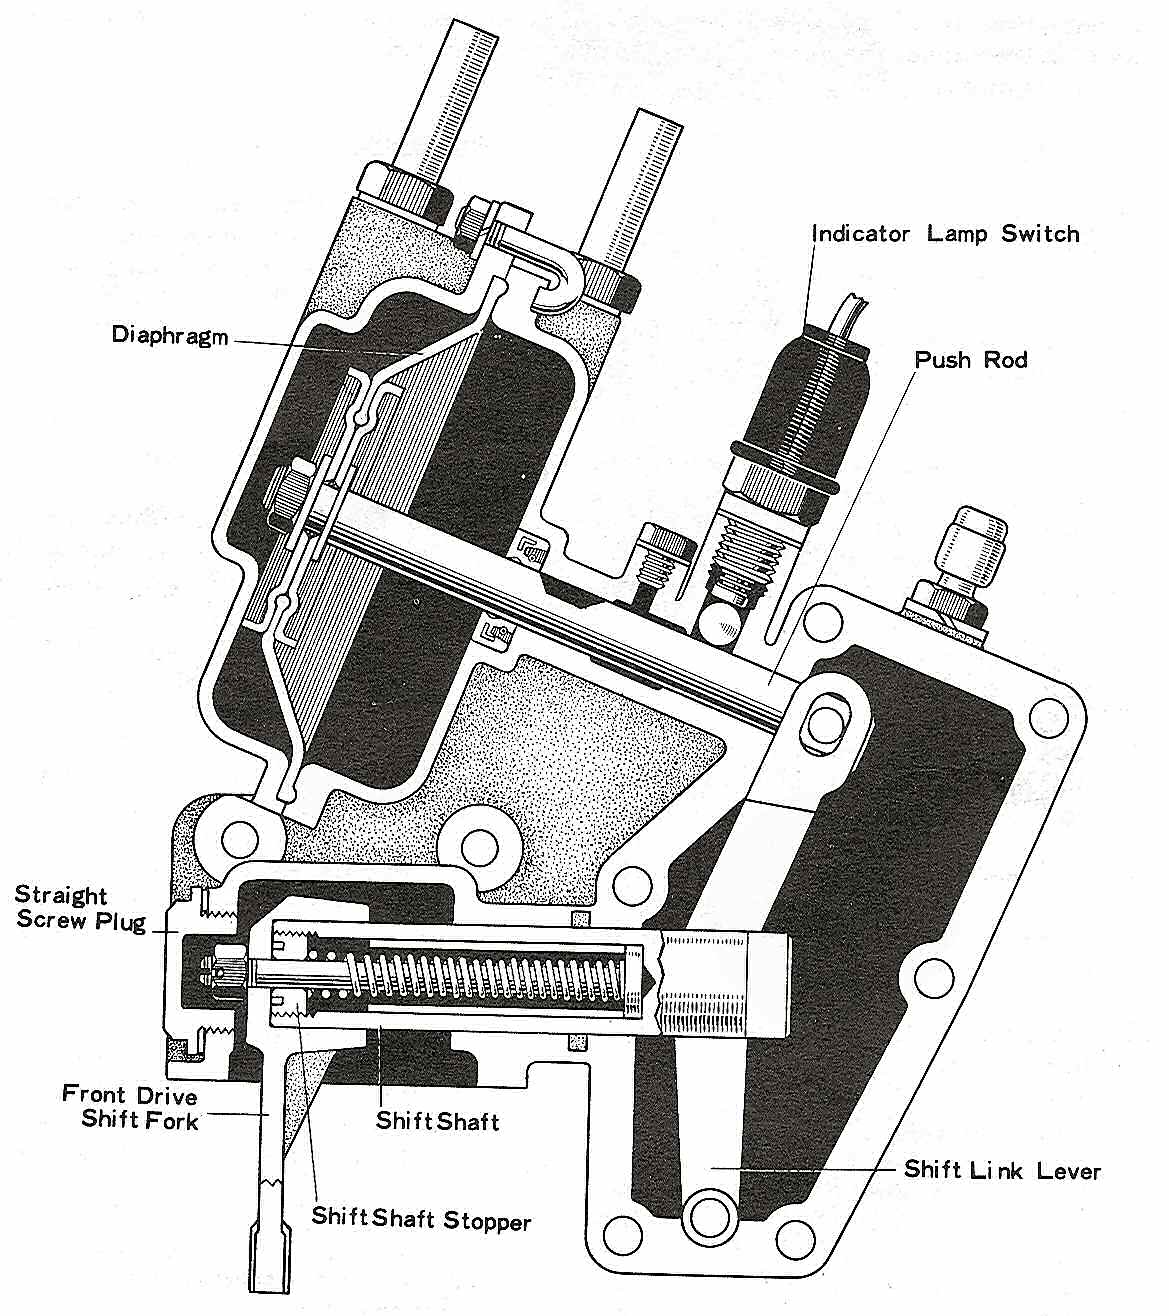
Fig. 4 shows the FSM
diagram of the vacuum shifter for reference. I suggest you print it out
for easy reference.
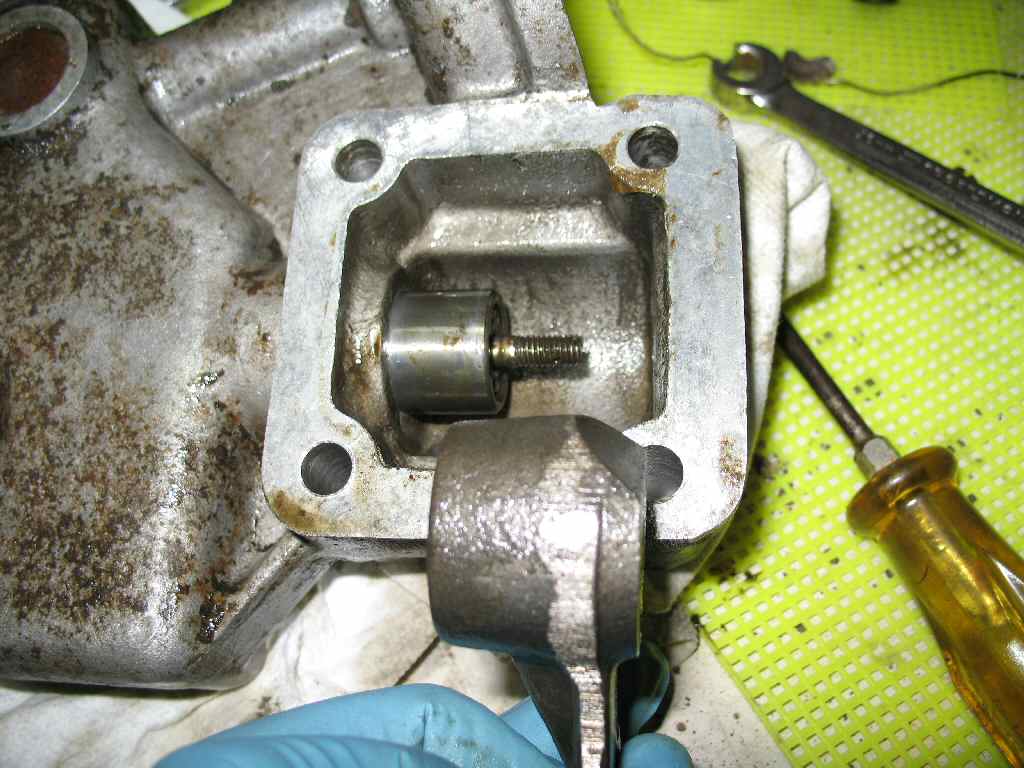
Remove the 6 8mm x 1.25 bolts and lock washers holding the
side plate on. Insert a putty knife in the seam to pry the cover up. The
top cover holds a dowel pin for the shift lever to pivot on so be careful
when prying it up! See Fig. 5. This reveals
a very simple mechanism. See Fig. 6 Remove the dowel pin.
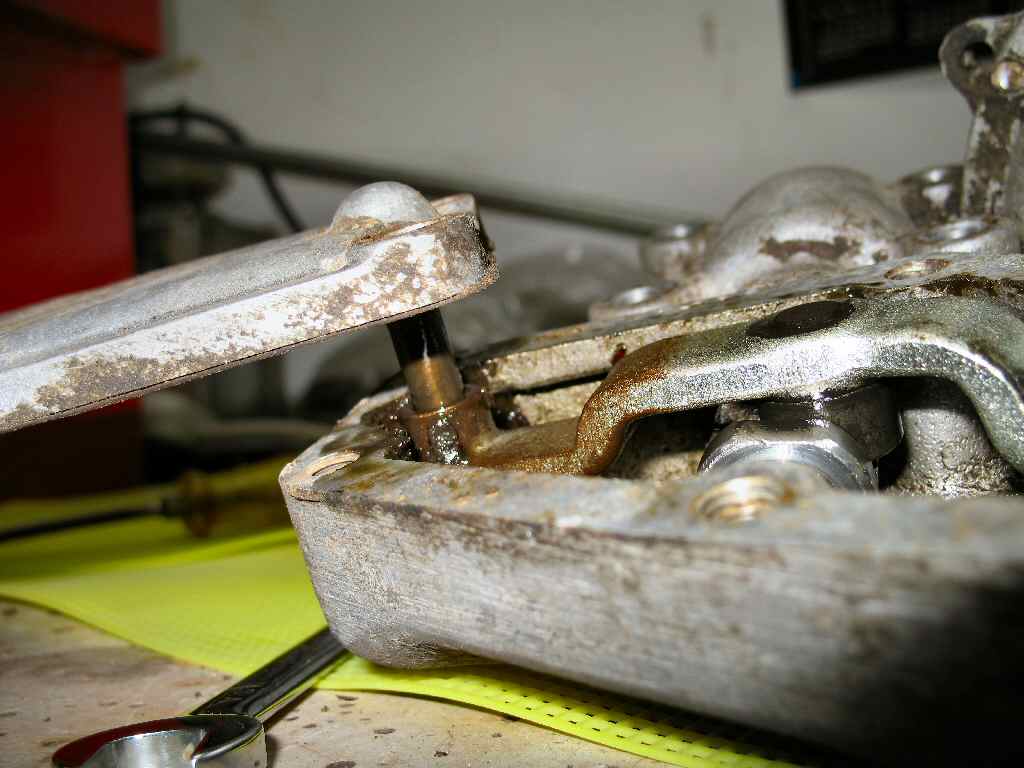
After removing the dowel pin Refer to Fig.
7 and remove
the cotter pin and washer holding the shift lever to the diaphragm push
rod. Now you can pivot the shifter up and pull the pin out. See Fig.
8.
Use a 10mm wrench and remove the J-Bolts holding the top
diaphragm housing cover on. If you are lucky they will come off easily.
All my nuts came off but two of the J-Bolt shafts had corroded to the housing.
I had to cut the J-bolt shafts with a Dremel tool and a cut-off wheel.
See Fig. 9. I lucked into another complete vacuum shifter from which I
borrowed two J-bolts. These could easily be made from some long 6mm x 1.0
threaded rod heated with a torch, bent to the proper shape then cut to
length.
Fig. 10
Diaphragm Exposed
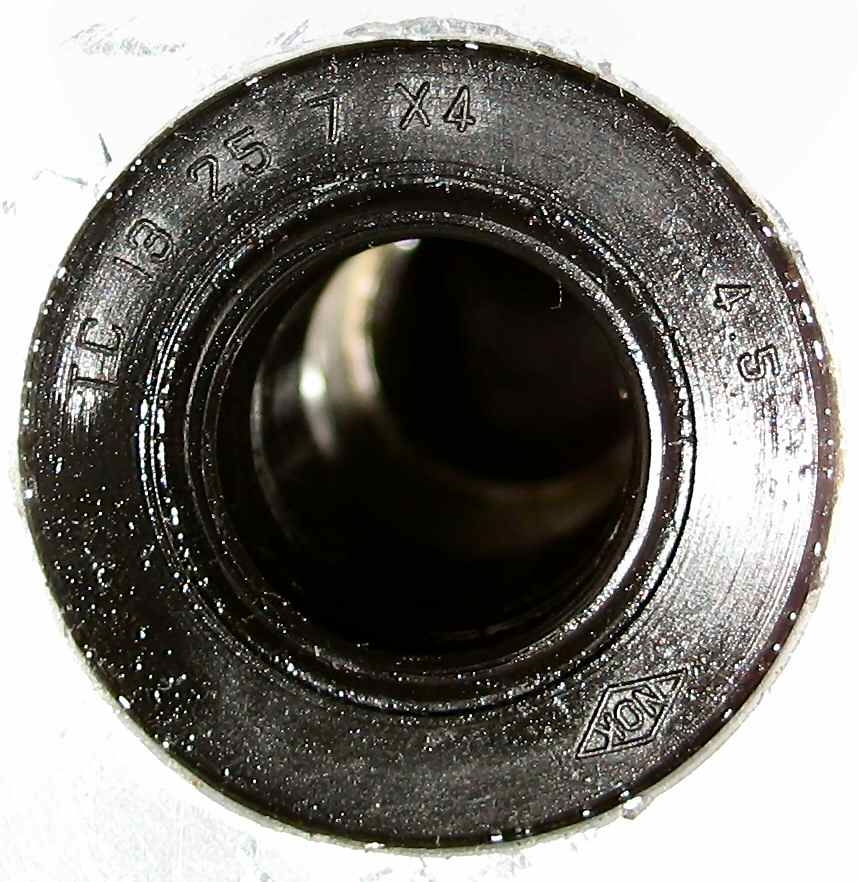
Fig. 11
Push rod Seal
Fig. 12
Screw Plug
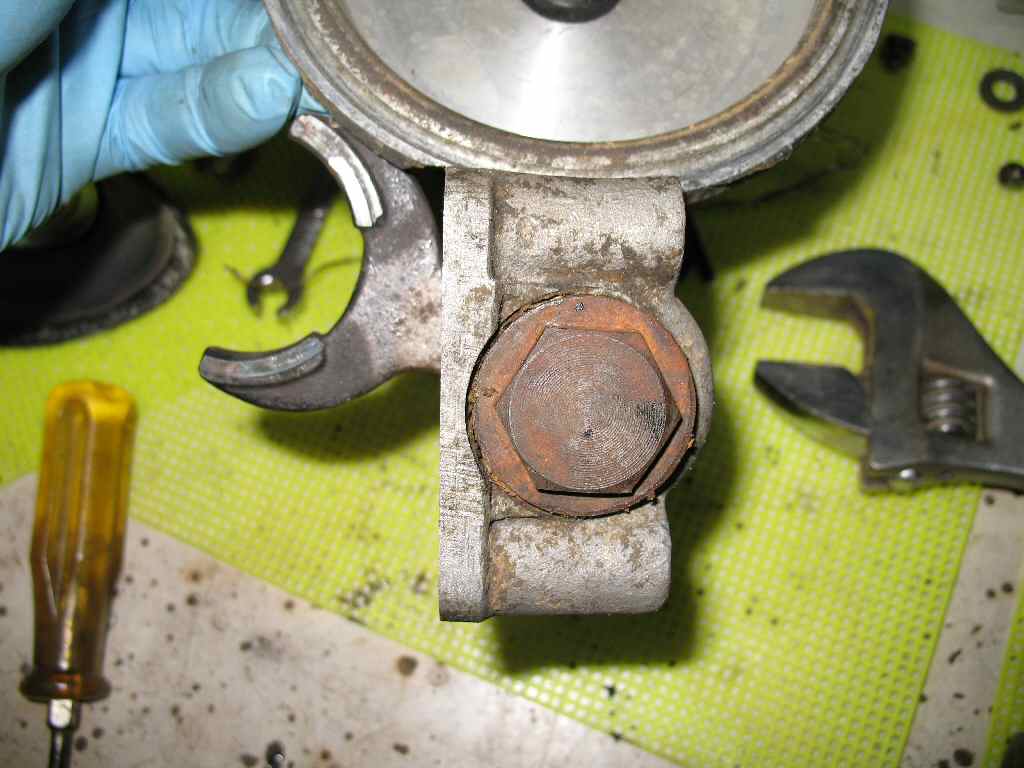
Fig. 13
Shift Fork Retaining Nut
Fig. 14
Shift Fork Removal
Fig. 15
Felt Washer Removal
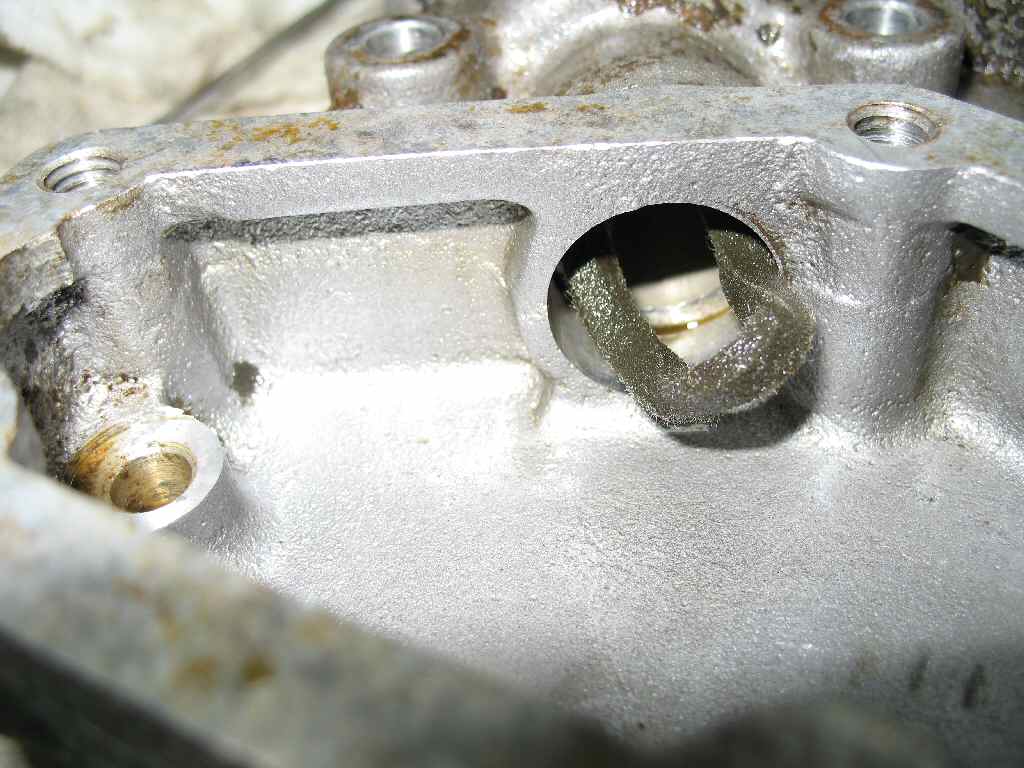
Once the top diaphragm housing cover is off you can see
the diaphragm See Fig. 10. Pull it out carefully, the edges tend to stick.
Inspect it with a bright light behind it to see if it's cracked. Don't
be tempted to put any kind if dressing on it. Fig.
11 shows a close up
of the seal the diaphragm push rod rides in. I could not figure an easy
way to remove this seal so left it in place. This meant I had to paint
the main housing instead of powder coating it.
Next use an adjustable wrench and remove the large nut and
copper washer shown in Fig. 12. This reveals
a smaller nut with a cotter pin and washer. Remove the cotter pin, nut
and washer. See Fig. 13.
Push the shift shaft as far to the left as possible. You
can now remove the shift fork as seen in Fig. 14.
Use a dental pick to remove the felt washer as shown in
Fig. 15. Wash the felt carefully, reshape it, dry it, then oil it and put
in a plastic bag for later reuse.
I masked off parts of the main housing I didn't want to
sandblast then sandblasted the housing and covers.
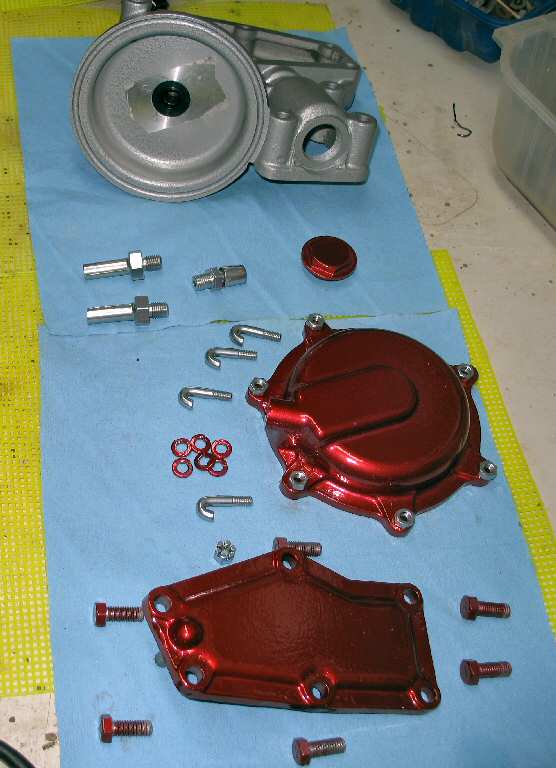
Fig. 16
Powder Coated Parts
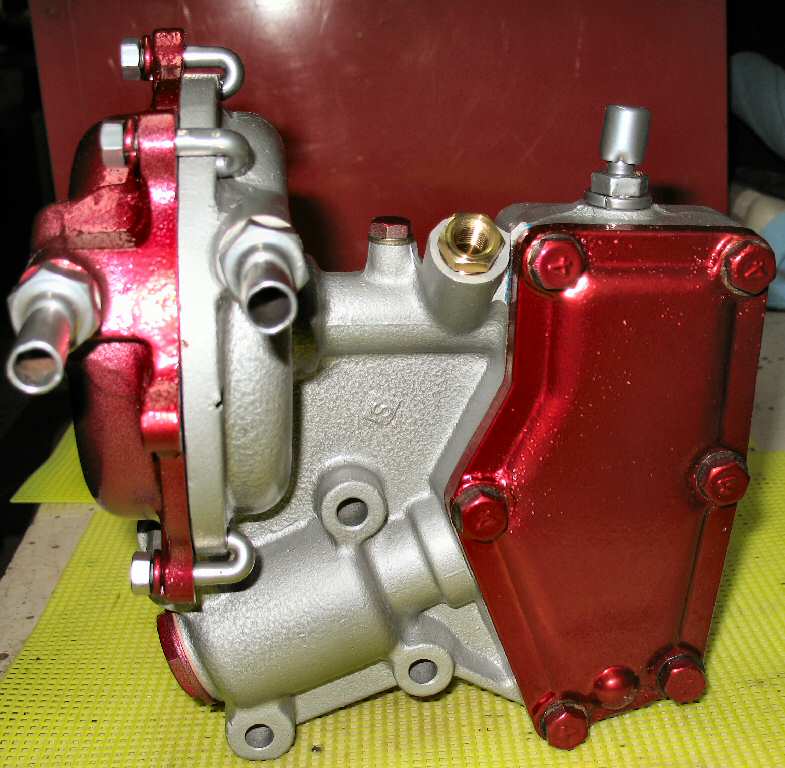
Fig. 17
All Assembled
Fig. 18
Mounted to T-Case
Next I primed and painted the main housing using Hammerite
paint and powder coated the covers and bolts,nuts and washers. See Fig.
16 for the completed parts.
Since this is so simple I'll not go into great detail about
the reassembly. Just use a bit of grease on the shafts when reassembling.
Ok so now find the square gasket Fig.
18 shows the completed
unit attached to the rebuilt T-case.