Chauncey Hood, after reading
my de-rust web page, decided to take
the basic de-rust tank idea
to the next level.
Chauncey is also
building and reviving an FJ40.
Chauncey and
a framing friend
built
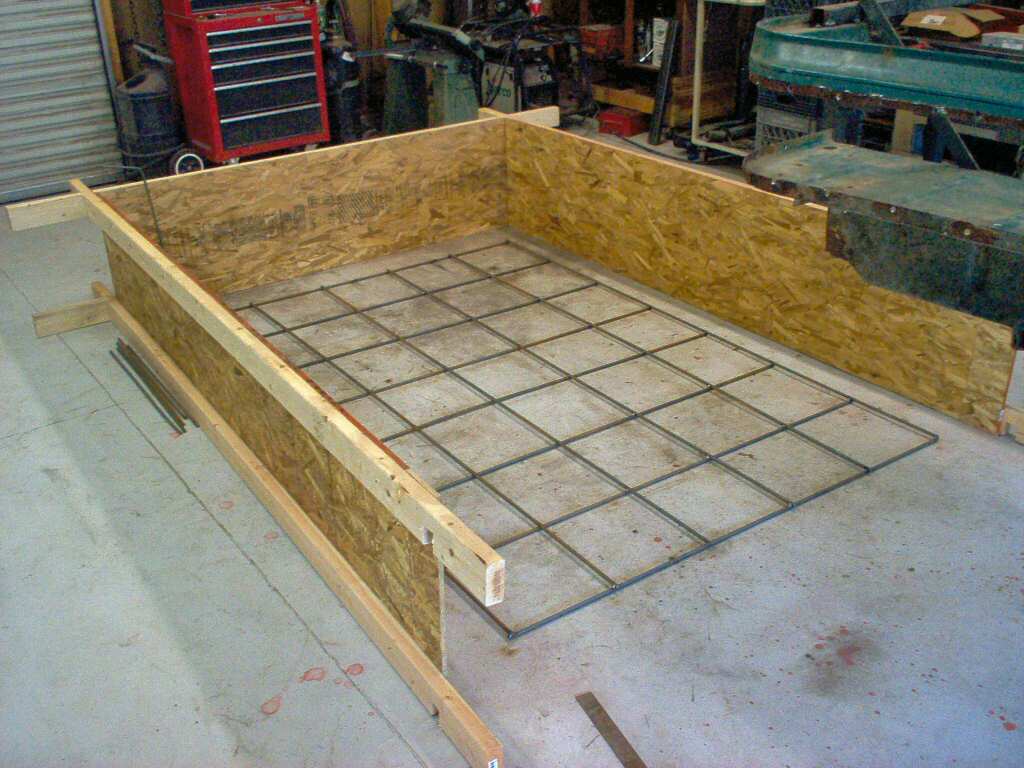
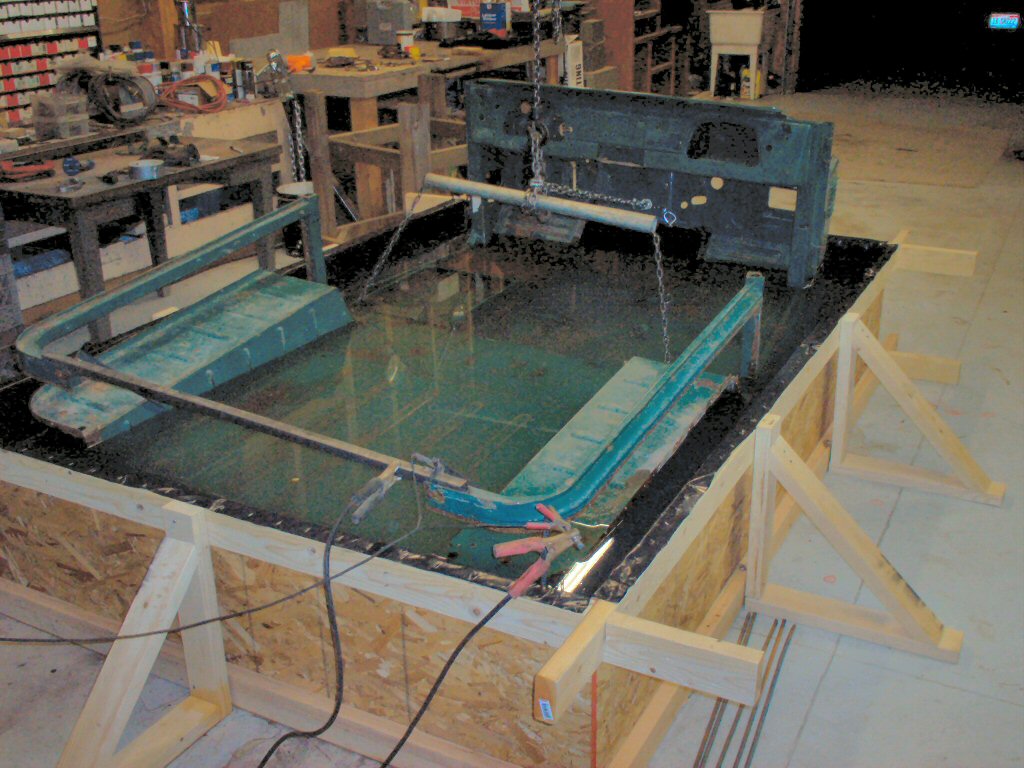
a 8.5' x 6' x 1.75' (102" x 72" x 20") 'tank' from 2 x 4's and chip board,
lined it with 6 mil black plastic, built an anode grid by welding re-bar
together
then
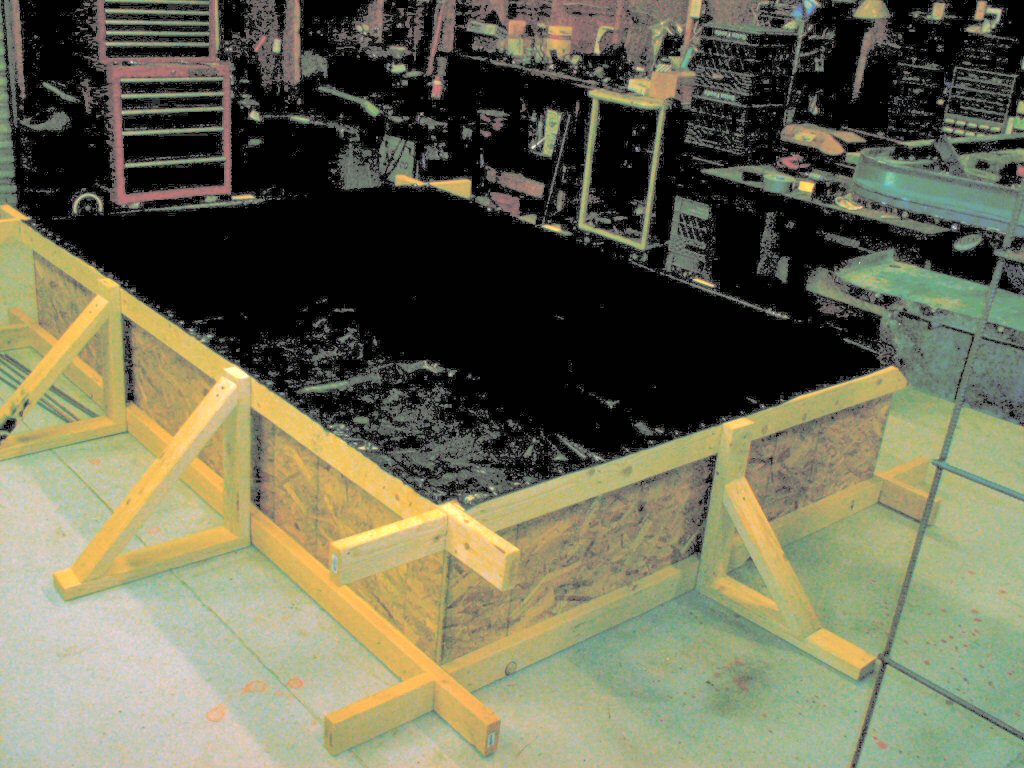
filled it with about 670 gallons of
a water and
Sodium Carbonate solution. What you are
about
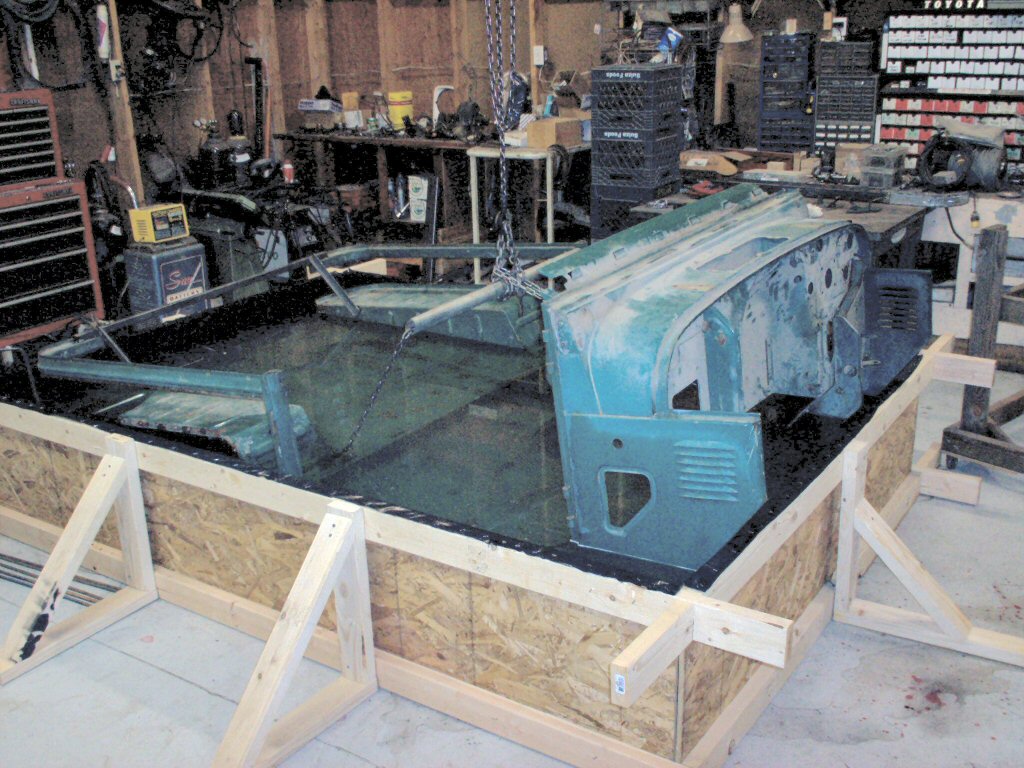
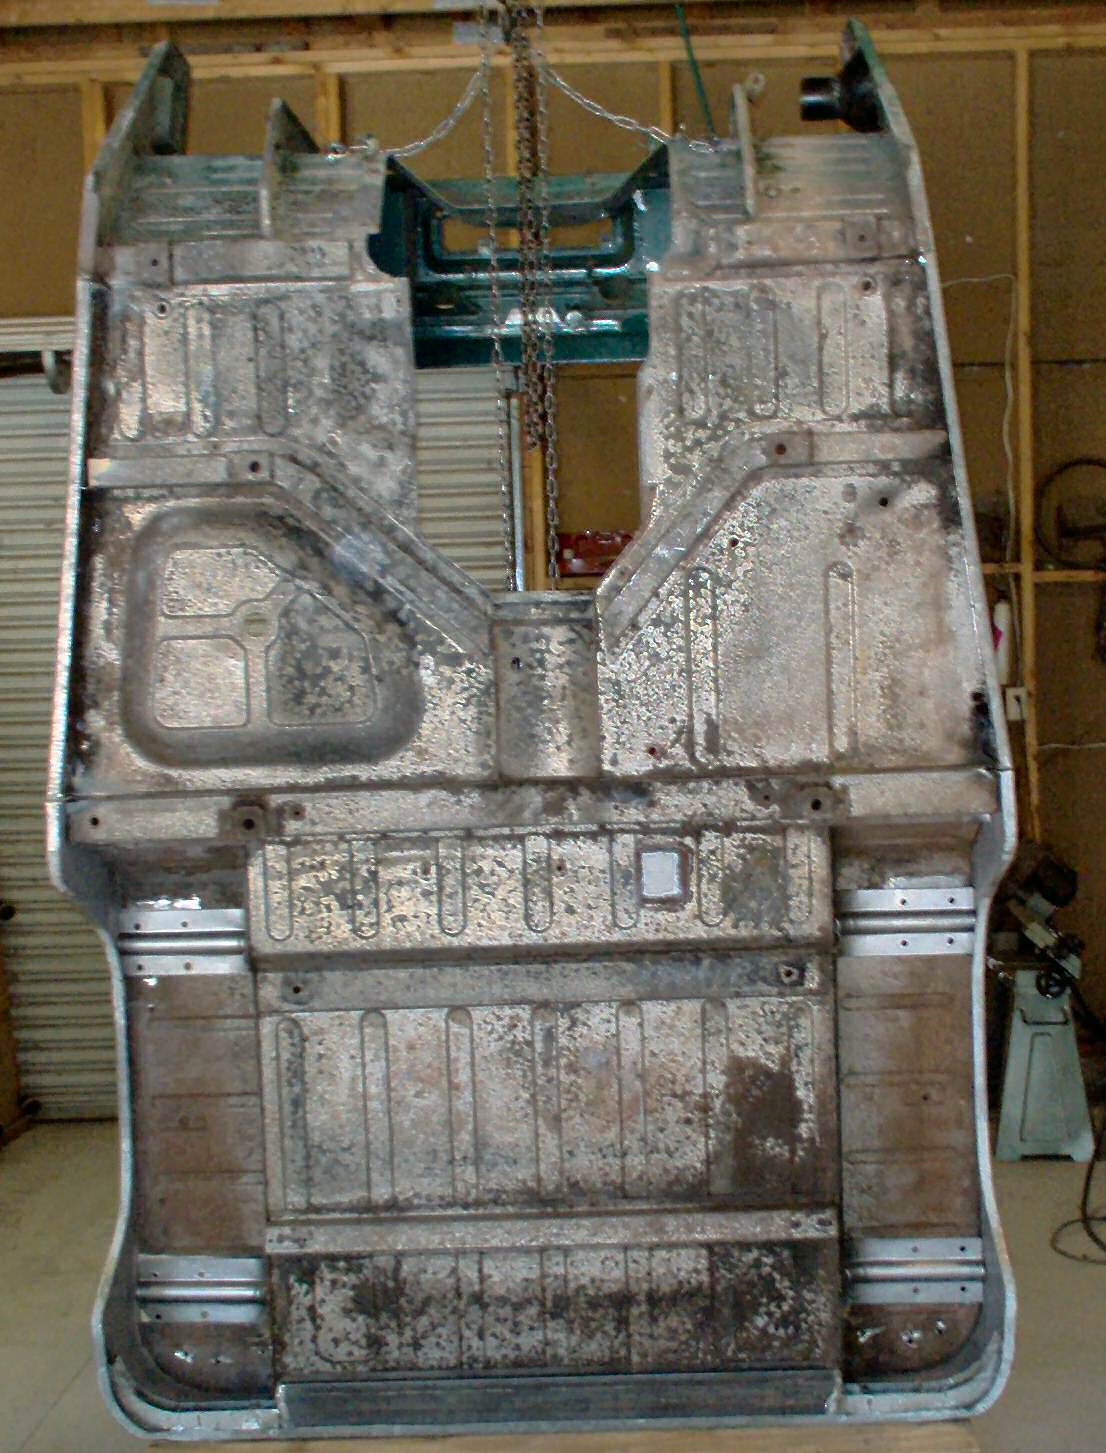
to see is the first known de-rust tank large enough to hold an ENTIRE Cruiser
body shell! There is no reason I can think of that a version deep enough
to submerge the entire body couldn't be built with just a few engineering
tweaks, but then most of the rust on a body good enough
to justify
this
amount of work will be on the bottom 20 inches of the shell anyway.
More details from the builder:
This tank was built on a flat garage floor, but
you could set something like this up outside on smooth level dirt, asphalt,
or gravel. You may need a more durable liner if
you choose to do that though!
Home Depot sells
thick pool
liner
material
in the garden section.
No matter how you slice it the 6 mil plastic will have pin holes, so be
prepared. The slightest bump will bruise it. My only saving grace was the
shop floor sealed
the
pin holes after the floor got a little wet. 670 gals of water is pretty
heavy
(5581 lbs) so it tends to seal very tightly against the floor! (Gallons
calculated by the formula L X W
X D X 7.5. This gives 8.5 x 6 x 1.75 x 7.5 = 670 gallons. Weigh of one gallon
of water is 8.33 lbs. 670 x 8.33 = 5581 lbs)
Construction of the tank is as follows: 2x4 rails top and bottom notched
to join
Lincoln log style. I left at least 6" on the ends so the notches wouldn't
split out. 3/8" chip board (roofing material) for the sides and be
sure the nails (or screws if you prefer) go from the inside out (punctures
you
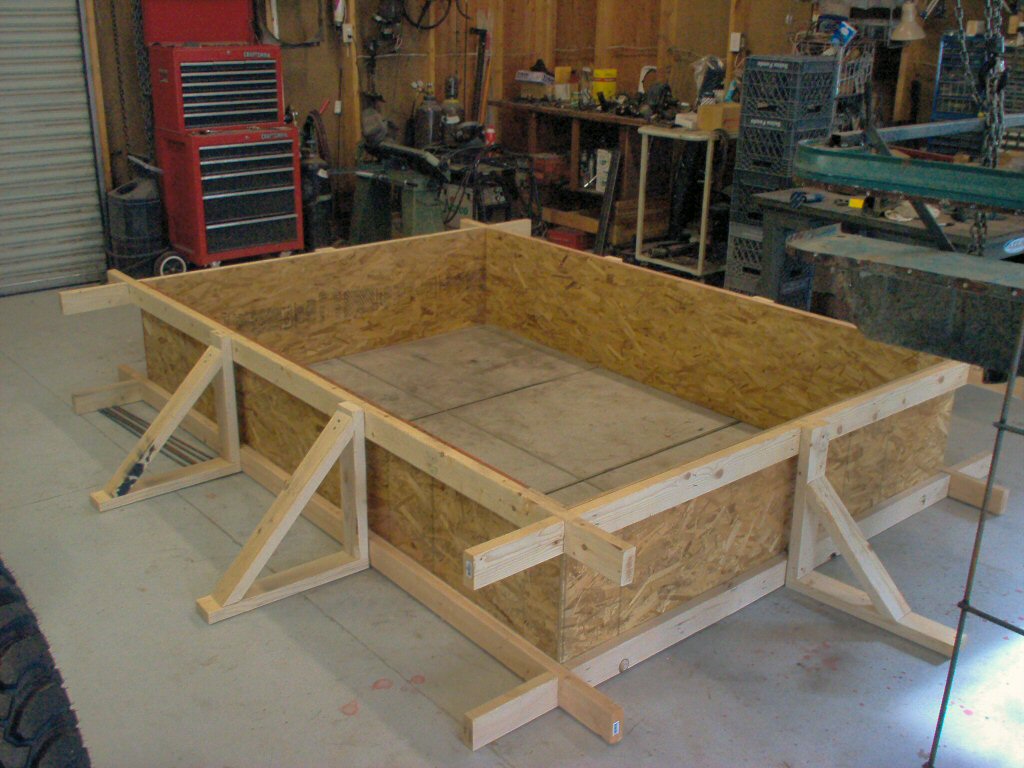
know). My reasoning is that the short sides would need only one brace and
the long sides
at least two. I used some hurricane cord (any stout strapping will do)
to run on the bottom from side to side and end to end where I placed the
braces. The
cord keeps the sides from bowing to water weight and the braces keep the
sides from bowing out. Placing the plastic in was a trial. A 12' x 13'
piece of plastic
just fit. The best thing to do is make sure your tub frame is relatively
square and staple one side (on the top of course) and work from there.
A few pieces
of duct tape will help hold the shape until you are satisfied. Then staple
around the top. Be careful with the plastic cause like I said before...
it bruises real
easy. My final size was 6'x8 1/2'x20". I suppose you could go perhaps
to 24" high without a design change.
Fig. 1
Basic Construction
Fig, 2
Yep it'll fit!
Fig. 3
Bracing the sides
Fig. 4
Plastic Installed
Fig. 5
Shell in tank
Fig. 6
Another View
Fig. 7
After a week
Fig. 8
The re-bar grid was connected to a small battery
charger and the plan is to leave it there for a week then lift the body out and
check the progress. I'll post new pics as I receive them. Enjoy!