Choose a page to see here!
Introduction
Rust Removal via Electrolysis
Home Powder Coating
Getting it to move/start
Body: Tool Box removal/repair
Body: Floor pan repair
Body: Making a new center channel
Body: Repairing the mid bed
Body: Making a new rear Sill
Body: Cargo Floor Replacement
Body: Wheel Well Replacement
Body: Quarter Panel Replacement
Body: Cowl Vent
Body: Overall Tub Repair
Body: Front Fender Repair
Body: Tail Gate
Body: CCOT Wheel Well Support
Body: Spare Tire Carrier
Body: Rear Hatch Handle Repair
Body: Windshield:Stripping/Glass Removal
Body: Windshield Rust Removal
Brakes: Master Cylinder Rebuilding
Brakes: Mini-Truck Booster swap
Brakes: Wheel Cylinder Rebuilding
Brakes: Assembling the Brake Backing Plate
Brakes: Making Your Own Brake Lines
Brakes: Bleeding Brakes 101
Cooling: Water Pump Replacement
Cooling:Radiator Assembly Restore
Drive Train: Rebuilding the 3sp T-case
Drive Train: 3 Sp to 4 sp Conversion
Drive Train: Marfield axle Tack
Drive Train: Installing Flywheel/Clutch
Drive Train: Clutch Master/Slave Cylinder
Drive Train: Pinion Flange Problem
Drive Train: Knuckle rebuild
Electrical: Carb Cooling Fan
Electrical: Schematics
Electrical: Wiring Color Codes
Electrical: Wiring Harness
Electrical: Amp Meter Science
Electrical: Turn Signal Switch
Electrical: Turn Signals/Marker Lights
Electrical: 71 to 74 Tail Lights
Electrical: FJ60 Dizzy/Igniter Install
Electrical: Dizzy FAQ
Electrical:Wiper Science 301
Electrical: Gauge Light Mod
Electrical: Horn: How it works
Electrical: Rebuilding the F/2F Starter
Electrical: F/2F Alternator Rebuild
Engine: Oil Pressure Regulator Renewal
Engine: Removal, Frame Blasting
Engine: FJ Crank Pulley Repair
Engine: Cleaning, Painting Engine
Engine: Reassembly 1
Engine: Reassembly 2
Engine: Installing in Frame
Fuel: Carb FAQ
Fuel: Gas Tank Repair
Fuel: Pump Renewal
Fuel: My 1971 Carb
Fuel: Marine Filter Upgrade
Fuel: Making Fuel Lines
Frame: 71 to 74 rear cross member swap
Frame: Sand Blasting/Rust Bullet
Gasket Identification
Heater: Front Heater Weirdness
Heater: Rear Heater Repair
Restoring: Restoring Horn
Spring Pack Restore/Mod
Steering: Tie Rod Replacement
Steering: Steering Box Rebuild
Steering: Center Arm Rebuild
Steering: Mini-Truck Power Steering
Steering: Drag Link Rebuild
Seats:Front
Seats:Rear
Windshield Wiper Maintainence
Windshield Washer Motor Replacement
Windshield Wiper Replacement
Ed's Red : Make your Own!
Making SST's
Updated 11-14-2005 Tool Box Repair
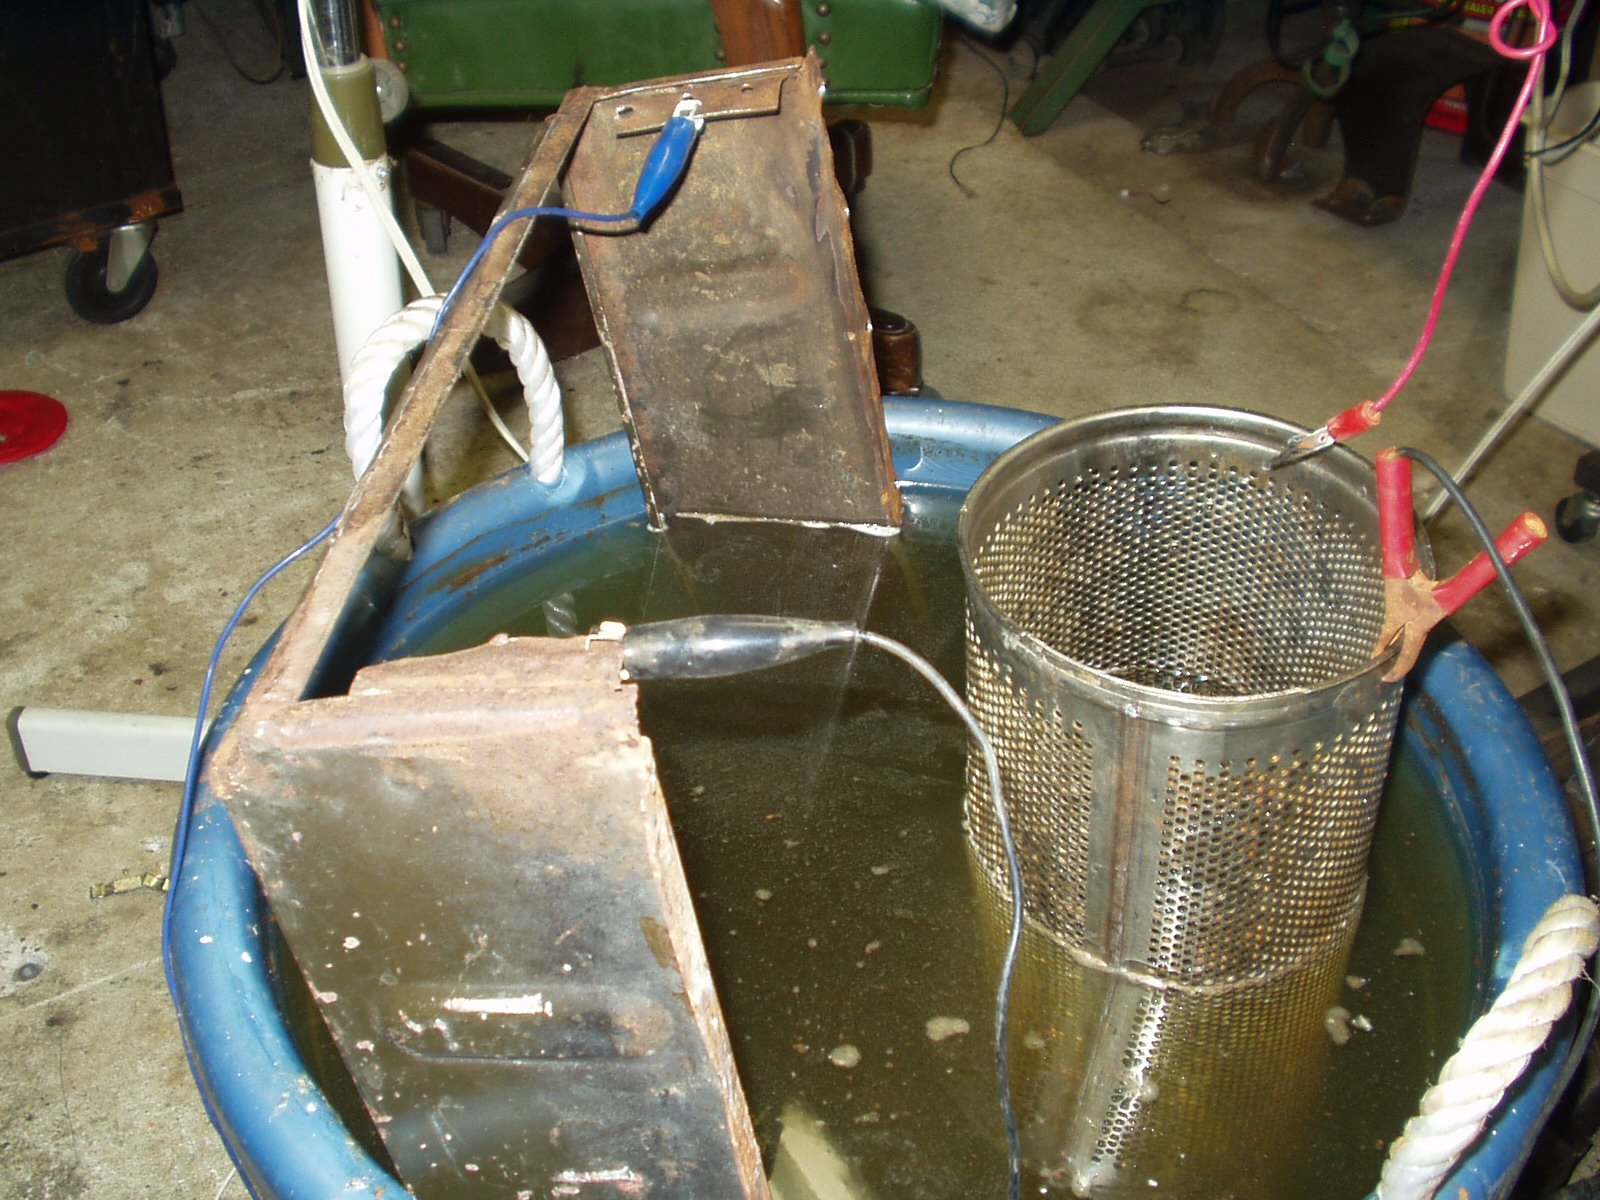
Fig. 1
De-Rusting the Tool Box
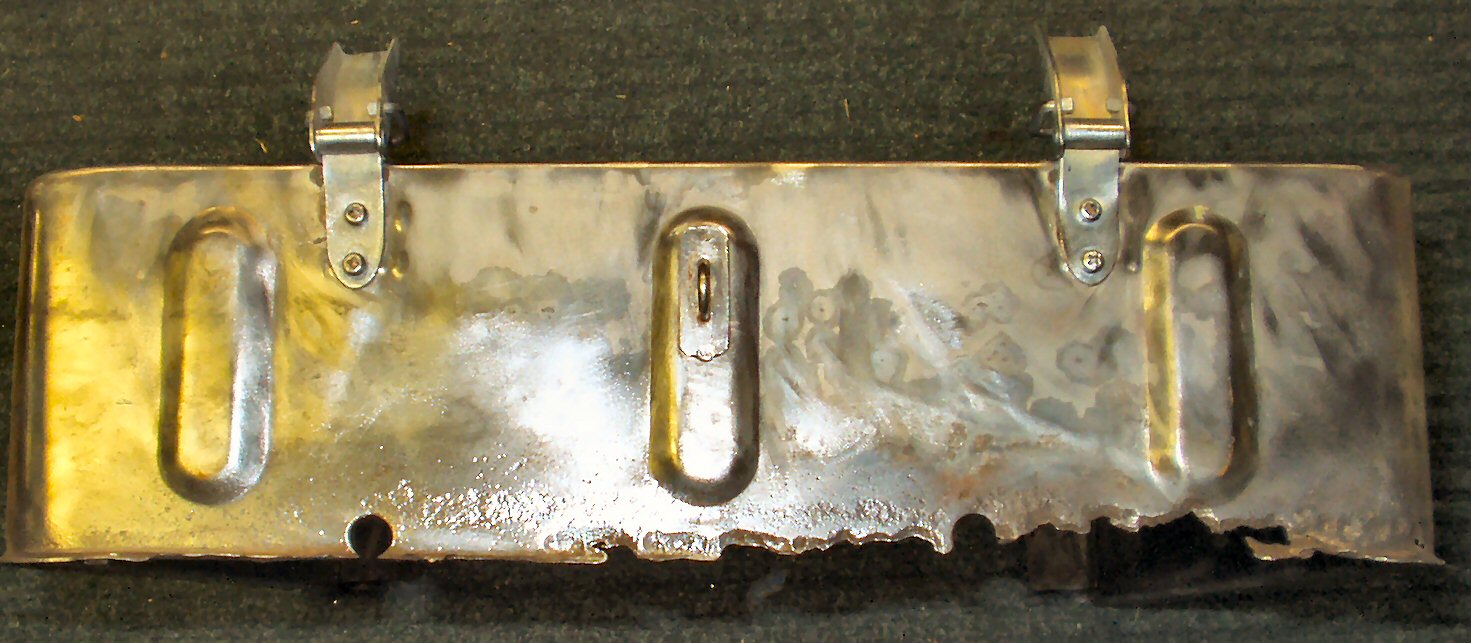
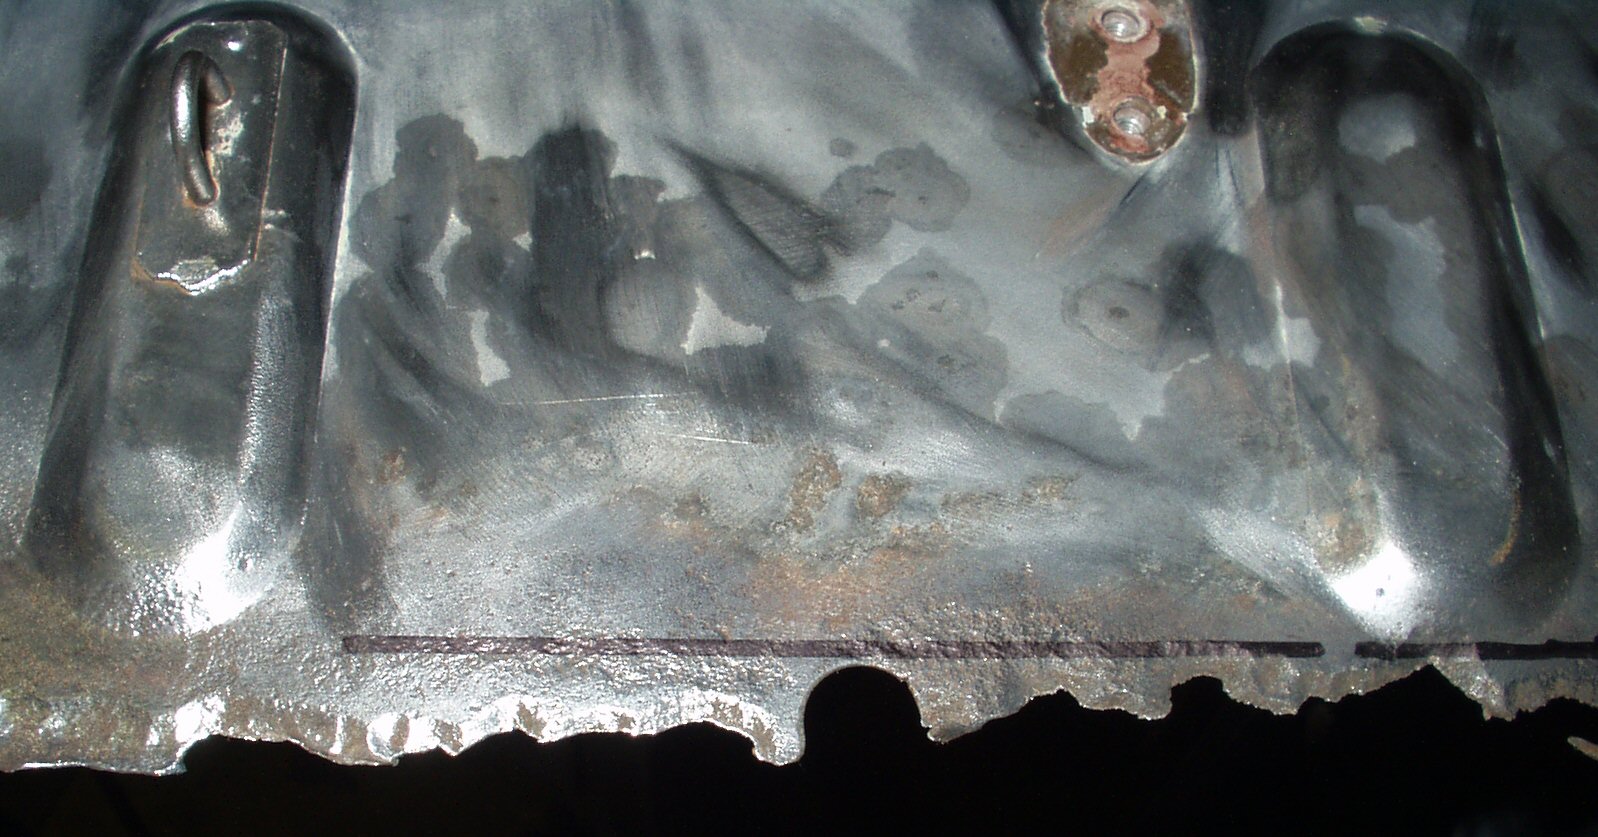
Fig. 2
Bit-o-rust?
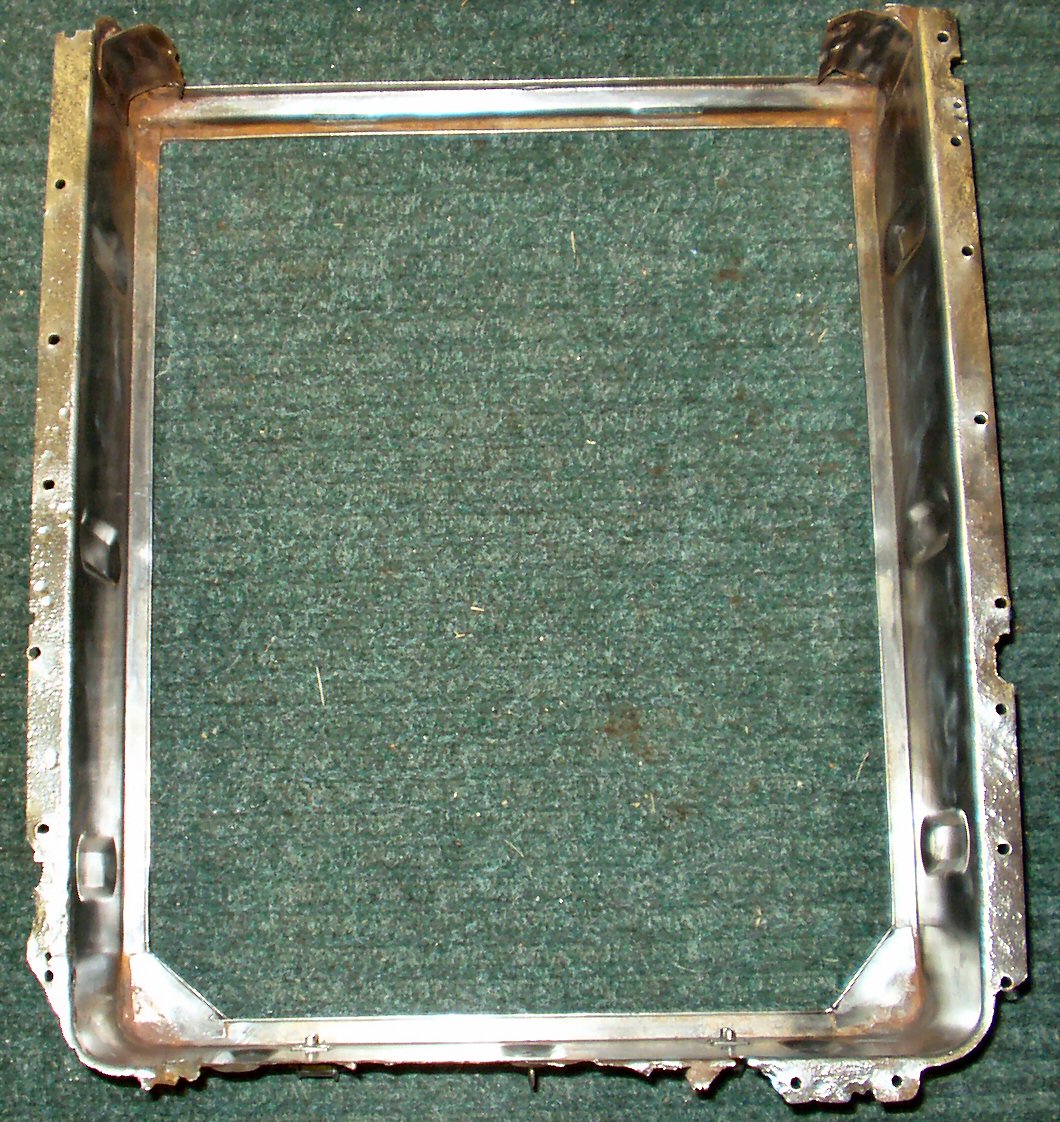
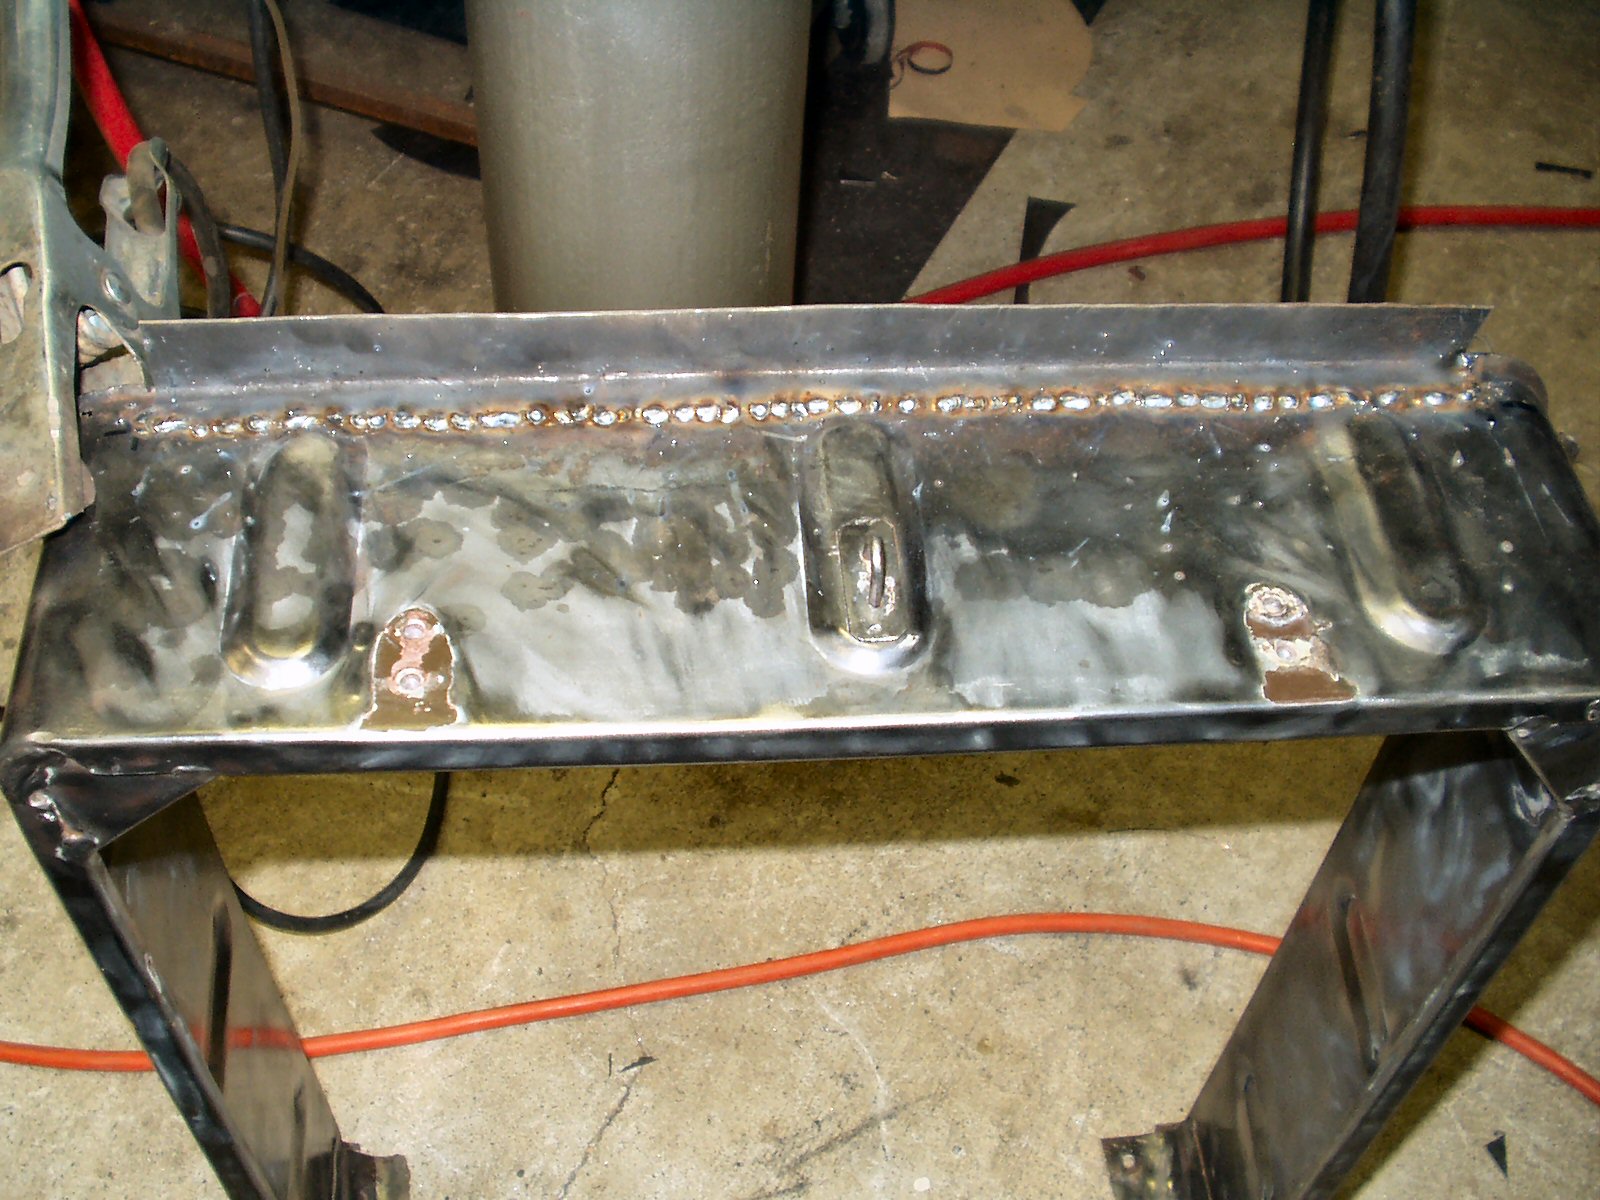
Fig. 3
Top of Tool Box
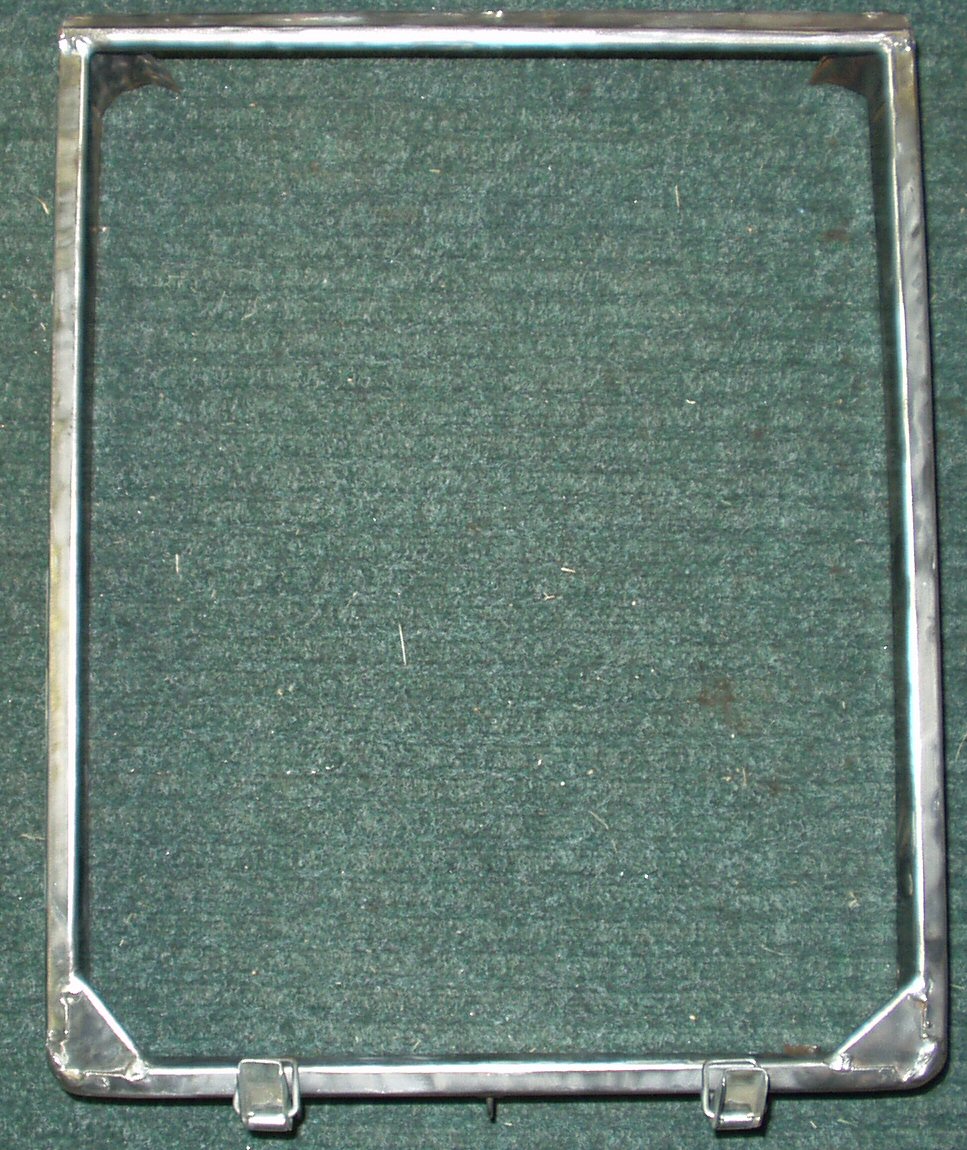
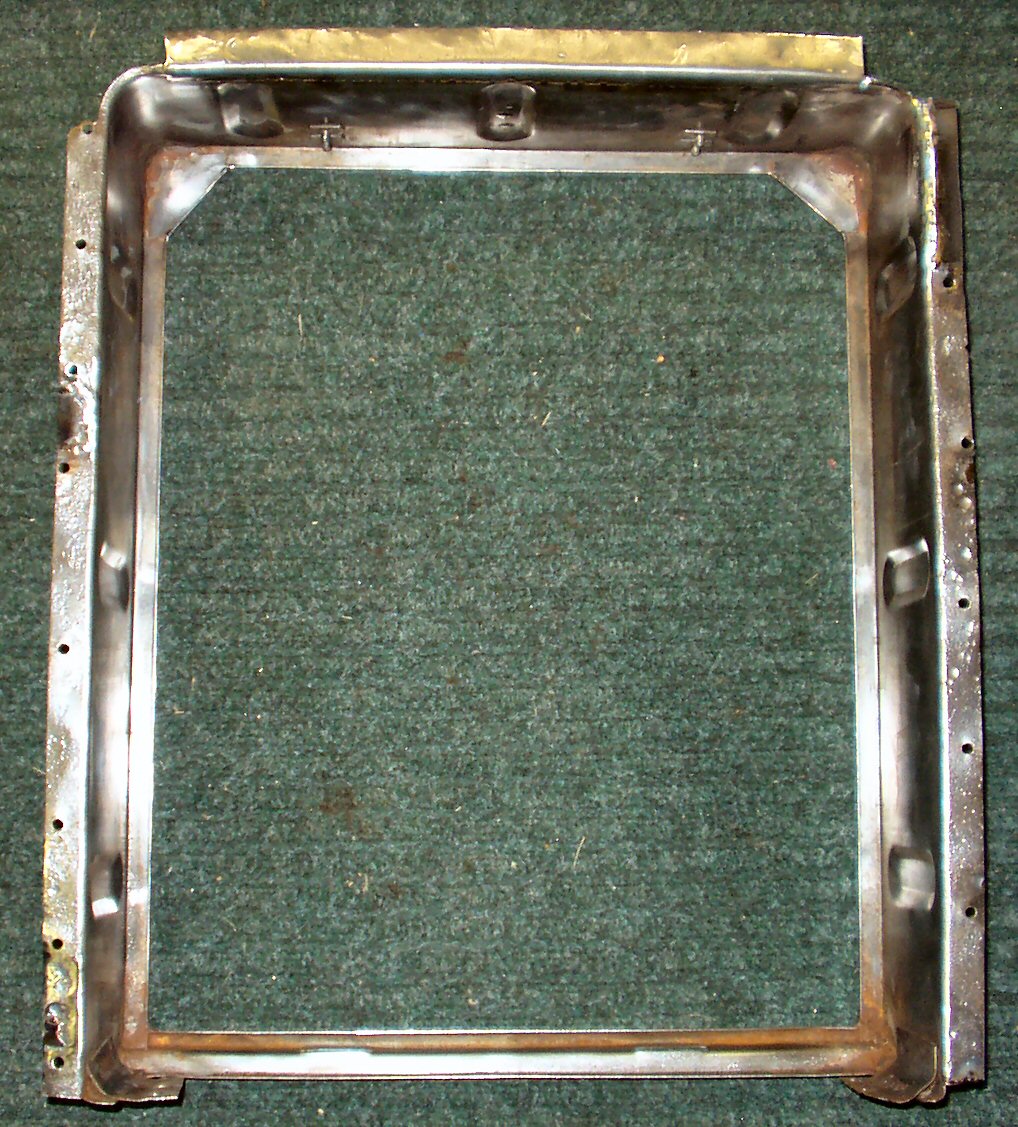
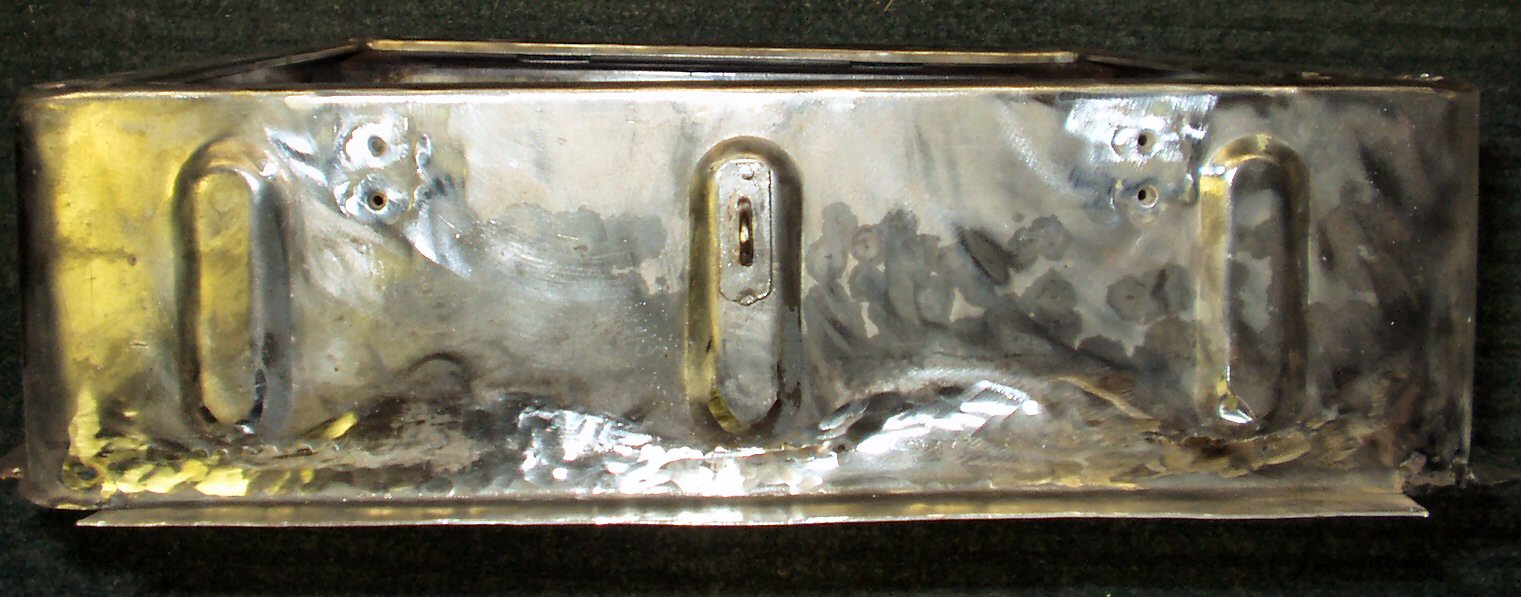
Fig. 4
Bottom of Tool Box
After getting the drivers side floor finished I started repairing
the Tool Box. I started by putting it in the de-rust tank for 2 days. See Fig.
1 . I was hoping this would loosen up the rust and 3 layers of paint.
The rust was gone and two layers of the paint softened up but that last factory
applied Sea Foam green layer had to be wire wheeled off! See Fig.
2-4 to see the box after most of the rust and paint were removed.
Fig. 5
Cut Line
Fig. 6
Making a patch panel the hard way
Fig. 7
Tacked in place
Fig. 8.
Finished
Fig. 2 shows where the
worst of the rust was. I cut this section out (See Fig.
5 ) then attempted to make a repair panel with a simple 90 degree bend
in a piece of 14.5" x 1.5" 16ga sheet. Sounds simple enough, right?
I tried the old 2x4 trick (clamp the metal between two pieces of 2x4 then bend)
but that did not work at all. I finally clamped the piece to a section of C
channel and just hammered it over. See Fig. 6 .
Of course I then had to use the anvil and shop press to straighten it out...
I really need a sheet metal brake for this kind of work!
Fig. 7 shows the piece
tacked in place, ready to be ground down. I next made up several small patch
pieces for the bottom flanges of the box and welded those on. Fig
8 shows the repaired box.
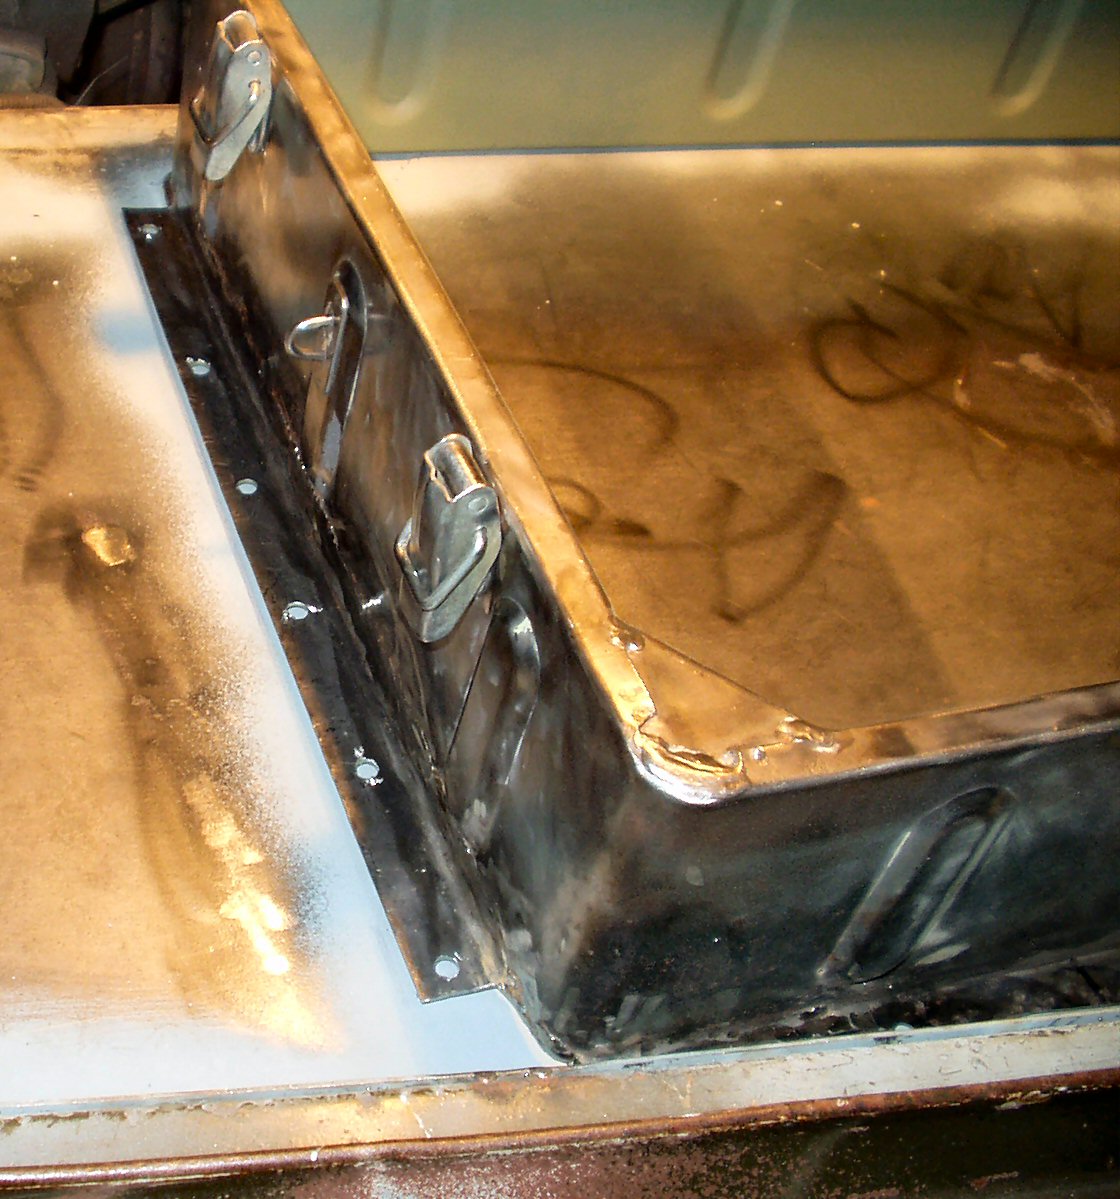
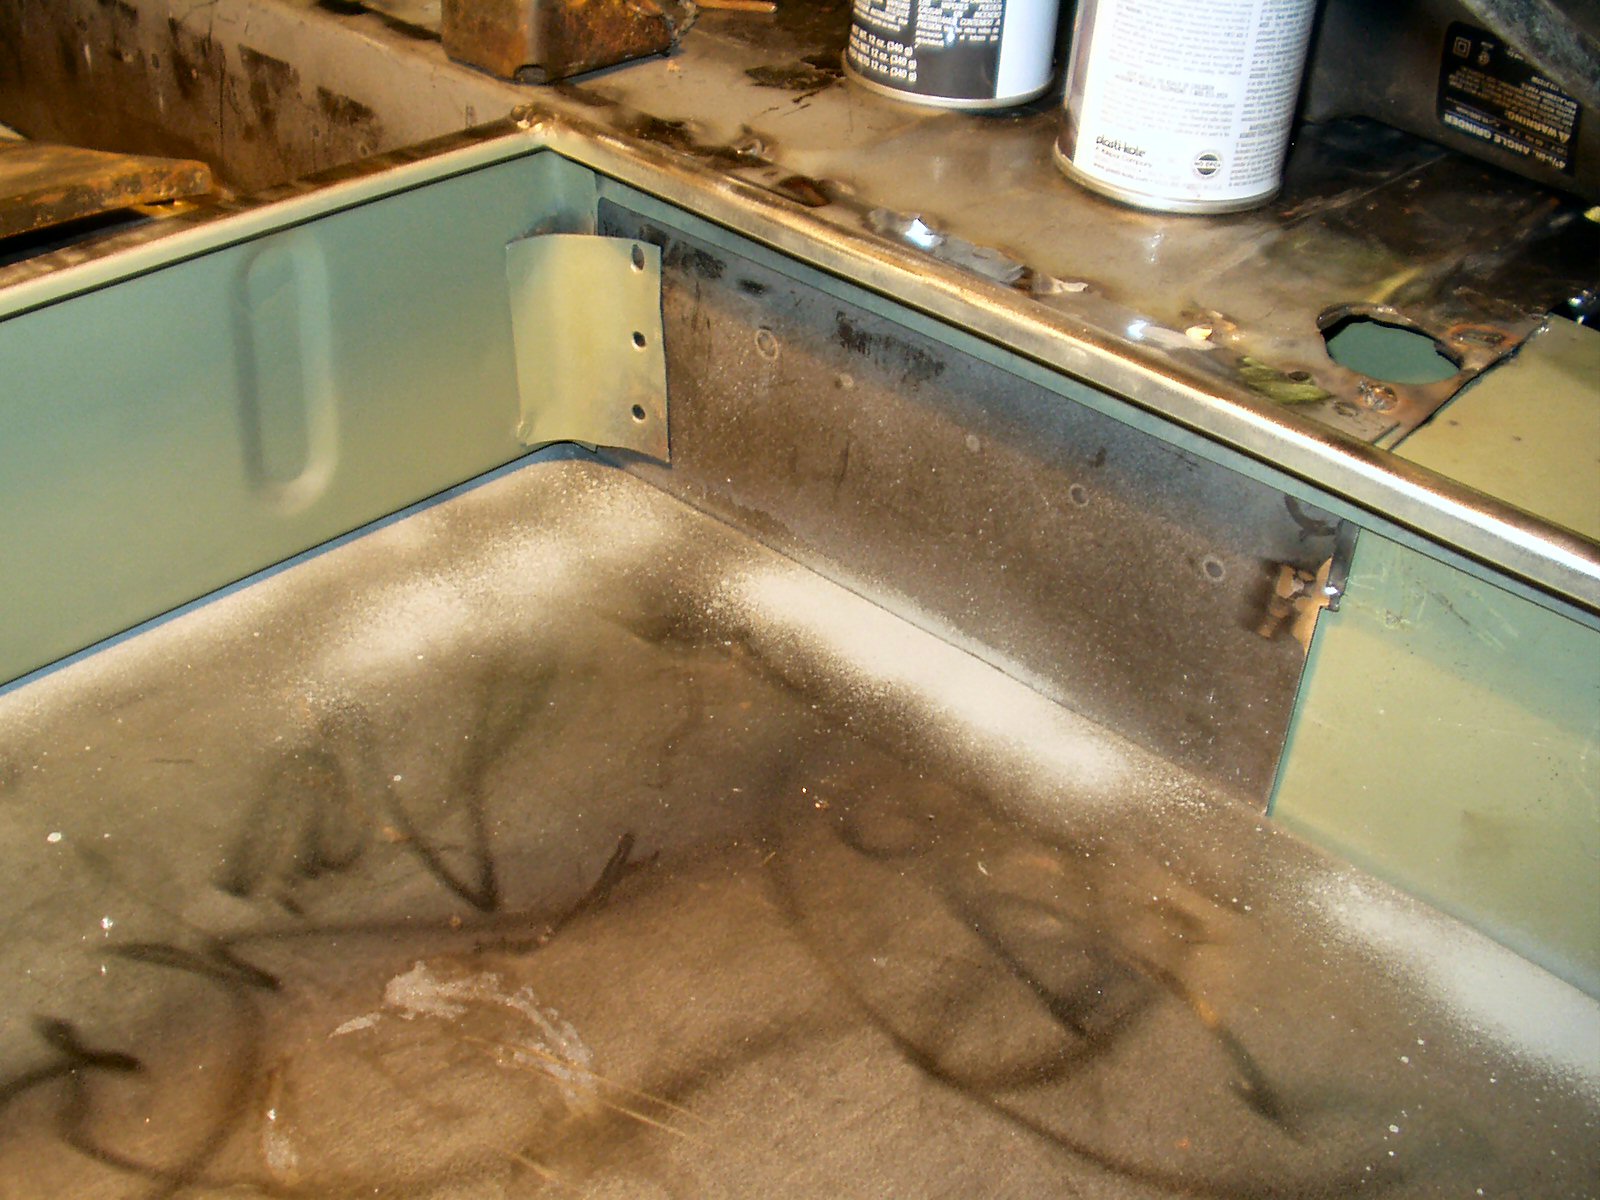
11-13-2005
Fig. 9
Getting ready to weld back in
Fig. 10
Getting ready to weld back in
Fig. 11
Welded in!
After much work on the rest of the truck (center
channel , passenger floor , and mid
bed ) I could finally put the tool box back into place. I primed the bottom
lip of the box and the floor pan, primed the inside of the box with self etching
primer, drilled some plug weld holes, lined it up, clamped it down and welded
in in place. See Figs. 9-11 .
Choose a page to see here!
Introduction
Rust Removal via Electrolysis
Home Powder Coating
Getting it to move/start
Body: Tool Box removal/repair
Body: Floor pan repair
Body: Making a new center channel
Body: Repairing the mid bed
Body: Making a new rear Sill
Body: Cargo Floor Replacement
Body: Wheel Well Replacement
Body: Quarter Panel Replacement
Body: Cowl Vent
Body: Overall Tub Repair
Body: Front Fender Repair
Body: Tail Gate
Body: CCOT Wheel Well Support
Body: Spare Tire Carrier
Body: Rear Hatch Handle Repair
Body: Windshield:Stripping/Glass Removal
Body: Windshield Rust Removal
Brakes: Master Cylinder Rebuilding
Brakes: Mini-Truck Booster swap
Brakes: Wheel Cylinder Rebuilding
Brakes: Assembling the Brake Backing Plate
Brakes: Making Your Own Brake Lines
Brakes: Bleeding Brakes 101
Cooling: Water Pump Replacement
Cooling:Radiator Assembly Restore
Drive Train: Rebuilding the 3sp T-case
Drive Train: 3 Sp to 4 sp Conversion
Drive Train: Marfield axle Tack
Drive Train: Installing Flywheel/Clutch
Drive Train: Clutch Master/Slave Cylinder
Drive Train: Pinion Flange Problem
Drive Train: Knuckle rebuild
Electrical: Schematics
Electrical: Carb Cooling Fan
Electrical: Wiring Color Codes
Electrical: Wiring Harness
Electrical: Amp Meter Science
Electrical: Turn Signal Switch
Electrical: Turn Signals/Marker Lights
Electrical: 71 to 74 Tail Lights
Electrical: FJ60 Dizzy/Igniter Install
Electrical: Dizzy FAQ
Electrical:Wiper Science 301
Electrical: Gauge Light Mod
Electrical: Horn: How it works
Electrical: Rebuilding the F/2F Starter
Electrical: F/2F Alternator Rebuild
Engine: Oil Pressure Regulator Renewal
Engine: Removal, Frame Blasting
Engine: FJ Crank Pulley Repair
Engine: Cleaning, Painting Engine
Engine: Reassembly 1
Engine: Reassembly 2
Engine: Installing in Frame
Fuel: Carb FAQ
Fuel: Gas Tank Repair
Fuel: Pump Renewal
Fuel: My 1971 Carb
Fuel: Marine Filter Upgrade
Fuel: Making Fuel Lines
Frame: 71 to 74 rear cross member swap
Frame: Sand Blasting/Rust Bullet
Gasket Identification
Heater: Front Heater Weirdness
Heater: Rear Heater Repair
Restoring: Restoring Horn
Spring Pack Restore/Mod
Steering: Tie Rod Replacement
Steering: Steering Box Rebuild
Steering: Center Arm Rebuild
Steering: Mini-Truck Power Steering
Steering: Drag Link Rebuild
Seats:Front
Seats:Rear
Windshield Wiper Maintainence
Windshield Washer Motor Replacement
Windshield Wiper Replacement
Ed's Red : Make your Own!
Making SST's
Hosted by Global
Software, Inc.
©1998 - 2023 Mark C. Baker Web Designer
Please: No part of this web site may be used without express
permission... email mbaker@globalsoftware-inc.com for permission.
www.globalsoftware-inc.com