Final Assembly: Spindle, Brake Backing
plate, Front Oil Seal, Hub
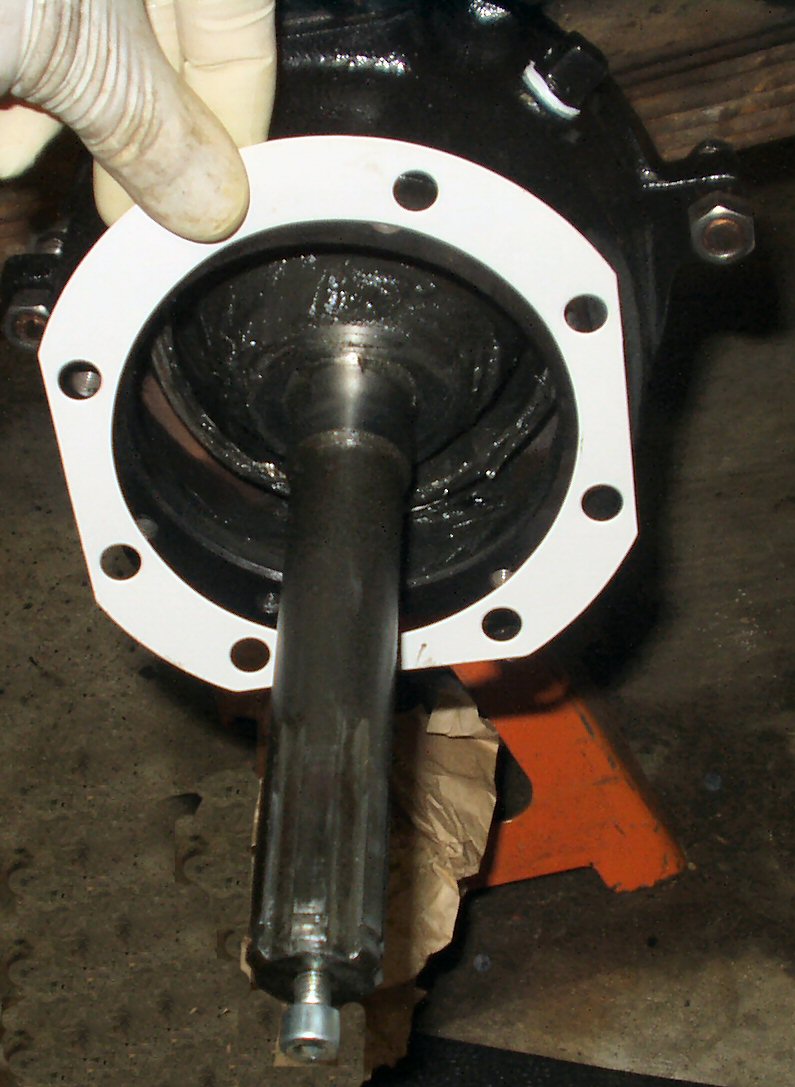
Fig. 1
Spindle Gasket
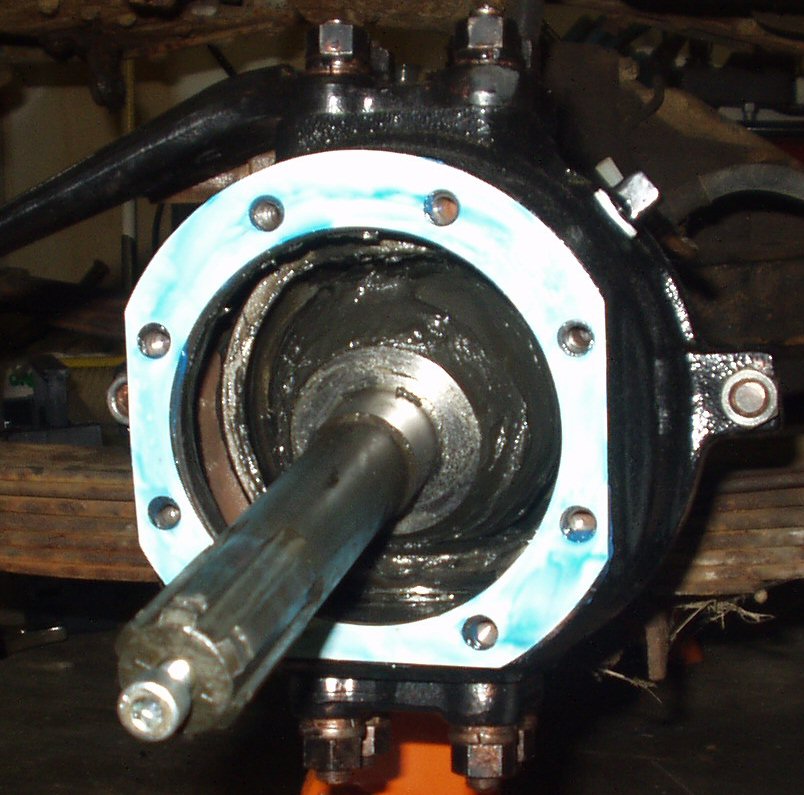
Fig, 2
Silicone on Gasket
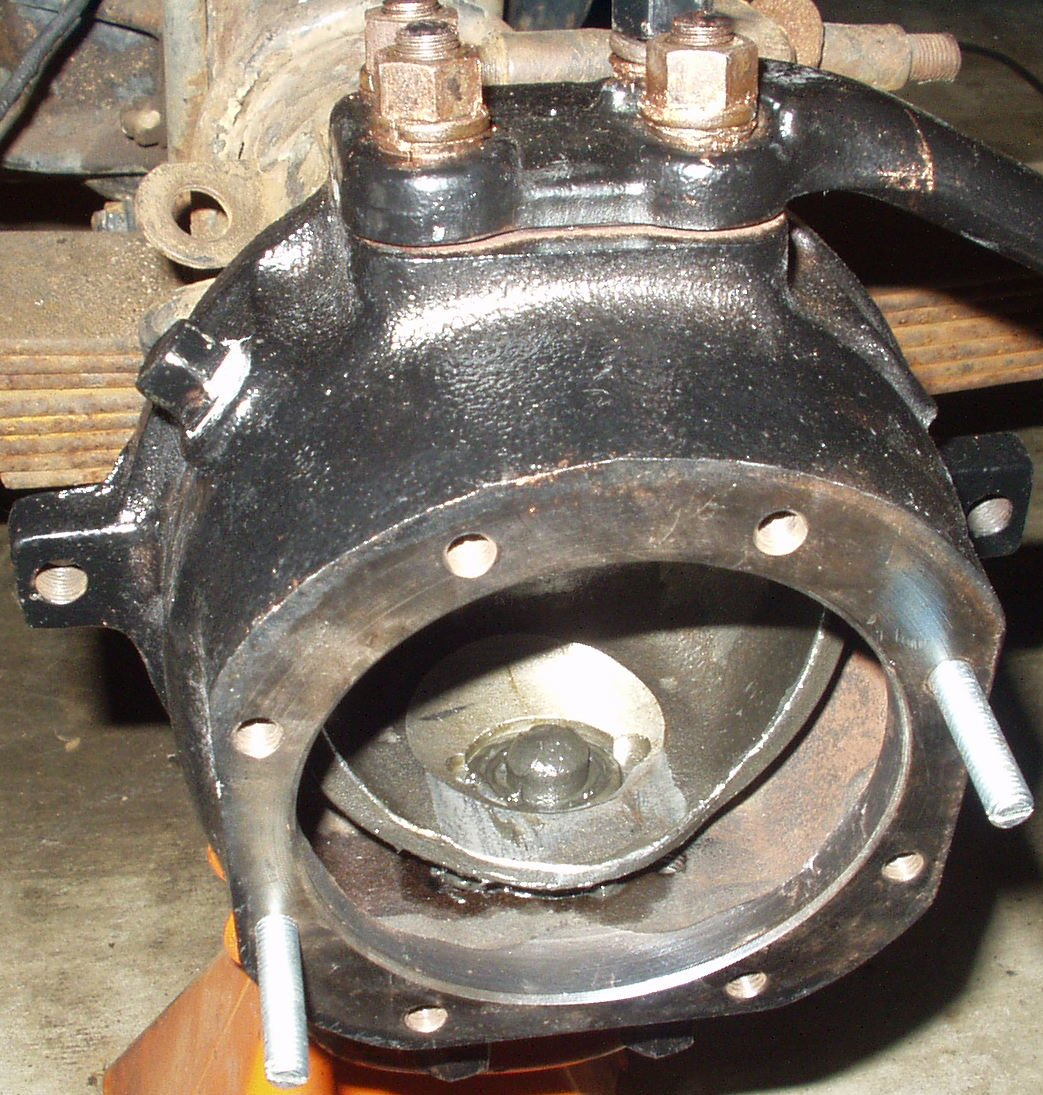
Fig. 3
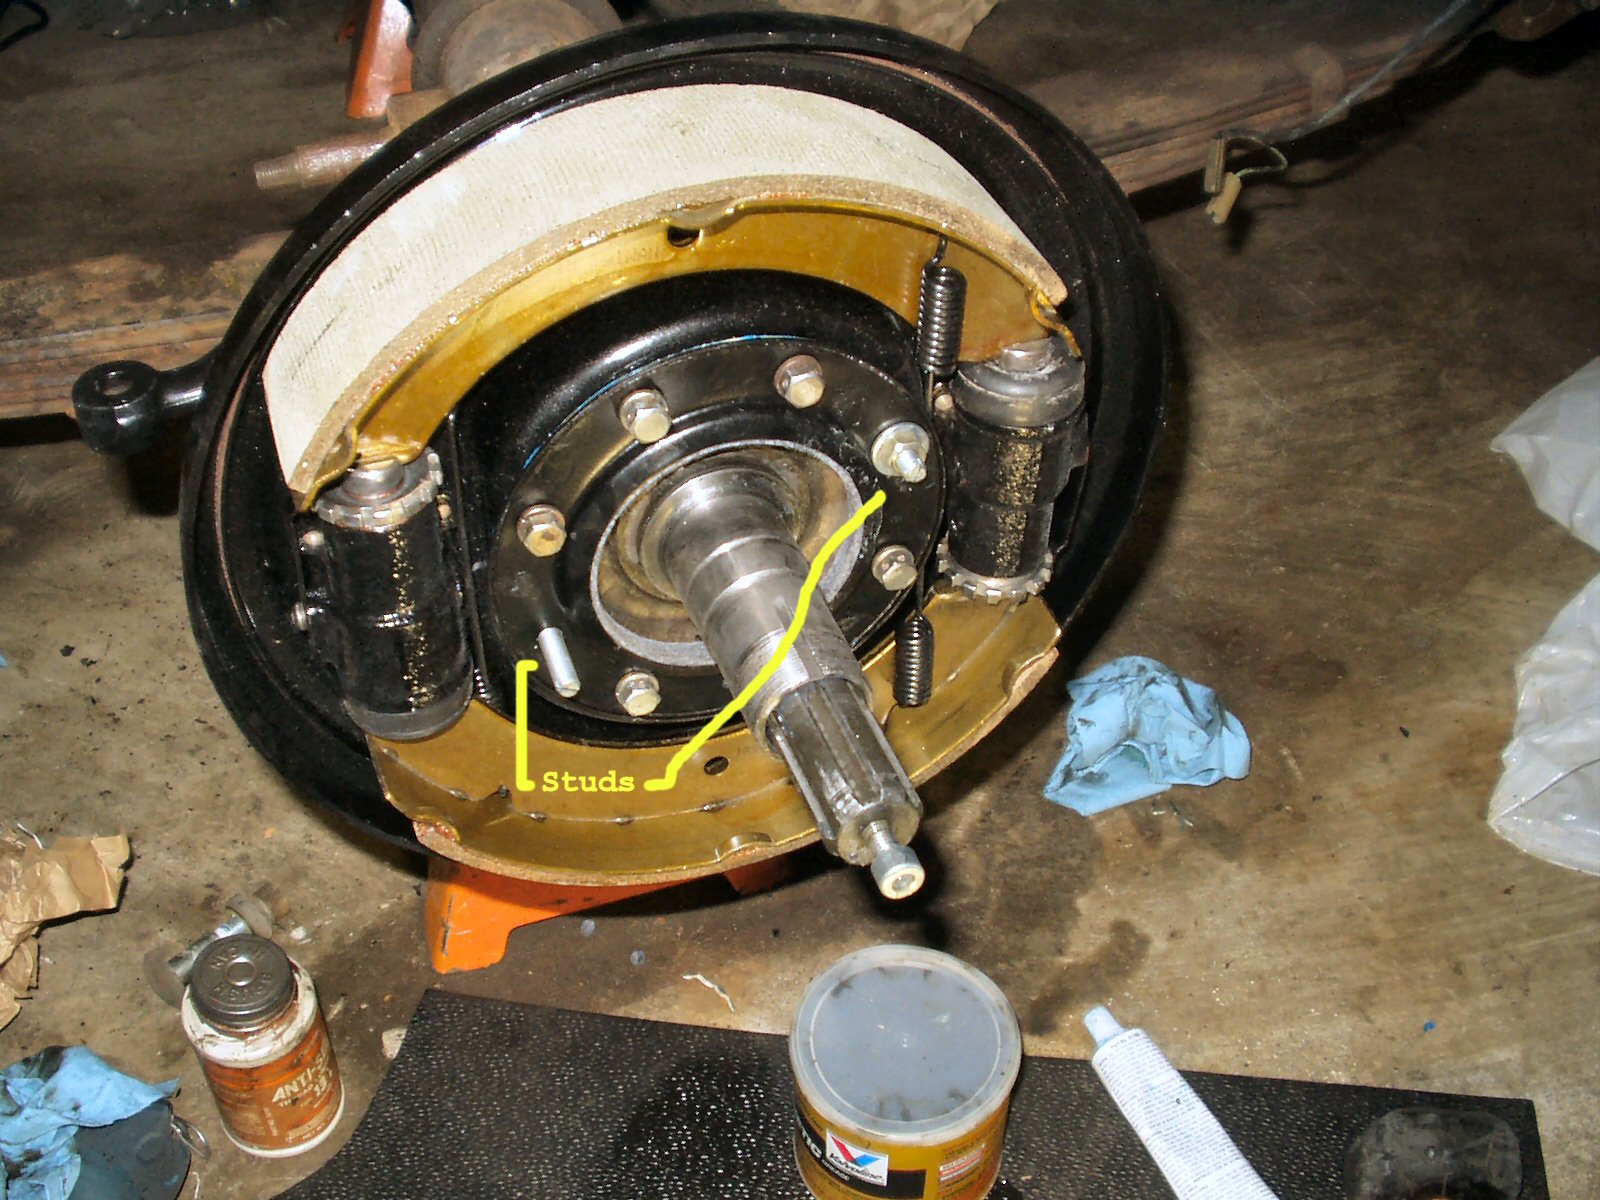
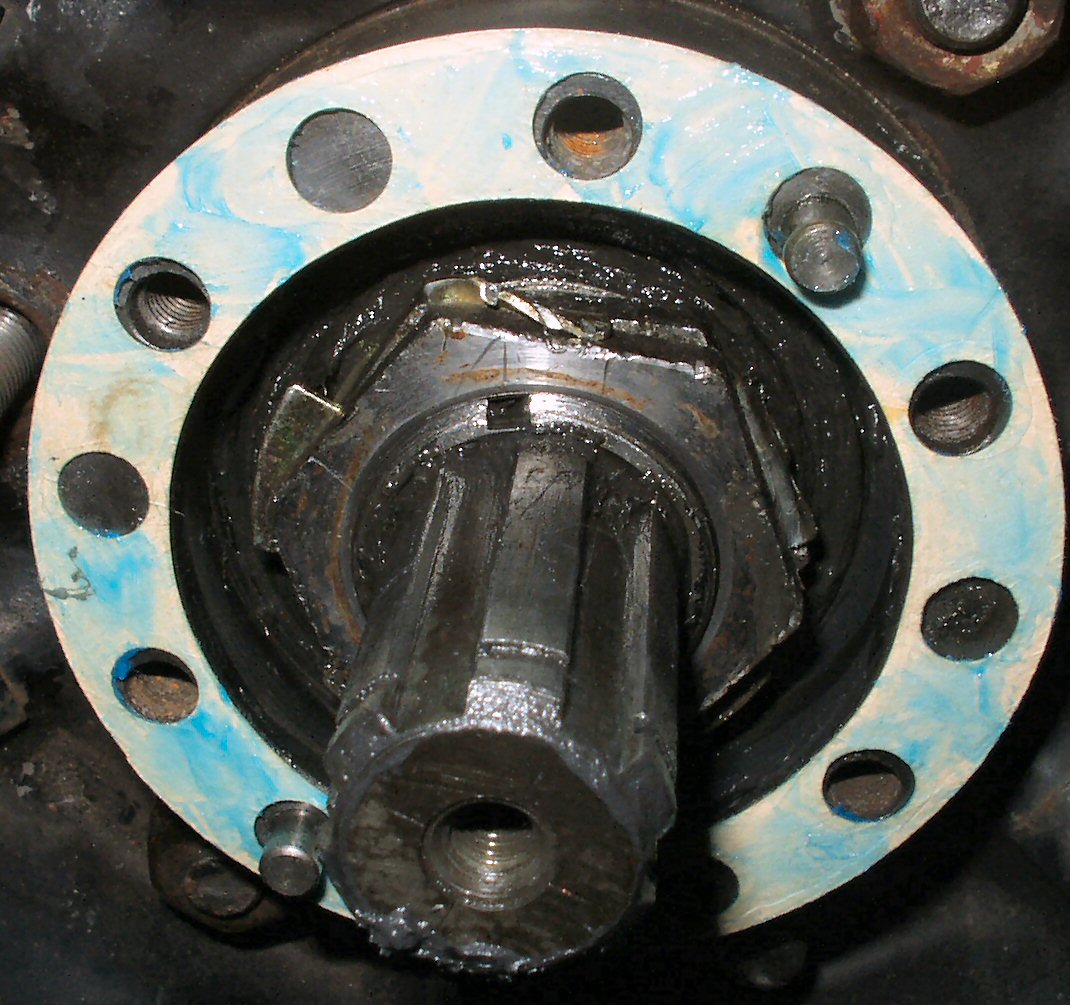
Studs
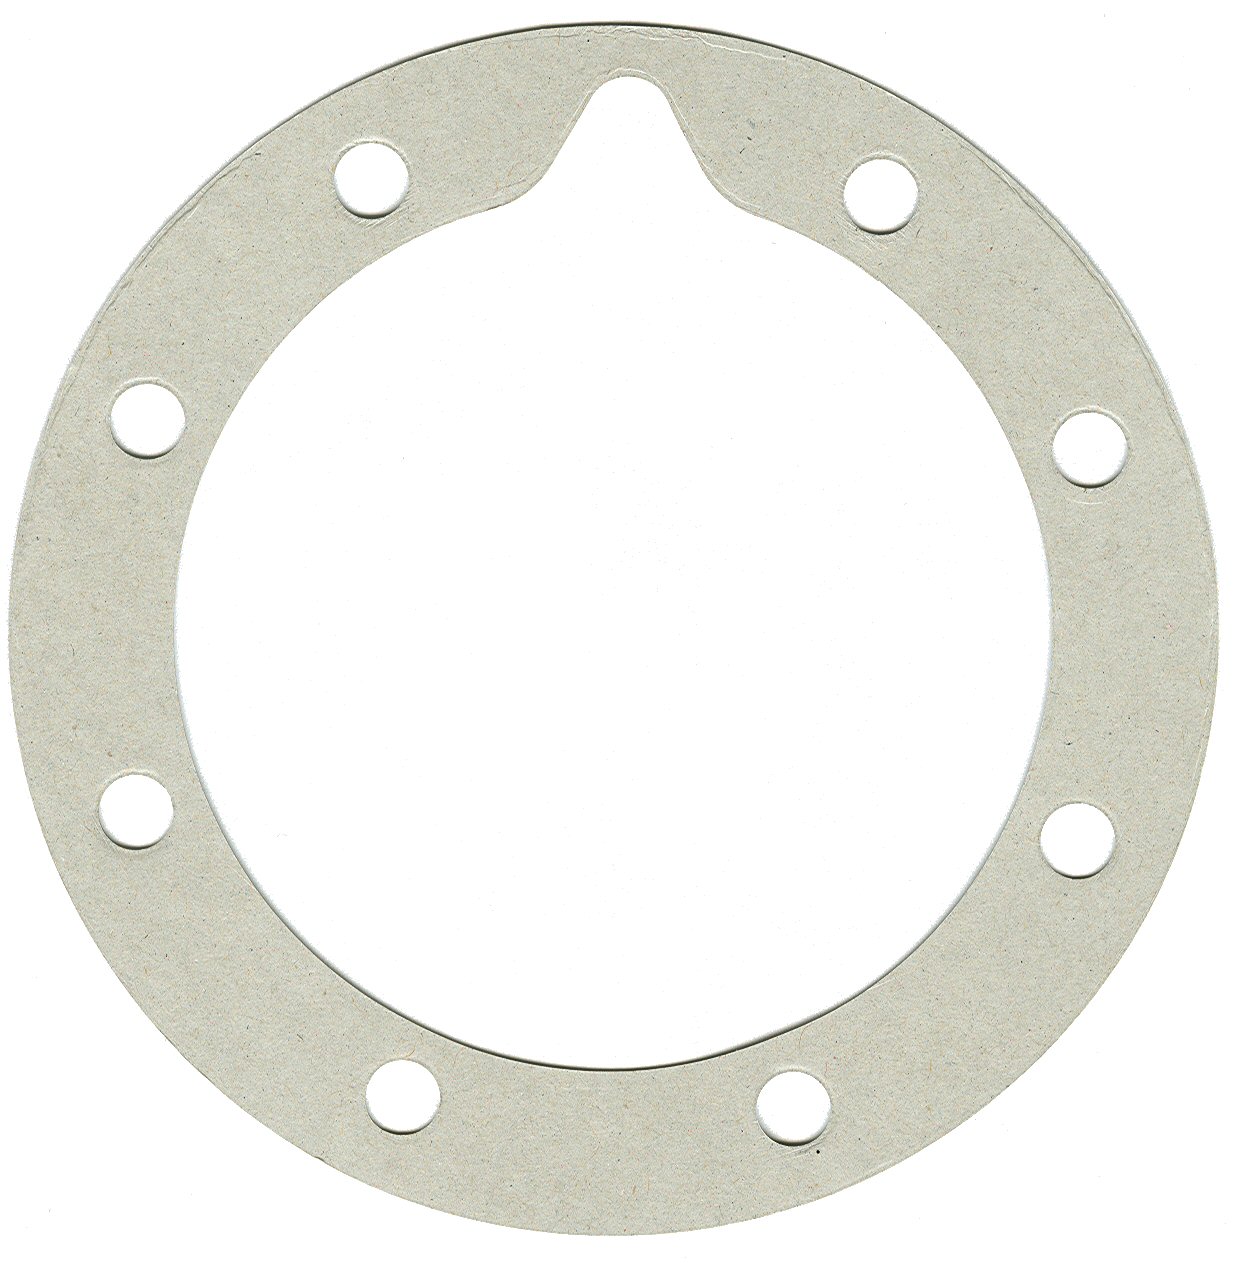
Fig. 4
Backing plate Gasket
Fig.5
Gasket Installed
Get the knuckle rebuild gasket set and some silicone sealer.
Locate the spindle gasket (See Fig. 1) and smear
a very thin coat of silicone sealer onto both sides. See Fig.
2.
The silicone will hold the gasket in place while you align
the spindle to the knuckle plus it will make it a bit easier to get it apart
the next time. Yeah I know, if you are having as much fun as I did you are
thinking never again...
Get the backing plate, oil seal retainer (the one with the
felt in it), and the spindle.
Also get the 8 spindle bolts (the ones with the lock wire
holes in them) and lock washers. Coat the threads of the bolts with a good
coat of anti-seize and set aside.
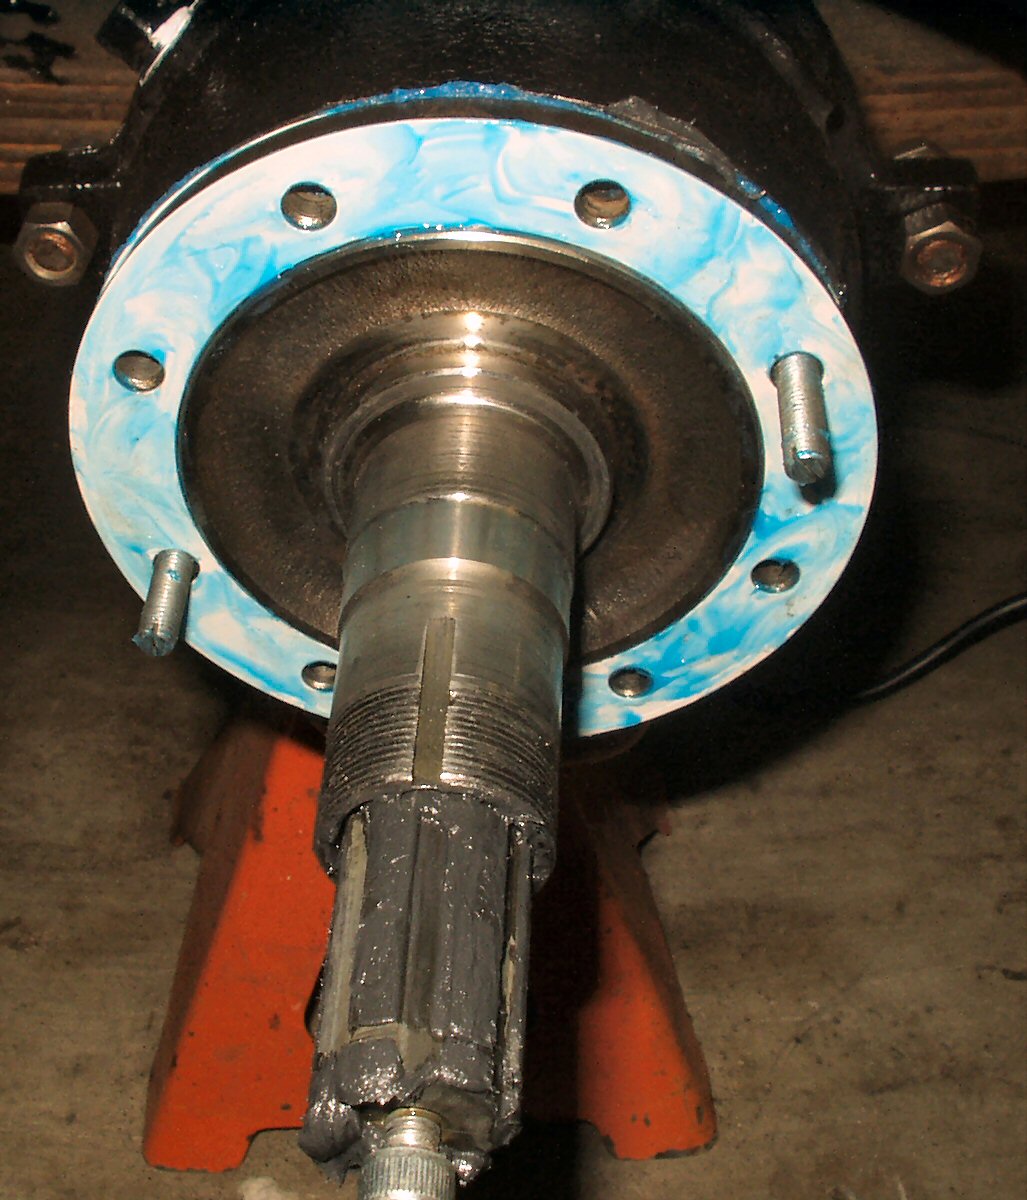
Get the 2 8mm x 1.25 x 3" studs you made or bought.
Thread them into the knuckle housing opposite of each other. See Fig.
3.
Thoroughly grease the inside of the spindle and the end of
the Birfield splines. Place the spindle over the axle and the studs and work
the spindle into the housing so that there is NO gap between it and the housing.
I had to tap it a bit with a rubber mallet. Check that the spindle is aligned
properly by attempting to thread the spindle bolts into the housing one by
one. You may have to 'rotate' the spindle a couple of times to ensure that
all of the bolts are going to go in properly. Do not continue until they ALL
go in easily. Remove all the bolts except the studs.
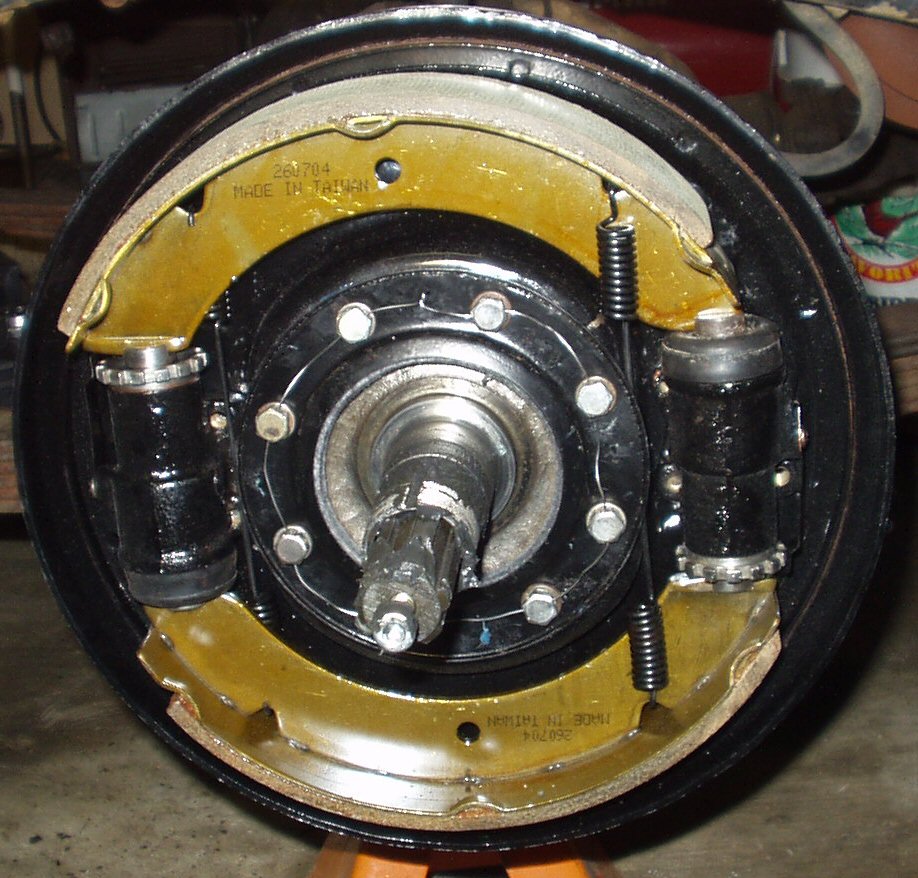
Place the assembled backing plate over
the spindle. Locate the backing plate to oil seal retainer gasket. See Fig.
4. Coat both sides with a thin layer of silicone.
Place the gasket over the studs (place the gasket as shown
with the little cut out down) then slide the oil seal retainer over top of
that. See Fig. 5.
Fig. 6
Oil Seal and studs
Fig. 7
Safety Wire
Fig. 8
Hub Seal
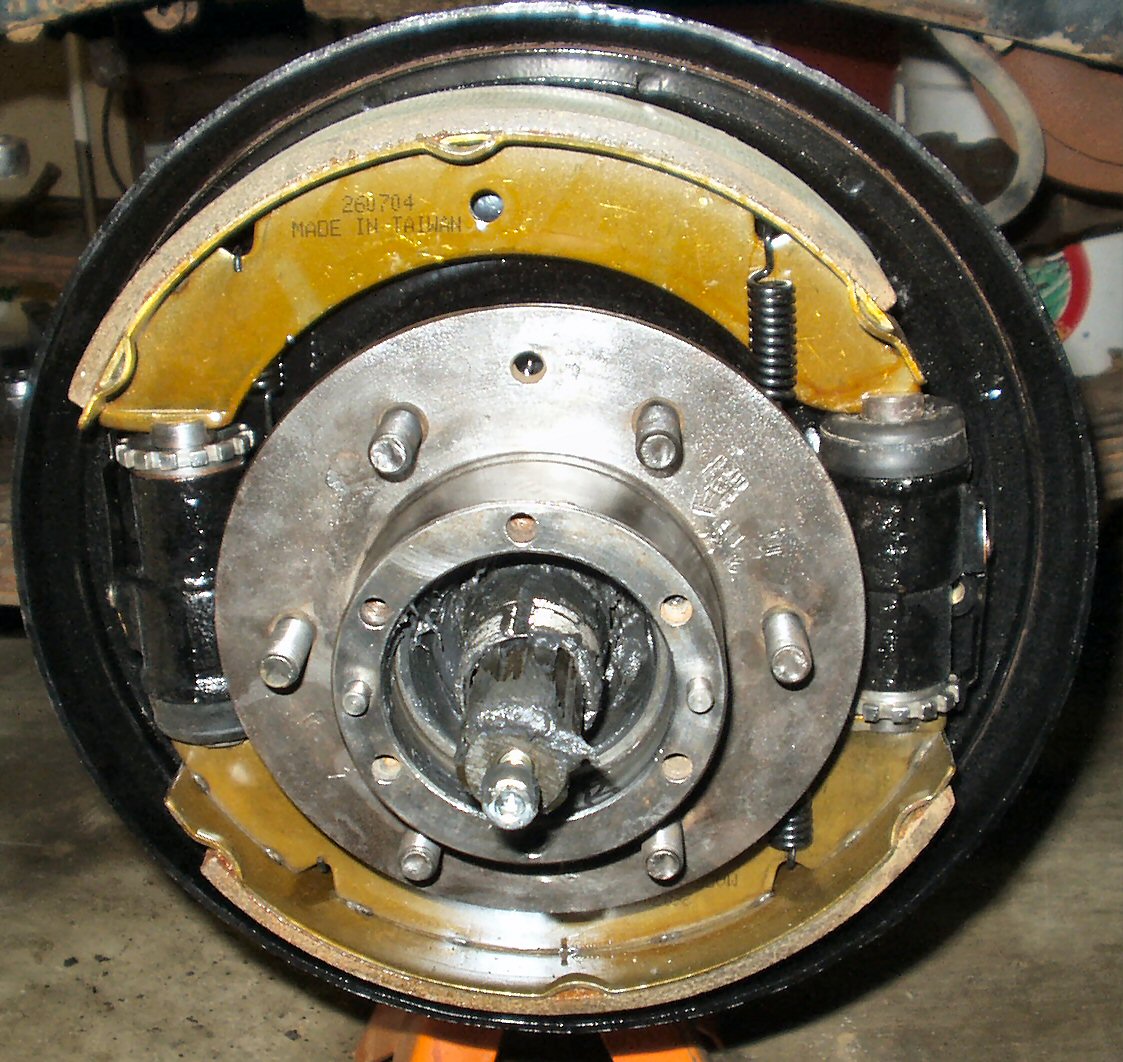
Start threading in the spindle bolts. Just finger tight until
you get them all in. Once you have the six in then remove the studs and replace
them with bolts.
In a criss cross pattern tighten the 8 bolts to 11-16 ft
lbs. Get some safety wire and using a pair of needle nose pliers thread the
wire through the holes in the spindle bolts going from bolt to bolt. Cut the
ends and twist them together. See Fig. 7. Don't
leave this out! In the unlikely event that all the bolts should loosen and
fall out your wheel will fall off!
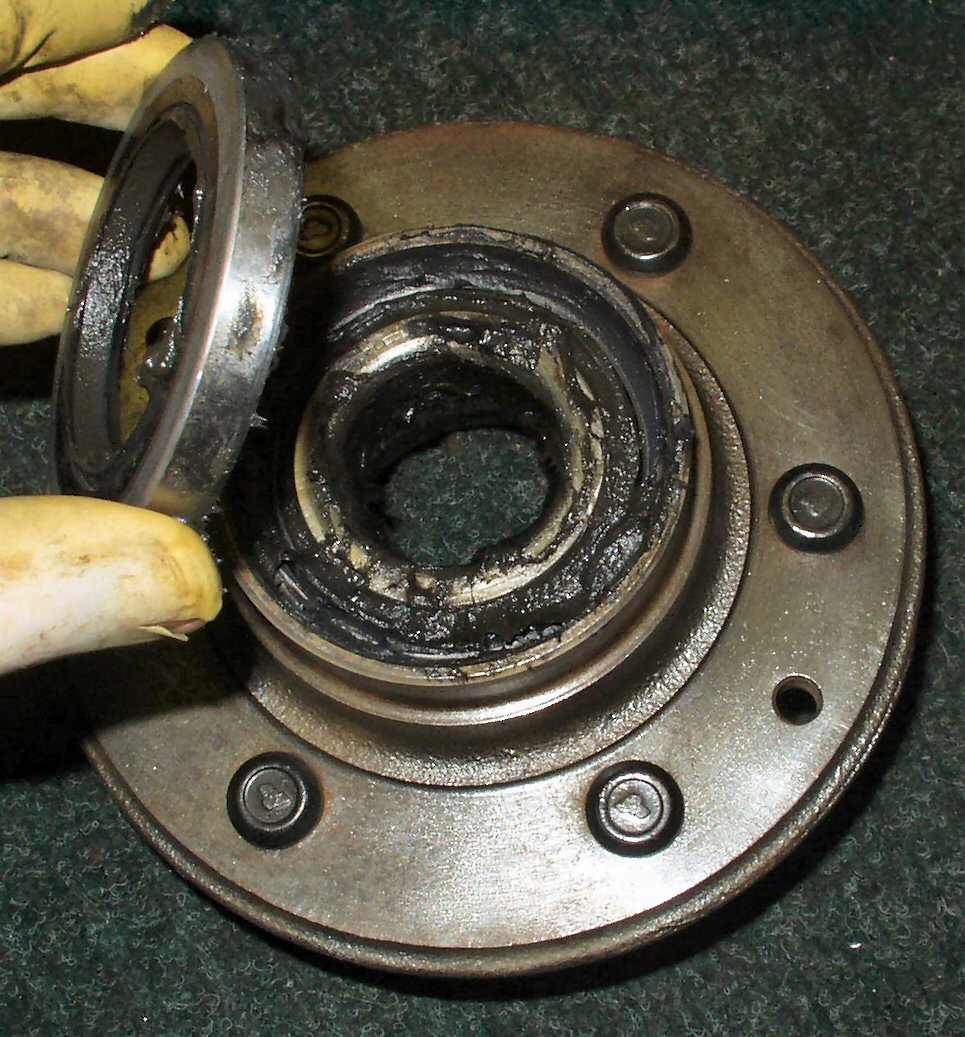
Locate your hub and bearings and new hub seal.
Clean the bearings with solvent, wash them in hot soapy water,
rinse them with hot water then use compressed air to dry them. Don't spin
the bearings at high speed with the air!
Using whatever method you desire pack the larger rear wheel
bearing with grease. Lay the hub on the bench with the rear facing up. Coat
the race with a good thick layer of grease. Place the bearing into the grease.
See Fig. 8.
Fig. 9
Seal Installation
Fig. 10
Hub Installation
Fig.11
Order left to right
Fig. 12
Hub Socket
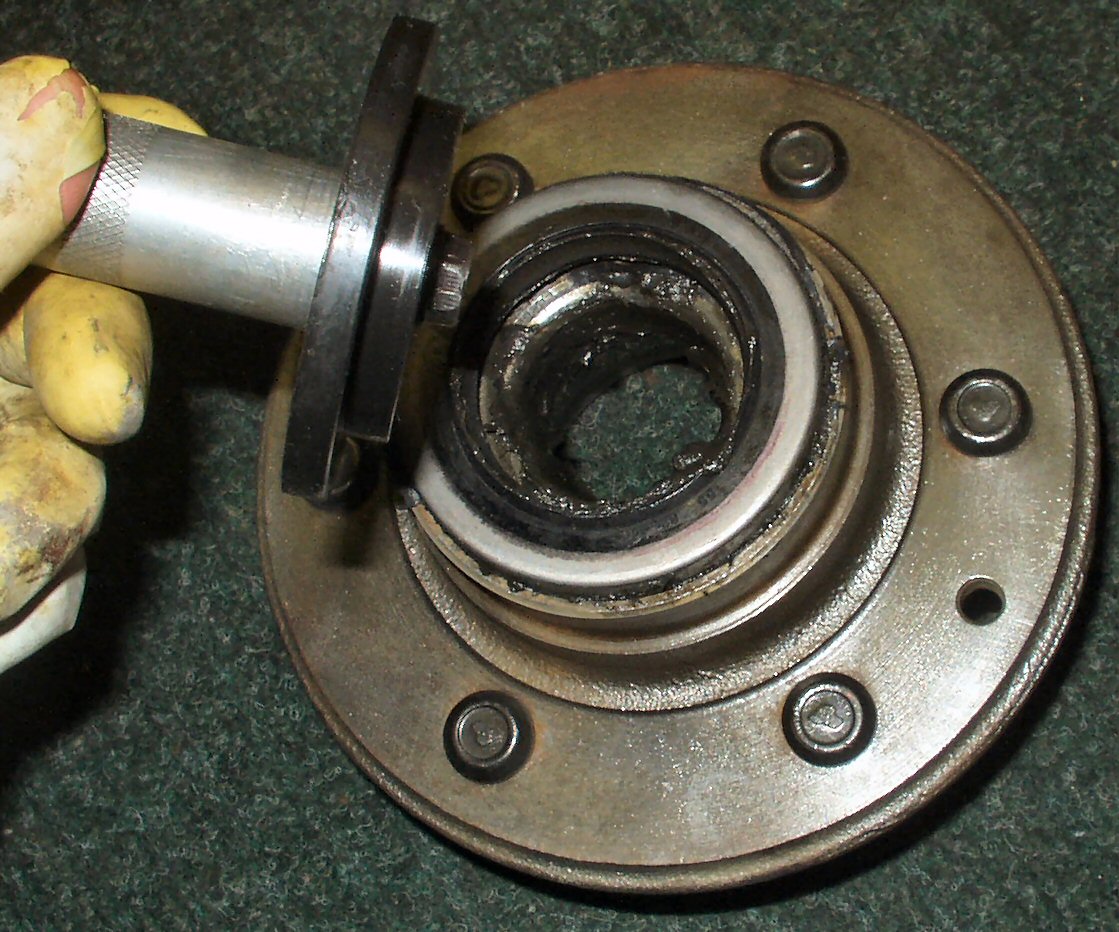
Again using your favorite method of seal installation drive
the seal into place so that it is flush with the hub. See Fig.
9 .
Flip the hub over and fill the center with grease. Coat the
front race also.
Pack the smaller front bearing and take it and the hub back
to the truck.
Looking at the back of the hub, smear a thin coat of grease
onto the area where the oil seal felt will run. Also put a bit onto
the felt itself.
Slide the hub onto the spindle. You may have to press
pretty hard to get it to compress the new felt back into the oil seal retainer.
See Fig. 10.
Place the front bearing over the spindle and into the hub.
Fig. 11 shows the order
that you will install the nuts and washers. Left to right they are claw washer,
bearing nut, lock washer, lock nut.
Place the claw washer over the spindle with the tang in the
groove. Thread the first lock nut on.
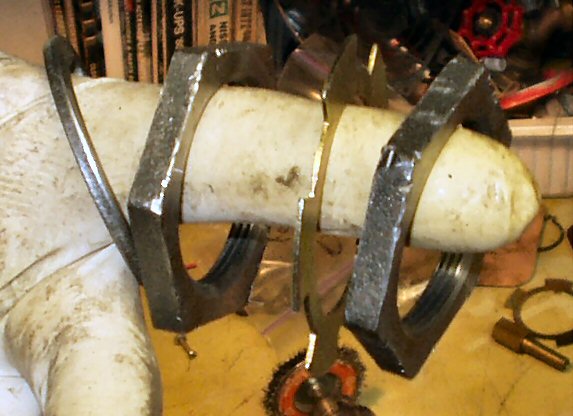
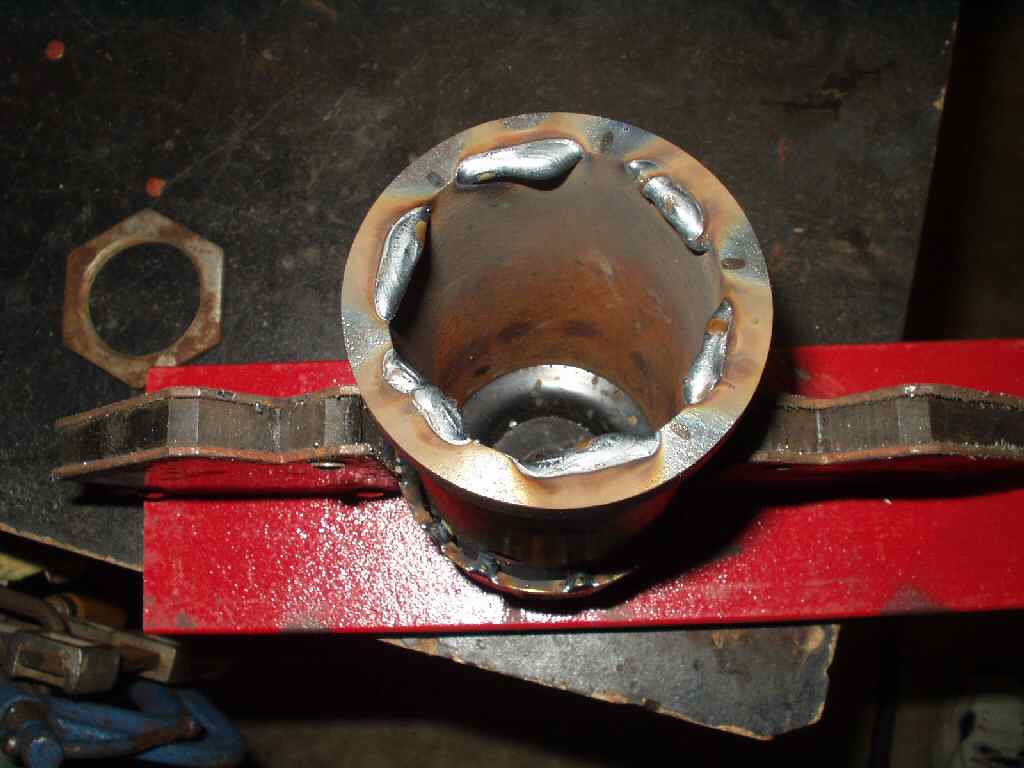
Get your 50mm hub socket (See
Fig. 12. for my home made version), and a torque wrench. There are many
variations on this part. This is the way I have always done my wheel bearings
and have never had a set fail.
Set the torque wrench to 60 ft lbs and while rotating the
hub back and forth, tighten the nut. What you are doing here is seating
the bearing squarely into the race.
Carefully back the nut off until its just finger loose while
being careful to NOT rotate or move the hub! Tighten the nut again with just
your fingers.
Place the lock washer over the spindle so the tang is in
the spindle groove. Thread the locking nut onto the spindle and tighten it
down.
Fold the lock washer tab over the locking nuts with a screwdriver.
Go have a beer, this is hard work!
Locking Hub Assembly
Fig.13
Hub Gasket
Fig. 14
Cover Screws
Not much to say here. I have Warn hubs that I took apart, cleaned,
lightly greased and reassembled.
Misc Final Steps
Using a new copper washer re-connect the soft brake line
to the union on the backing plate. For reference a stock front Soft Brake
Hose is Part #: BH38009. If you need one that is 5" longer for a 2"
lift use Part # BH38431. Use a 17mm flare wrench to tighten it firmly.
Slide the other end into it's mounting bracket and put the
retaining clip back on it. I would use a new clip ( Raybestos p/n H1457-2).
Thread the hard line into the softline and tighten with a
10mm flare nut wrench.