Since I had to remove the master cylinder when
I upgraded my old booster to a mini-truck unit, (Mini-Truck
Booster) I decided to 're-condition' it while I had it off. Good thing I
did! It was full of rusty crap and black gunk. (Technical Cruiser Terms) If
you have a rebuild kit just substitute new parts where you need to. The only
special tool you will need is a pair of inner snap ring pliers.
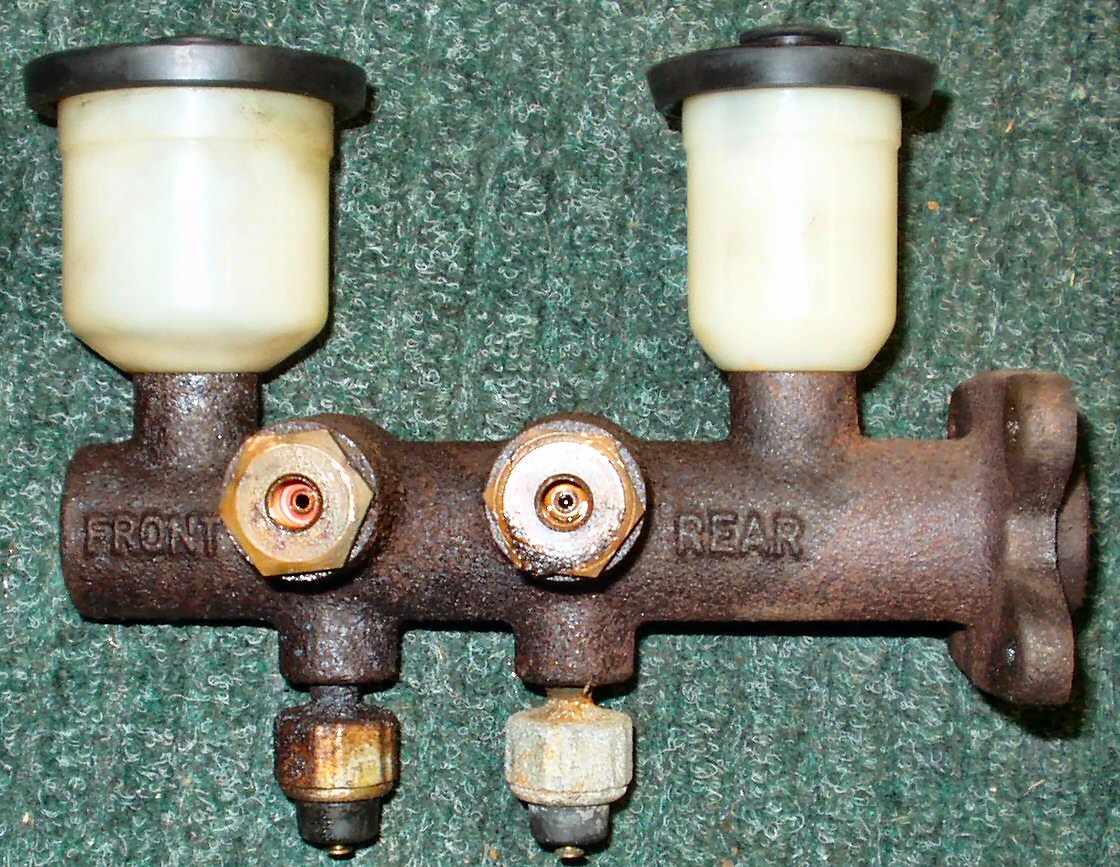
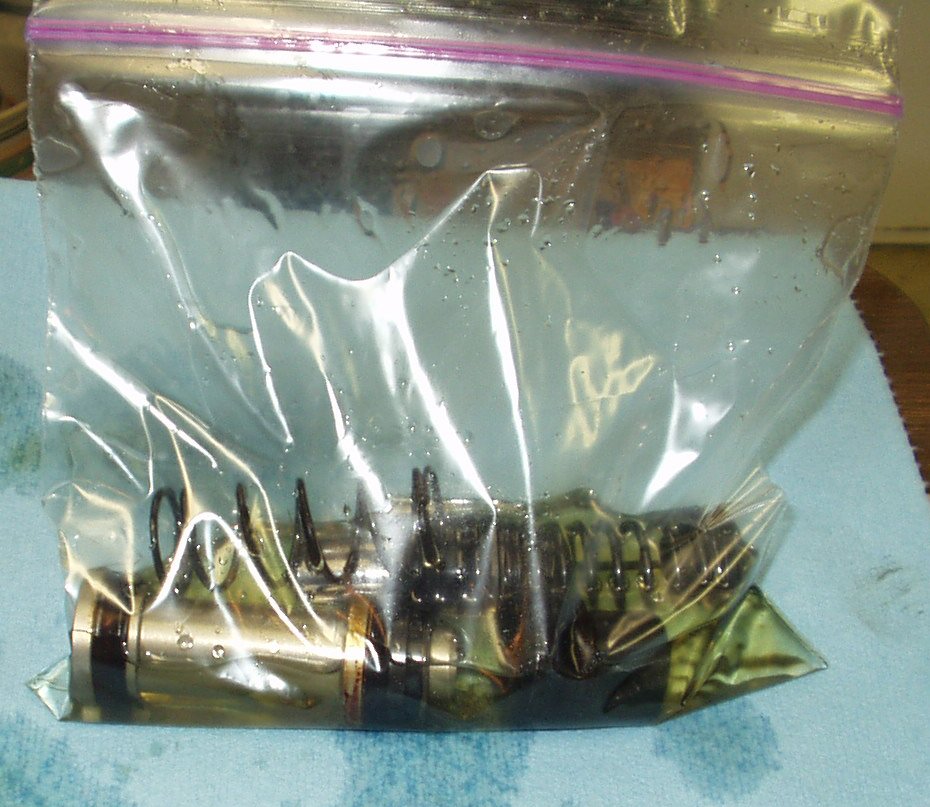
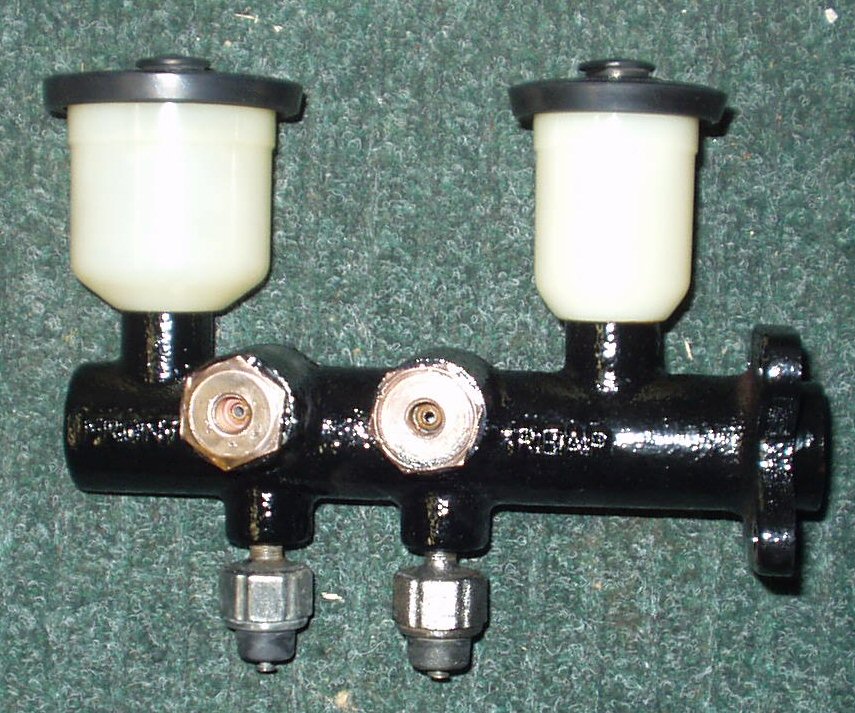
Fig. 1
Before Disassembly
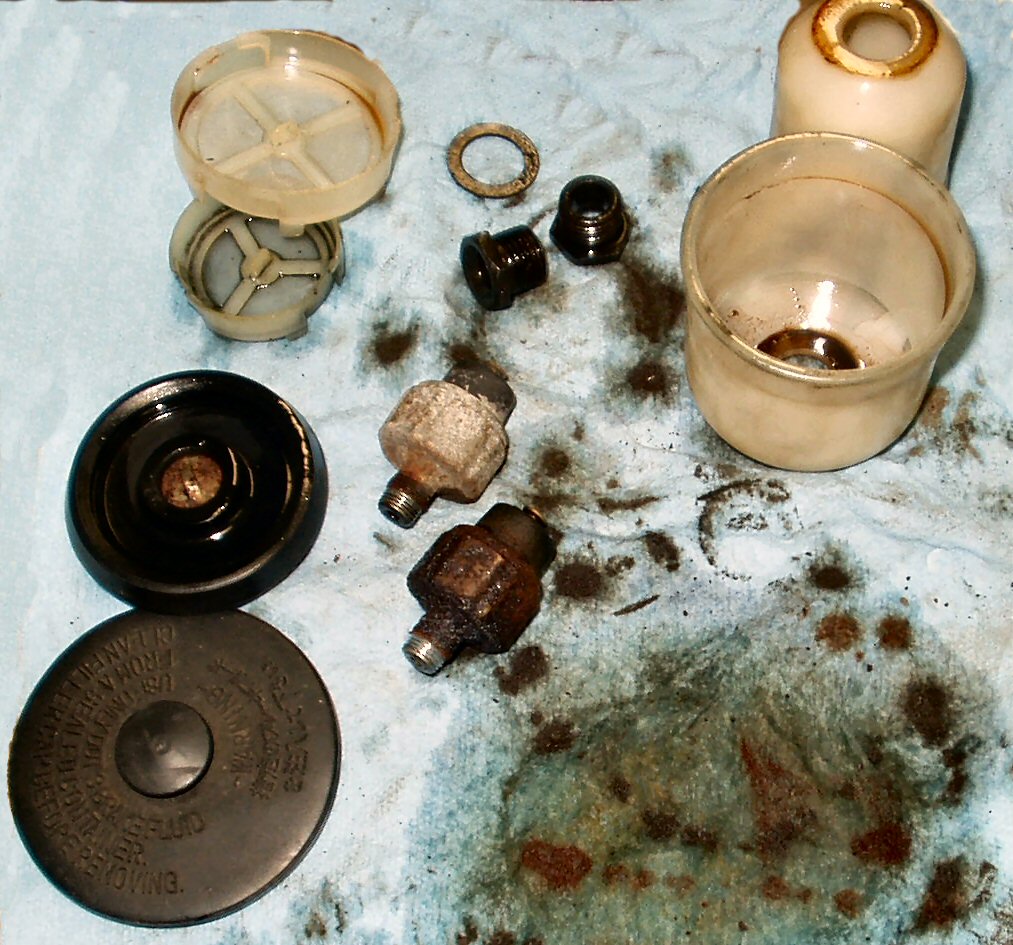
Fig. 2
Cups & Switches
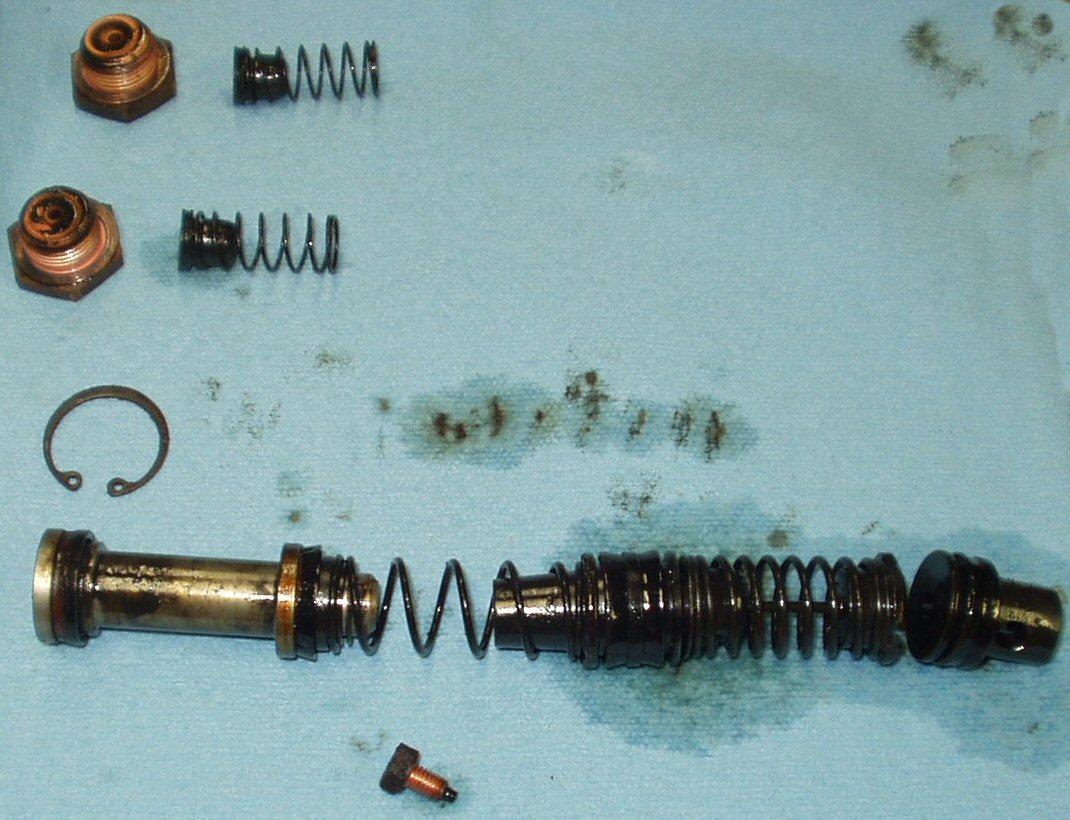
Fig. 3
Pistons and Residual Check Valves
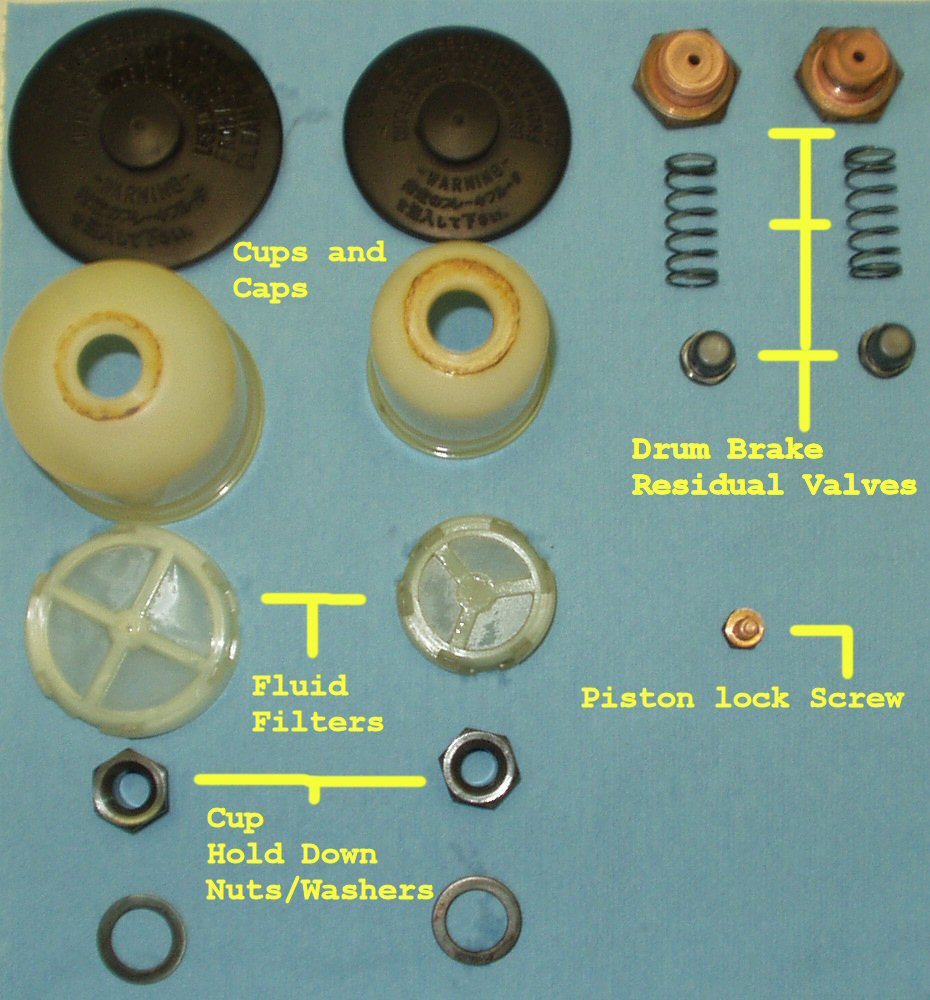
Fig. 4
Cleaned Parts
Fig. 5
Cleaned Pistons in Brake Fluid
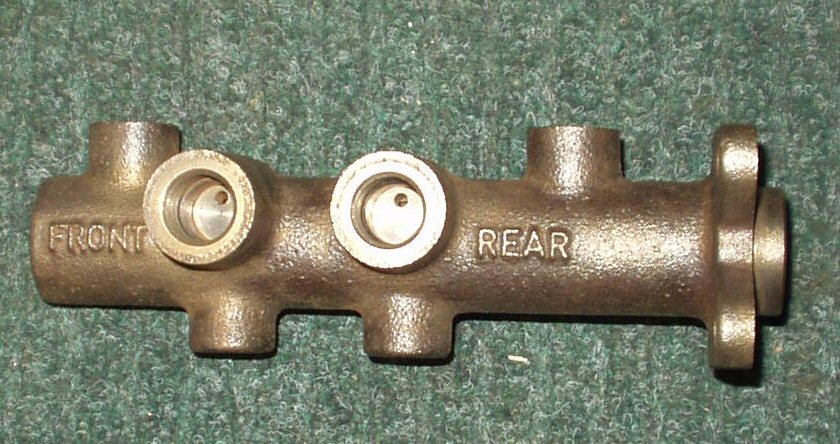
Fig. 6
MC De-rusted
Remove the large nuts shown in Fig.
1. This allows you to remove the residual check valves shown at the
top of Fig. 3. These valves MUST be installed
if you have drum brakes! These valves are what you remove when doing the disk
brake conversion. Their purpose is to counteract the return springs leaving
a bit of pressure on the cylinders.
Remove the pressure switches from the bottom of the MC.
Use a 12mm socket and remove the nuts holding the plastic
reservoirs on.
Use a 10mm wrench and remove the piston lock bolt from the
MC.
Remove the snap ring from the MC end and pull out the pistons
and seals. Take note of the position everything is in. See Fig.
3.
Clean all the internal parts with hot soapy water, rinse,
dry THROUGHLY, then put in a container with brake fluid so they don't dry
out or rust. If you are rebuilding then skip this step as all these parts
will be replaced with new. See Fig. 4-5.
Clean the cups and set aside.
Clean the housing and hone it out it necessary. I placed
the housing in my de-rust tank then powder
coated it. I used some 1000 grit sandpaper wrapped around a small hone to
just polish the bore a bit. See Fig. 6-8.
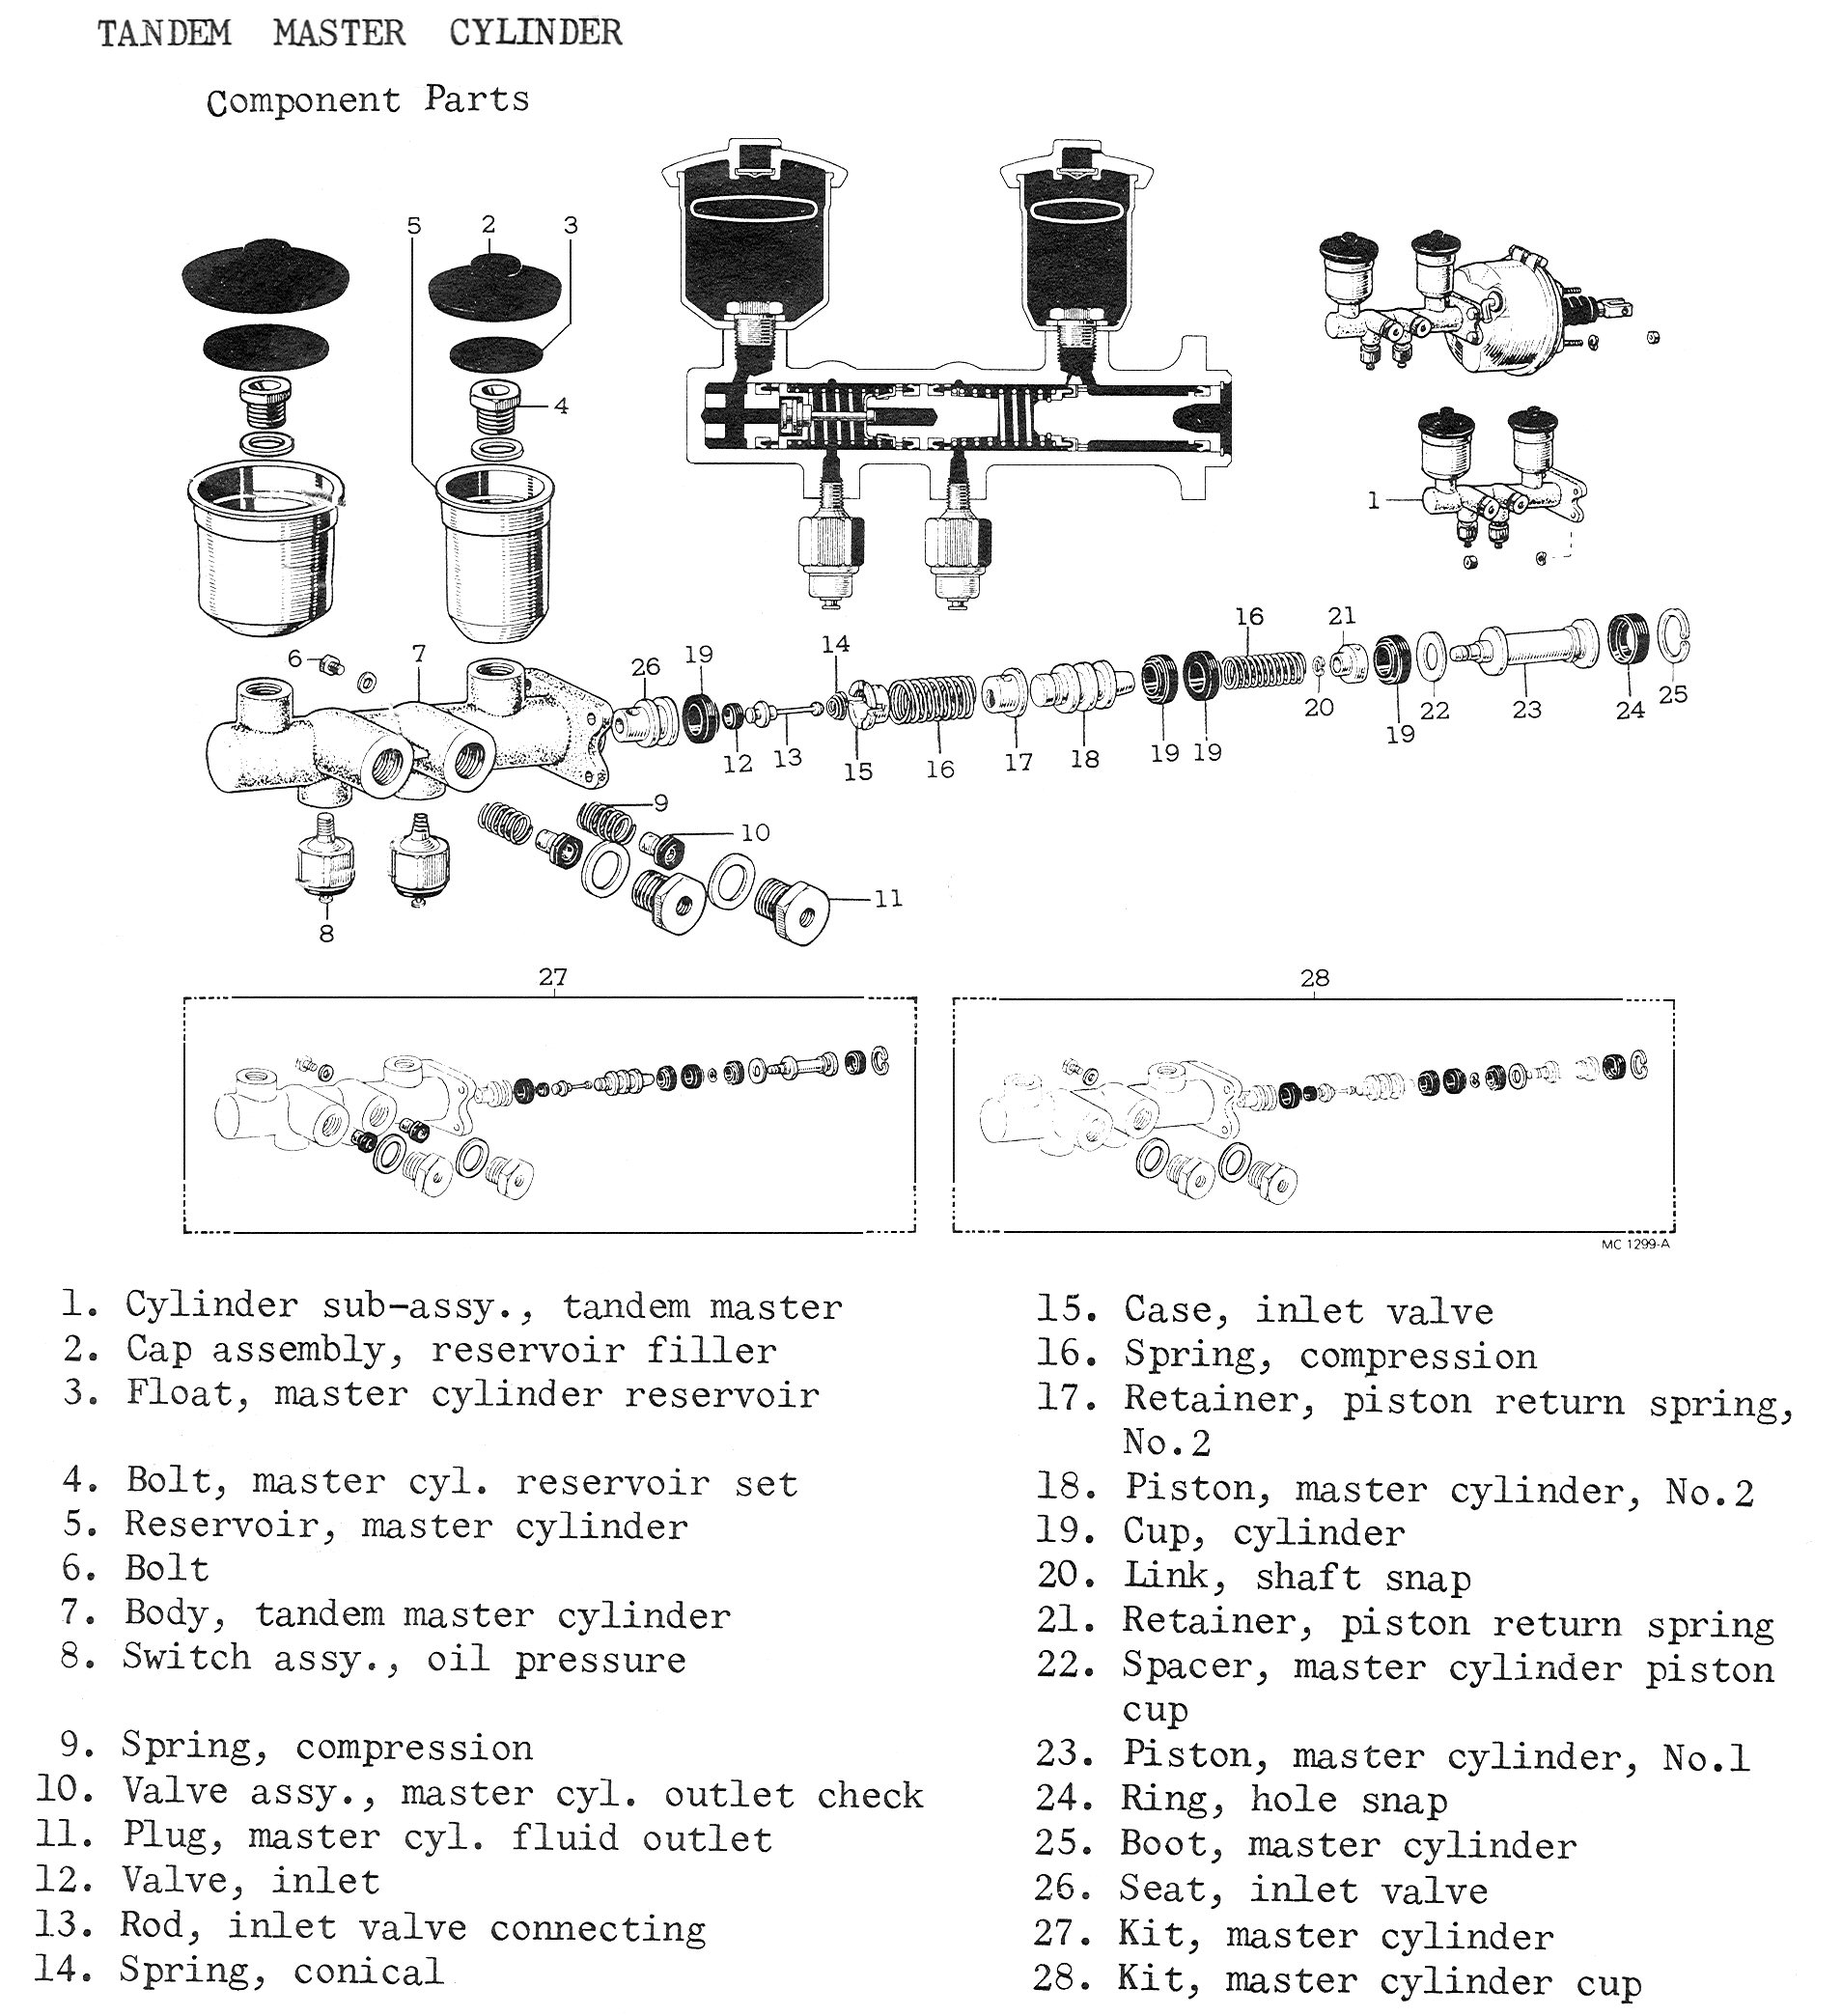
Coat the bore with clean brake fluid then reassemble the
internal parts in the exact order they came out. Refer to Fig.
7.
Re-install the snap ring then put the piston lock bolt back
in.
Thread the pressure switches back in place.
Re-attach the plastic cups. Don't forget the washer goes
under the nuts!
See below to set the booster push rod length.
Fig. 7
Exploded Master Cylinder Diagram
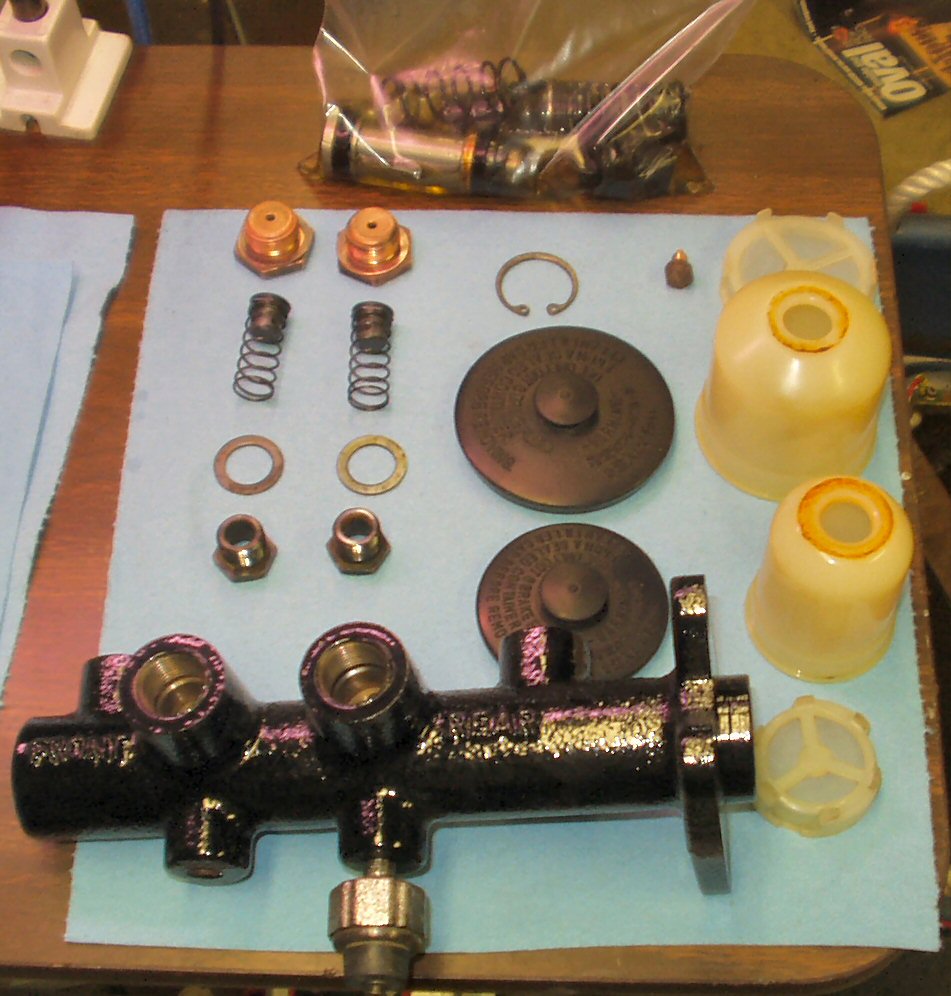
Fig. 8
Final Assembly
Fig. 9
After Reassembly
Adjusting
the Booster Front Push rod to MC Piston Clearance
Of all the adjustments on the boosted drum brake
Cruiser (right after shoe to drum clearance) this one is the most important!
Done wrong, it can cause dragging brakes, ( no clearance, rod out too far) or
little to no boost with excessive pedal travel (too much clearance, rod not
out far enough). The recommended clearance between the end of the rod and the
surface of the master cylinder is not much, it's only a max of .020! Toyota
has a SST to do this of course but we will do it with a little common sense.
I was working on a way to either measure the clearance
using standard tools or possibly making a tool to set this when I ran across
a page devoted to a 1949 Packard. What does a 1949 Packard have to do with
a 1971 FJ40? Nothing. However,
they describe this adjustment as follows: "Adjust
the rod until the desired affects are observed" Sounds good
to me. :-)
Remove the 4 bolts holding the Master Cylinder to the booster.
Do NOT take the brake lines loose! There should be enough give in the lines
to allow you to pull the MC off the studs so you can reach the pushrod to
adjust it.
Loosen the acorn nut at the end of the pushrod. It's an 7
or 8mm. You will have to use Vice Grips on the knurled part so it doen't spin.
If your problem is excessive pedal travel after perfoming
a shoe adjustment and system bleed then start turning the nut so that the
rod gets longer. Adjust this in small increments. Between adjustments put
the MC back on the booster with a couple of nuts then try the pedal height.
If you get it too far out you will actually have the MC putting on the brakes!
This causes the brakes to always drag. Make SURE you test this by trying to
rotate each wheel! If you get it out too far then of course back it off. Remember: Adjust the rod until the desired
affects are observed!
If your problem was dragging or overheated brakes then back
it off or shorten it.
The idea is too get this as close to touching the MC piston
as possible so that the pedal does not have to travel so far to start the
braking action.