I started to title this: Easily Making Your Own Brake Lines,
but this is one of those jobs that requires a couple of special tools, and one
of them takes a bit of practice to use it correctly. So...
We will start with the fact that Rainman (Rainey Kirk), a respected
MUD member, makes complete sets of brake lines for ALL FJ40's and now FJ55's!
Here is the link to his site: Rainman's
Brake Lines
Please! If you have any doubt as to your ability to make your
own brake lines, DON'T EVEN TRY! Your life, your familys life, or someone you
don't even know could suffer the consequences! Just contact Rainman!
Another site that makes brake line sets, though they are not
as accurate as Rainmans, is Classis Tube
They also carry the 10mm x 1.0 flare nuts (Part # ST8036), and
the 3/16 brake line in 25' rolls (Part # C3). Plus they have all kinds of clips,
and other often needed brake items.
I'm not going to give a step by step, how to pull, bend, and
replace your lines, but I am going to go step by step, and show you how to do
the hardest part of this job:Double
Flaring!
Tools needed:
Double Flaring tool.
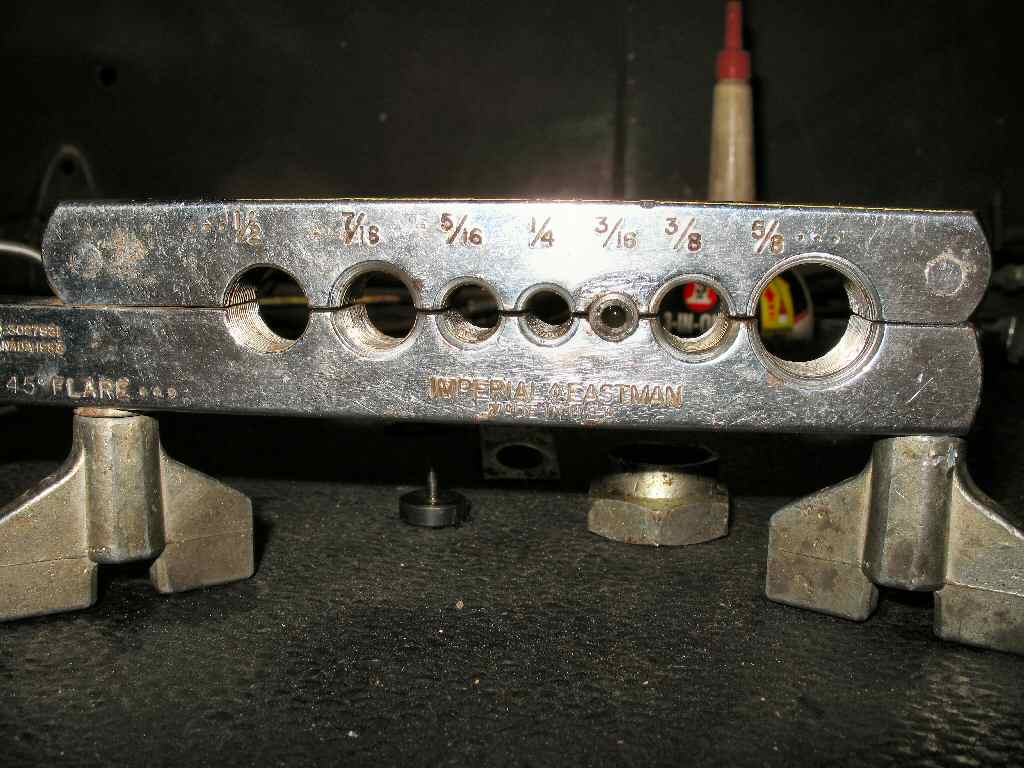
I bought a cheap flaring kit from Auto Zone. It came with the
split die block (cheap ass piece of junk) , a set of dies to make the double
flare, and the yoke that makes the 45 degree flare. I threw the die block and
yoke assembly away after just one attempt! The die block allowed the tube to
slip resulting in bad flares. I replaced those two pieces with Imperial brand
pieces from a PLUMBING flare kit I've had for years. The Imperial split die
block has knurled holes in the die block that really grip the tube preventing
slippage, double clamps (one at each end of the die block), and the yoke is
massive compared to the Auto Zone junk. I then used the dies that came with
the Auto Zone kit.
Tubing bender:
Some will claim to never use one, but it sure makes pretty bends once you get
the hang of it. Cheaper styles will only bend to maybe 120 degrees. The better
ones will have a degree scale and bend a true 180 degrees, and will have different
dies for various size tubes.
Metric flare wrenches.
Craftsman makes a good set. The flare nuts fittings take a 10mm wrench. You
might also need a propane torch to get some of the fittings loose and a good
set of Vise grips for the ones that won't come off easily!
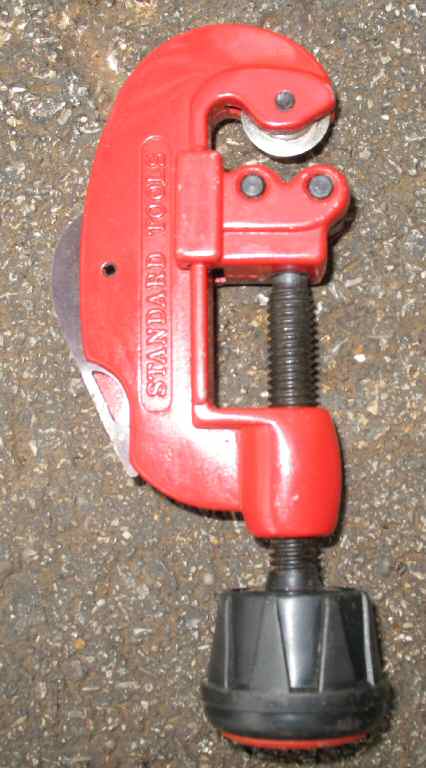
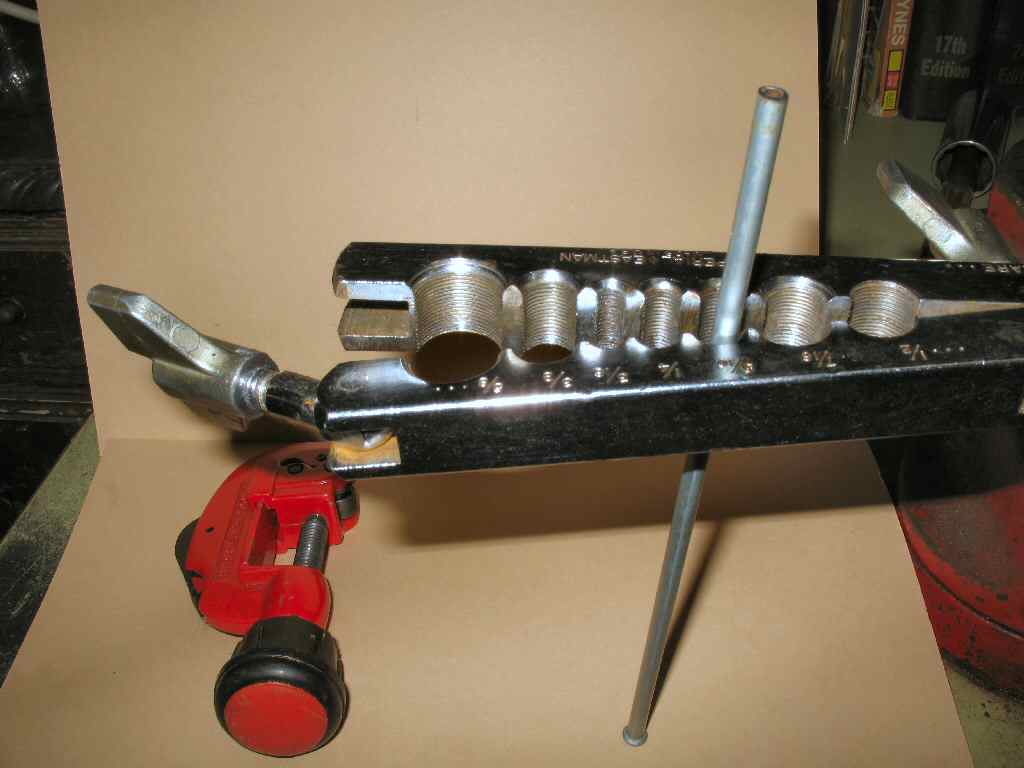
Tubing Cutter or fine blade
hack saw. It is very important to get a STRAIGHT cut on
the end of the line. I prefer a small tubing cutter like plumbers use. It automatically
makes straight cuts, is super quick, and you don't run the risk of collapsing
the tube trying to clamp it in a vise to cut it.
Tips:
If you are not doing a frame off, work on ONE line at a time.
It's fine to pull all the lines off at once as long as you know where they go.
Masking tape and a black marker are your friends! Take pics and pay attention
to how lines are attached to the frame or supported on the tub before removing.
If your lines are all original don't sweat trying to make an exact duplicate!
There may be Bezel Police ready to slam you, but I'm not aware of brake line
police!
Just make sure to get the line routed so it does not touch anything
except the clamps holding it. A line that is touching something will eventually
wear through due to vibration. Small sections of rubber hose can be slit and
placed over the line to help protect it if it must touch something to be routed.
I always leave a couple of extra inches of brake line at each
end for mistakes in flaring. It pisses me off to spend an hour bending up a
line to the exact shape, screw up the flare, and not have enough line to cut
it off and do another one. Also it can be hard to get the tubing cutter on the
end if the bend is tight.
Practice, practice practice!
Get some old line and practice making the flares BEFORE trying it on your actual
lines!
Preparing the Tubing...
Ok. You have your new 10mm x 1.0 fittings, a new flaring
tool, and you just completed the most beautiful and complicated bend job in
the world. Now, how do you get those nice double flares on the ends? You have
to prepare the tubing first by cutting it properly.
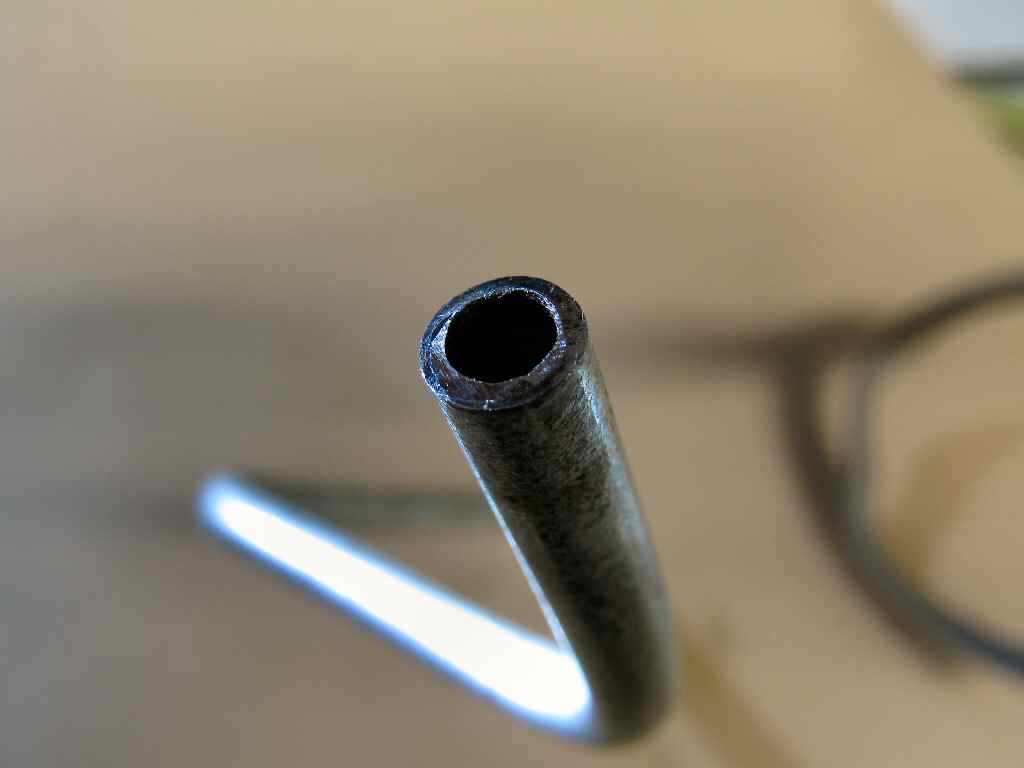
The objective of cutting tubing is to produce a square
end that is free from burrs. A lopsided cut will make a lopsided
flare! Some folks use a hacksaw to do it but I prefer a tubing cutter.
Tip: A convenient
method for cutting tubing with a hacksaw is to place the tube in the flaring
block and clamp the block in a vice. Use the clamp block as a guide for the
hack saw blade to get a square cut. After cutting the tubing with a hacksaw,
remove all saw marks by filing the end, or sanding it square.
Fig. 1
Tubing Cutter
Fig. 2
Using Cutter
Fig. 3
Cut tube
Fig. 4
Another Cut
Using the tubing cutter...
A tubing cutter is basically a clamp with two rollers on one
end, and a hardened steel cutting wheel on the other end. See Fig.
1 . I use a small plumbers cutter. The smaller cutters will work better
on 3/16" brake line.
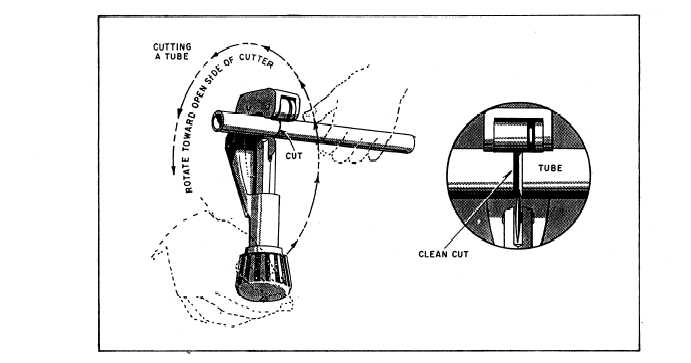
Turn the tubing cutter knob counter-clockwise to move the
double rollers back away from the cutting wheel until you can wrap it around
the brake line. Place the tube in the cutter with the cutting wheel at the
point where the cut is to be made.
Turn the knob clockwise to tighten the tubing between the
rollers until it's just touching the tubing. Too much pressure
applied to the cutting wheel at one time may deform
the tubing or cause excessive burrs. Refer to Fig.
2.
Rotate the whole tubing cutter clockwise ( toward its
open side ) around the tubing until there is a noticeable ease of rotation.
You will see a score on the tubing. Refer to Fig. 2.
Tighten the roller adjustment knob, just a little bit.
Rotate the tubing cutter around the tubing again until there
is a noticeable ease of rotation. The score on the tubing should be deeper.
Tighten the roller adjustment knob again.
Keep going around the tubing and tightening the rollers when
there is a noticeable ease of rotation. You'll see the score or the cut beginning
to deepen. Keep going until the brake line separates. The piece you're cutting
just pops off.
After the tubing is cut, remove all burrs and sharp edges
from inside and outside of the tube with deburring tools
or sand paper. That's what the pointed deburring point (spear) on the side
of the tubing cutter is for. Stick it inside the brake line and gently twist
it a few times. Don't ream the tubing out! This will make a thin weak area!
Just get the burrs off! See Fig. 3-4.
Blow out the tubing with compressed air. Make
sure no foreign particles remain!
Flaring...
Tube flaring is a method of forming
the end of a tube into a funnel shape so it can be held by a threaded
fitting called a flare nut. There are two types of flares, single flares used
in low pressure situations like fuel line, and double flares used in high pressure
lines like brakes and clutches. Double flaring is nothing more than folding
the edge of the hard line back on itself (thereby doubling the thickness at
the end) then creating the actual 45 degree flare . This doubling allows
the flared end to withstand the higher pressures of braking systems without
splitting.
Fig. 5
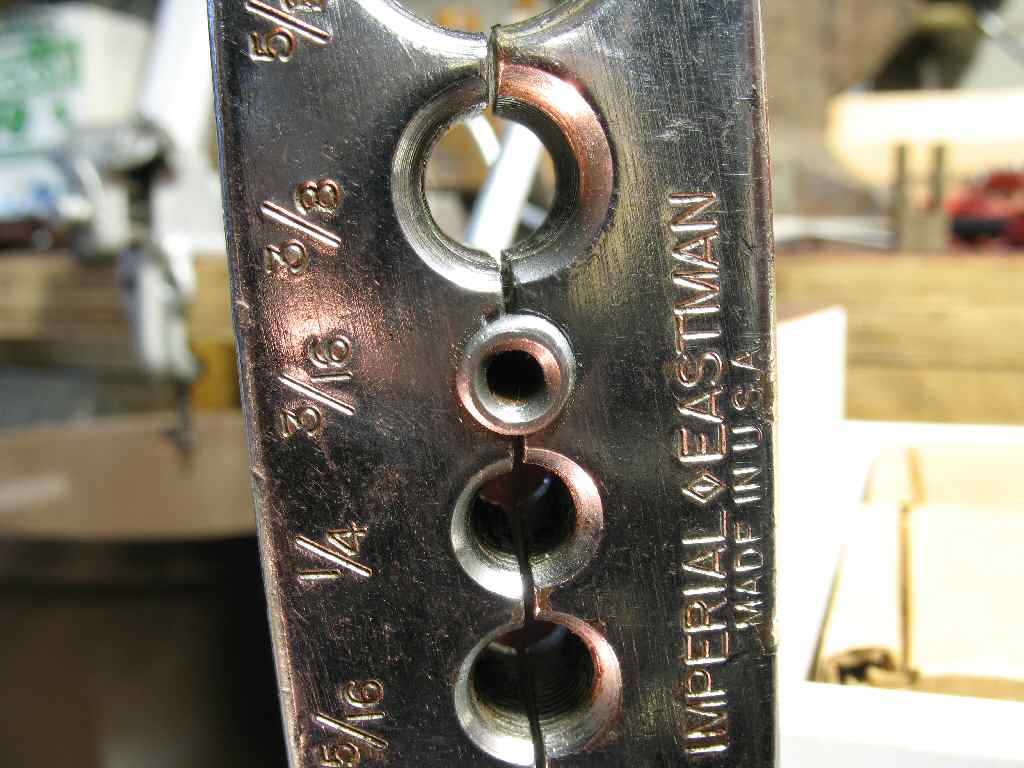
Imperial Split Die Block
Fig. 6
Open Clamp
Fig. 7
Adjusting Height
Fig. 8
Die In Place
Now that the tubing is cut square and de-burred it's time to
do the actual flaring.
PLACE THE FLARE NUT ON THE LINE NOW!!! You will be cussing
yourself if you don't!
Loosen both die clamps until you can pivot the one clamp
to open the block. See Fig. 6. ( Notice anything?....)
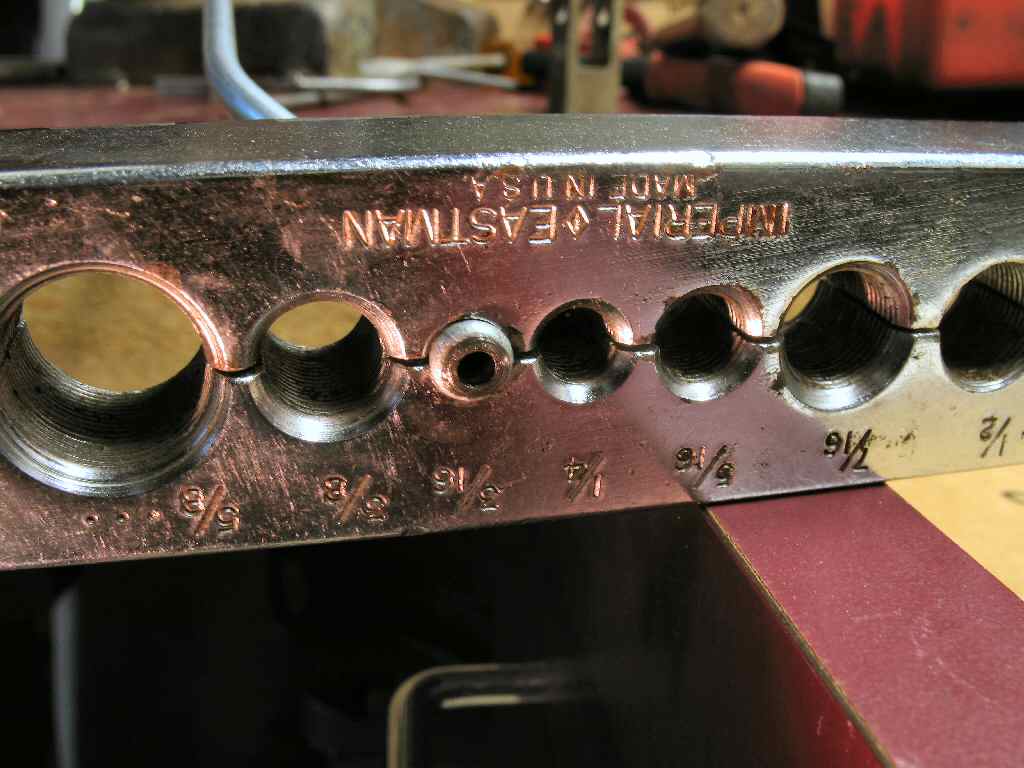
Insert the tubing into the 3/16 hole, pivot the end clamp
back to lock position then turn the die block so the end of the line is pointing
up.
Place the correct die next to the end of the tube as shown
in Fig. 7 then adjust the height of the tube
to match the die as shown. This is critical! Too much tube sticking up allows
the tube to try to collapse on itself when formed or forces the tube to be
pushed out of the die block, and too little results in not enough material
being bent back on itself to correctly form the double thickness end. FIRMLY
tighten the die block clamps! You don't want the tube slipping!
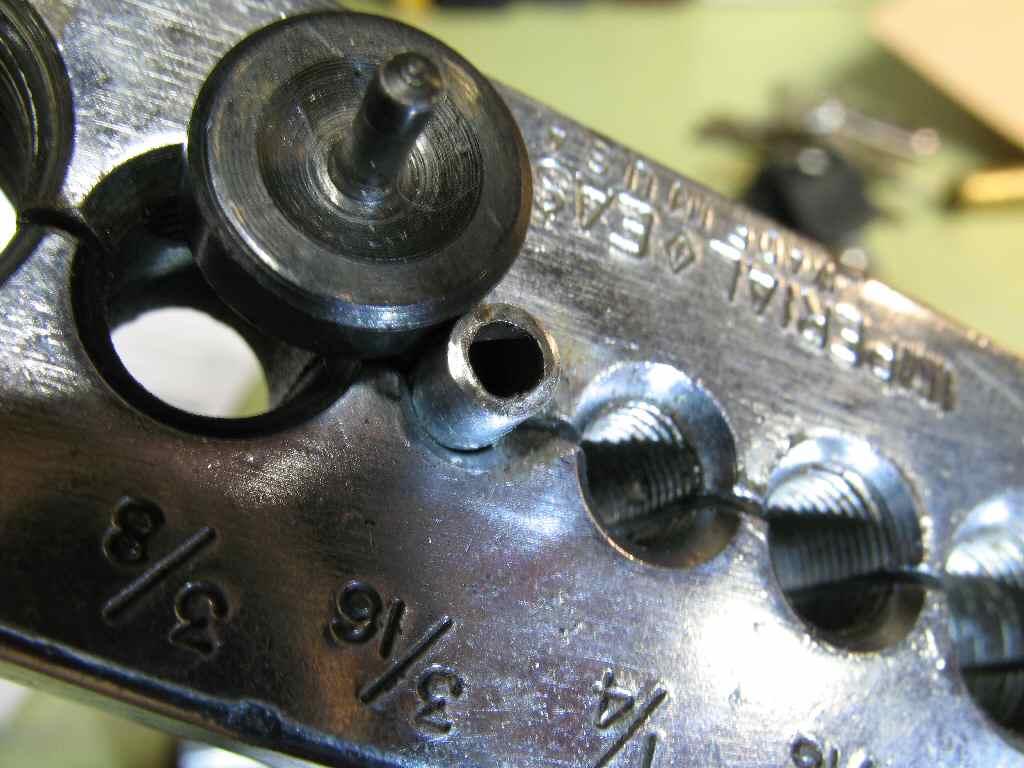
Place a drop of oil on the little rod sticking up from the
die. Now flip the die over, and insert it into the end of the tube as shown
in Fig. 8. The little rod that goes inside the
line prevents the tube from collapsing inwards when you form the end.
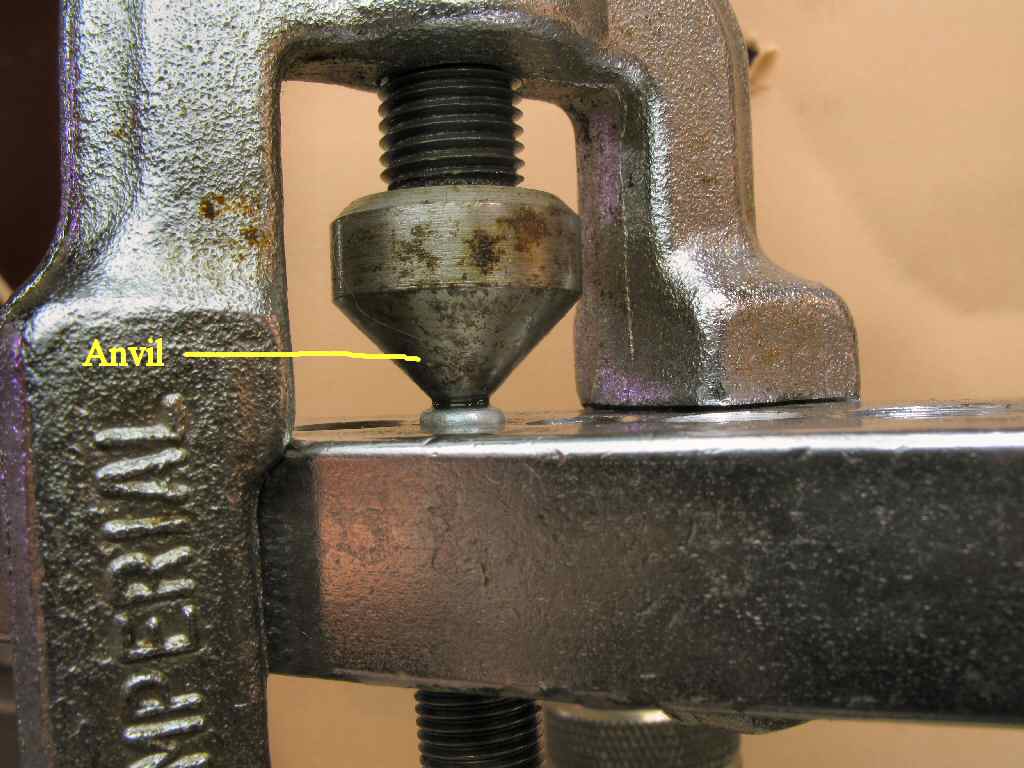
Place a drop of oil into the depression on top of the die
that the anvil fits into. Attach the anvil to the die block as shown in Fig.
9 and center the tip on the die.
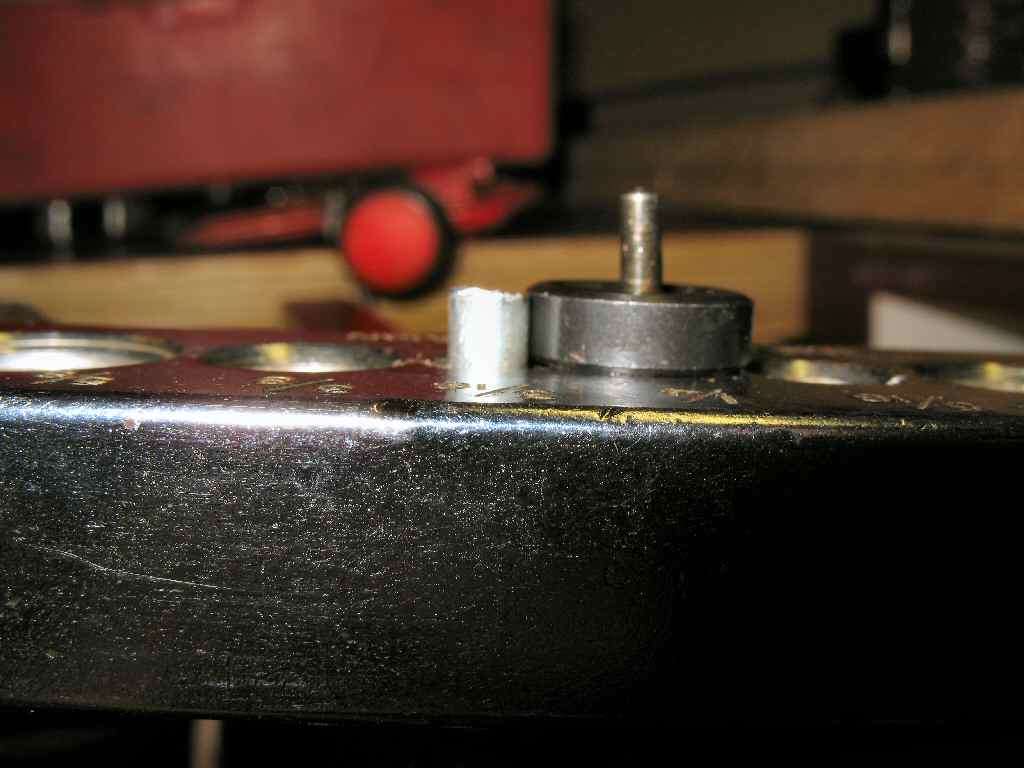
Slowly start tightening the anvil. If the brake tube is being
pushed out, the clamps are not tight enough! You will need to start over with
step 1!
Tighten the anvil until the die contacts the die block all
the way around. This step rolls the end of the tube back on itself to form
the double thick end.
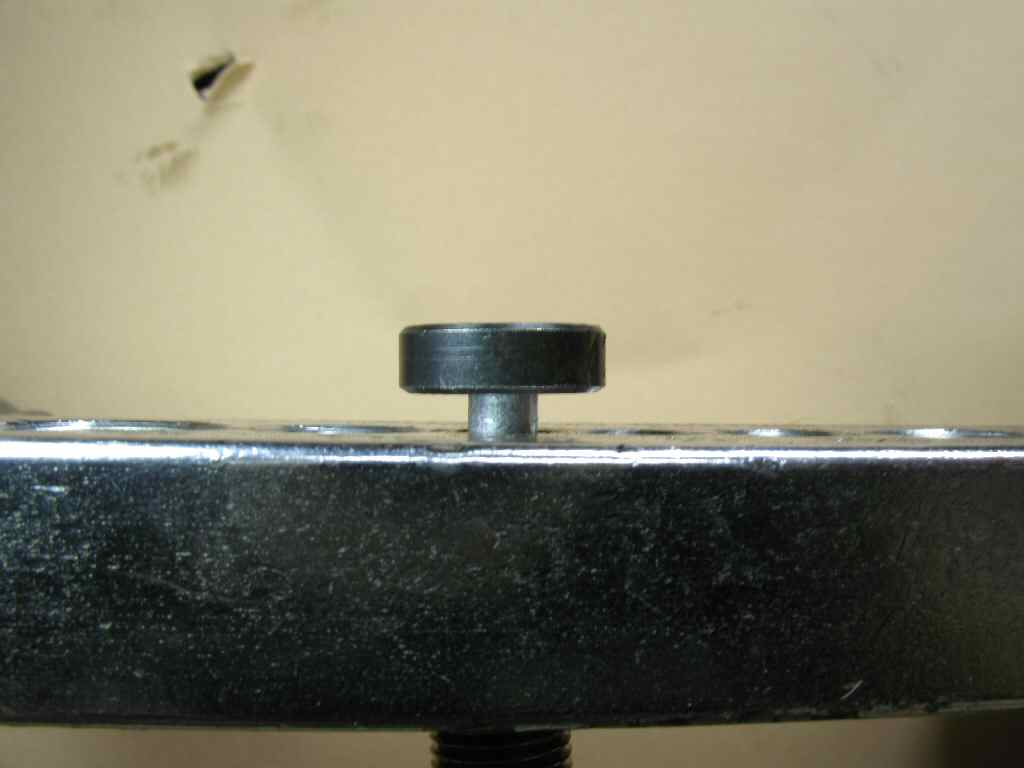
Remove the anvil and die. Inspect the end of the tube. It
should look like Fig. 10.
Place a drop of oil on the tip of the anvil. Now reinstall
the anvil without the die, and center the tip of the anvil into the end of
the tube as shown in Fig. 11.
This step forms the 45 degree flare. SLOWLY tighten the anvil
a bit, then back it off to see what is happening. You want to make a good
flare, but if you go too far, you will split the edge of the tube. See Fig.
12 for what a good flare should look like. If there are ANY cracks
or splits around the edge of the tube, then start over!
Fig. 9
Step One
Fig. 10
Result of Step One
Fig. 11
Step 2
Fig. 12
Finished Flare!
You did put the flare nut on the line before
all this.... right?.... Of course you didn't, just like I didn't for this
line...:-)