Rebuilding Your Front/Rear Drum Brake Wheel Cylinders
Disclaimer: Any
ideas you get from this site should be checked against a qualified mechanics opinion.
Brake work should NOT be taken lightly! If you have ANY doubts as to your ability
to do a quality job, stop right now, and pay someone to do it right! I recommend
you not do this rebuild, but just get all new parts, take them to a certified
mechanic, and have him install them.
Overall Brake Notes
On older Land Cruiser like mine there are 4 different
styles of wheel cylinders on one truck! Front and rear and left and
right. They are NOT interchangeable, though they WILL fit! First of all the
four front cylinders are SINGLE PISTON while the
four rear ones are DUAL PISTON. The wheel cylinders
are also 'handed', meaning they are for a certain side. Fortunately for us
dumb mechanics Toyota was smart enough to cast into the cylinder body a big L or R to keep you from getting confused.
( That did not stop the PO of my truck! He had the front cylinders
swapped resulting in the truck NEVER having good brakes.)
Front Brakes
If your wheel cylinders are in pretty good shape it makes
no sense to buy new ones when the cylinder cups wear out. The wheel cylinders
on the FJ40 are super simple to rebuild.
Get a cup rebuild kit from NAPA, SOR, or you
favorite auto parts store and follow along as we rebuild them. I got my front cup kit from
Advanced Auto Parts. They were made by Beck Arnely and are Advanced Auto Part
# 18020538 (Beck Arnely Part #071-4758. Rear cup kit is Part #071-4816). This is a minor kit and does not contain
the spring and spring seat. Only the cup, dust boot and bleeder cap.
I am going to assume that you have removed the
cylinders, taken them apart and cleaned them up. See the Knuckle
Rebuild section for how to remove all the brake components. The following
tools are needed for rebuilding the cylinders.
Tools Needed
Tools
Description/Job
10mm Flare Nut Wrench
For removing the bleeder screws if
you didn't already.
Brake Cylinder Hone
Any auto parts store will have this.
Brake Fluid
To wet the hone
Calipers or Micrometer
To measure the diameter of the cylinder
bore and piston. If they are worn past the limit the cylinder piston
will hang in the bore.
Brass wire wheel
To remove the build up from the cylinder
piston. Steel wheels will remove material! You can also use a scotch
pad. (Green kitchen scrubby)
Alcohol
To clean the parts
Fig. 1
Page from manual
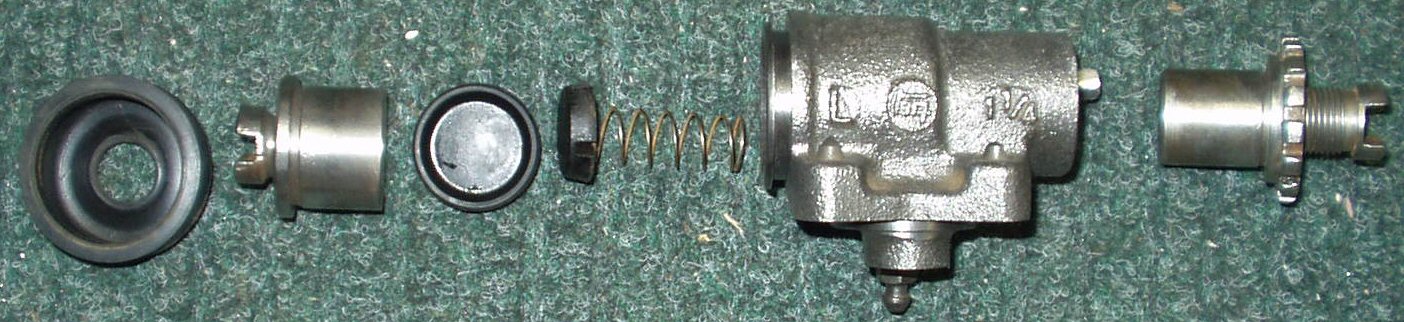
Fig.1A
Actual Cylinder
Fig.1 shows
an exploded view of what is inside the cylinder from the factory manual.
Fig. 1A shows a picture of my wheel cylinder.
From left to right: Wheel Cylinder Boot, Cylinder Piston, Cylinder Cup. Spring
Seat, Compression Spring, Cylinder Body, Wheel Cylinder Adjuster mechanism.
Note: DO NOT mix the adjusters up! Some are left handed threads,
some are right! I will explain below what goes where. Work with one wheel
cylinder at a time to avoid mixing up parts. If you do mix stuff up I'll explain
what goes where later.
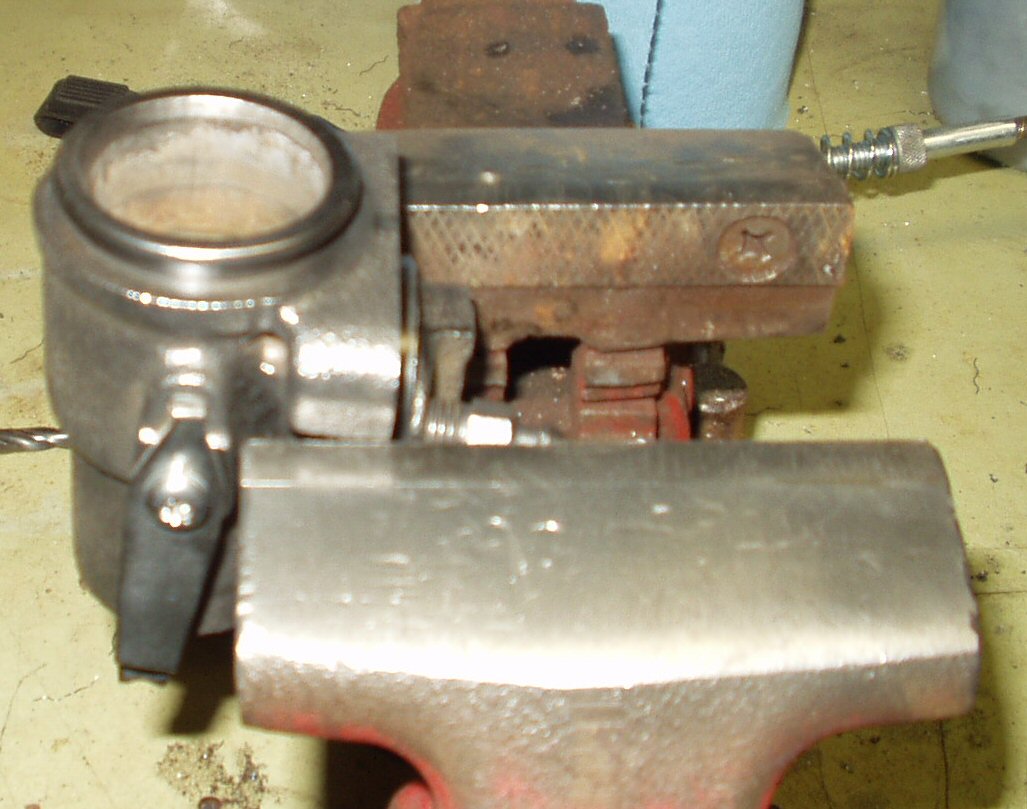
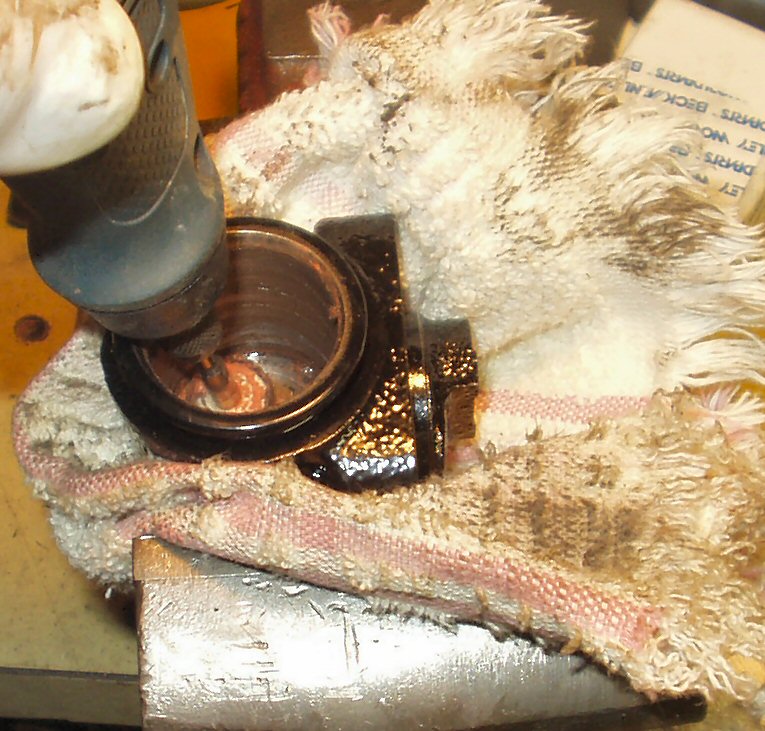
Fig.2
Ready to Hone
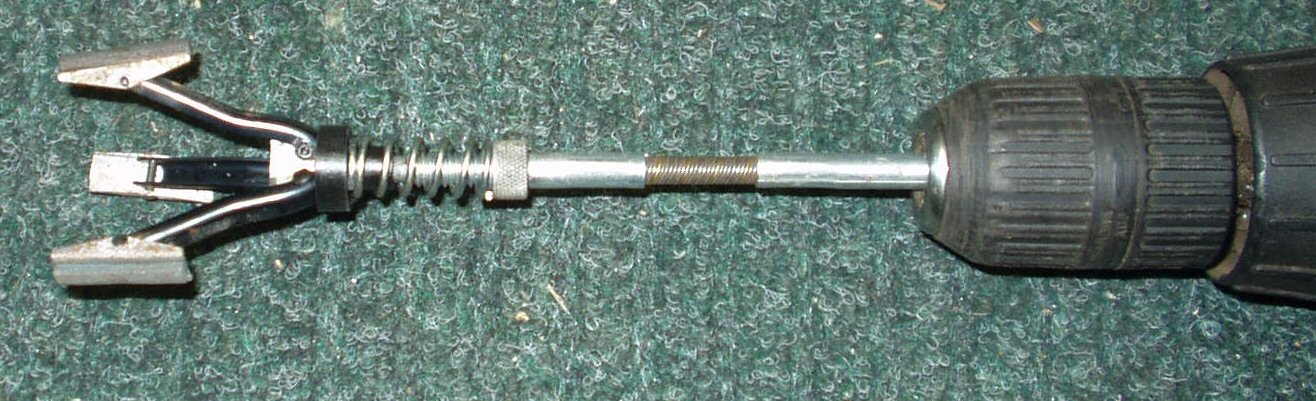
Fig. 3
Hone
Cylinder Honing,
Polishing and Cylinder Piston cleaning
Choose a cylinder body and matching piston to work
with. Clamp the cylinder piston carefully in the vice and using
the brass wire wheel, GENTLY remove the buildup on the piston. Set the piston
aside.
Clamp the cylinder body in the vise, piston bore up, as shown
in Fig 2. Get some clean brake fluid and coat
the inside of the piston bore with it. Mount your hone (See Fig.
3.) in a variable speed drill then dip the stones in some clean brake
fluid. Now compress the hone into the cylinder bore . If your hone has adjustable
tension set it according to the manufactures recommendation or so there is
firm tension holding the stones against the cylinder wall .
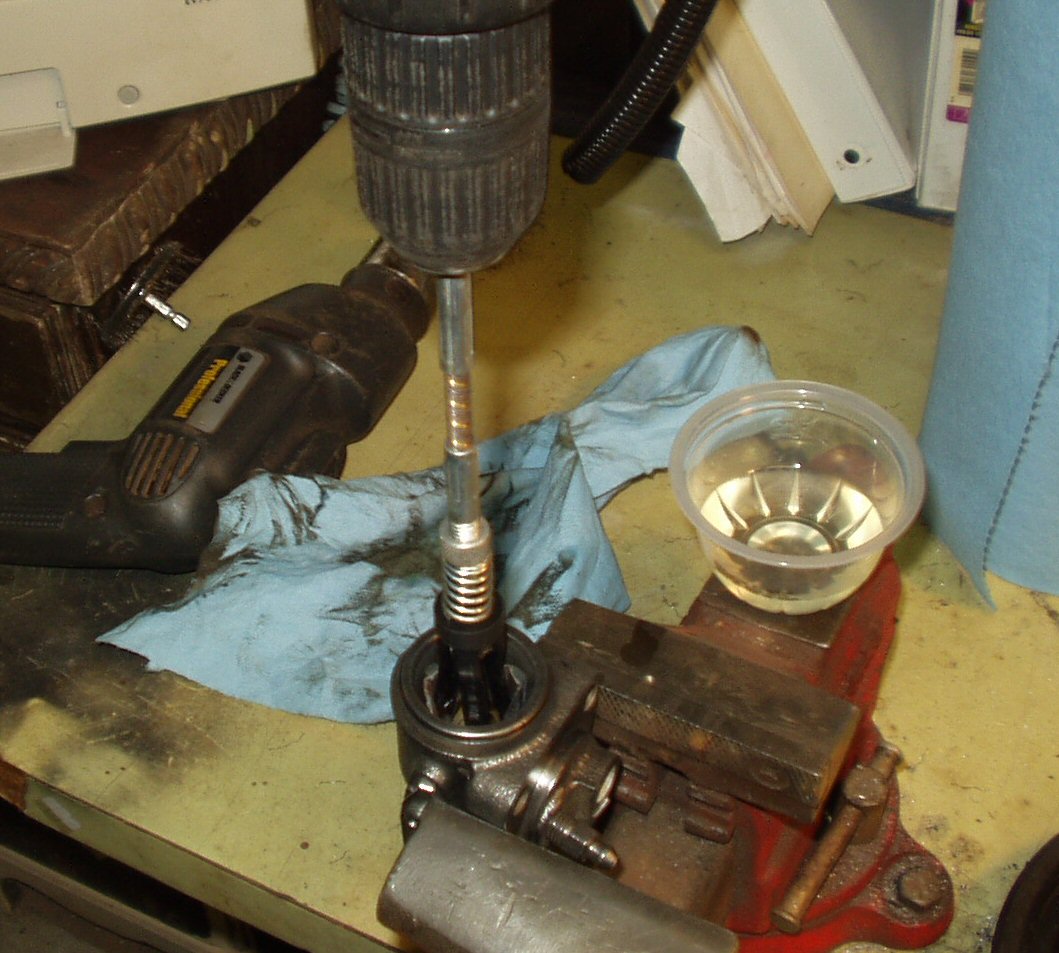
See Fig. 4
Using a variable speed drill at low speed with plenty of
brake fluid as a lubricant, run the hone the full length of the bore in an
up and down motion. You are trying to make a cross hatch pattern. Run the
hone long enough to smooth out the bore, but do not over hone! I found that
with a severely corroded cylinder that about 300 strokes up and down got the
most of it. Do 100 strokes then wipe out the cylinder and clean off the stones.
The stones will foul if you don't clean them, cutting their effectiveness.
Fig. 4
Honing the Cylinder
Fig. 5
Dremel Polishing
Fig. 6
Polished Bore
Check that you have removed all pits and corrosion. Repeat
the honing till the bore is smooth and free of all defects.
Wash out the bore with soap and water to remove all traces
of the hone grit.
Next you need to polish the bore to as fine a finish as possible.
There are several ways to accomplish this. I used two things: One I cut a
piece of 1000 grit (very fine) sandpaper to fit the bore of the wheel cylinder.
Then inserted the hone so that it was pressing the sandpaper against the inside
of the wheel cylinder. I ran it up and down 50 times, wiped it out then used
my Dremel Tool with a polishing felt and rubbing compound. See Fig.
5. I followed this with a metal polish. If you don't have a Dremel
tool then get a 3/8" wooden dowel rod and cut a 5" piece off. Next
make a slit in the end with a knife and insert a folded piece of very fine
grit sandpaper into the slit. Chuck the dowel into your drill and use this
to fine sand the bore. Next put a piece of old rag soaked in a metal polish
in the slit and repeat. You want that bore to SHINE! The purpose is to help
the cylinder cup make a good seal against the bore. A smooth bore means a
tight seal with less chance of leakage. A smooth bore will also slow wear
of the cup. See Fig. 6 for a finished bore.
You may also want to hone the adjuster side of the cylinder
to remove any corrosion. It does not need to be polished unless you are just
really bored.
Measuring Clearances
I know you just put a lot of work into prepping
that cylinder but if the piston clearances are now too large due to your honing
and polishing and you put it in service you will experience leakage past the
cups. We now need to determine if this cylinder/piston combo will work.
Start by measuring the inside diameter of
the just honed Wheel Cylinder bore. Write this down. Now measure the outside
diameter of the cylinder piston. Subtract the piston diameter from the bore
diameter. There should be no more than six thousandths (.006) difference
between the two. Measure in several locations then average to ensure a good
reading. If the readings are more than the allowable difference then you
should either look for new replacements or have all your friends send you
their old wheel cylinders! (They all converted to disk brakes long ago of
course) Mix and match pistons and cylinders until you have a good set. The
tighter the better but don't match a set so tight the pistons bind! I would
allow at least .002 for thermal expansion.
Assembling the Cylinder
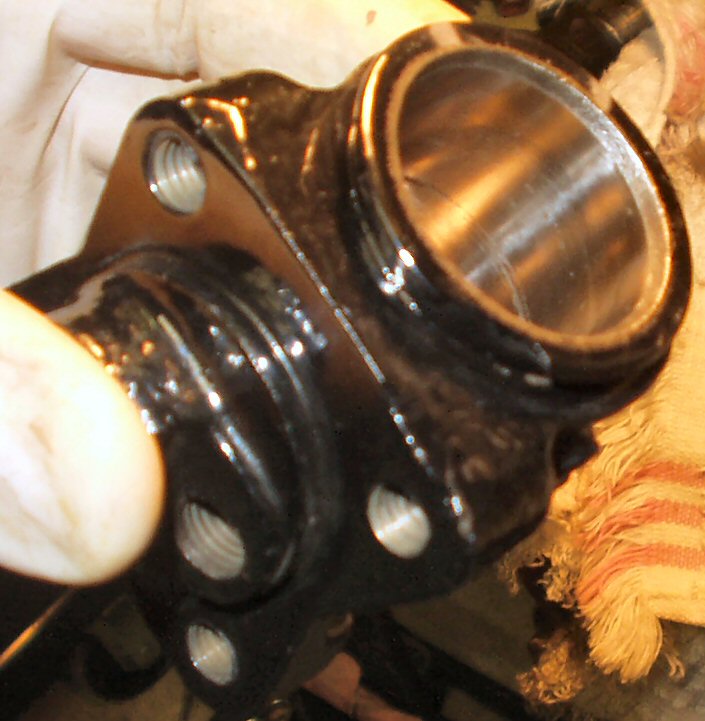
Use an 8mm x 1.25 tap to clean out the four mounting bolt
holes. Then use a 10mm x 1.25 tap to clean out the bleeder screw threads.
Last use a 12mm x 1.25 tap to clean out the banjo bolt threads. See Fig.
7.
Clean the cylinder body and piston of all dirty brake fluid
with soap and hot water. Use compressed air to blow out all the water and
wipe it down with alcohol. Get your rebuild kit out.
Place all the parts except the dust boot into a small container
of clean brake fluid.
Place the wheel cylinder upright with the piston bore up.
See Fig. 8.
Coat the inside of the cylinder bore with clean brake fluid.
Place the Spring into the center of the bore and put the
spring cap on top of it with the large end up. The spring will fit in the
recess on the back of the spring cap. See Fig. 9.
Place the rubber cup on top of the cap with the large recessed
end facing into the cylinder ( flat face facing out). See Fig.
10.
Install the rubber dust boot on the metal piston. Use the
piston to push the rubber cup in to the cylinder. While holding the piston
in, use a small screwdriver to seat the dust boot around the lip of the cylinder.
Make SURE it's seated all the way around. Twist it back and forth a couple
of times to seat it.
Coat the adjusting screw bore with grease or anti-seize compound,
coat it good! Remove the adjusting screw (to prevent air lock) and place the
adjuster piston into the bore and rotate it back and forth several times to
coat the piston. Remove and ensure it's coated well. Put the adjuster screw
back in.
Attach the adjuster lock spring after coating the screw with
some anti-seize.
Your done! Wow! One down and three or seven to go! See Fig.
11.