Replacing the stock Booster with
a Mini-Truck Booster
You will need to get a 1979 to 1985 Toyota mini-truck
booster complete with all the spacers and mounting plates and the inline vacuum
check valve. This valve is installed in-line INSIDE the hose that connects to
the booster. Make sure to ask for it if you get one from the bone yard. Don't
forget the nut/bolts/washers for everything. Your master cylinder will bolt
right up to this booster but if they are throwing it in then take it. You can
use it as a core for when you eventually do the disk brake swap.
I got one from a guy in Va and when it arrived
here is what I found:
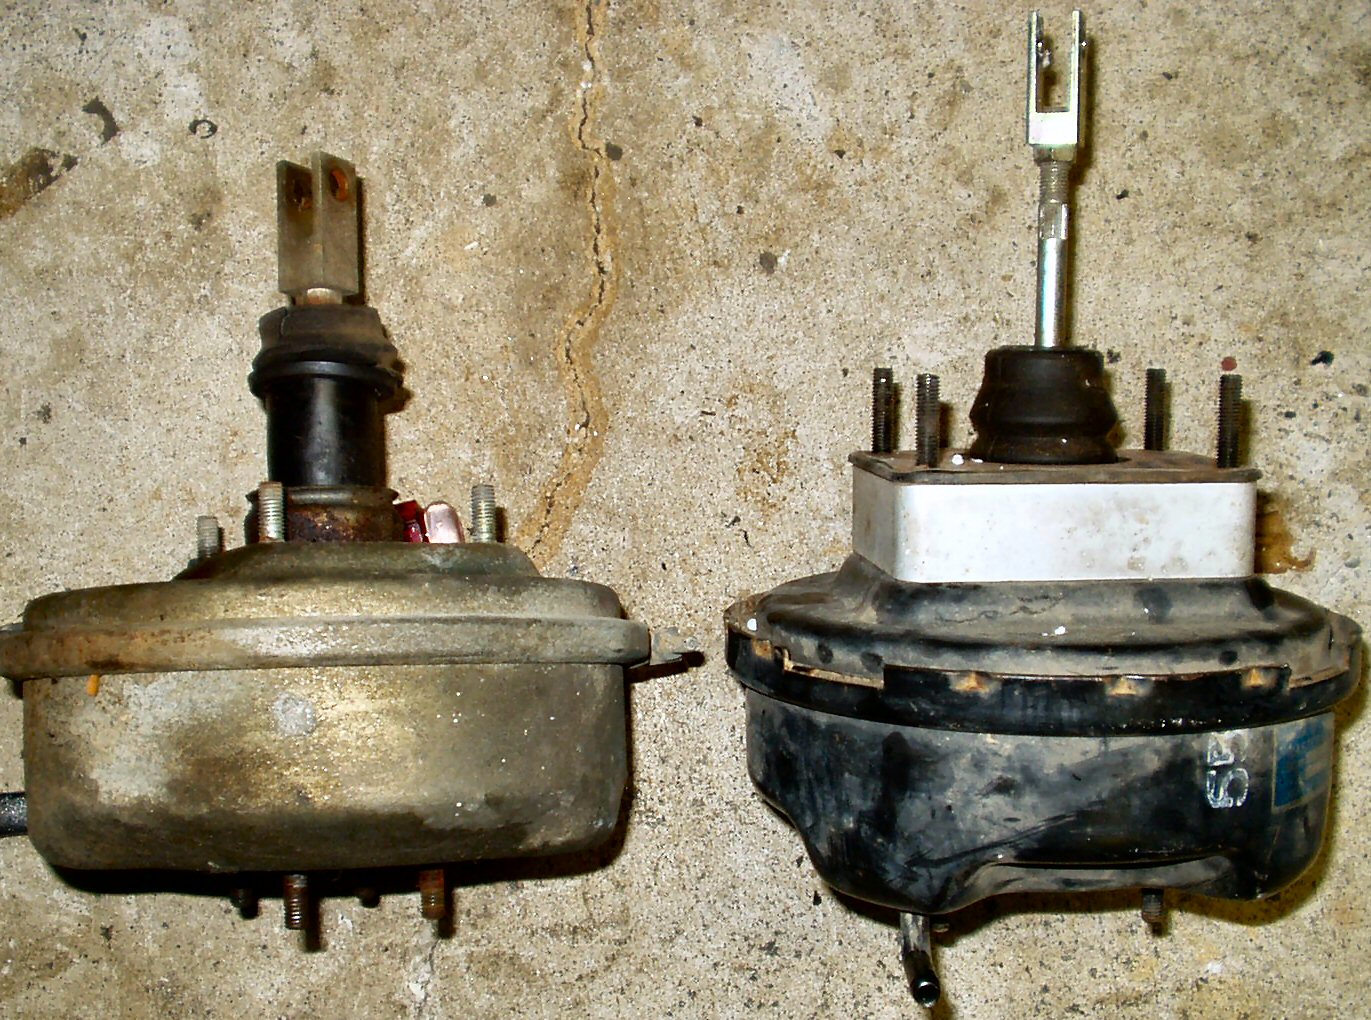
Fig. 1
Boosters Side by Side
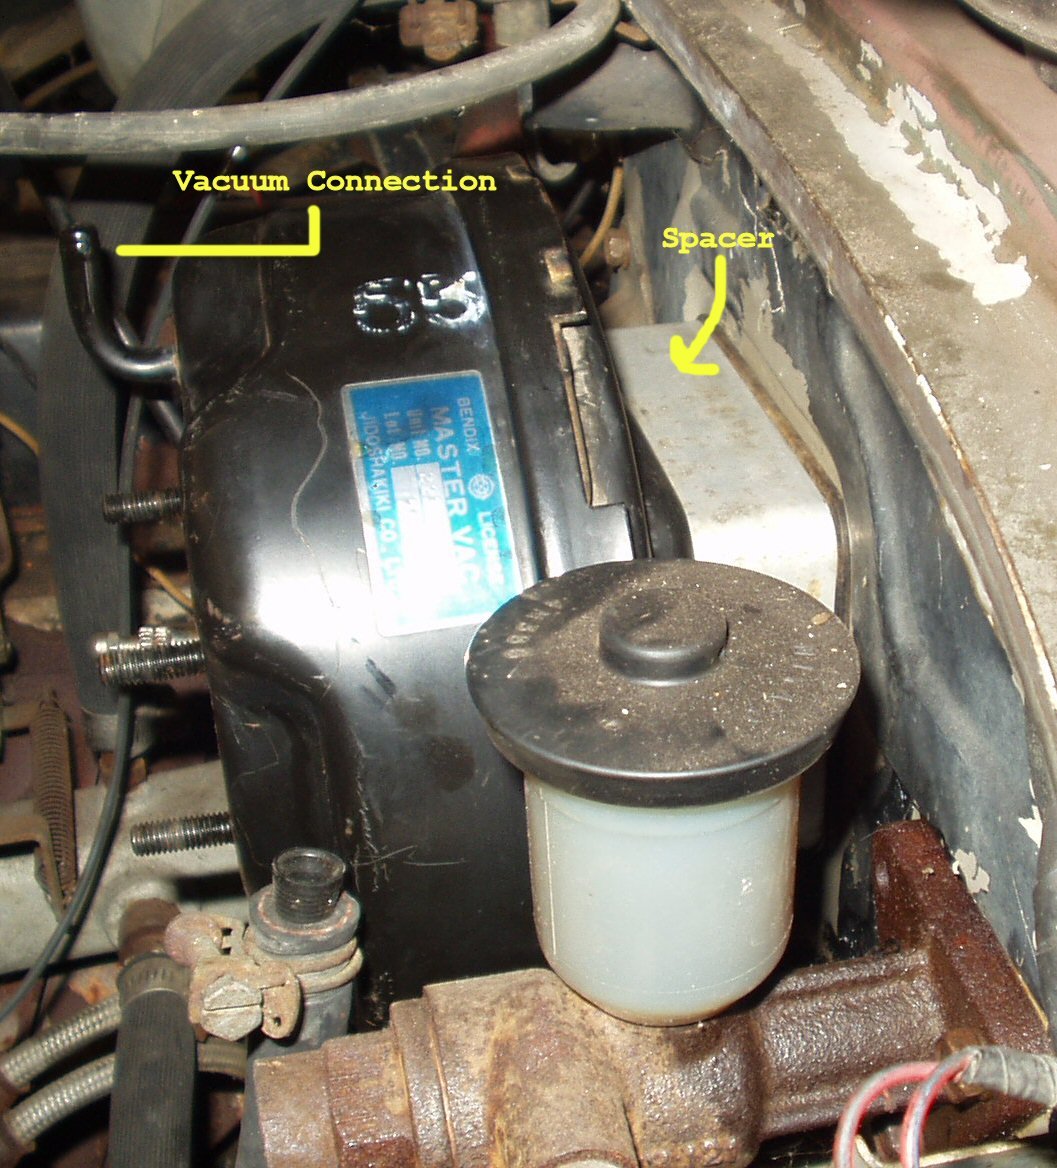
Fig. 2
Spacer Installed
For comparision to the stock booster see Fig.
1. The booster is slightly thicker in
the body, about the same diameter, but is a good
2 inches overall longer from the front to the end of the push rod. Though the
spacer that comes with it makes up most of the difference this still caused
me a bit of a problem. I'll explain that a bit later.
Mounting The Booster
Remove the brake lines from the master cylinder
and bend them slightly out of the way.
Unbolt the master cylinder from the booster
and take it to the bench.
Remove the return spring from the pin bushing.
Remove the cotter pin from the pin bushing holding
the push rod to the brake pedal arm and push the pin out to release the push
rod.
Unbolt the old booster by removing the 4 12mm
nuts holding it in place.
Remove the booster through the engine compartment.
Clean up the 'new' booster by cleaning around the opening
where the master cylinder bolts. Wipe it all down, then put a coat of wax
on it. Just kidding!
Mount the booster so the vacuum inlet is UP. Also when
you mount the new booster make sure to leave all the spacers, gaskets, and
mounting plates in place as shown in Fig.2-3!
If you leave these off it will NOT work!
Until you get everything adjusted correctly only install
and tighten two nuts on diagonals from each other. You may be removing and
installing it more than once.
Attach the return spring to the pin bushing. You must do
this to get a good reading for the pedal height adjustment.
Fig. 3
Booster Spacer
When I first mounted mine and tested it, it would
not hold vacuum. (See Below for testing the Booster.)
At first I thought I had a bad booster but it turned out that because
the push rod was a bit too long (even when adjusted all the way against the
brake pedal arm) the booster was being activated when I tightened down the bolts!
(Of course it took 2 hours to figure this out and fix it.) My solution was to
cut about 1/4" off the end of the push rod. This stopped the booster from
being wrongly activated and allowed me to adjust the push rod to get the proper
pedal height. You may or may not have to do this, mount yours and see if it
holds vacuum. If it won't, first try adjusting the push rod in. If the rod contacts
the brake pedal arm you will need to trim it. Start with a 1/4" and test
it again. See Fig 4. for the adjustment.
Fig. 4
Adjusting the pedal height
Adjusting Pedal Height
Place a ruler against the firewall so that
you are measuring the distance from the bottom edge of the pedal to the firewall.
See Fig. 4. It should be about 9.65". To
adjust this loosen the 14mm locknut on the push rod and using a pair of pliers
turn the rod in or out to obtain this reading. DO NOT adjust to the push rod
out to the point that you have triggered the booster! Don't sweat it if you
can't get it exact! I got close. Instead
of 9.65" I got 9.75. Tighten the lock nut down when done.
Testing the Booster
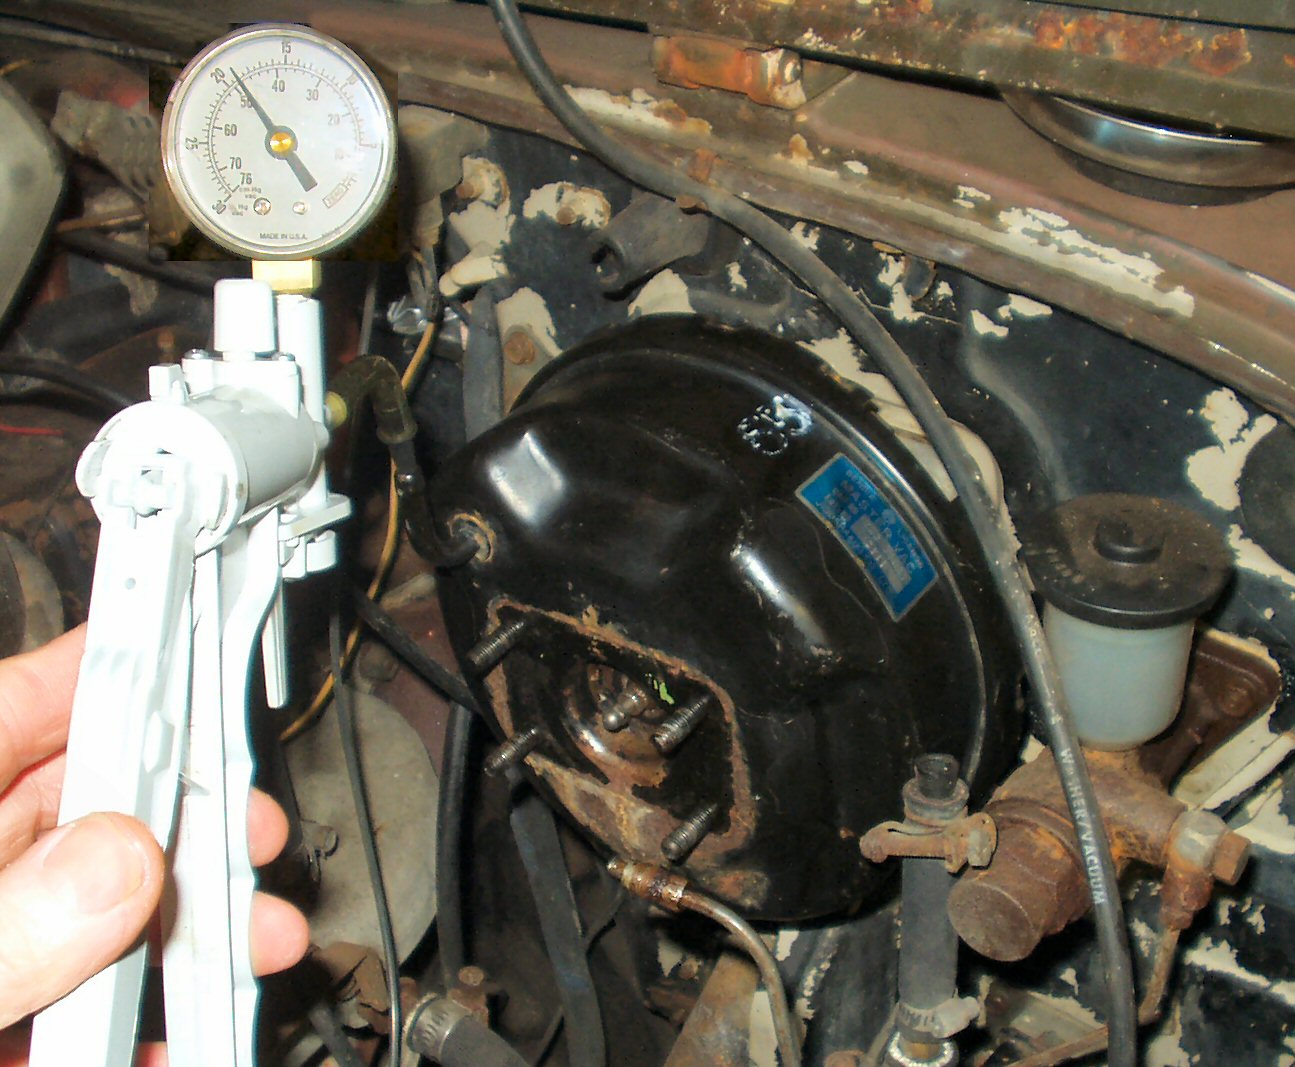
Fig. 5
Testing Booster
I tested it with a Mighty-Vac Vacuum tester and
it checked out good. To test your booster hook it up as shown in Fig.
5. Pump the handle until you have about 20 inches of vacuum showing.
If the booster is good it should hold that vacuum for a long time. If it's leaking
then the needle will gradually fall. Make sure you have good tight connections!
Don't want a loose hose causing you to throw a good booster away! :-) To test
the check valve connect it in series with the booster and repeat the test but
after reaching the 20" disconnect the pump. The check valve should prevent
the booster from bleeding off.
Adjusting the Booster Front Push rod to
MC Piston Clearance