The Roof
Last Updated 10-24-2005
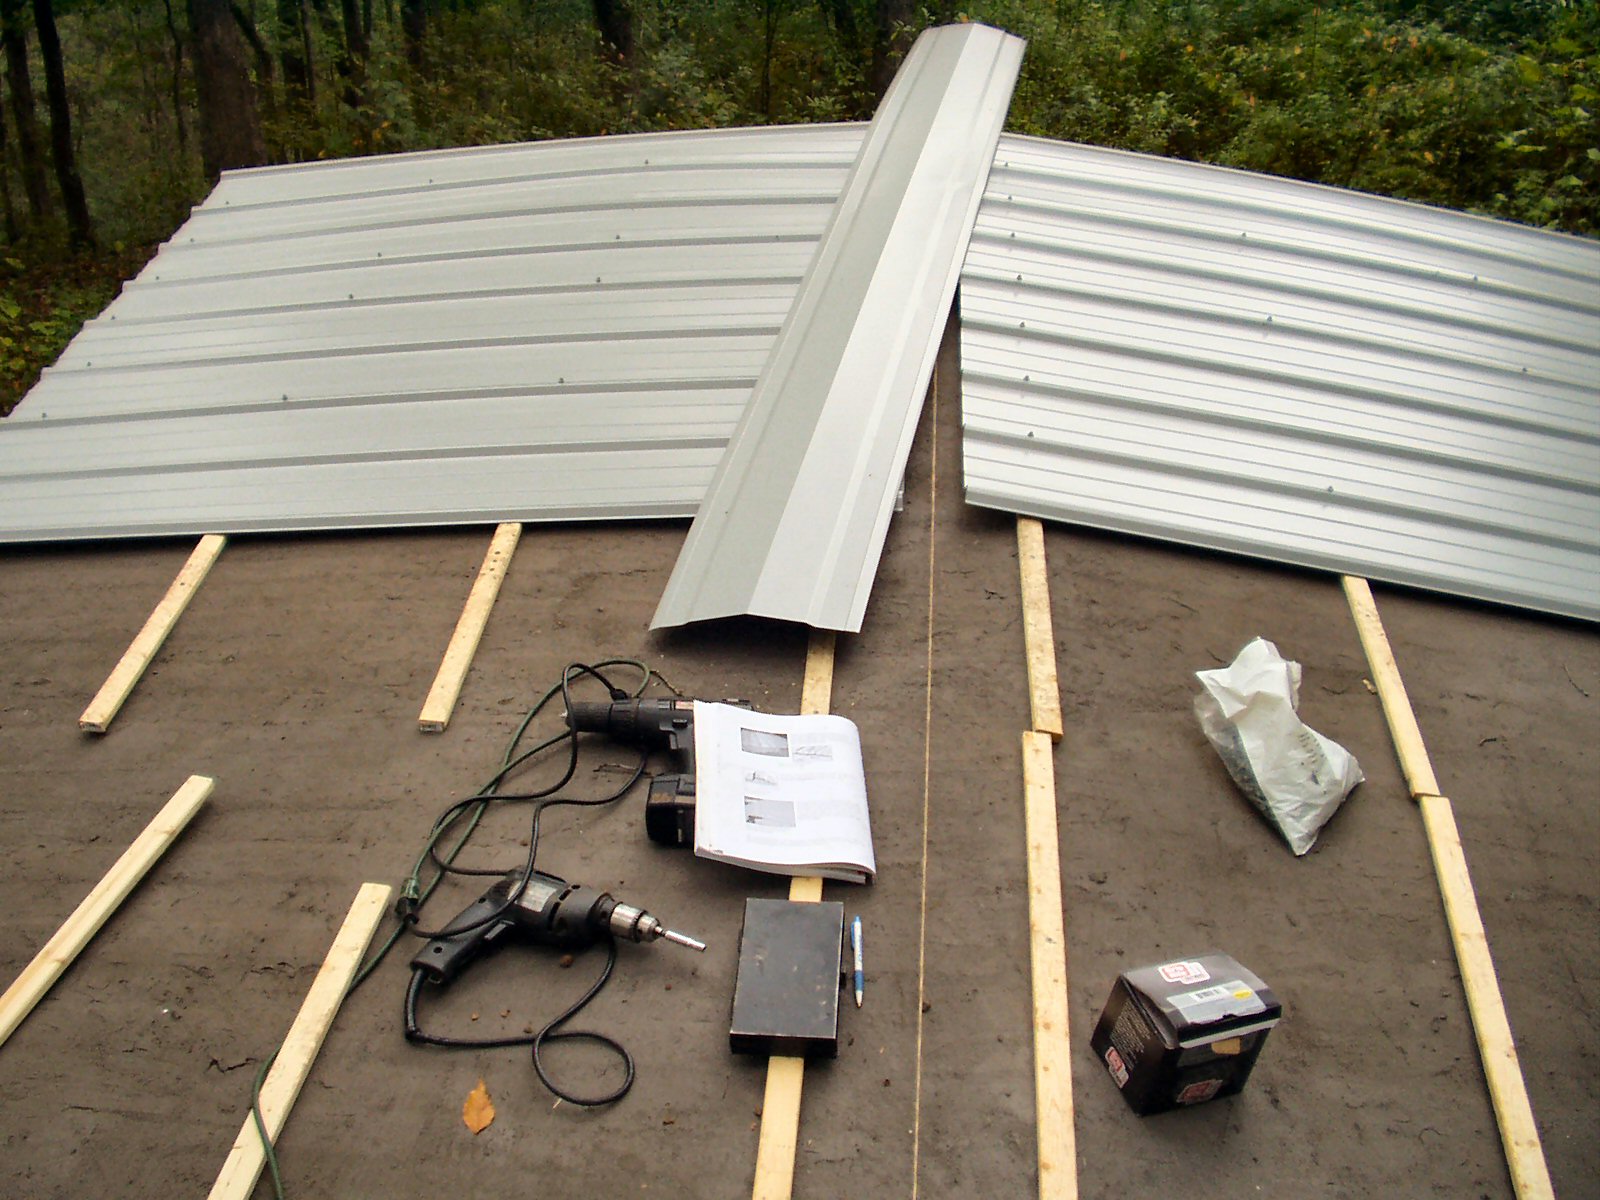
Fig. 1 40 3'x 6' Sections
|
Fig. 2 Ridge Cap |
Fig. 3 End Caps |

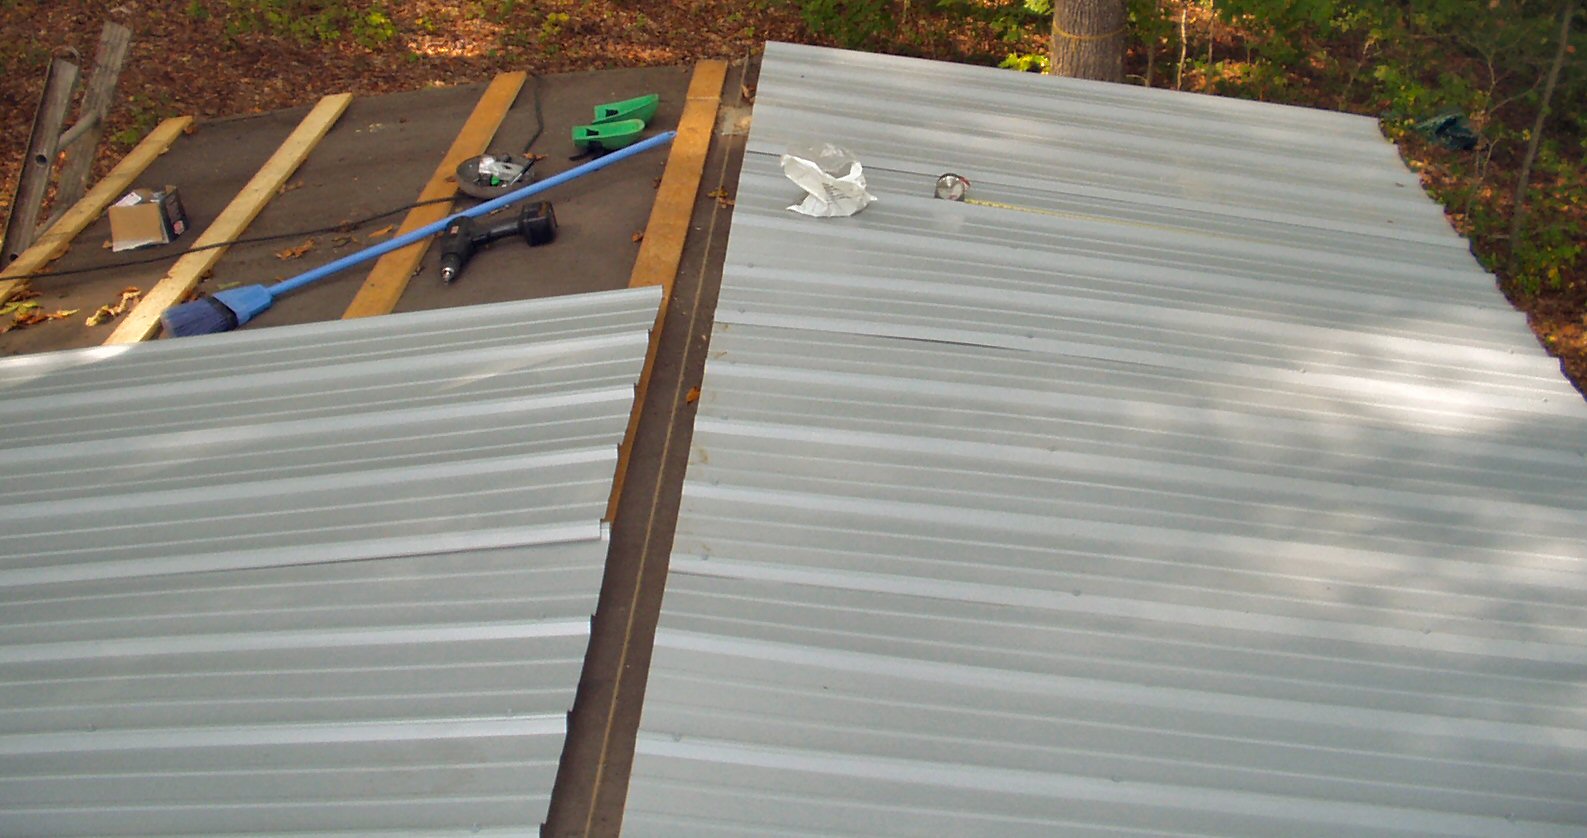
One of the deal makers for us was the inclusion of a brand new metal roof kit with the purchase of the home. There were 40 3' x 6' roofing sections, 6 10' 6" ridge caps and 2 14' end caps. Also there were 48 foam ridge caps gaskets with peel and press adhesive and a large bag 500 count of roofing screws with rubber washers. All we had to buy was 360' of rough cut 1x4s so we could make 3 runs per side to attach the roof to. We figure it will take us a weekend to do the entire roof. (We were very wrong!)
The fun part was the various vents to we had to contend with. There were two 6" roof vents dead center on each end, three 3" plumbing vents and one 4" exhaust fan.
We finally got around to doing the roof in October 2005. We waited until the weather cooled off here in KY and took our two weeks of vacation to get as much done as possible.
The Beginning
We started with a trip to Lowes to get the remaining 1" x 4" furring strips I needed. I already had 8 12' long pieces but needed 24 more. When I saw the price of a 10' 1x4 ($4.50 thanks to hurricanes Katrina and Rita!) I elected to get 1" x 2" strips instead as they were only $1.15 for 8' long pieces. I ended up needing 36 of those. I also picked up some lead flashing's for the plumbing vents, some 1 1/2" PVC couplers to extend the vents and a 4' section of 1 1/2" pipe. I started on the roof Sunday of the last day of the first week of vacation. Of course it rained ...
Fig. 4 The old roof before |
Fig. 5 Attic Vent |
Fig. 6 Vent Top Removed |
Fig. 7 Other Vent |
Fig. 8 Vent Removed |
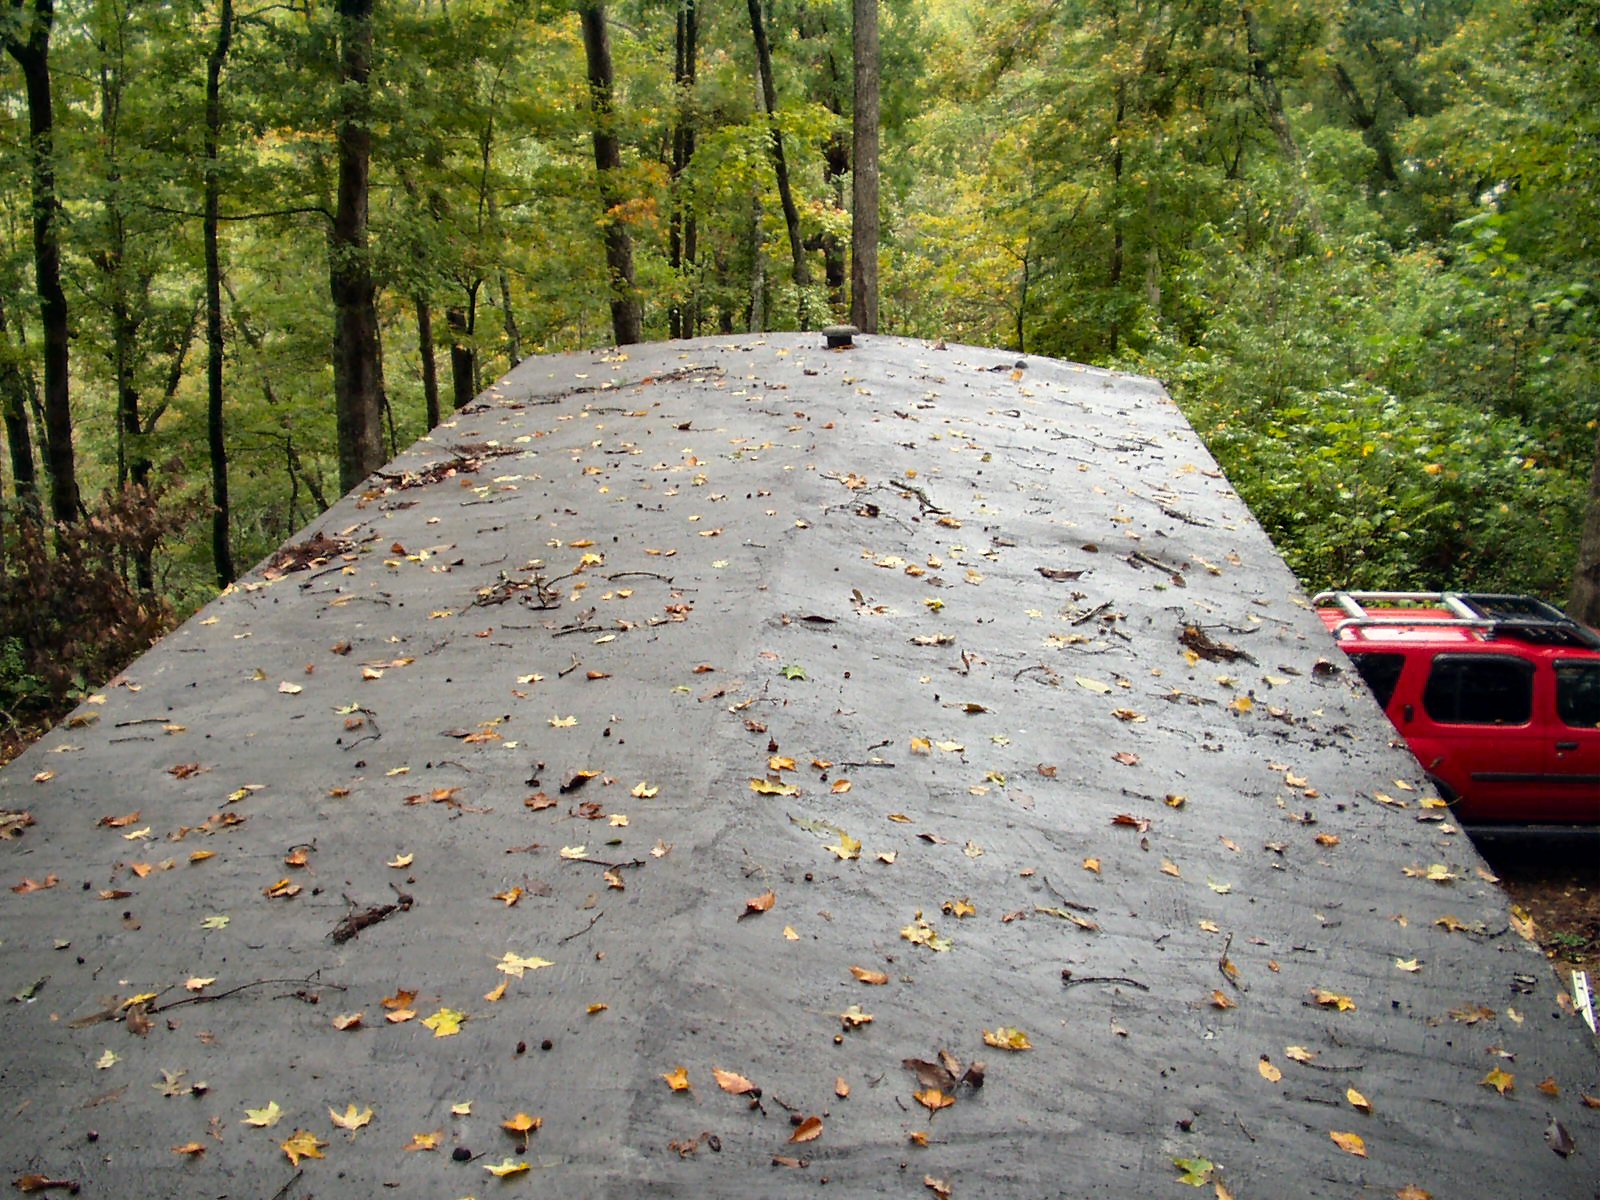
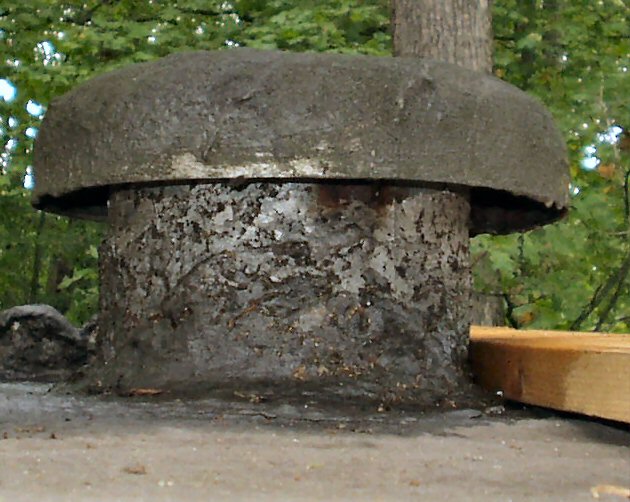
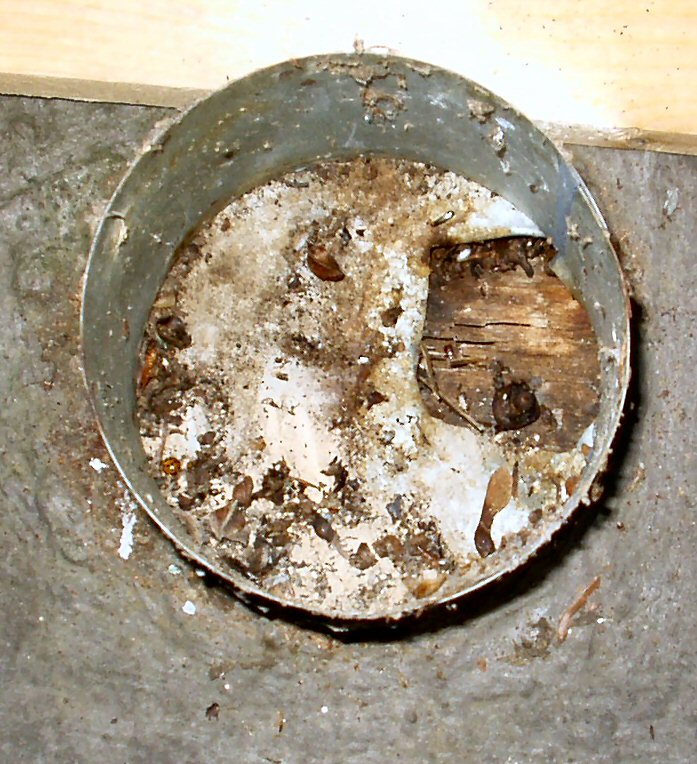
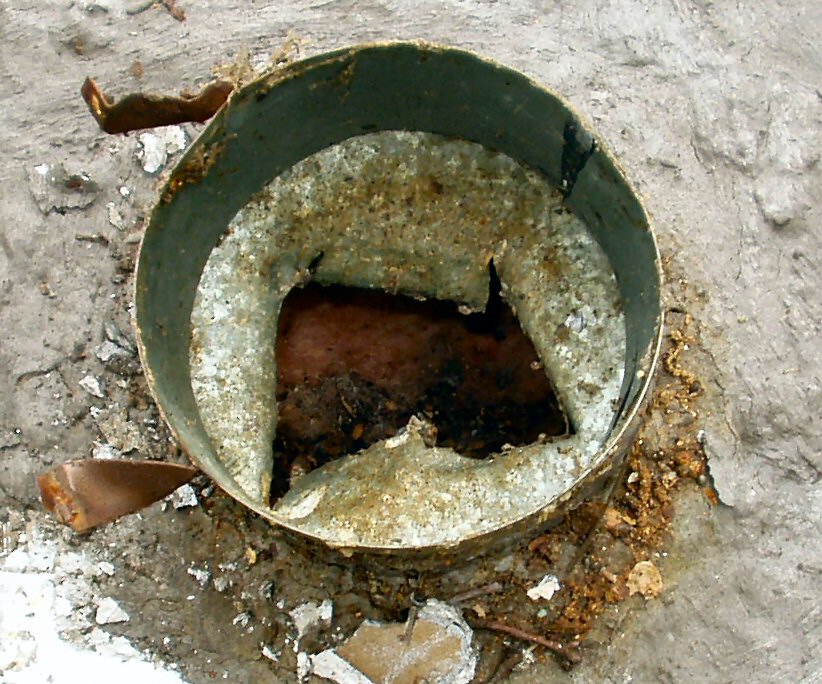
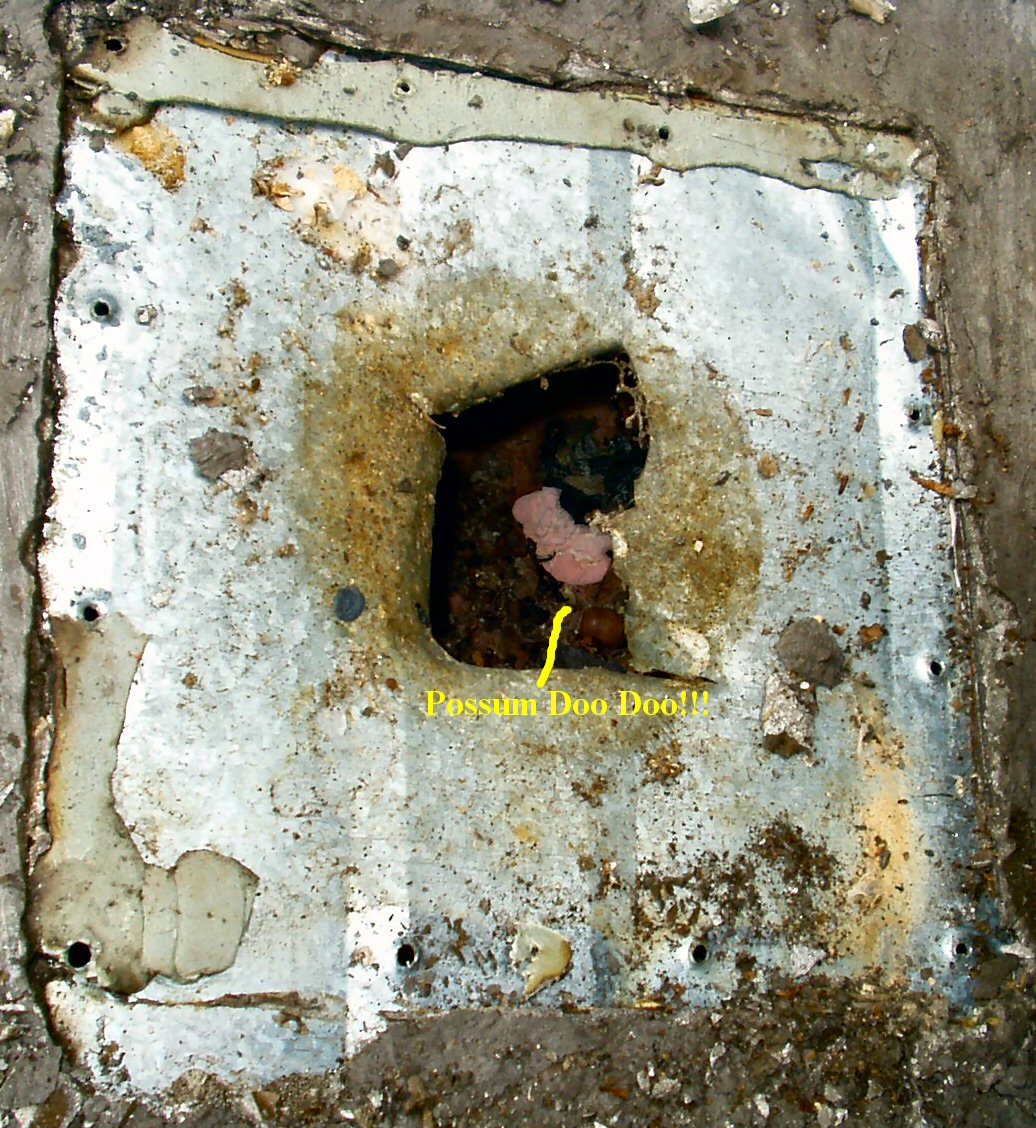
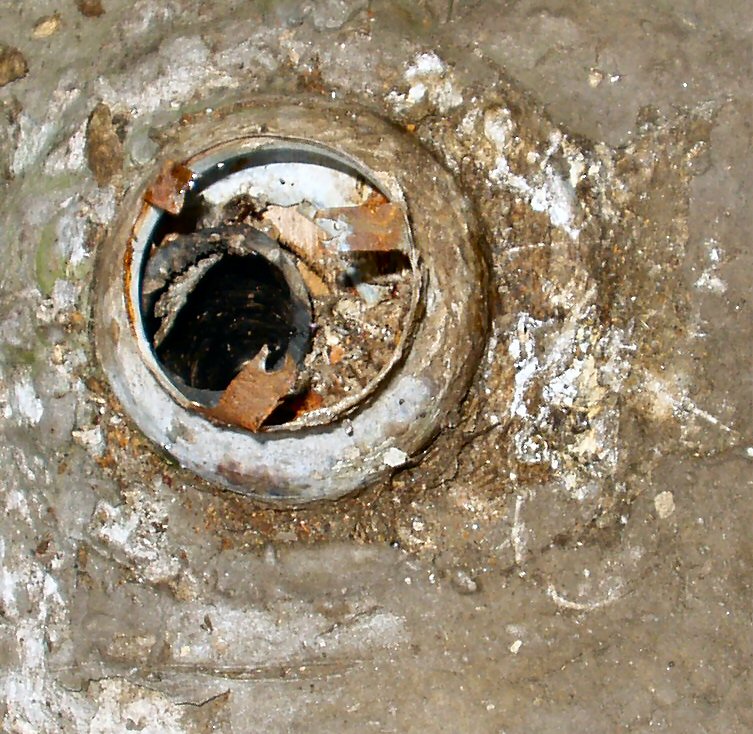
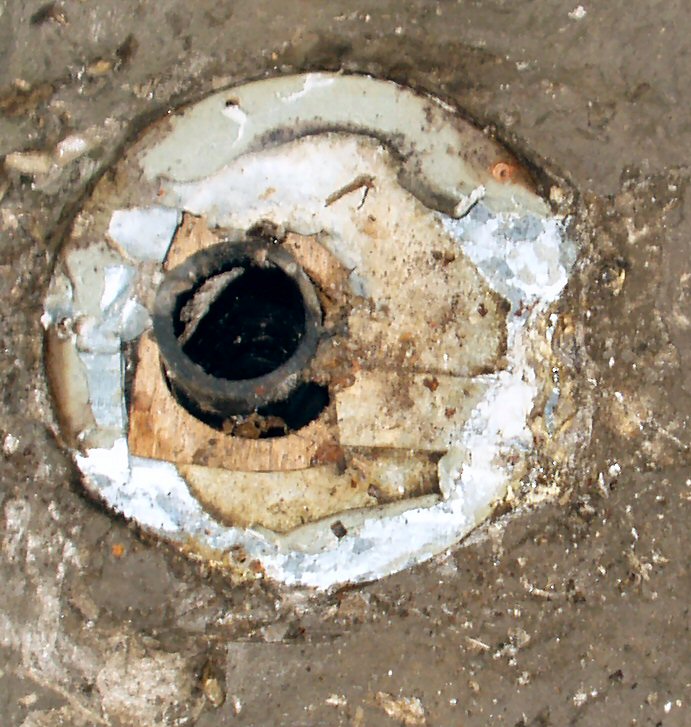
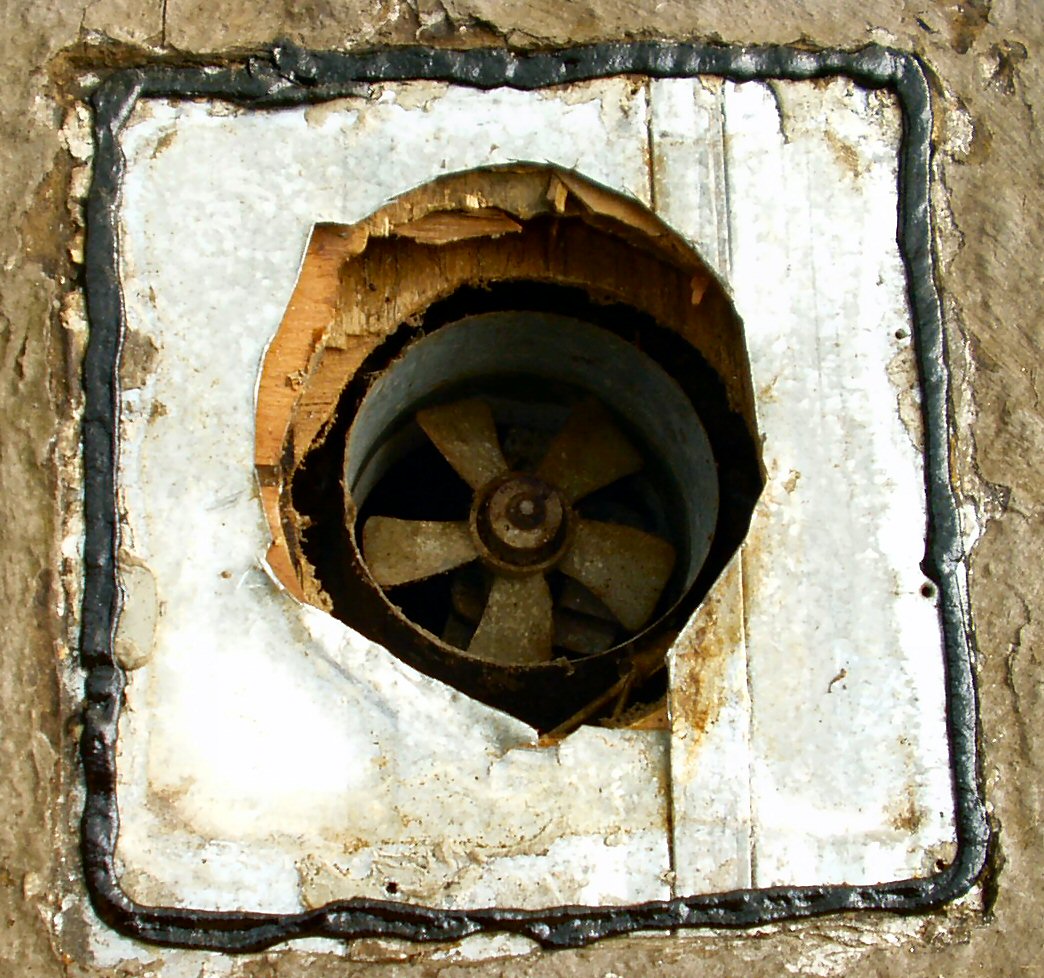
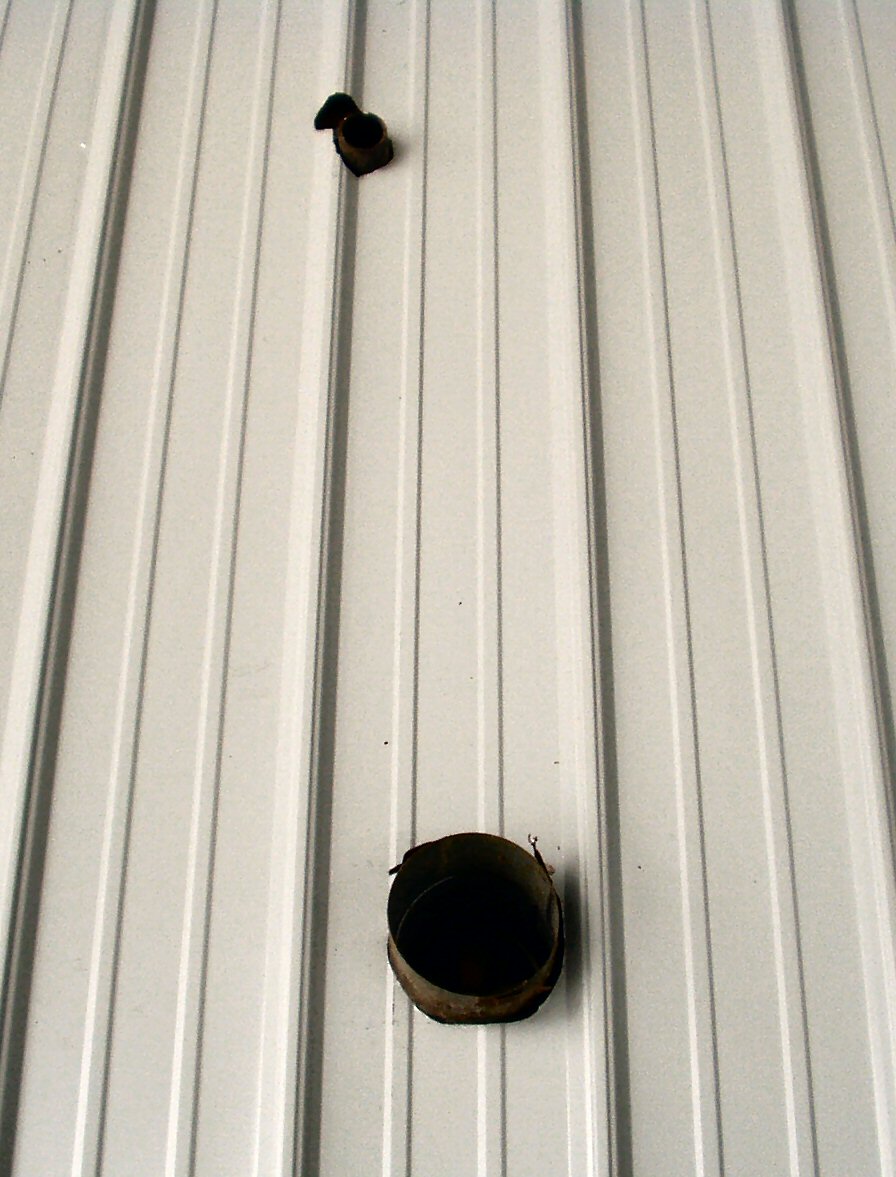
I started by sweeping off the roof. This was when I discovered that the roof had some serious dips in several sections! In two places I determined that the roof trusses or joists appeared to actually be broken underneath the metal! I started walking on long boards from that point forward so I wouldn't damage the roof. Other than that the roof was solid. It appeared to only have 3 coats of coating on it with no exposed rusted metal. Next I removed all the towing lights that were still attached. Now I looked at the 'attic' vents that were at each end of the roof. They were almost dead center of the roof. I figured that I would need to remove them so I could lay the roof easier. I also decided to let them vent into the ridge cap area instead of coming back through the roof.
What I found when I removed them was some very shoddy manufacturing. See Fig. 5,6,7. One one end, under the vent, they cut the metal roof in a 3" x 3" area but never cut the wood out into the attic! Then they mounted the vent! How lazy can you get? On the other they cut a ragged hole with what looks like a hatchet then mounted the vent. It's no wonder mobile homes get a bad rap about shoddy construction, they are shoddily constructed! I removed the vents completely by scraping off all the roof coating exposing the mounting screws then pried them up and tossed them over the side. See Fig. 8. Down inside the attic was what appeared to be possum dung and all kinds of seeds, nuts and wasp nests. Since the vents also had no screens, all kinds of critters were getting in. I cleaned out all I could reach. Since the vent will be mostly covered I left it open. I plan to cut vents in each end of the gable to provide better air circulation.
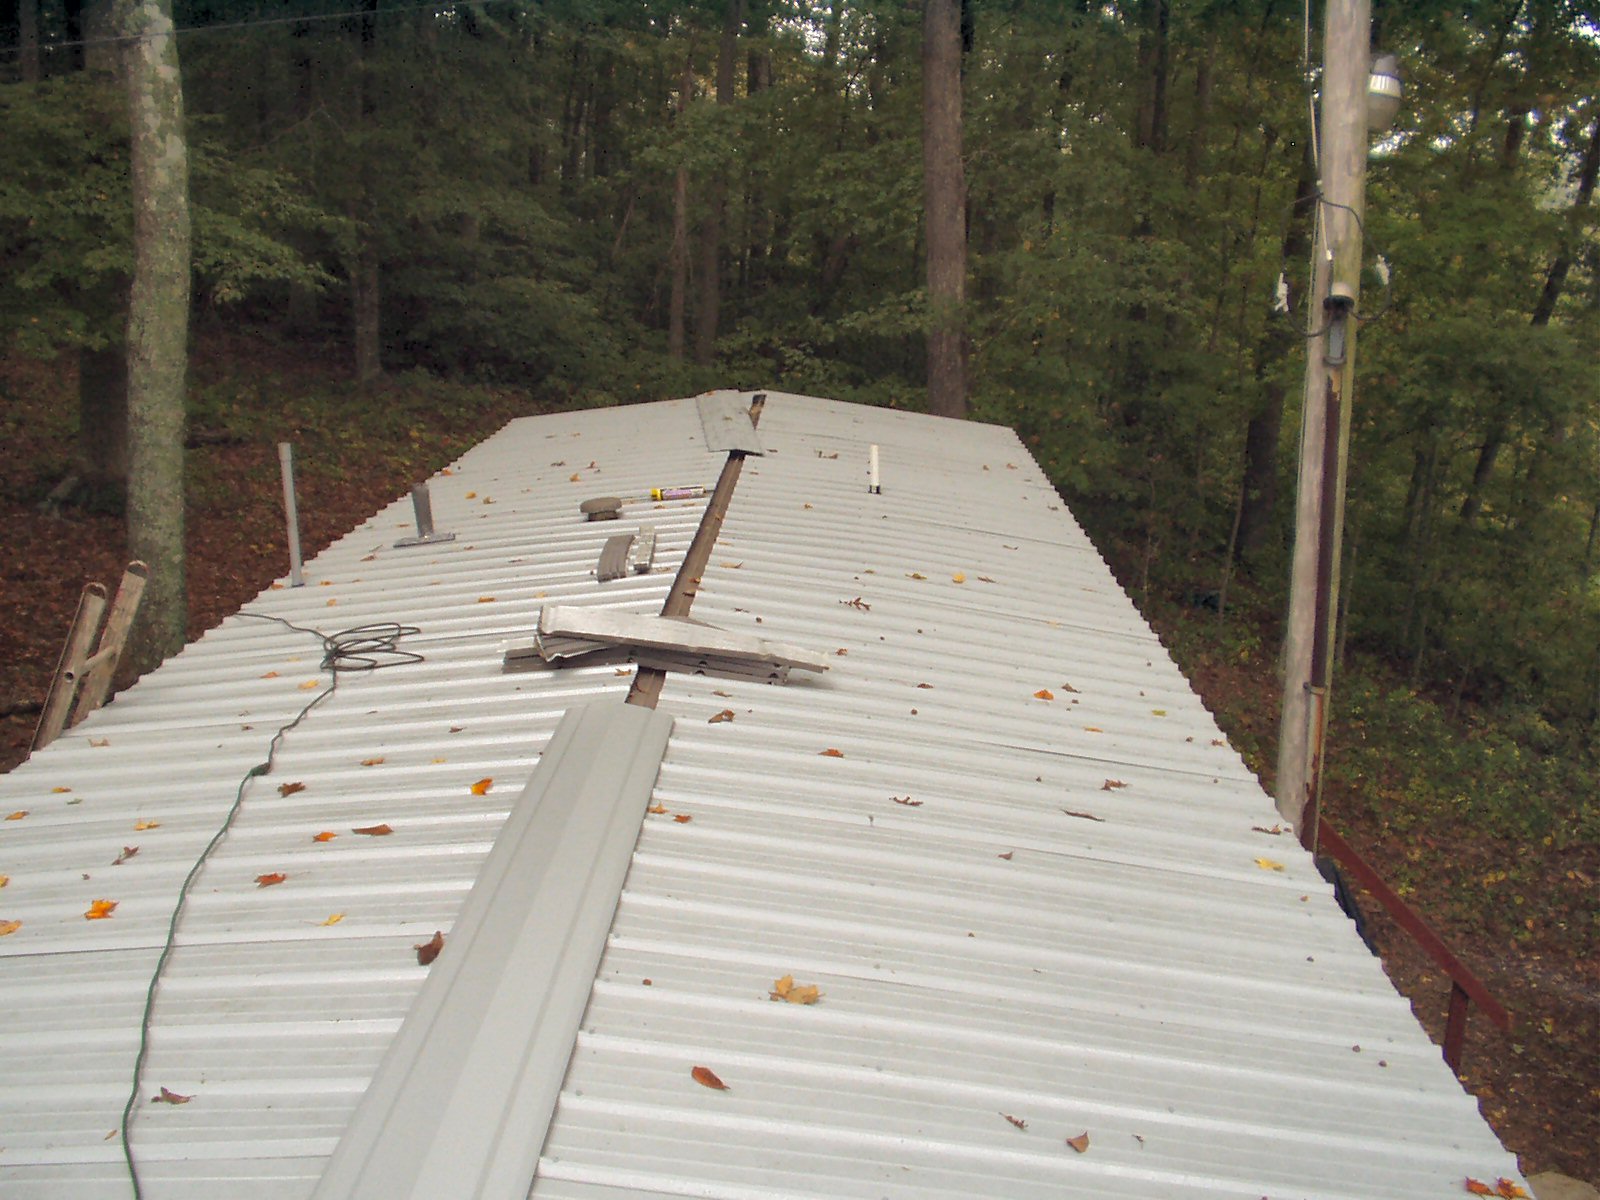
Ok now I had a clear roof ridge. I measured from each edge of the roof at the very end of the home to the center ridge line to determine the exact center of the roof. If you are using this as a guide to do your own roof measure carefully! The entire roof alignment is based on this being right. Next I drove a 3 1/2" deck screw into the roof at the center on each end and ran a heavy string the entire length of the roof. I pulled it as tight as possible. This will be my alignment reference for each sheet of metal. Remember I am doing this completely by myself so I won't have someone on the lower edge aligning the panels to the edge. This way I can line them up by myself. You can see the string in Fig. 9. I then starting laying out the spacing of the furring strips. Here is where I made a BIG MISTAKE. Keep reading ...
The BIG MISTAKE!!!
When the previous owner told me he had some of the lumber to do the roof I knew I would have to get more. What he had was 10 12' long 2x4's, enough for only two runs down the roof. For the life of me I could not figure out why he was going to use 2x4's since they were so expensive. After reading the section on metal roofs in Mark's excellent book I decided to use 1" x 4" boards (later changed to 1" x 2"). When I got about 2/3's done with the roof it suddenly became VERY clear why he had bought only 2 runs of 2 x 4. The top of my single wide home is curved not flat. Sort of like a dome shape. When attaching the metal sections they would bend quite easily to fit this gentle curve. I remember thinking, "This is cool! The sheets bend to fit the irregular roof!" What I had not realized, was that by bending to fit the curve the TOPS of the sheets were almost laying FLAT at the roof center! This would not be good as water would stand there or possibly even run back under the ridge cap. I temporarily placed sections of ridge cap and did a water hose test. In two areas water indeed ran back under the cap. I unscrewed the tops of the sheets in those areas and added 1" x 4" boards to 'raise' those areas. So the reason for the 2 x 4's was to turn my 'domed' roof into a true 'peaked' roof. The 2 x 4 would raise the top of the panel enough to keep it flat end to end when screwed down. Later when trying to attach the gable end pieces I discovered the other reason for making the roof peaked, the end pieces would NOT bend to fit the curve! Grrrrr .... So if you are doing this type of two piece roof use 2x4's for the top runs not 1 x 4's!
So why didn't I go back and replace all the 1" boards with the 2 x 4's? Time. It took 5 total days for me to do this by myself and it was threatening rain toward the end of day 3 when I discovered the issue. The water test showed it shouldn't leak. If it does then later I will get some help and spend a day fixing it.
Continuing on laying out the strips
Fig. 9 Laying it out |
Fig. 10 Laying Metal |
Calculating the spacing of the strips
On my 12' x 60' home it was 74" from center to each edge. One furring strip goes right on the edge of the roof and since my ridge cap is 12 1/2" wide and the screws must go in the edges another must go about 6" from the center line so it will catch the screws in the edges of the ridge cap. That leaves two runs of furring strips that must be centered between these two. So 74" - 6 inches is 68". To get equal spacing for the other two rows I divided 68 by 3 to get 22. So my furring strips were at 1"(right on the edge), 22" 44" and 68"(6" from the center) all measured from the edge. Your roof may vary! This spacing is not critical of course. I cut a spacer out of scrap wood to help me keep my spacing consistent.
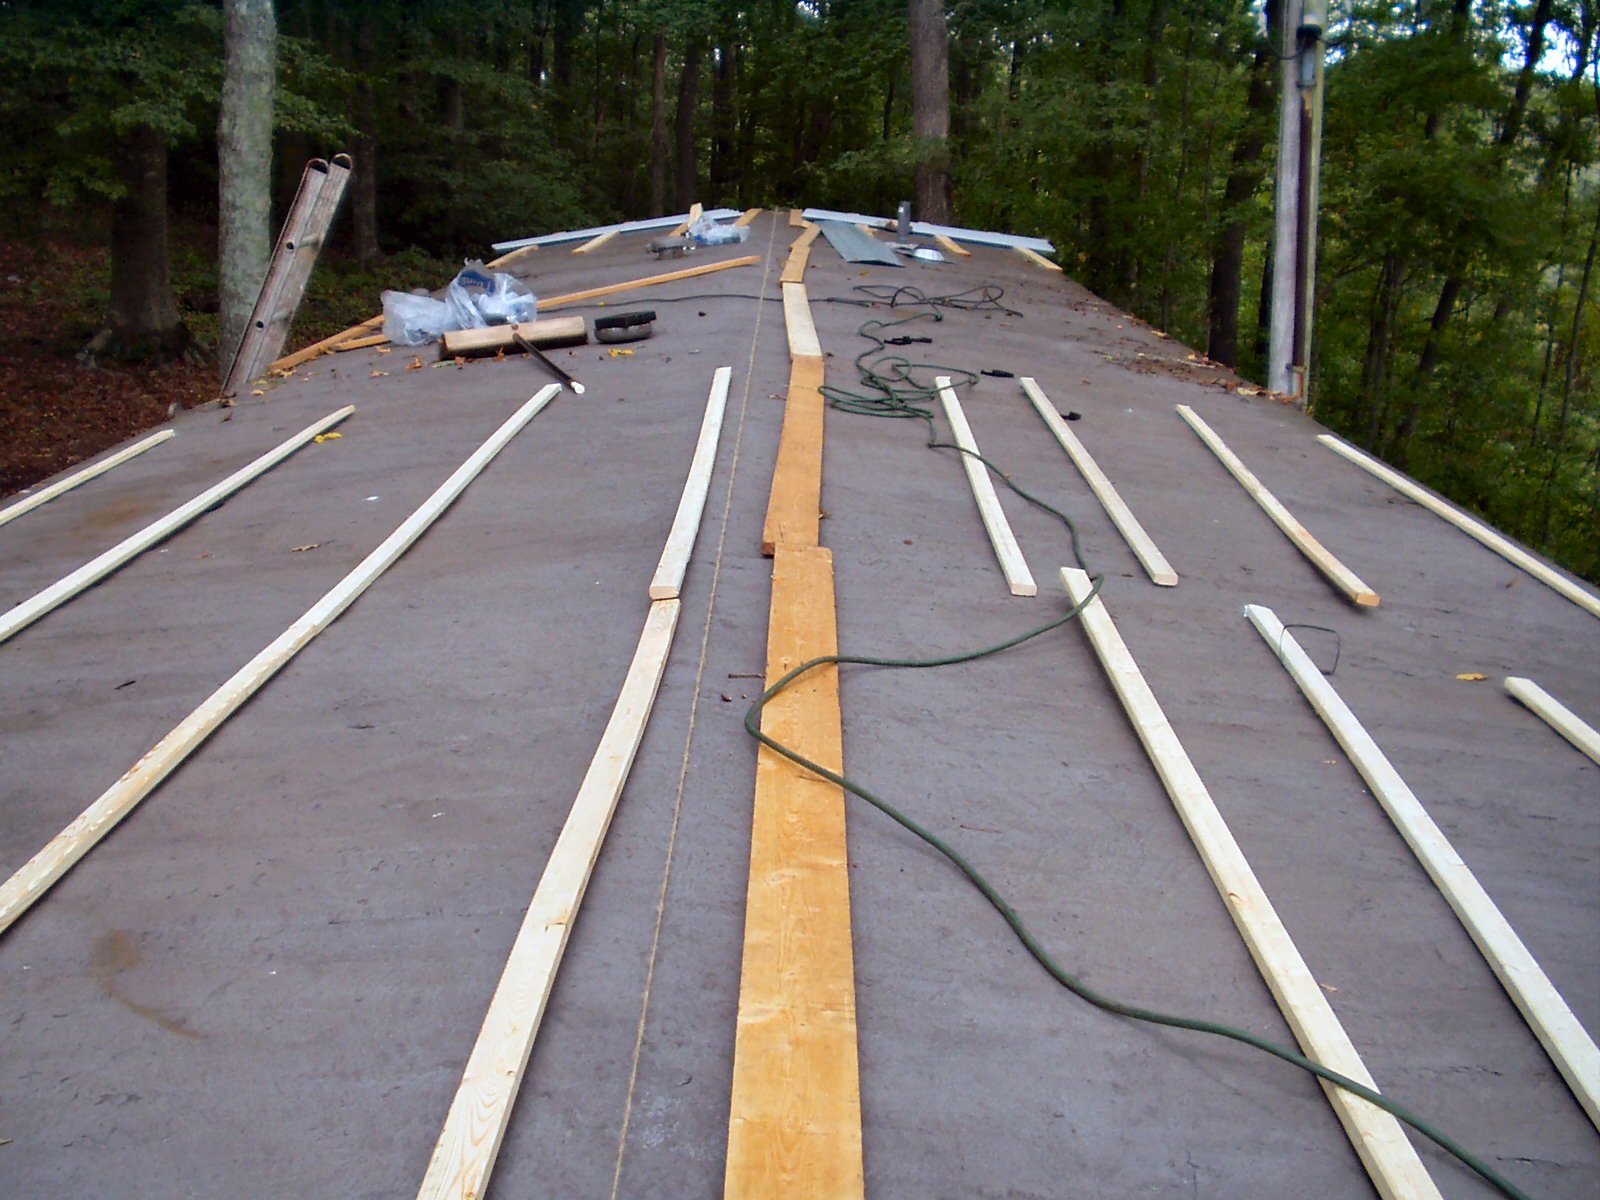
I figured since they kept calling for a chance of rain each day that I would work in 8' sections. That way if it came a hard rain I would only have to cover an 8' area of furring strips with a tarp. If you have a long dry spell predicted then go ahead and attach the furring strips down the entire roof on both sides then do your center strips then the middle strips.
I attached the edge furring strips to the roof first with 3" deck screws and used a corded drill for more power. Slightly counter sink the screws. There is a board running the full length of the roof under the metal right at the edge so don't worry about trying to hit roof joists. I spaced the screw about every 12 inches. Then I measured 6" from my string at the center of the roof and centered the next strip there. Then using my wood spacer I screwed the middle pieces in place. Now I was ready to lay my first sheet.
Getting the first sheet on each side aligned correctly is critical! ALL the other sheets on this side will align to this one so get it on straight! I placed the first sheet flush with the gable end of the roof then slide it down until the edge of the sheet was 1 1/2 " from the string along the entire edge. This gave me a 3" overhang on the roof edge. Don't take these measurements as gospel! You know the old saying, "Your mileage may vary"! Using a cordless drill with a clutch setting that didn't dimple the metal or not compress the washer, I screwed the first piece down with two screws at the top, double checked it was still aligned with the string and WTH? It wasn't aligned! Darn thing slipped on me! I fixed that then drove screws in every ridge on the bottom and top then every other ridge in the middle. Note: It's best to have two people doing this job. One to align the edge, the other to drive the first screw. To keep the sheet from bowing and warping on you, the screws should be driven from the overlapping edge top to bottom, then work your way across the sheet. This allows the sheet to spread out and conform to the roof. It's hard to explain. You'll see what I mean when you start laying the metal.
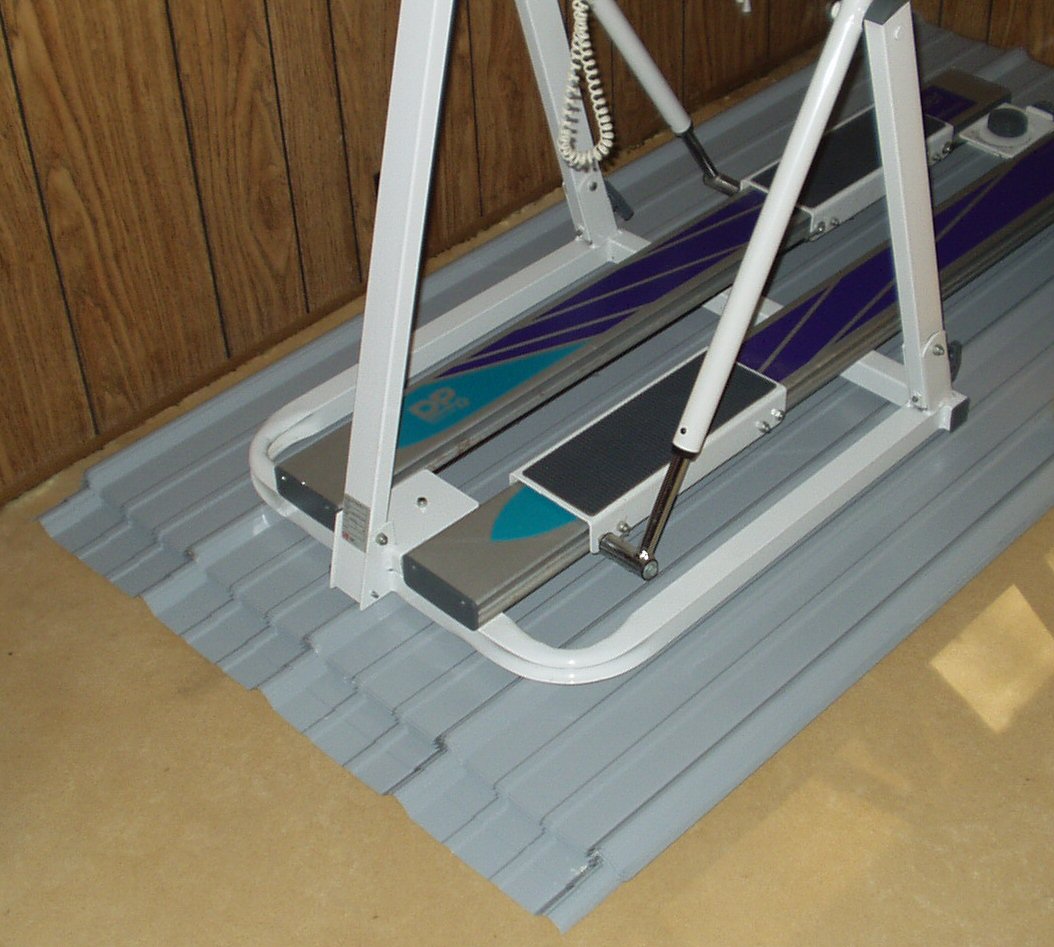
I drove screws in the overlapped ridge into each furring strip, then skipped a ridge, then again put screws into each ridge into the strip. At the top and bottom I drove screws in every ridge. To keep the ridges aligned on each side of the roof I basically laid one sheet on one side then laid the other sheet on the other side. Doing so allowed me to correct small misalignments between sides. Don't worry if they get off, you can't see it anyway. While laying the roof don't allow small alignment errors to creep in. They have a tendency to become large errors after a couple of sheets! I learned that after I had to take up 3 sheets to correct an error! See Fig. 10 for some details. (Notice Mark's book with me on the roof?) Once you get the first few sheets lain down you get 'in the groove' and can move pretty quickly. Then as Mark says in his book, "Then you run into a vent ..."
Doing the Plumbing/Air Vents
Fig. 11 Kitchen Sink Vent |
Fig. 12 Flashing Removed |
Fig. 13 Coupler installed |
Fig. 14 Hole Cut |
Fig. 15 Two Vents |
Fig. 16 More Shoddy Work |
Fig. 17 Uh huh ... |
Fig. 18 Fixing it |
Fig. 19 Almost done |
Fig. 20 Done! |
Fig. 21 All Covered |
Fig. 22 Lead Flashing |
Fig. 23 Last Vent |
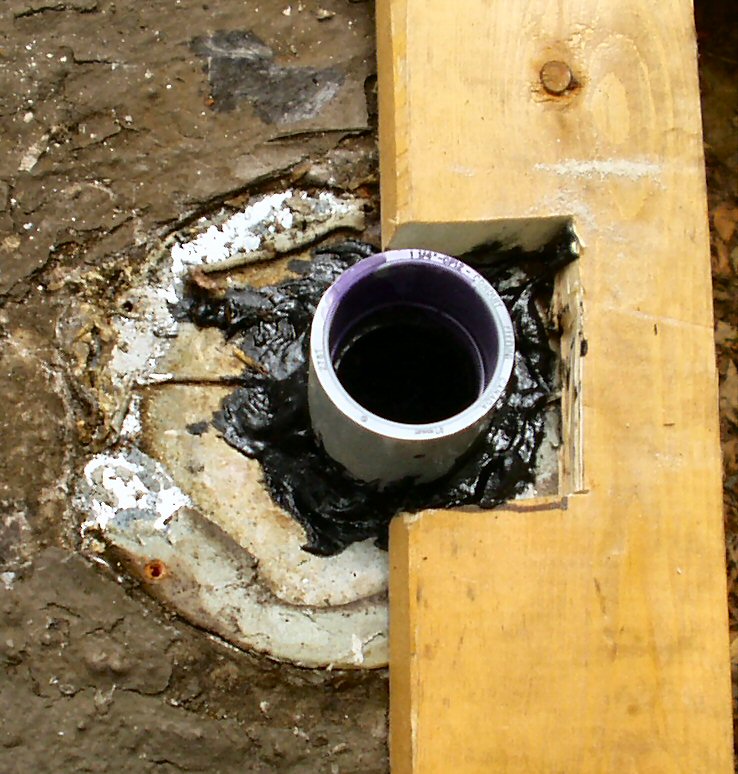
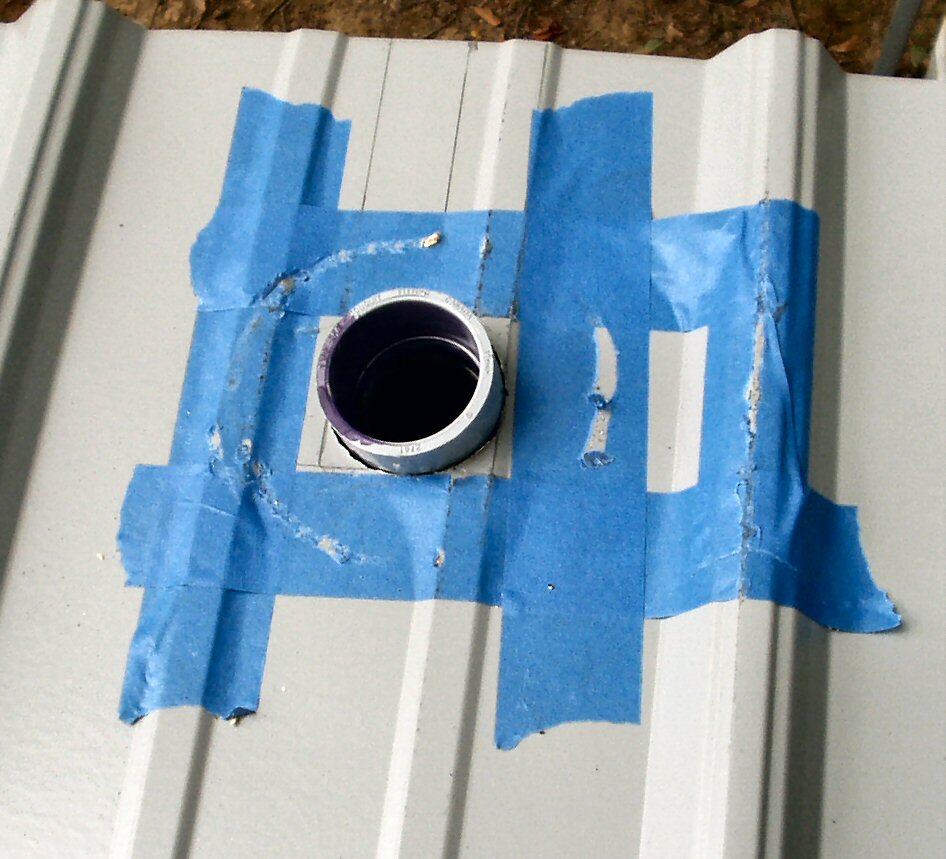
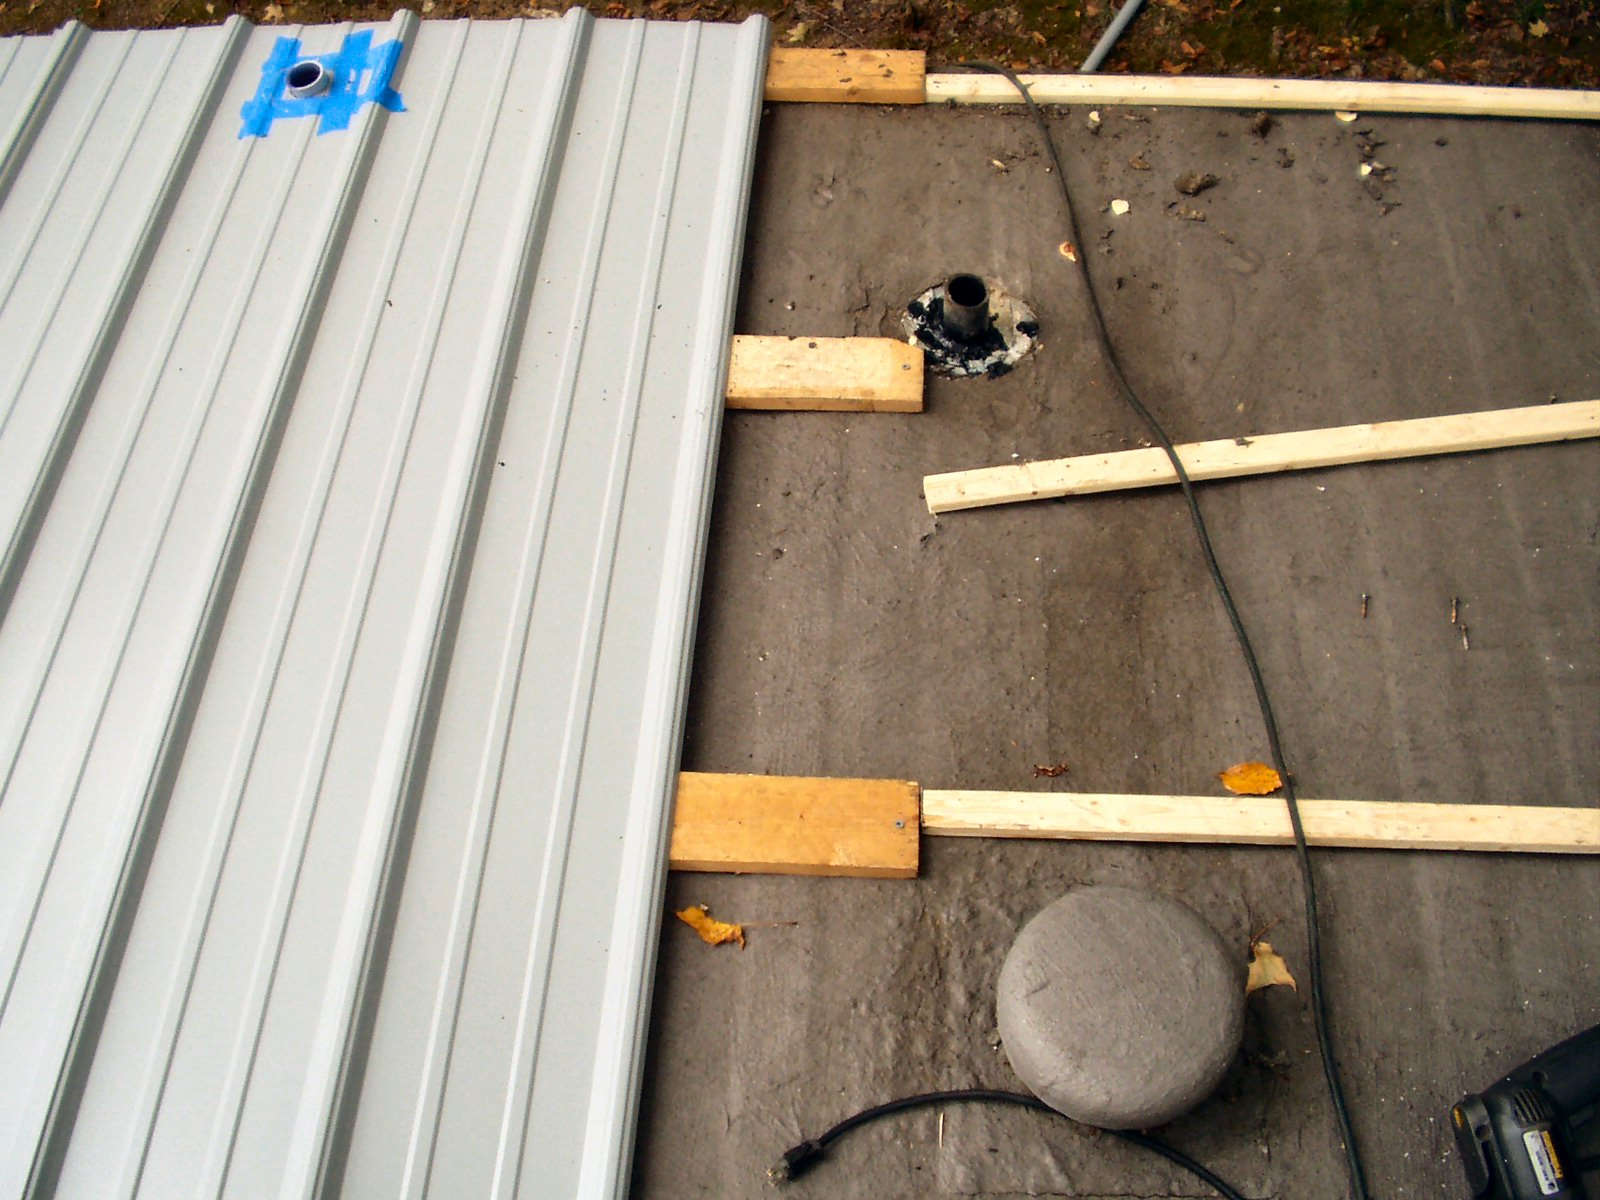

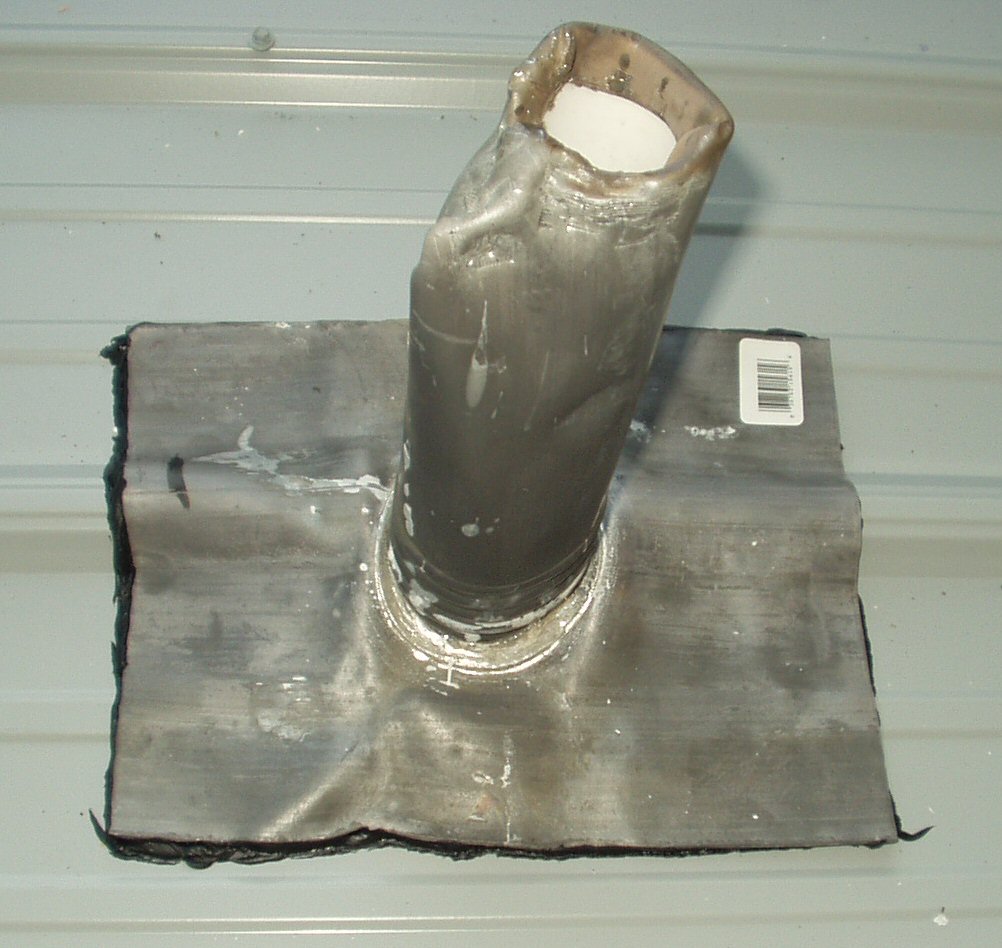
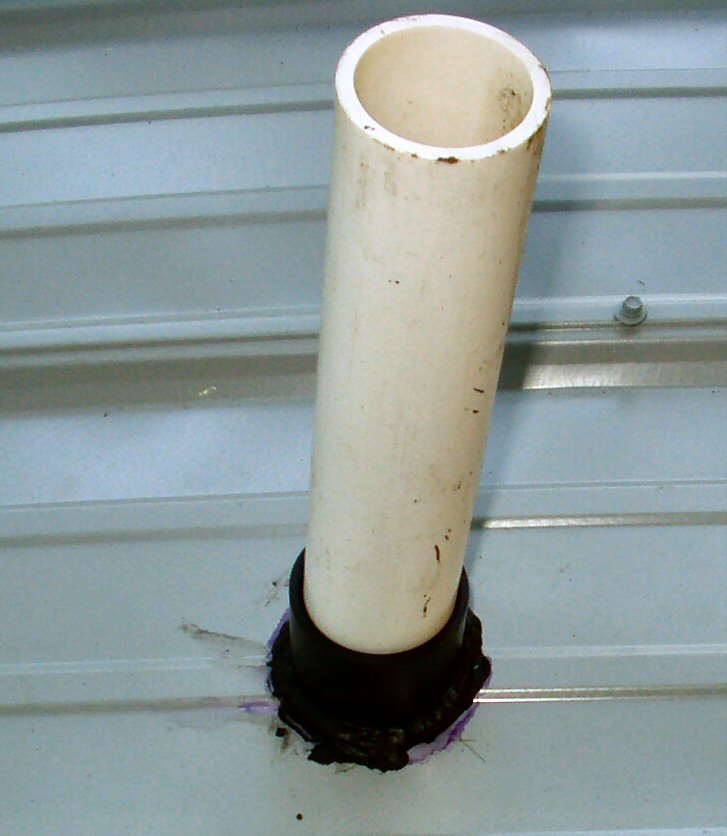
The vent for the kitchen sink was the first vent I ran into. It was right on the edge of the roof. When I tried to pull the cap off I didn't have to try very hard, it had rusted off and was just lying on top of the flashing! See Fig. 11. I removed the flashing and threw it away. I wanted to extend the vents above the roof line so I needed to install a coupler. There was just enough pipe stub sticking out to do so. Turned out this pipe was 1 1/4" diameter not 1 1/2 as I expected. I had to use Schedule 40 conduit as the local supply house did not stock any 1 1/4" black pipe. Once the coupler was on I ran a thick bead of sealant around the coupler. If the metal roof leaks it will still not leak through. See Fig. 12 and 13. ( Because this area was one of the areas that appeared to have a broken roof joist I used 1 x 4 furring strips for some added strength. ) After measuring carefully, twice, I put some masking tape on the roof, drilled a pilot hole then used a small scroll saw to cut out the hole. See Fig. 14. All I had to do to complete this one was to run another bead of sealant between the metal and the coupler and add the 18" extension.
That went pretty easy but the very next sheet had TWO vents in one piece! A 1 1/2" vent for the washer drain and a 4" bathroom vent. See Fig. 15. This sheet was much more difficult and took the better part of 2 hours to do. A lot of that time was spent 'fixing' the bath vent. Read on.
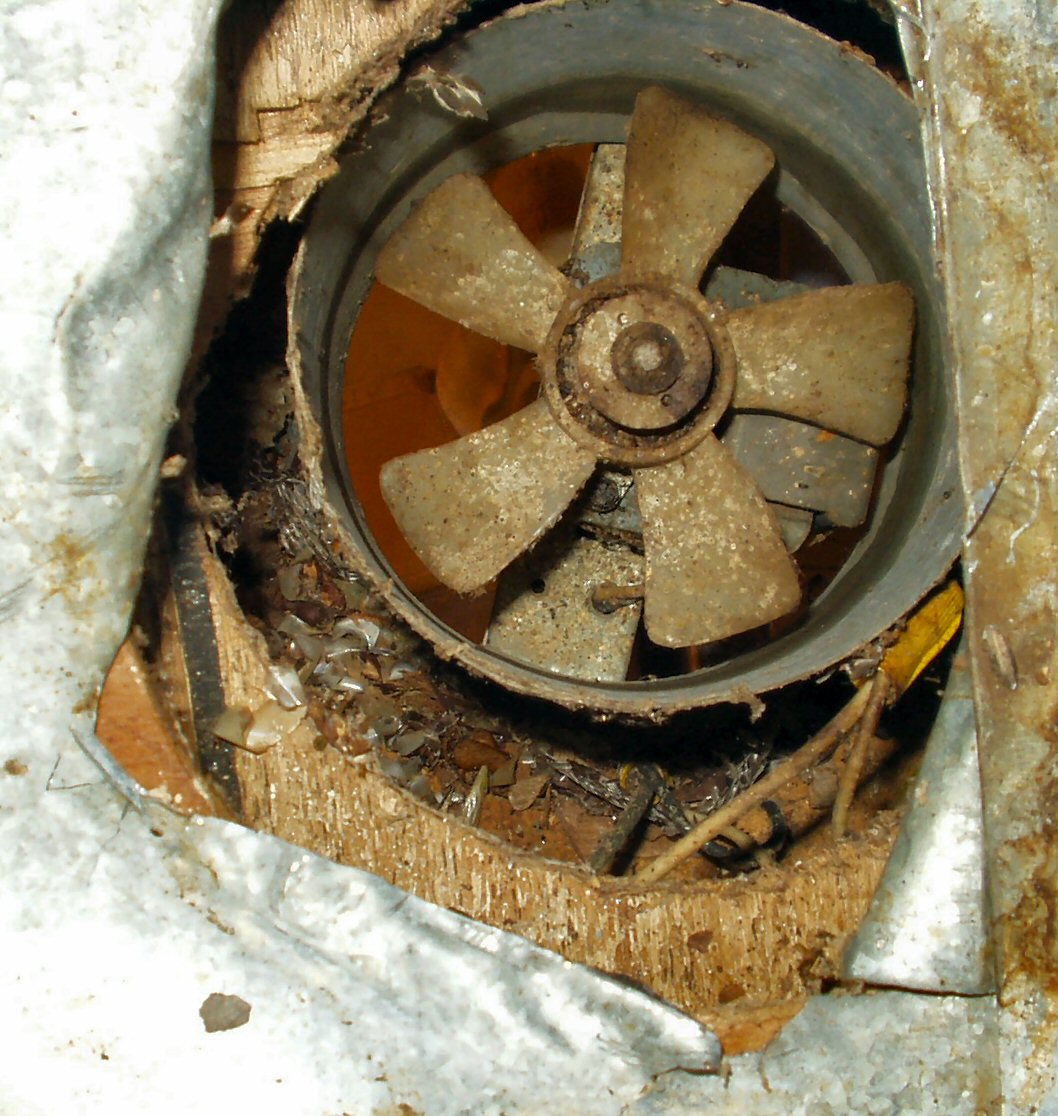
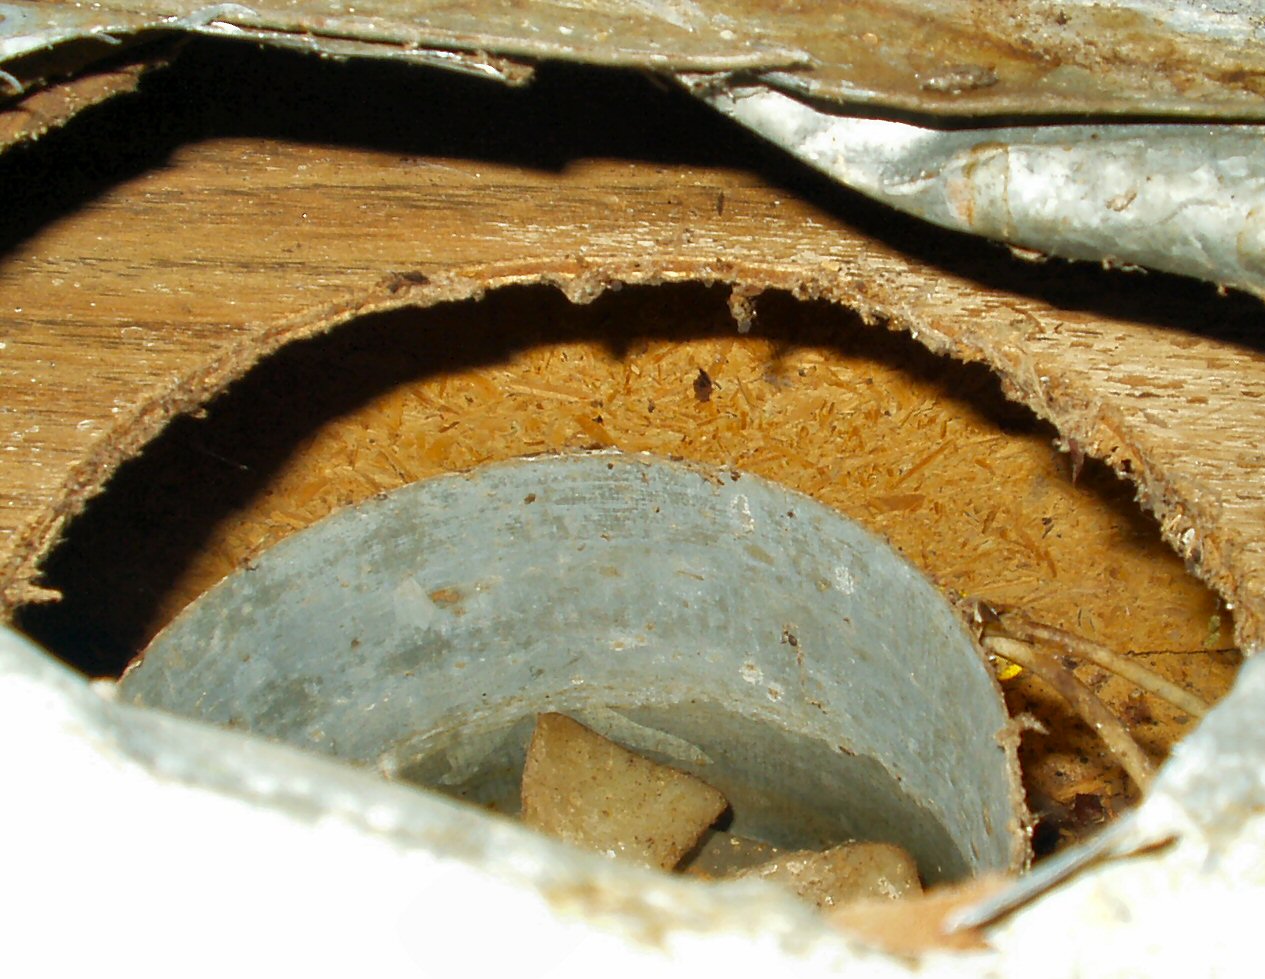
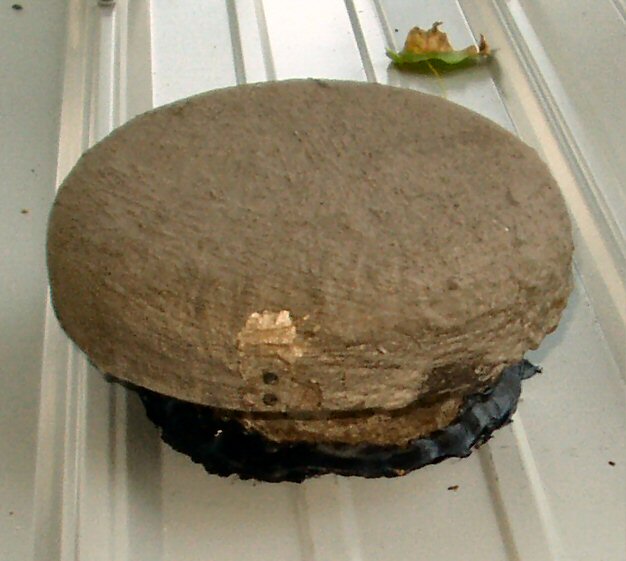
As with the other vents I removed the caps and old flashing. For the vent fan this revealed another nice piece of shoddy work. See Fig. 15 and 16. First there was no screen on this vent and no extension tube between the fan and the vent.This od course allowed all kinds of creatures to get down in the fan and the attic space! Not to mention that the fan was venting mostly into the attic not outside. To fix this first I removed all the crap that was within reach. Wasp nest, nuts and seeds and such. Then I cleaned up the hole with tin snips making it bigger, ran a thick bead of sealant around the edge, and finally took advantage of the fact that the bath vent was identical to the two end attic vents. How? I cleaned up one of the old ridge vents, straightened it out, turn it upside down and inserted the tube into the hole so that it was right up against the fan! This ensured that all the air was going out the roof not into the attic. It also really helped the fan move more air. Last I put the original vent flashing back on top of the upside down vent after applying a good bead of sealant and screwed it down. See Fig. 18 and 19. Now I could measure and cut out the holes. See Fig. 20. ( I messed up the small hole (don't ask) which forced me to have to use one of the lead flashing's I had bought. The bath vent was perfect.)
Next I cut up an old window screen and placed it over the top of the tube to keep critters out. After applying a good coat of sealant between the roof and tube I put the top back on. See Fig. 21. To fix the mistake I made in cutting the hole for the small vent I used one of the lead flashing's I got from Lowes. This is a 1/8" thick sheet of lead formed into a flashing. Because it is so flexible I was able to mold it to the roof perfectly. After molding it I removed it, put a thick bead of sealant on the roof and the bottom of the flashing and pressed it into place. I did not use screws to secure it as after it dried it would have taken a hurricane to remove it! I cut my extension tube a couple of inches short of the height of the flashing then folded it down INSIDE the vent to make a perfectly rain proof seal. See Fig. 22. The last vent was the bath sink vent and it went easily. See Fig. 23.
Finishing Up
Fig. 24 Only two to go! |
Fig. 25 Gable Trim Installed |
Fig. 26 Starting Ridge Cap |
Fig. 27 Laying out Foam Strips |
Fig. 28 Almost done! |
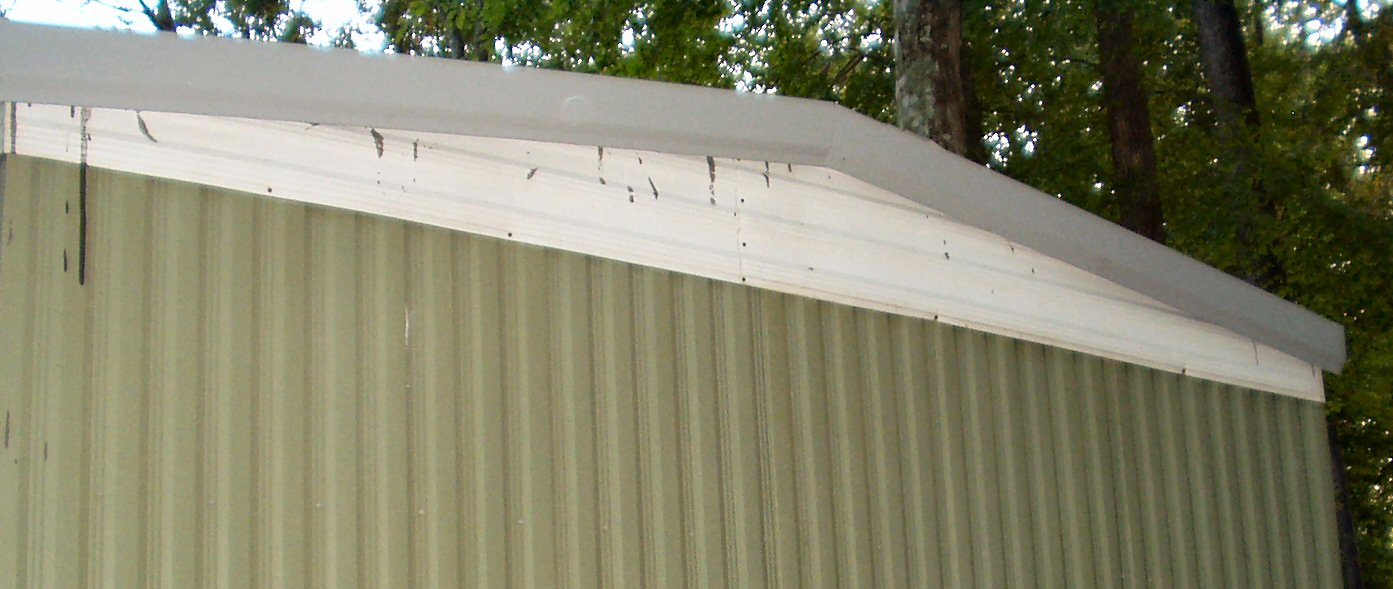

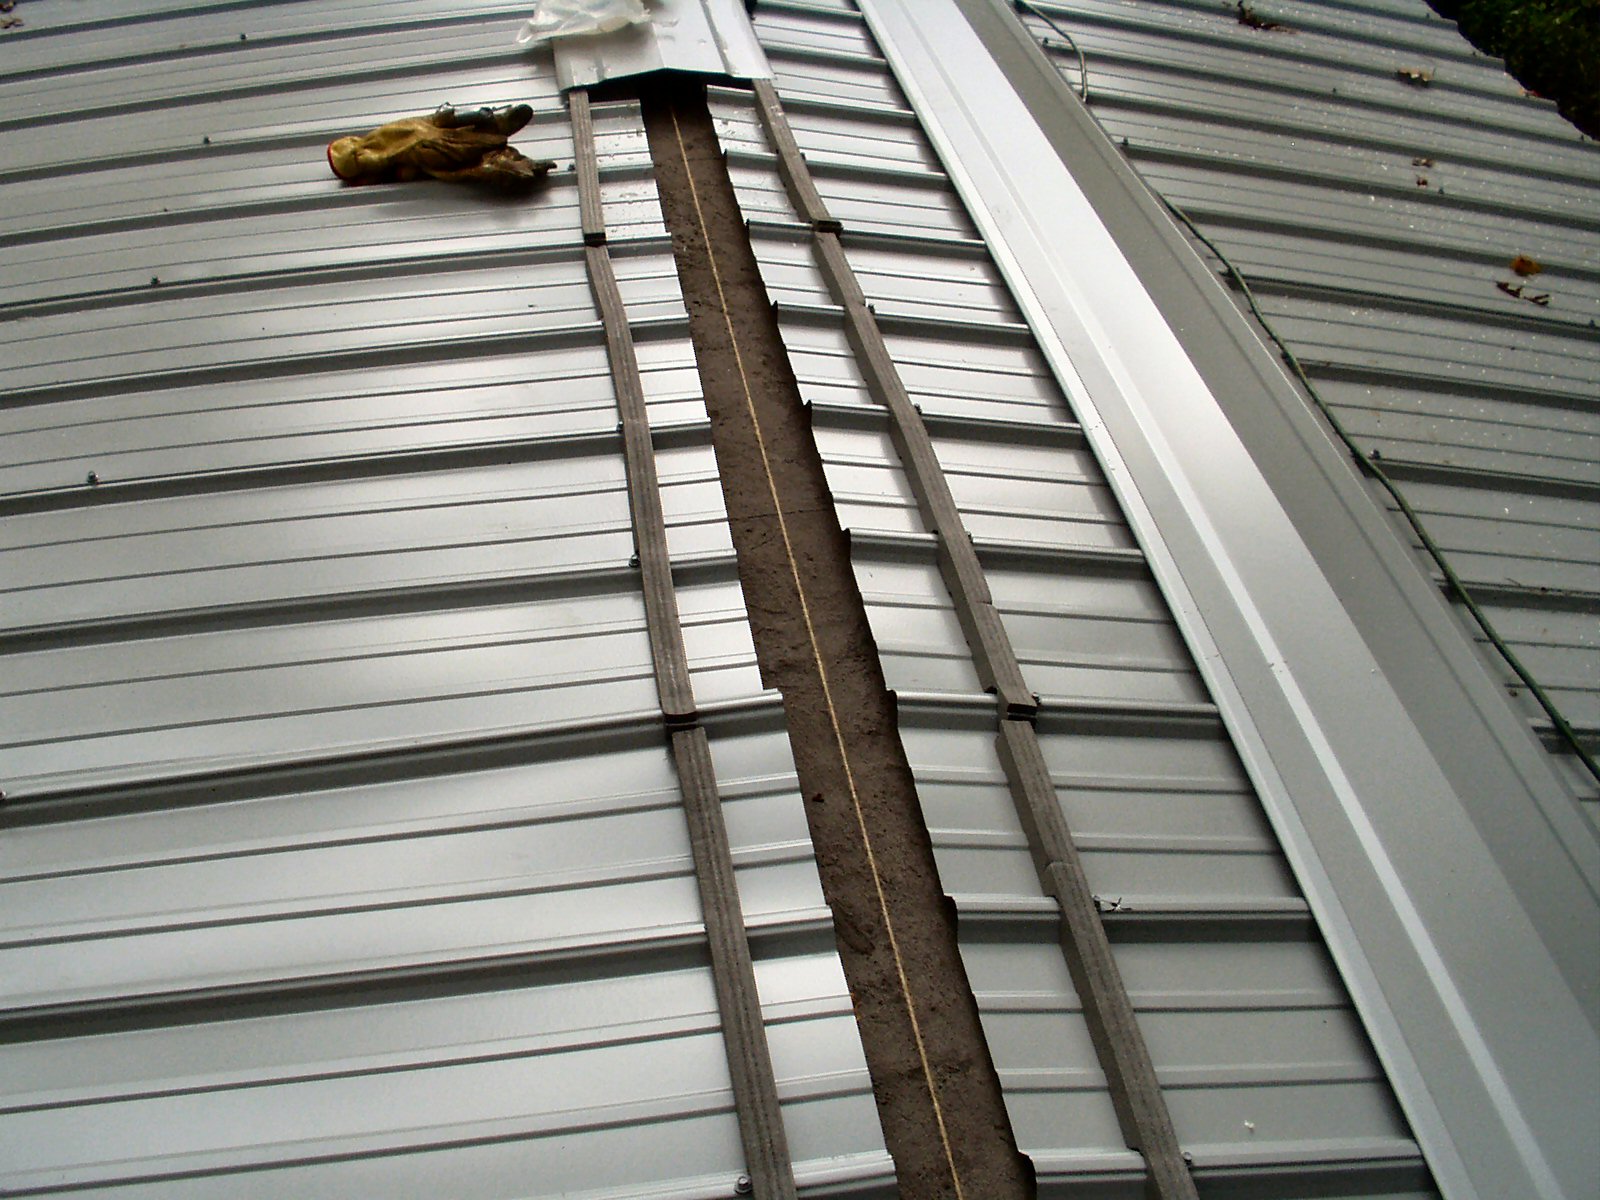
After finishing the sheet metal I installed the gable trim. This is a 90 degree bend trim panel that you just overlap the edge of the roof then attach to the end. Measure and trim to fit. Last to be installed is the ridge cap. This is a 12.5" wide trim piece to cover the joint between the roof halves. It has self adhesive foam strips that are put down where the screws will come through. This job only took about an hour and a half. Start by putting the foam down for about 12 feet then align the cap with the edge and screw it down putting screws about every 12". Lay down more strips and then overlap the next piece about 6" on top of the first piece. On the last piece instead of cutting it to fit I just allowed a much larger overlap.
Well that wrapped up a long week of work. I deserved a rest inside a dry home with my new floors...
Finally I can relax ...